LiftMaster TDC Installation Manual - English French Spanish - Page 17
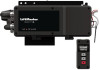
JDC/JHDC Assembly, Con the Operator, Wall Mount, Front of Hood Mount, Applying AC Power
 |
View all LiftMaster TDC manuals
Add to My Manuals
Save this manual to your list of manuals |
Page 17 highlights
JDC/JHDC Assembly Configure the Operator Units are now dual handed and can be used in either the right or left side. 1. Select right (R) or left (L) handing for the sprocket and hoist as needed. • For JDC models, the drive sprocket can be mounted on either the right or left side. Drive Sprocket R L • For JHDC models with manual hand chain systems, the drive sprocket can be installed as a right (R) hand or left (L) hand. NOTE: The hoist will need to change location depending on the wall mount or front of hood application shown in the images below. Drive Sprocket Drive Sprocket WARNING To prevent possible SERIOUS INJURY or DEATH: • DO NOT connect electric power until instructed to do so. • If the door lock needs to remain functional, install an interlock switch. • ALWAYS call an Authorized Service Technician if door binds,sticks or is out of balance. An unbalanced door may NOT reverse when required. • NEVER try to loosen, move or adjust doors, door springs,cable, pulleys, brackets or their hardware, ALL of which are under EXTREME tension and can cause SERIOUS PERSONAL INJURY. • Disable ALL locks and remove ALL ropes connected to door BEFORE installing and operating door operator to avoid entanglement. • Fasten the operator SECURELY to structural supports of the building. • Concrete anchors MUST be used if installing ANY brackets. L R L R Hoist Wall Mount Front of Hood Mount • To reposition the hoist: a. Remove the four allen bolts. b. Pull the housing down and away from the motor, then rotate the housing 180 degrees. c. Place the housing back up to the motor and tighten back in place using the allen bolts. 2. Place the operator drive sprocket on the appropriate side of the operator for your installation type. To avoid potential damage caused by an overhung load, position the sprocket as close to the center of the exposed drive shaft. Applying AC Power 1. Power the operator by turning the circuit breaker on supplying AC power to the operator. 17
-
 1
1 -
2
-
3
-
4
-
5
-
6
-
7
-
8
-
9
-
10
-
11
-
 12
12 -
 13
13 -
 14
14 -
 15
15 -
 16
16 -
 17
17 -
 18
18 -
 19
19 -
 20
20 -
 21
21 -
 22
22 -
23
-
24
-
25
-
26
-
27
-
28
-
29
-
30
-
31
-
32
-
33
-
34
-
35
-
36
-
37
-
38
-
39
-
40
-
41
-
42
-
43
-
44
-
45
-
46
-
47
-
48
-
49
-
50
-
51
-
52
-
53
-
54
-
55
-
56
-
57
-
58
-
59
-
60
-
61
-
62
-
63
-
64
-
65
-
66
-
67
-
68
-
69
-
70
-
71
-
72
-
73
-
74
-
75
-
76
-
77
-
78
-
79
-
80
-
81
-
82
-
83
-
84
-
85
-
86
-
87
-
88
-
89
-
90
-
91
-
92
-
93
-
94
-
95
-
96
-
97
-
98
-
99
-
100
-
101
-
102
-
103
-
104
-
105
-
106
-
107
-
108
-
109
-
110
-
111
-
112
-
113
-
114
-
115
-
116
-
117
-
118
-
119
-
120
-
121
-
122
-
123
-
124
-
125
-
126
-
127
-
128
-
129
-
130
-
131
-
132
-
133
-
134
-
135
-
136
-
137
-
138
-
139
-
140
-
141
-
142
-
143
-
144
-
145
-
146
-
147
-
148
-
149
-
150
-
151
-
152
-
153
-
154
-
155
-
156
-
157
-
158
-
159
-
160
-
161
-
162
-
163
-
164
-
165
-
166
-
167
-
168
-
169
-
170
-
171
-
172
-
173
-
174
-
175
-
176
-
177
-
178
-
179
-
180
-
181
-
182
-
183
-
184
-
185
-
186
-
187
-
188
-
189
-
190
-
191
-
192
-
193
-
194
-
195
-
196
-
197
-
198
-
199
-
200
-
201
-
202
-
203
-
204
-
205
-
206
-
207
-
208
-
209
-
210
-
211
-
212
-
213
-
214
-
215
-
216
 |
 |
