Lantronix EDS2100 EDS1100 / EDS2100 - User Guide
Lantronix EDS2100 Manual
 |
View all Lantronix EDS2100 manuals
Add to My Manuals
Save this manual to your list of manuals |
Lantronix EDS2100 manual content summary:
- Lantronix EDS2100 | EDS1100 / EDS2100 - User Guide - Page 1
EDS1100/2100 User Guide Part Number 900-567 Revision B December 2010 - Lantronix EDS2100 | EDS1100 / EDS2100 - User Guide - Page 2
in this guide may change without notice. The manufacturer assumes no responsibility for any errors that may appear in this guide.For the latest revision of this product document, please check our online documentation at www.lantronix.com/support/ documentation.html. EDS1100/2100 User Guide 2 - Lantronix EDS2100 | EDS1100 / EDS2100 - User Guide - Page 3
History Date March 2010 December 2010 Rev. A B Comments Initial Document Updated for firmware version 5.2.0.0R20. Added support for Modbus protocol, configurable MTU, and additional VIP tunnel connect protocols; as well as improvements to SNMP, logging, and SSL. EDS1100/2100 User Guide 3 - Lantronix EDS2100 | EDS1100 / EDS2100 - User Guide - Page 4
17 Really Simple Syndication (RSS 17 Enterprise-Grade Security 17 Terminal Server/Device Management 18 Troubleshooting Capabilities 18 Configuration Methods 18 Addresses and Port Numbers 19 Hardware Address 19 IP Address 19 Port Numbers 19 Product Information Label 19 3: Installation of - Lantronix EDS2100 | EDS1100 / EDS2100 - User Guide - Page 5
EDS2100 26 Package Contents 26 User-Supplied Items 26 Hardware Components 26 Back Panel 28 Reset Button 28 Top LEDs 28 Installing the EDS2100 29 5: Using DeviceInstaller 31 Accessing EDS1100/2100 Using DeviceInstaller 31 Device 61 Tunnel - Modem Emulation 62 EDS1100/2100 User Guide 5 - Lantronix EDS2100 | EDS1100 / EDS2100 - User Guide - Page 6
65 Network Terminal Configuration 67 Host Configuration 68 10: Service Settings 69 DNS Settings 69 PPP Settings 70 SNMP Settings 84 SSH Settings 84 SSH Server Host Keys 85 SSH Server Authorized Users 86 SSH Client Known Hosts 88 SSH Client User 89 SSL Settings 91 SSL User Guide 6 - Lantronix EDS2100 | EDS1100 / EDS2100 - User Guide - Page 7
Browser 101 Protocol Stack Settings 104 TCP Settings 104 IP Settings 105 ICMP Settings 105 ARP Settings 107 SMTP Settings 108 IP Address Filter 109 Query Port 110 Diagnostics 111 Hardware 133 Import Line(s) from Single Line Settings on the Filesystem 135 EDS1100/2100 User Guide 7 - Lantronix EDS2100 | EDS1100 / EDS2100 - User Guide - Page 8
IP (VIP) Counters 139 Virtual IP (VIP) Configuration 139 16: Branding the EDS1100/2100 140 Web Manager Customization 140 Short and Long Name Customization 140 17: Updating Firmware 142 Obtaining Firmware 142 Loading New Firmware 142 Appendix - Technical Support 143 Technical Support - Lantronix EDS2100 | EDS1100 / EDS2100 - User Guide - Page 9
25 Figure 4-1 EDS2100 Male DB9 DTE Serial Ports 27 Figure 4-2 EDS2100 Pinout Configuration for RS-232 27 Figure 4-3 EDS2100 Pinout Configuration for RS-422 (4-wire 27 Figure 4-4 EDS2100 Pinout Configuration for RS 10-14 HTTP Authentication 79 Figure 10-16 RSS 81 EDS1100/2100 User Guide 9 - Lantronix EDS2100 | EDS1100 / EDS2100 - User Guide - Page 10
Server: Host Keys 85 Figure 11-3 SSH Server: Authorized Users 87 Figure 11-5 SSH Client: Known Hosts 88 Figure 11-7 SSH Client: Users Figure 13-18 MIB-II Network Statistics 112 Figure 13-20 IP Sockets 113 Figure 13-21 Diagnostics: Ping 113 Figure 13- Firmware 142 EDS1100/2100 User Guide 10 - Lantronix EDS2100 | EDS1100 / EDS2100 - User Guide - Page 11
Table 4-7 EDS2100 LEDs and SNMP 72 Table 10-8 TFTP Server 74 Table 10-10 Syslog Server Host Keys Settings 85 Table 11-4 SSH Server Authorized User Settings 87 Table 11-6 SSH Client Known Hosts 88 Table 11-8 SSH Client Users 90 Table 11-9 Supported 108 Table 13-15 IP Address Filter Settings 109 - Lantronix EDS2100 | EDS1100 / EDS2100 - User Guide - Page 12
Table 14-6 CLI Configuration 127 Table 14-8 XML Export Configuration 129 Table 14-10 XML Export Status 131 Table 14-16 XML: Import Line(s) from Single Line Settings 136 Table 15-3 VIP Counters 139 Table 19-1 Binary to Hexadecimal Conversion Table 144 EDS1100/2100 User Guide 12 - Lantronix EDS2100 | EDS1100 / EDS2100 - User Guide - Page 13
. Instructions for customizing the device. Instructions for obtaining the latest firmware and updating the device. Instructions for contacting Lantronix Technical Support. Instructions for converting binary values to hexadecimals. Lantronix compliance information. EDS1100/2100 User Guide 13 - Lantronix EDS2100 | EDS1100 / EDS2100 - User Guide - Page 14
Windows-based utility to locate the device and to view its current settings. Instructions for using the Lantronix Windows-based utility to create virtual com ports. Secure Com Port Redirector User Guide Instructions for using the Lantronix Windows-based utility to create secure virtual com - Lantronix EDS2100 | EDS1100 / EDS2100 - User Guide - Page 15
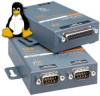
server connects serial devices such as those listed below to Ethernet networks using the IP protocol family. ATM machines Data display devices Security alarms and access control devices Modems Time/attendance clocks and terminals Patient monitoring equipment EDS1100/2100 User Guide - Lantronix EDS2100 | EDS1100 / EDS2100 - User Guide - Page 16
Industrial Manufacturing/Automation systems Building Automation equipment Point of Sale Systems Protocol Support The EDS1100/2100 device server contains a full-featured TCP/IP stack. Supported protocols include: ARP, IP, UDP, TCP, ICMP, BOOTP, DHCP, AutoIP, Telnet, DNS, FTP, TFTP, HTTP/HTTPS - Lantronix EDS2100 | EDS1100 / EDS2100 - User Guide - Page 17
you decrease downtime (using the troubleshooting tools) and implement configuration changes Virtual IP Access is the Lantronix technology that solves the access-through-firewall problem. supports XML-based configuration setup records that make device configuration transparent to users User Guide 17 - Lantronix EDS2100 | EDS1100 / EDS2100 - User Guide - Page 18
the unit's serial port. (See the EDS1100/2100 Command Reference Guide for instructions and available commands.) XML: The EDS1100/2100 supports XML-based configuration and setup records that make device configuration transparent to users and administrators. XML is easily editable with a standard text - Lantronix EDS2100 | EDS1100 / EDS2100 - User Guide - Page 19
TCP connection and every UDP datagram is defined by a destination and source IP address, and a destination and source port number. For example, a Telnet server commonly uses port number 23. The following is a list of the default server port numbers running on the EDS1100/2100: TCP Port 22: SSH - Lantronix EDS2100 | EDS1100 / EDS2100 - User Guide - Page 20
Hardware Address (MAC Address or Serial Number) Figure 2-2 Product Label Revision Part Number Serial Number 2: Introduction EDS1100/2100 User Guide 20 - Lantronix EDS2100 | EDS1100 / EDS2100 - User Guide - Page 21
to install the EDS1100 device server. It contains the following sections: Package Contents User-Supplied Items Hardware Printed Quick Start Guide User-Supplied Items To complete your installation, you need the following items: RS-232/422/485 serial device that requires network connectivity - Lantronix EDS2100 | EDS1100 / EDS2100 - User Guide - Page 22
of EDS1100 Hardware Components The EDS1100 has a female DB25 serial port that supports RS-232, RS-422, and RS-485 serial devices. The default serial port settings are 9600 baud, 8 bits, no parity, 1 stop Pinouts Figure 3-4 shows the RS-485 (2-wire) pinout configuration. EDS1100/2100 User Guide 22 - Lantronix EDS2100 | EDS1100 / EDS2100 - User Guide - Page 23
to factory defaults, including clearing the network settings. The IP address, gateway, and netmask are set to 00s. To reset the unit to factory defaults, perform the the button. The firmware restores factory default settings to the configuration and reboots the unit. EDS1100/2100 User Guide 23 - Lantronix EDS2100 | EDS1100 / EDS2100 - User Guide - Page 24
with mounting brackets for mounting the device vertically, for example on a wall. If using AC power, avoid outlets controlled by a wall switch. Observe the following guidelines when connecting the serial devices: The EDS1100 serial ports support RS-232/422/485 devices. EDS1100/2100 User Guide 24 - Lantronix EDS2100 | EDS1100 / EDS2100 - User Guide - Page 25
device. Power-up the device by using the barrel-power connector only. The barrel-power connector supports a power range of 9 to 30 VDC. Note: As soon as you plug the device into power, the device required. 4. Power up the serial device. Figure 3-8 EDS1100 Connections EDS1100/2100 User Guide 25 - Lantronix EDS2100 | EDS1100 / EDS2100 - User Guide - Page 26
chapter describes how to install the EDS2100 device server. It contains the following sections: Package Contents User-Supplied Items Hardware Components Installing the EDS2100 Package Contents The EDS2100 package includes the following items: One EDS2100 device One DB9F-to-DB9F serial - Lantronix EDS2100 | EDS1100 / EDS2100 - User Guide - Page 27
Configuration for RS-232 Figure 4-3 shows the pinout configuration for RS-422 (4-wire). Figure 4-3 EDS2100 Pinout Configuration for RS-422 (4-wire) Figure 4-4 shows the pinout configuration for RS-485 (2-wire). Figure 4-4 EDS2100 Pinout Configuration for RS-485 (2-wire) EDS1100/2100 User Guide 27 - Lantronix EDS2100 | EDS1100 / EDS2100 - User Guide - Page 28
the EDS2100 to factory defaults, including clearing the network settings. The IP address, firmware restores factory default settings to the configuration and reboots the unit. Top LEDs Figure 4-6 shows the top of the EDS2100. Table 4-7 lists and describes the LEDs. EDS1100/2100 User Guide - Lantronix EDS2100 | EDS1100 / EDS2100 - User Guide - Page 29
with mounting brackets for mounting the device vertically, for example on a wall. If using AC power, avoid outlets controlled by a wall switch. Observe the following guidelines when connecting the serial devices: The EDS2100 serial ports support RS-232/422/485 devices. EDS1100/2100 User Guide 29 - Lantronix EDS2100 | EDS1100 / EDS2100 - User Guide - Page 30
Ethernet network. 3. Plug the EDS2100 into the power outlet by using the power supply that was included in the packaging. The required input voltage is 9-30 VDC (center +) with1.5W maximum power required. 4. Power up the serial devices. Figure 4-8 EDS2100 Connections EDS1100/2100 User Guide 30 - Lantronix EDS2100 | EDS1100 / EDS2100 - User Guide - Page 31
free utility program provided by Lantronix that discovers, configures, upgrades and manages Lantronix Device Servers. It can be downloaded from the Lantronix website at www.lantronix.com/support/downloads.html. For instructions on using DeviceInstaller to configure the IP addres, related settings or - Lantronix EDS2100 | EDS1100 / EDS2100 - User Guide - Page 32
ID Hardware Address Firmware Version Extended Firmware Version Online Status IP Address IP Address was Obtained Subnet Mask Gateway Number of Ports Supports Configurable Pins Supports Email Triggers Telnet Enabled Telnet Port Web Enabled Web Port Firmware Upgradable Shows the EDS1100 - Lantronix EDS2100 | EDS1100 / EDS2100 - User Guide - Page 33
address bar. The IP address may have been assigned manually using DeviceInstaller (see the EDS1100/2100 Quick Start Guide) or automatically by DHCP. 3. Enter your username and password.The factory-default username is "admin" and the factorydefault password is "PASS." The Device Status web page shown - Lantronix EDS2100 | EDS1100 / EDS2100 - User Guide - Page 34
6: Configuration Using Web Manager Device Status Page The Device Status page is the first page that appears after you log into the Web Manager. It also appears when you click Status in the Main Menu. Figure 6-1 Web Manager Home Page EDS1100/2100 User Guide 34 - Lantronix EDS2100 | EDS1100 / EDS2100 - User Guide - Page 35
you to link to sub pages. On some pages, you must also select the item you are configuring, such as a line or a tunnel. EDS1100/2100 User Guide 35 - Lantronix EDS2100 | EDS1100 / EDS2100 - User Guide - Page 36
or help area shows information or instructions associated with the page. information and a link to the Lantronix home page. Navigating the Web Manager HTTP IP Address Filter File Transfer Protocol (FTP) server. Lets you view and IP addresses and subnets that are allowed to send data to this device - Lantronix EDS2100 | EDS1100 / EDS2100 - User Guide - Page 37
, and SSH client users. Lets you upload an existing certificate or create a new self-signed certificate. Lets you specify the severity of events to log and the server and ports to which the syslog should be sent. Lets you reboot device, restore factory defaults, upload new firmware, and change the - Lantronix EDS2100 | EDS1100 / EDS2100 - User Guide - Page 38
click Network 1, Interface, and Status at the top of the page. The Network 1 (eth0) Interface Status page appears. Figure 7-1 Network 1 (eth0) Interface Status EDS1100/2100 User Guide 38 - Lantronix EDS2100 | EDS1100 / EDS2100 - User Guide - Page 39
Table 7-3 Network 1 (eth0) Interface Configuration Description Select On or Off. At boot up, the device will attempt to obtain an IP address from a BOOTP server. Notes: Overrides the configured IP address, network mask, gateway, hostname, and domain. When DHCP is On, the system automatically - Lantronix EDS2100 | EDS1100 / EDS2100 - User Guide - Page 40
Client ID, in hexadecimal notation, instead of the device MAC address. Primary DNS IP address of the primary name server. This entry is required if you choose to configure DNS (Domain Name Server) servers. Secondary DNS IP address of the secondary name server. MTU When DHCP is enabled, the MTU - Lantronix EDS2100 | EDS1100 / EDS2100 - User Guide - Page 41
. Default is Auto. Select the Ethernet link duplex mode. Default is Auto. 3. Click Submit. The changes take effect immediately. Note: The following section describes the steps to view and configure Line 1 settings; these steps apply to other line instances of the device. EDS1100/2100 User Guide - Lantronix EDS2100 | EDS1100 / EDS2100 - User Guide - Page 42
Lantronix DeviceLinx products. The screenshots in this manual represent one line and tunnel, as available, for example, on an XPort Pro and EDS1100. However, other device networking products (such as EDS2100, EDS4100, XPort AR, and EDS8/16/32PR) support . These instructions also apply User Guide 42 - Lantronix EDS2100 | EDS1100 / EDS2100 - User Guide - Page 43
field blank will disable this line from appearing in the Terminal Login Menu. The default Name is blank. See Terminal and Host Settings on page 65 for related configuration menu. The default is Tunnel. Select the baud rate from the drop-down menu. The default is 9600. EDS1100/2100 User Guide 43 - Lantronix EDS2100 | EDS1100 / EDS2100 - User Guide - Page 44
of data when Flow Control is set to Software. Prefix a decimal character with \ or a hexadecimal character with 0x, or provide a single printable character. The default Xon char is 0x11. Xoff Char Specify the , according to additional line(s) available for your product. EDS1100/2100 User Guide 44 - Lantronix EDS2100 | EDS1100 / EDS2100 - User Guide - Page 45
. The Line 1 Command Mode page appears. Note: The CP Group option displayed in the screenshot is only supported in XPort Pro and XPort AR. 8: Line and Tunnel Settings Figure 8-4 Line 1 Command Mode 2. Enter or time for the serial string during boot-up in milliseconds. EDS1100/2100 User Guide 45 - Lantronix EDS2100 | EDS1100 / EDS2100 - User Guide - Page 46
Lantronix DeviceLinx products. The screenshots in this manual represent one line and tunnel, as available, for example, on an XPort Pro and EDS1100. However, other device networking products (such as EDS2100, EDS4100, XPort AR, and EDS8/16/ 32PR) support is disabled by default. Accept User Guide 46 - Lantronix EDS2100 | EDS1100 / EDS2100 - User Guide - Page 47
EDS1100/2100. To display the tunnel statistics, perform the following steps. 1. Click Tunnel on the menu bar. The Statistics page for Tunnel 1 appears. EDS1100/2100 User Guide 47 - Lantronix EDS2100 | EDS1100 / EDS2100 - User Guide - Page 48
Figure 8-6 Tunnel 1 Statistics 8: Line and Tunnel Settings EDS1100/2100 User Guide 48 - Lantronix EDS2100 | EDS1100 / EDS2100 - User Guide - Page 49
size to change the maximum amount of data the serial port stores. For any active connection, the device sends the data in the buffer. The modem control signal DTR on the Line may be continuously asserted regardless of the status of a tunnel connection. 3. Click Submit. EDS1100/2100 User Guide 49 - Lantronix EDS2100 | EDS1100 / EDS2100 - User Guide - Page 50
at the top of the page. The Tunnel 1 Packing Mode page appears. Depending on the Mode selection, different configurable parameters are presented to the user. The following figures show the display for each of the three packing modes. Figure 8-8 Tunnel 1 Packing Mode (Mode = Disable) EDS1100/2100 - Lantronix EDS2100 | EDS1100 / EDS2100 - User Guide - Page 51
to send data after the specified time has elapsed. Select Send Character to send the queued data when the send character is received. EDS1100/2100 User Guide 51 - Lantronix EDS2100 | EDS1100 / EDS2100 - User Guide - Page 52
is Timeout. Enter the send character (single printable or control). Upon receiving this character, the device sends out the queued data. The data is packed until the specified send character is encountered. put on the network immediately following the send character. EDS1100/2100 User Guide 52 - Lantronix EDS2100 | EDS1100 / EDS2100 - User Guide - Page 53
the remote device connects to for this connection. There is no remote port or address. The default local port is 10001 for serial port 1 and increases sequentially for each additional serial port, if supported. Accept Mode supports the following protocols: SSH (the EDS1100/2100 is the server in - Lantronix EDS2100 | EDS1100 / EDS2100 - User Guide - Page 54
10001 for Tunnel 1. Additional tunnels, if supported, increase sequentially. Select the protocol type for use with Accept Mode. The default protocol is TCP. If you select TCP AES you will need to configure the AES keys. Enter the time, in seconds, the device waits during a silent connection before - Lantronix EDS2100 | EDS1100 / EDS2100 - User Guide - Page 55
device. Select On to block, or not tunnel, network data transmitted to the device. Enter a password that clients must send to the device within 30 seconds from opening a network connection to enable data transmission. The password device - Lantronix EDS2100 | EDS1100 / EDS2100 - User Guide - Page 56
port is configured Enter the remote host address as an IP address or DNS name. The EDS1100/2100 device will make a connection only if it can resolve the the EDS1100/2100 SSH client username is configured on the remote SSH server before using it with the EDS1100/2100. SSL UDP Is User Guide 56 - Lantronix EDS2100 | EDS1100 / EDS2100 - User Guide - Page 57
> Connect Mode at the top of the page. The Tunnel 1 Connect Mode page appears. Note: The CP Output option displayed in the screenshot is only supported in XPort Pro and XPort AR. Figure 8-14 Tunnel 1 Connect Mode EDS1100/2100 User Guide 57 - Lantronix EDS2100 | EDS1100 / EDS2100 - User Guide - Page 58
Server Authorized Users must be configured. Table 8-15 Tunnel Connect Mode Description Select the method to be used to attempt a connection to a remote host or device selected by default. Once you Lantronix Virtual IP identified by the VIP Name. When VIP is enabled, the Host 2 field displays. Default - Lantronix EDS2100 | EDS1100 / EDS2100 - User Guide - Page 59
The default is 1500 milliseconds. The Reconnect Timer only applies if a Disconnect Mode is configured. With a Disconnect Mode set, the device server maintains to configure additional hosts as necessary. EDS1100/2100 supports configuration of up to sixteen hosts. EDS1100/2100 User Guide 59 - Lantronix EDS2100 | EDS1100 / EDS2100 - User Guide - Page 60
Host List Promotion on page 60). Sequential is the default Host Mode. Simultaneous - A tunnel will connect to all hosts accepting a connection. Simultaneous connections occur at the same time to all listed hosts. The device can support a maximum of 64 total aggregate connections. Figure 8-16 Host - Lantronix EDS2100 | EDS1100 / EDS2100 - User Guide - Page 61
to disable. Select Enabled to disconnect when the modem control pin is not asserted on the serial line. Enter a time, in milliseconds, for the device to disconnect on a Timeout. The value 0 (zero) disables the idle timeout. Select Enabled to flush the serial data buffer on a disconnection. 3. Click - Lantronix EDS2100 | EDS1100 / EDS2100 - User Guide - Page 62
Connect Mode type. The Modem Emulation Command Mode supports the standard AT command set. For a list to make a Command Mode connection as per the IP/DNS/port numbers defined in Connect Mode. It is >:). See ATDT. Like ATDT. Dials default Connect Mode remote address and port. Sets up User Guide 62 - Lantronix EDS2100 | EDS1100 / EDS2100 - User Guide - Page 63
255 characters, the EDS1100/2100 replaces the last segment of the IP address with the configured Connect Mode remote station address. It is exit command, the EDS1100/2100 reverts to modem emulation mode. By default, the +++ characters are not passed through the connection. Turn /2100 User Guide 63 - Lantronix EDS2100 | EDS1100 / EDS2100 - User Guide - Page 64
Incoming Connection requests will be disabled, answered automatically, or answered manually. Default is Disabled. Enter the connect string. This modem initialization string the Serial Line is followed by the IP address of the caller. Default is Disabled. 3. Click Submit. EDS1100/2100 User Guide 64 - Lantronix EDS2100 | EDS1100 / EDS2100 - User Guide - Page 65
a serial port. From the menu, a user can choose one of the presented options and the device automatically makes the predefined connection. The Terminal page controls whether a Telnet, SSH, or serial port connection presents the CLI or the Login Connect Menu. By default, the CLI is presented when the - Lantronix EDS2100 | EDS1100 / EDS2100 - User Guide - Page 66
over the network such as send break or start echoing. Select the interface to display when the user logs in. Choices are: Enabled = shows the Login Connect Menu. Disabled = shows the CLI Select whether of each character typed. 3. Click Submit to save changes. EDS1100/2100 User Guide 66 - Lantronix EDS2100 | EDS1100 / EDS2100 - User Guide - Page 67
the user to exit to the CLI. Disabled = there is no exit to the CLI. Applies only to Connect Mode Telnet connections, not to Accept Mode. Only disable Echo if your terminal echoes, in which case you will see double of each character typed. 3. Click Submit to save changes. EDS1100/2100 User Guide - Lantronix EDS2100 | EDS1100 / EDS2100 - User Guide - Page 68
is the default.) Host Users page), or leave it blank to be prompted for a username and password at connect time. Enter an IP address for the host to which the device will connect. Enter the port on the host to which the device will connect. 3. Click Submit to save changes. EDS1100/2100 User Guide - Lantronix EDS2100 | EDS1100 / EDS2100 - User Guide - Page 69
Settings This chapter describes the available services and how to configure each. It contains the following sections: DNS Settings and is removed automatically after a certain period, or you can delete it manually. To view the DNS status: 1. Click DNS on the menu bar. The DNS page appears - Lantronix EDS2100 | EDS1100 / EDS2100 - User Guide - Page 70
Peer device and the remote device it wishes to communicate with. The static route in the PPP Peer device must use the PPP Local IP Address as its gateway, and the static route in the remote device must use the network interface IP Address of the EDS1100/2100 as its gateway. EDS1100/2100 User Guide - Lantronix EDS2100 | EDS1100 / EDS2100 - User Guide - Page 71
the following settings: PPP Configuration Settings Local IP Address Peer IP Address Authentication Mode Username Password 3. Click Submit. Table 10-3 PPP Configuration Description Enter the IP address assigned to the device's PPP interface. Enter the IP address assigned to the peer (when requested - Lantronix EDS2100 | EDS1100 / EDS2100 - User Guide - Page 72
network management tool that monitors network devices for conditions that need attention. The SNMP service responds to SNMP requests and device boot up, and the Linkdown trap is sent when the device is rebooted from software control. Enter the primary SNMP trap host. EDS1100/2100 User Guide - Lantronix EDS2100 | EDS1100 / EDS2100 - User Guide - Page 73
2. Enter or modify the following settings: FTP Settings State Admin Username Admin Password Description Select Enabled to enable the FTP server. Enter the username to use when logging in via FTP. Enter the password to use when logging in via FTP. 3. Click Submit. EDS1100/2100 User Guide 73 - Lantronix EDS2100 | EDS1100 / EDS2100 - User Guide - Page 74
whether the TFTP server is allowed to accept an XML configuration file for update. An attempt to import configuration is recognized based on the name of the file. Note: TFTP cannot authenticate the client, so the device is open to malicious update. 3. Click Submit. EDS1100/2100 User Guide 74 - Lantronix EDS2100 | EDS1100 / EDS2100 - User Guide - Page 75
the syslog. Enter the IP address of the remote server to which system logs are sent for storage. Enter the number of the local port on the device from which system logs are sent. Enter the number of the port on the remote server that supports logging services. The default is 514. From the drop - Lantronix EDS2100 | EDS1100 / EDS2100 - User Guide - Page 76
defines the actions web servers and browsers should take in response to different commands. HTTP Authentication enables the requirement of usernames and passwords for access to the EDS1100/2100 device. This page has that can be viewed on the HTTP Configuration Page. EDS1100/2100 User Guide 76 - Lantronix EDS2100 | EDS1100 / EDS2100 - User Guide - Page 77
10: Service Settings HTTP Configuration On this page you server. Enter the port for the HTTP server to use. The default is 80. Enter the port for the HTTPS server to use. The default is 443. The HTTP server only listens on the HTTPS Port when an SSL certificate is configured. EDS1100/2100 User Guide - Lantronix EDS2100 | EDS1100 / EDS2100 - User Guide - Page 78
server to wait when receiving a request. This prevents Denial-of-Service (DoS) attacks. The default is 10 seconds. Enter the maximum number of bytes the HTTP server accepts when receiving a request. The default the HTTP server. Follow these Log Format rules: %a - remote IP address ( User Guide 78 - Lantronix EDS2100 | EDS1100 / EDS2100 - User Guide - Page 79
10: Service Settings HTTP Authentication HTTP Authentication enables you to require usernames and passwords to access specific web pages or directories on the EDS1100/2100's built-in web server. To configure HTTP , or realm, used for HTTP. Required with the URI field. EDS1100/2100 User Guide 79 - Lantronix EDS2100 | EDS1100 / EDS2100 - User Guide - Page 80
access the URI. More than one Username per URI is permitted. Click Submit and enter the next Username as necessary. Password Enter the Password for the Username. 3. Click Submit. 4. To delete the URI and users, click Delete in the current configuration table. Note: The URI, realm, username, and - Lantronix EDS2100 | EDS1100 / EDS2100 - User Guide - Page 81
10: Service Settings RSS Feed entries, as necessary. LPD Settings The EDS1100/2100 device acts as a print server if a printer gets connected to one of its serial ports Statistics This read-only page shows various statistics about the LPD server. To view LPD statistics: 1. Click LPD on the menu bar - Lantronix EDS2100 | EDS1100 / EDS2100 - User Guide - Page 82
Statistics 10: Service Settings LPD Configuration Here you can change LPD configuration settings. To configure LPD settings: 1. Click LPD on the menu bar, select the LPD line and click Configuration. The LPD Configuration page appears. Figure 10-19 LPD Configuration EDS1100/2100 User Guide 82 - Lantronix EDS2100 | EDS1100 / EDS2100 - User Guide - Page 83
10: Service Settings 2. Enter to do so. Selected by default. Select Enabled for the device to pass the entire file to the printer unchanged. Otherwise, the device passes only valid ASCII and to 31 characters. The default is LPDQueueX (for line number X) 3. Click Submit. EDS1100/2100 User Guide 83 - Lantronix EDS2100 | EDS1100 / EDS2100 - User Guide - Page 84
cryptography against eavesdropping and tampering. It provides encryption and message integrity services. SSL is widely used for secure communication to a web server. SSL uses certificates and private keys. Note: The EDS1100/2100 supports SSLv3 and its successors, TLS1.0 and TLS1.1. An incoming SSlv2 - Lantronix EDS2100 | EDS1100 / EDS2100 - User Guide - Page 85
menu bar and SSH Server: Host Keys at the top of the page. The SSH Server Host Keys page appears. Figure 11-1 SSH Server: Host Keys 2. Enter or modify the following settings: SSH Server: Host Keys Settings Upload key with the SSH2 protocol. Note: RSA is more secure. EDS1100/2100 User Guide 85 - Lantronix EDS2100 | EDS1100 / EDS2100 - User Guide - Page 86
clients require RSA host keys to be at least 1024 bits long. This device generates keys up to 1024 bits long. It can work with larger keys >SSH Server: Authorized Users at the top of the page. The SSH Server: Authorized Users page appears. 3. Enter the Username and Password for authorized users. - Lantronix EDS2100 | EDS1100 / EDS2100 - User Guide - Page 87
an SSH connection to a device port. Every account must have a password. The user's public keys are optional and Server Authorized User Settings SSH Server: Authorized Users Settings Username Description Enter the name of the user authorized to access the SSH server. Password Enter the password - Lantronix EDS2100 | EDS1100 / EDS2100 - User Guide - Page 88
Client Known Hosts Description Enter the name or IP address of a known host. If you enter a server name, the name should match the name of the server used as the Remote Address in Connect mode Current Configuration table, delete currently stored settings as necessary. EDS1100/2100 User Guide 88 - Lantronix EDS2100 | EDS1100 / EDS2100 - User Guide - Page 89
, specifically tunneling in Connect Mode. At the very least, a password or key pair must be configured for a user. The keys for public key authentication can be created elsewhere and uploaded to the device or automatically generated on the device. If uploading existing keys, be sure the private key - Lantronix EDS2100 | EDS1100 / EDS2100 - User Guide - Page 90
Users Settings Username Description Enter the name that the device uses to connect to a SSH server. Password Enter the password associated with the username. Remote Command Private Key Public Key Key Type Create New Keys Enter the command that can be executed remotely. Default the user device - Lantronix EDS2100 | EDS1100 / EDS2100 - User Guide - Page 91
RSA 1024 bits RSA 1024 bits RSA 56 bits RC4 56 bits RC4 40 bits RC4 MD5 SHA1 MD5 Whichever side is acting as server decides which cipher suite to use for a connection. It is usually the strongest common denominator of the cipher suite lists supported by both sides. EDS1100/2100 User Guide 91 - Lantronix EDS2100 | EDS1100 / EDS2100 - User Guide - Page 92
to allow verifying the identity of website servers, which need to have certificates signed by the authority certificate that can authenticate users with which it wishes to communicate . The EDS1100/2100 supports key exchange methods that a password or not. The EDS1100/2100 currently only - Lantronix EDS2100 | EDS1100 / EDS2100 - User Guide - Page 93
. We will add support for this and other formats in future releases. Free Radius-Linux open-source Radius server. It is versatile, but complicated to configure. FreeRadius Free Radius is a Linux open-source Radius server. It is versatile, but complicated to configure. EDS1100/2100 User Guide 93 - Lantronix EDS2100 | EDS1100 / EDS2100 - User Guide - Page 94
SSL Configuration To configure SSL settings: 1. Click SSL from the main menu. The SSL page appears. Figure 11-10 SSL 11: Security Settings EDS1100/2100 User Guide 94 - Lantronix EDS2100 | EDS1100 / EDS2100 - User Guide - Page 95
-11 SSL SSL Settings Upload Certificate Description New Certificate This certificate identifies the device to peers. It is used for HTTPS and SSL Tunneling. Enter the path is setting up a web server for the Sales department, enter Sales for your organizational unit. EDS1100/2100 User Guide 95 - Lantronix EDS2100 | EDS1100 / EDS2100 - User Guide - Page 96
Name Expires Key length Type Description Enter the same name that the user will enter when requesting your web site. Example: If a user enters http://www.widgets.abccompany.com to access your web site, the US government to avoid the patents on RSA. 3. Click Submit. EDS1100/2100 User Guide 96 - Lantronix EDS2100 | EDS1100 / EDS2100 - User Guide - Page 97
through an existing Modbus TCP/IP network. Any device having access to a given Modbus implementation will be able to perform full range of operations that the implementation supports. Modbus/TCP use a the following sections: Modbus Statistics Modbus Configuration EDS1100/2100 User Guide 97 - Lantronix EDS2100 | EDS1100 / EDS2100 - User Guide - Page 98
Modbus Modbus Statistics This read-only web page displays the current connection status of the Modbus servers listening on the TCP ports. When a connection is active, the remote client information is page. The Modbus Statistics page appears. Figure 12-3 Modbus Statistics EDS1100/2100 User Guide 98 - Lantronix EDS2100 | EDS1100 / EDS2100 - User Guide - Page 99
for a response on the serial side. The device returns exception code 11 to the network master controller if the slave serial device fails to reply within this time out. If to configuring the Modbus server. See Chapter 8: Line and Tunnel Settings on page 42 for details. EDS1100/2100 User Guide 99 - Lantronix EDS2100 | EDS1100 / EDS2100 - User Guide - Page 100
methods and contains the following sections: Filesystem Settings Protocol Stack Settings IP Address Filter Query Port Diagnostics System Settings Filesystem Settings The EDS1100/2100 usage information of the flash filesystem. Figure 13-1 Filesystem Statistics EDS1100/2100 User Guide 100 - Lantronix EDS2100 | EDS1100 / EDS2100 - User Guide - Page 101
needed under normal circumstances as the system manages this automatically. 4. Back up all files before you perform the next (Format) step, because all user files get erased in that step. 5. Click Format in the Actions row. The configuration gets retained. Filesystem Browser To browse the filesystem - Lantronix EDS2100 | EDS1100 / EDS2100 - User Guide - Page 102
directory view. To make changes within other folders, click the folder or directory and then enter the parameters in the settings listed below. EDS1100/2100 User Guide 102 - Lantronix EDS2100 | EDS1100 / EDS2100 - User Guide - Page 103
to be performed. Enter the name of the file at the remote location that is to be stored locally ("get') or externally ("put"). Enter the IP address or name of the host involved in this operation. Enter the number of the port involved in TFTP operations on which the specified TFTP - Lantronix EDS2100 | EDS1100 / EDS2100 - User Guide - Page 104
Maintenance and Diagnostics Settings Protocol Stack Settings In the Protocol Stack web page, you can configure TCP, IP, ICMP, SMTP and ARP. TCP Settings To configure the TCP network protocol: 1. Click Protocol Stack Expedited to send data whenever the window allows it. EDS1100/2100 User Guide 104 - Lantronix EDS2100 | EDS1100 / EDS2100 - User Guide - Page 105
to be transmitted before the packet is discarded. This value fills the Time To Live in any multicast IP header. Normally this value will be one so the packet will be blocked at the first router. It Click Submit. ICMP Settings To configure the ICMP network protocol: EDS1100/2100 User Guide 105 - Lantronix EDS2100 | EDS1100 / EDS2100 - User Guide - Page 106
State selection is used to turn on/off processing of ICMP messages. This includes both incoming and outgoing messages. Choose Enabled or Disabled. EDS1100/2100 User Guide 106 - Lantronix EDS2100 | EDS1100 / EDS2100 - User Guide - Page 107
menu bar. 2. Click ARP. Figure 13-10 ARP Protocol Page 3. Modify the following settings: Table 13-11 ARP Settings Protocol Stack ARP Settings ARP Timeout IP Address Description This is the maximum duration an address remains in the cache. Enter the time, in hours, minutes and seconds. Enter the - Lantronix EDS2100 | EDS1100 / EDS2100 - User Guide - Page 108
to add to the ARP cache. Note: Both the IP and MAC addresses are required for the ARP cache. 4. is a simple forwarding agent. Note: Lantronix does not support SMTP AUTH or any other authentication or encryption through a mail server. Can contain either a hostname or an IP address. Port utilized - Lantronix EDS2100 | EDS1100 / EDS2100 - User Guide - Page 109
3. Click Add. Table 13-15 IP Address Filter Settings Description Enter the IP address to add to the IP filter table. Enter the IP address' network mask in dotted notation. Note: In the Current State table, click Remove to delete any existing settings, as necessary. EDS1100/2100 User Guide 109 - Lantronix EDS2100 | EDS1100 / EDS2100 - User Guide - Page 110
DeviceInstaller (on page 31). To configure the query port server: 1. Click Query Port on the menu bar. The Query Port page opens to display the current configuration. Figure 13-16 Query Port Configuration 2. Select On to enable the query port server. 3. Click Submit. EDS1100/2100 User Guide 110 - Lantronix EDS2100 | EDS1100 / EDS2100 - User Guide - Page 111
Hardware This read-only page shows the current device's hardware configuration. To display hardware diagnostics: 1. Click Diagnostics on the menu bar. The Diagnostics: Hardware page opens and shows the current hardware configuration. Figure 13-17 Diagnostics: Hardware EDS1100/2100 User Guide 111 - Lantronix EDS2100 | EDS1100 / EDS2100 - User Guide - Page 112
below: Table 13-19 Requests for Comments (RFCs) RFC 1213 RFC 2011 RFC 2012 RFC 2013 RFC 2096 Original MIB-II definitions. Updated definitions for IP and ICMP. Updated definitions for TCP. Updated definitions for UDP. Definitions for IP forwarding. EDS1100/2100 User Guide 112 - Lantronix EDS2100 | EDS1100 / EDS2100 - User Guide - Page 113
Ping EDS1100/2100 uses 56 bytes of data in a ping packet. Ping size is not configurable. To ping a remote device or computer: 1. Click Diagnostics on the menu bar and then Ping at the top of the page. The Diagnostics: Ping page opens. Figure 13-21 Diagnostics: Ping EDS1100/2100 User Guide 113 - Lantronix EDS2100 | EDS1100 / EDS2100 - User Guide - Page 114
of ping packets the device should attempt to send to the Host. The default is 3. Enter the time, in seconds, for the device to wait for a response from the host before timing out. The default is 5 seconds. 3. Click Submit. The results of the ping display in the page. EDS1100/2100 User Guide 114 - Lantronix EDS2100 | EDS1100 / EDS2100 - User Guide - Page 115
Traceroute Diagnostics: Traceroute Settings Host Description Enter the IP address or DNS hostname. This address is used to show the path between it and the device when issuing the traceroute command. 3. Click Submit. The results of the traceroute display in the page. EDS1100/2100 User Guide 115 - Lantronix EDS2100 | EDS1100 / EDS2100 - User Guide - Page 116
top of the page. The Diagnostics: Log page opens. Figure 13-25 Diagnostics: Log 2. Click the Output type and select one of the following: Disable (default) Filesystem Line1 Figure 13-26 Diagnostics: Log (Filesystem) EDS1100/2100 User Guide 116 - Lantronix EDS2100 | EDS1100 / EDS2100 - User Guide - Page 117
) limits the size in Kbytes of the log (/log.txt). Severity Level specifies the level of system message to be logged. 4. Click Submit. EDS1100/2100 User Guide 117 - Lantronix EDS2100 | EDS1100 / EDS2100 - User Guide - Page 118
pools: 1. Click Diagnostics on the menu bar and then Buffer Pools at the top of the page. The Diagnostics: Buffer Pools page opens. EDS1100/2100 User Guide 118 - Lantronix EDS2100 | EDS1100 / EDS2100 - User Guide - Page 119
and then Processes at the top of the page. Note: The Adobe SVG plug-in is required to view the CPU Load Graph. EDS1100/2100 User Guide 119 - Lantronix EDS2100 | EDS1100 / EDS2100 - User Guide - Page 120
13: Maintenance and Diagnostics Settings Figure 13-30 Diagnostics: Processes EDS1100/2100 User Guide 120 - Lantronix EDS2100 | EDS1100 / EDS2100 - User Guide - Page 121
reboot the device. The system refreshes and redirects the browser to the device home page. Click Factory Defaults to restore the device to the original factory settings. All configurations will be lost. The device automatically reboots upon setting back to the defaults. EDS1100/2100 User Guide 121 - Lantronix EDS2100 | EDS1100 / EDS2100 - User Guide - Page 122
new firmware. Note: Close and reopen the web manager browser upon a firmware update. Enter a new Short Name and a Long Name (if necessary). The Short Name maximum is 32 characters. The Long Name maximum is 64 characters. Click Submit. Changes take place upon the next reboot. EDS1100/2100 User Guide - Lantronix EDS2100 | EDS1100 / EDS2100 - User Guide - Page 123
This read-only page shows various statistics and current usage information about the email subsystem. When you transmit an email, the transmission to the SMTP server gets logged and displayed in the bottom portion of the page. 1. Click Email 1 and Statistics at the top of the page to view its - Lantronix EDS2100 | EDS1100 / EDS2100 - User Guide - Page 124
. Figure 14-2 Email Configuration Note: The Trigger Email Send option displayed in the screenshot is only supported in XPort Pro and XPort AR. 2. Enter or modify the following settings: Email - Configuration Settings alert. Required field if an email is to be sent. EDS1100/2100 User Guide 124 - Lantronix EDS2100 | EDS1100 / EDS2100 - User Guide - Page 125
the domain name to override the current domain name in EHLO (Extended Hello). Server Port Enter the SMTP server port number. The default is port 25. Local Port Enter the local port to use for email alerts. back to the Statistics page for a log of the transaction. EDS1100/2100 User Guide 125 - Lantronix EDS2100 | EDS1100 / EDS2100 - User Guide - Page 126
configure CLI settings. CLI Statistics This read-only page shows the current connection status of the CLI servers listening on the Telnet and SSH ports. When a connection is active, the following display: page. The Command Line Interface Configuration page appears. EDS1100/2100 User Guide 126 - Lantronix EDS2100 | EDS1100 / EDS2100 - User Guide - Page 127
for access to the Command Mode Enable level. There is no password by default. Enter a string to terminate a connect line session and resume the CLI. Type before any key the user must press when holding down the Ctrl key. An example of such a string is L. Set an Inactivity Timeout - Lantronix EDS2100 | EDS1100 / EDS2100 - User Guide - Page 128
and exporting differ between Lantronix DeviceLinx products. The screenshots in this manual represent one line, as available, for example, on an XPort Pro and EDS1100. However, other device networking products (such as EDS2100, EDS4100, XPort AR, and EDS8/16/32PR) support additional lines and tunnels - Lantronix EDS2100 | EDS1100 / EDS2100 - User Guide - Page 129
to a file on the device. If you select this option, enter a file name for the XML configuration record. Only use this with extreme caution. If selected, secret password and key information will be exported. Use only with a secure link, and save only in secure locations. EDS1100/2100 User Guide 129 - Lantronix EDS2100 | EDS1100 / EDS2100 - User Guide - Page 130
bar and then Export Status at the top of the page. The XML: Export Status page appears. 2. Enter or modify the following settings: EDS1100/2100 User Guide Figure 14-9 XML: Export Status 130 - Lantronix EDS2100 | EDS1100 / EDS2100 - User Guide - Page 131
status record to a web browser. Select this option to export the XML status record to a file on the device. If you select this option, enter a file name for the XML status record. Select the instances you file. See Import Configuration from External File on page 132. EDS1100/2100 User Guide 131 - Lantronix EDS2100 | EDS1100 / EDS2100 - User Guide - Page 132
file you want to import. You can also browse to select the XCR file. Figure 14-12 XML: Import Configuration from External File EDS1100/2100 User Guide 132 - Lantronix EDS2100 | EDS1100 / EDS2100 - User Guide - Page 133
14: Advanced Settings Import Configuration from the Filesystem This selection shows a page for entering the filesystem and your import requirements - groups, lines, and instances. Figure 14-13 XML: Import from Filesystem 1. Enter or modify the following settings. EDS1100/2100 User Guide 133 - Lantronix EDS2100 | EDS1100 / EDS2100 - User Guide - Page 134
Import Description Enter the name of the file on the device (local to its filesystem) that contains XCR data. Select . Click the Clear All link to clear all of the checkboxes. By default, all line instances are selected. Only the selected line instances will be imported EDS1100/2100 User Guide 134 - Lantronix EDS2100 | EDS1100 / EDS2100 - User Guide - Page 135
the file. To modify Single Line Settings on the Filesystem: Figure 14-15 XML: Import Line(s) from Single Line Settings on the Filesystem EDS1100/2100 User Guide 135 - Lantronix EDS2100 | EDS1100 / EDS2100 - User Guide - Page 136
Whole Groups to Import Description Provide the name of the file on the device (local to its file system) that contains XCR data. Select the groups to import from the XML configuration record. Note: By default, all groups are checked except those pertaining to the network EDS1100/2100 User Guide 136 - Lantronix EDS2100 | EDS1100 / EDS2100 - User Guide - Page 137
IP) takes advantage of the Lantronix ManageLinx technology that solves the accessthrough-firewall problem. ManageLinx utilizes existing network infrastructure to create a virtual device Record (XCR). For instructions on importing XCRs see Advanced Settings (on page 123). EDS1100/2100 User Guide 137 - Lantronix EDS2100 | EDS1100 / EDS2100 - User Guide - Page 138
do not require special configuration. If VIP access is enabled (in the VIP configuration page), then VIP Accept Mode requests from a ManageLinx device will be accepted. Virtual IP (VIP) Statistics To view the EDS1100/2100 VIP Statistics: 1. Click VIP from the main menu. The VIP Status page appears - Lantronix EDS2100 | EDS1100 / EDS2100 - User Guide - Page 139
counts are packet based, and do not record the number of data bytes. Virtual IP (VIP) Configuration To configure the EDS1100/2100 VIP settings: 1. Click VIP >Configuration Mode and Tunnel Connect Mode. The default is disabled. 3. Click Submit save a changed state. EDS1100/2100 User Guide 139 - Lantronix EDS2100 | EDS1100 / EDS2100 - User Guide - Page 140
overridden with the following procedure: 1. FTP to the EDS1100/2100 device. 2. Make a directory (mkdir) and name it http/config 9. If you wish to go back to the default files in the firmware image, simply delete the overriding files from the Lantronix EDS1100/2100 (EDS) EDS1100/2100 User Guide 140 - Lantronix EDS2100 | EDS1100 / EDS2100 - User Guide - Page 141
The System page opens. Figure 16-1 System Branding 2. In the Short Name field, enter the new short name for the device (up to 32 characters). 3. In the Long Name field, enter the new long name for the device (up to 64 characters). 4. Click Submit. 5. Click Reboot to display the names. EDS1100/2100 - Lantronix EDS2100 | EDS1100 / EDS2100 - User Guide - Page 142
release notes for the unit from the Lantronix web site (http:// www.lantronix.com/support/downloads) or by using anonymous FTP (ftp://ftp.lantronix.com/). Loading New Firmware Reload the firmware using the device web manager Filesystem page. To upload new firmware: 1. Click System in the menu bar - Lantronix EDS2100 | EDS1100 / EDS2100 - User Guide - Page 143
http://www.lantronix.com/support. When you report a problem, please provide the following information: Your name, and your company name, address, and phone number Lantronix model number Lantronix serial number Firmware version (on the first screen shown when you Telnet to the device and type - Lantronix EDS2100 | EDS1100 / EDS2100 - User Guide - Page 144
Hex 0 0000 0 1 0001 1 2 0010 2 3 0011 3 4 0100 4 5 0101 5 6 0110 6 7 0111 7 8 1000 8 9 1001 9 10 1010 A 11 1011 B 12 1100 C 13 1101 D 14 1110 E 15 1111 F EDS1100/2100 User Guide 144 - Lantronix EDS2100 | EDS1100 / EDS2100 - User Guide - Page 145
, select Scientific. The scientific calculator appears. 3. Click Bin (Binary), and type the number you want to convert. 4. Click Hex. The hexadecimal value appears. EDS1100/2100 User Guide 145 - Lantronix EDS2100 | EDS1100 / EDS2100 - User Guide - Page 146
to ISO/IEC Guide 17050-1, 17050-2 and EN 45014) Manufacturer's Name & Address: Lantronix 167 Technology Drive, Irvine, CA 92618 USA Product Name Model: EDS1100/2100 Device Server Conforms to the following No. 60950-1-03 EN 60950-1:2001, Low Voltage Directive (73/23/EEC) EDS1100/2100 User Guide 146 - Lantronix EDS2100 | EDS1100 / EDS2100 - User Guide - Page 147
Drive, Irvine, CA 92618 USA Tel: 949-453-3990 Fax: 949-450-7249 RoHS Notice All Lantronix products in the following families are China RoHS-compliant and free of the following hazardous substances and used for this part is above the limit requirement in SJ/T11363-2006. EDS1100/2100 User Guide 147 - Lantronix EDS2100 | EDS1100 / EDS2100 - User Guide - Page 148
Break Duration 66 EDS1100/2100 User Guide C Challenge Handshake Authentication Default Server Port Numbers 19 Device Control 17 Device Details 31 Device Details Summary 31 Device Management 18 DeviceInstaller 31 DHCP 16, 40 Diagnostic Toolset 18 Diagnostics 111 Buffer Pools 118 Hardware 111 IP - Lantronix EDS2100 | EDS1100 / EDS2100 - User Guide - Page 149
user-supplied items 21 EDS2100 installation 26 back panel 28 device user-supplied items 26 Electrical 146 Electrical Fast Transient/Burst Immunity 146 Email on Connect 55, 59 Email on Disconnect 55, 59 Enable Level Password 36, 142 EDS1100/2100 User Guide Firewall 137 Firmware 142 Flush Serial Data - Lantronix EDS2100 | EDS1100 / EDS2100 - User Guide - Page 150
Lantronix Discovery Protocol 19 Line 1 Configuration 43 Statistics 42 Line Settings 42 Lines to Export 130, 131 Lines to Import 134, 136 Loading New Firmware 142 Local IP Address 71 Local Port 54, 58 Login Connect Menu 66, 67 Login Password Multiple Hosts 60 EDS1100/2100 User Guide N Name 122 NAT 70 - Lantronix EDS2100 | EDS1100 / EDS2100 - User Guide - Page 151
Queue Name 83 Quick Start Guide 21, 26 Quit Connect Line 127 R Radiated and Conducted Emissions 146 Read Community 72 Really Simple Syndication 17 Reboot Device 121 Reconnect Timer 59 Remote Address 68 Remote Command 90 Remote Port 68 Response Timeout 99 Restore Factory Defaults 121 RF Common Mode - Lantronix EDS2100 | EDS1100 / EDS2100 - User Guide - Page 152
TCP/IP 97 Technical Support 143 Telnet 16 Telnet Max Sessions 127 Telnet Port 127 Telnet State 127 Terminal Server 18 Firmware 122 URI 79 Username 71, 90 V VIP Access 17 VIP Configuration 139 VIP Statistics 138 VIP Settings 137 Voltage Dips and Interrupts 146 W Web Manager Device User Guide 152
-
 1
1 -
 2
2 -
 3
3 -
 4
4 -
 5
5 -
 6
6 -
 7
7 -
8
-
9
-
10
-
11
-
12
-
13
-
14
-
15
-
16
-
17
-
18
-
19
-
20
-
21
-
22
-
23
-
24
-
25
-
26
-
27
-
28
-
29
-
30
-
31
-
32
-
33
-
34
-
35
-
36
-
37
-
38
-
39
-
40
-
41
-
42
-
43
-
44
-
45
-
46
-
47
-
48
-
49
-
50
-
51
-
52
-
53
-
54
-
55
-
56
-
57
-
58
-
59
-
60
-
61
-
62
-
63
-
64
-
65
-
66
-
67
-
68
-
69
-
70
-
71
-
72
-
73
-
74
-
75
-
76
-
77
-
78
-
79
-
80
-
81
-
82
-
83
-
84
-
85
-
86
-
87
-
88
-
89
-
90
-
91
-
92
-
93
-
94
-
95
-
96
-
97
-
98
-
99
-
100
-
101
-
102
-
103
-
104
-
105
-
106
-
107
-
108
-
109
-
110
-
111
-
112
-
113
-
114
-
115
-
116
-
117
-
118
-
119
-
120
-
121
-
122
-
123
-
124
-
125
-
126
-
127
-
128
-
129
-
130
-
131
-
132
-
133
-
134
-
135
-
136
-
137
-
138
-
139
-
140
-
141
-
142
-
143
-
144
-
145
-
146
-
147
-
148
-
149
-
150
-
151
-
152
 |
 |
Part Number 900-567
Revision B December 2010
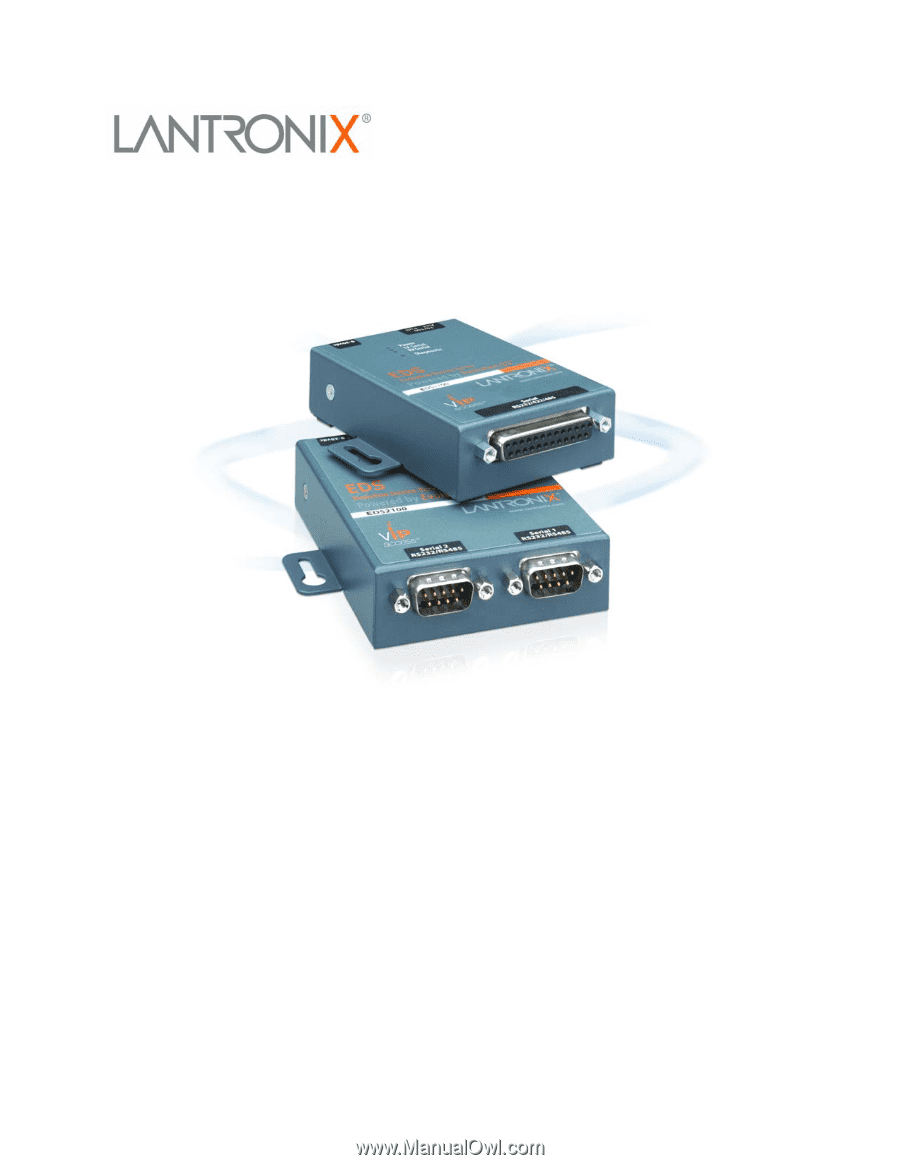
EDS1100/2100
User Guide