LiftMaster JHDC Installation Manual - English French Spanish - Page 25
Install the Monitored Light Curtain
 |
View all LiftMaster JHDC manuals
Add to My Manuals
Save this manual to your list of manuals |
Page 25 highlights
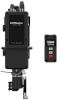
Entrapment Protection (continued) Install the Monitored Light Curtain (Optional) This step includes directions to install one set of monitored light curtains as a standalone primary entrapment protection device. The mounting brackets must be securely fastened to a solid surface such as a wall framing. If installing the mounting brackets in masonry construction, add a piece of wood at each location to avoid drilling extra holes in the masonry. NOTE: If the Monitored Light Curtain is installed with coil cord, the coil cord needs to be secured so it will not interrupt the light beams. 1. Fasten the mounting brackets loosely to both Monitored Light Curtain with the screws provided. 2. Measure a maximum of 6 inches above the floor. Mark this location. The lowest optical sensor of the Monitored Light Curtain must be installed at or below this point. In this application, in order to assure that the lowest optical sensor is mounted no higher than 6" above the ground, the light curtain wires must be oriented at the top of the light curtain in this application. 3. Hold the Monitored Light Curtain up to the desired mounting location with the cable end pointing upward. Secure the bottom mounting bracket to the mounting surface. 4. Make sure the Monitored Light Curtain is level and secure the upper mounting bracket to the mounting surface. 5. Tighten the screws to secure the Monitored Light Curtain to the mounting bracket. 6. Secure the other Monitored Light Curtain to the opposite side of the door following steps 2-5, making sure they are aligned. 7. Run wires to the operator. 8. Twist like colored wires together, brown to brown and blue to blue. POWER WIRING Do not run wiring in the same conduit with AC power. 1. Disconnect power to the operator. 2. Connect the wires from the Monitored Light Curtain LC36M to the following. a. Brown wire to + Aux24 power WARNING To prevent possible product damage and incorrect operation: • NEVER scratch or paint the optical sensors. • DO NOT drill ANY additional holes into the Monitored Light Curtain. • Correctly connect and align the Monitored Light Curtain transmitter and receiver. • DO NOT bend or twist the Monitored Light Curtain. • Oil may damage the Monitored Light Curtain cable so contamination MUST be avoided at ALL times. • DO NOT mount the Monitored Light Curtain where sunlight or other external infrared light sources will shine directly into the optical sensors of the Monitored Light Curtain receiver. If necessary, switch the mounting side of the Monitored Light Curtain transmitter and receiver. b. Blue wired to - Aux24 CMN c. White wire to eye/edge input - d. Black wired to eye/edge input + ALIGNMENT The Monitored Light Curtain transmitter and receiver must be aligned. When properly wired and aligned the amber and green LEDs will be ON. The amber LED is located on the Monitored Light Curtain Transmitter and the green LED is located on the Monitored Light Curtain Receiver. If the amber and green LEDs are not on, see the table below. 1. Open and close the door for one complete cycle to let the operator register the Monitored Light Curtain. Amber LED Green LED Status Solution OFF OFF No power Check wiring. ON Blinks • Monitored Light Curtain receiver and • Adjust the Monitored Light Curtains to transmitter are not aligned correct alignment • Obstructed light beam • Remove the obstruction • Defective Monitored Light Curtain Receiver • Replace Monitored Light Curtain receiver and transmitter (Model LC36M) NOTE: For more detailed information, please refer to Monitored Light Curtain manual 114-5541. 25
-
 1
1 -
2
-
3
-
4
-
5
-
6
-
7
-
8
-
9
-
10
-
11
-
12
-
13
-
14
-
15
-
16
-
17
-
18
-
19
-
 20
20 -
 21
21 -
 22
22 -
 23
23 -
 24
24 -
 25
25 -
 26
26 -
 27
27 -
 28
28 -
 29
29 -
 30
30 -
31
-
32
-
33
-
34
-
35
-
36
-
37
-
38
-
39
-
40
-
41
-
42
-
43
-
44
-
45
-
46
-
47
-
48
-
49
-
50
-
51
-
52
-
53
-
54
-
55
-
56
-
57
-
58
-
59
-
60
-
61
-
62
-
63
-
64
-
65
-
66
-
67
-
68
-
69
-
70
-
71
-
72
-
73
-
74
-
75
-
76
-
77
-
78
-
79
-
80
-
81
-
82
-
83
-
84
-
85
-
86
-
87
-
88
-
89
-
90
-
91
-
92
-
93
-
94
-
95
-
96
-
97
-
98
-
99
-
100
-
101
-
102
-
103
-
104
-
105
-
106
-
107
-
108
-
109
-
110
-
111
-
112
-
113
-
114
-
115
-
116
-
117
-
118
-
119
-
120
-
121
-
122
-
123
-
124
-
125
-
126
-
127
-
128
-
129
-
130
-
131
-
132
-
133
-
134
-
135
-
136
-
137
-
138
-
139
-
140
-
141
-
142
-
143
-
144
-
145
-
146
-
147
-
148
-
149
-
150
-
151
-
152
-
153
-
154
-
155
-
156
-
157
-
158
-
159
-
160
-
161
-
162
-
163
-
164
-
165
-
166
-
167
-
168
-
169
-
170
-
171
-
172
-
173
-
174
-
175
-
176
-
177
-
178
-
179
-
180
-
181
-
182
-
183
-
184
-
185
-
186
-
187
-
188
-
189
-
190
-
191
-
192
-
193
-
194
-
195
-
196
-
197
-
198
-
199
-
200
-
201
-
202
-
203
-
204
-
205
-
206
-
207
-
208
-
209
-
210
-
211
-
212
-
213
-
214
-
215
-
216
 |
 |
