LiftMaster 8587WL Owners Manual - English French Spanish
LiftMaster 8587WL Manual
 |
View all LiftMaster 8587WL manuals
Add to My Manuals
Save this manual to your list of manuals |
LiftMaster 8587WL manual content summary:
- LiftMaster 8587WL | Owners Manual - English French Spanish - Page 1
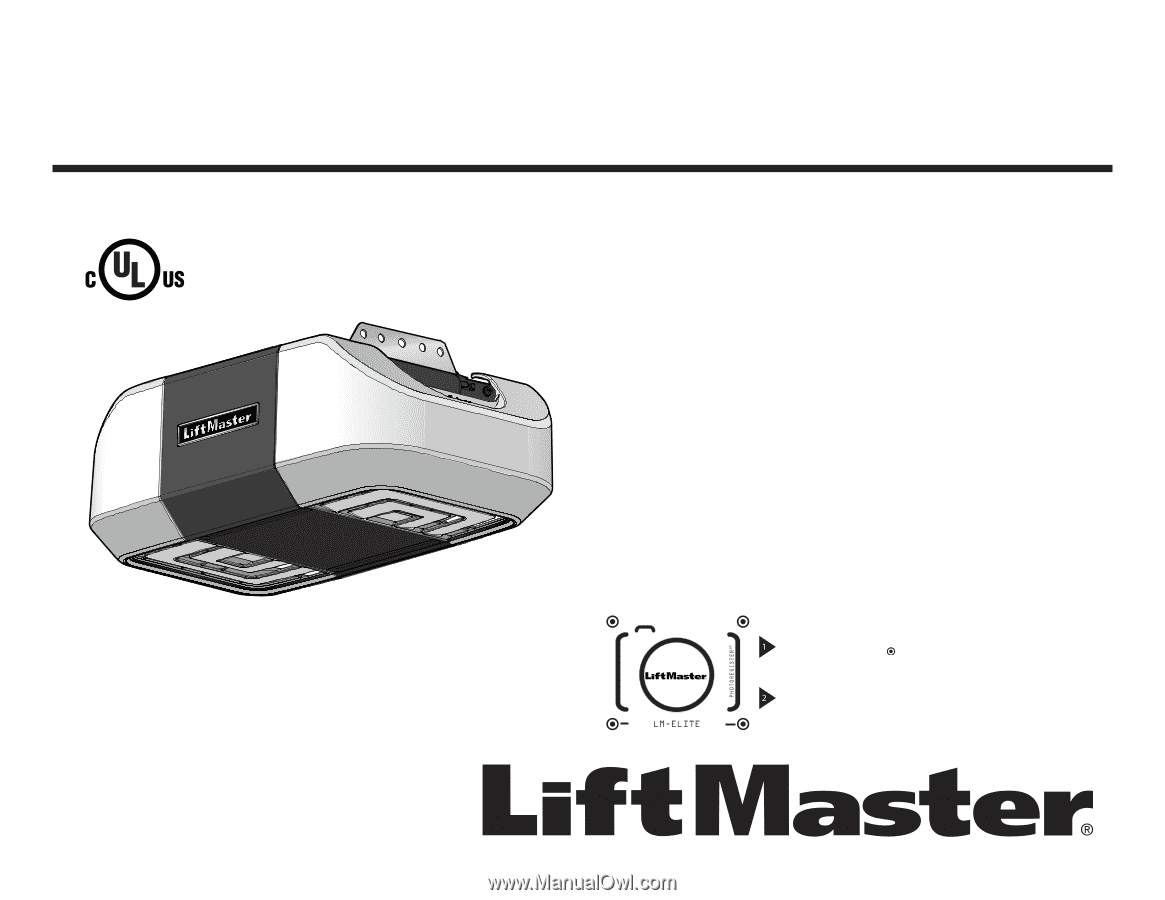
Models 8587W and 8587WL FOR RESIDENTIAL USE ONLY ®� ®� LiftMaster 300 Windsor Drive Oak Brook, IL 60523 • Please read this manual and the safety ONLY compatible with myQ® and Security+ 2.0® accessories. • DO NOT install on a one-piece door if using devices or features providing unattended close - LiftMaster 8587WL | Owners Manual - English French Spanish - Page 2
Contents Preparation 3 Assembly 7 Installation 9 Install the Door Control 17 Install the Protector System 19 Power 23 Adjustments 25 Operation 28 Maintenance 35 Troubleshooting 36 Accessories 38 Warranty 39 Repair Parts 40 2 - LiftMaster 8587WL | Owners Manual - English French Spanish - Page 3
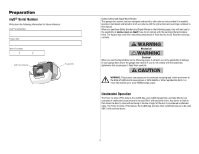
Word Review This garage door opener has been designed and tested to offer safe service provided it is installed, operated, maintained and tested in strict accordance with the instructions and warnings contained in this manual. When you see these Safety Symbols and Signal Words on the following pages - LiftMaster 8587WL | Owners Manual - English French Spanish - Page 4
halfway up. Release the door. If balanced, it should stay in place, supported entirely by its springs. 3. Raise and lower binds, sticks, or the the safety reversal system may not work properly. 5. The opener should be installed above the center of the door. If there is a torsion spring or - LiftMaster 8587WL | Owners Manual - English French Spanish - Page 5
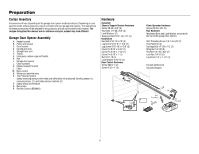
Preparation Tools Needed 5/32 3/16 5/16 7/16 1/2 5/8 1/4 7/16 9/16 5 - LiftMaster 8587WL | Owners Manual - English French Spanish - Page 6
instructions for these accessories will be attached to the accessory and are not included in this manual. The images throughout this manual Chassis Support Bracket Hardware Screw #8-32 x 3/8" (2) Hex Bolts 1/4"-20 x 5/8" (2) Lock Washers (2) Washered Bolt 5/16"-18 x 1/2" (2) Installation Hex - LiftMaster 8587WL | Owners Manual - English French Spanish - Page 7
and lock nut. 4. Position the chain around the garage door opener sprocket. 5. Attach the chain spreader to the garage door opener with screws. 6. Guide the chain around the selected groove in the chain spreader, to engage either the 8- tooth or 6-tooth sprocket. NOTE: The 6-tooth sprocket is for - LiftMaster 8587WL | Owners Manual - English French Spanish - Page 8
and a matching hole in the bracket. Complete the connection by inserting the #8-32 x 3/8" screw through the back flange and the hole in rail support. Lock Washer Hex Bolt 1/4"-20x5/8" Screw #8-32x3/8" Washerd Bolt 5/16"-18x1/2" 3 Tighten the Chain 1. Loosen the inner nut and lock washer on the - LiftMaster 8587WL | Owners Manual - English French Spanish - Page 9
release. 7. NEVER connect garage door opener to power source until instructed to do so. 8. NEVER wear watches, rings or loose clothing while installing or servicing opener. They could be caught in garage door or opener mechanisms. 9. Install wall-mounted garage door control: • within sight of the - LiftMaster 8587WL | Owners Manual - English French Spanish - Page 10
To prevent possible SERIOUS INJURY or DEATH: • Header bracket MUST be RIGIDLY fastened to structural support on header wall or ceiling, otherwise garage door might NOT reverse when required. DO NOT install header bracket over drywall. • Concrete anchors MUST be used if mounting header bracket or 2x4 - LiftMaster 8587WL | Owners Manual - English French Spanish - Page 11
the instructions which will work best for your particular requirements. Do not install the header bracket over drywall. If installing into masonry and fasten bracket securely to a structural support with the hardware provided. OPTION A - WALL INSTALLATION 1. Center the bracket on the vertical - LiftMaster 8587WL | Owners Manual - English French Spanish - Page 12
Installation 3 Attach the Rail to the Header Bracket 1. Align the rail with the header bracket. Insert the outer trolley. Slide the outer trolley toward the garage door opener. The trolley can remain disconnected until instructed. Clevis Pin 5/16" X 2-3/4" Ring Fastener Connected Disconnected 12 - LiftMaster 8587WL | Owners Manual - English French Spanish - Page 13
, fasten it SECURELY to structural supports of the garage. Concrete anchors MUST be used if installing ANY brackets into masonry. Hanging your the bracket is not centered above the door). 7. Remove the 2x4. Operate the door manually. If the door hits the rail, raise the header bracket. NOTE: DO NOT - LiftMaster 8587WL | Owners Manual - English French Spanish - Page 14
Installation 6 Install the Light Bulbs 7 Attach the Emergency Release Rope and Handle To prevent possible OVERHEATING of the end panel or light socket: • Use ONLY A19 light - LiftMaster 8587WL | Owners Manual - English French Spanish - Page 15
long enough to be secured to two or three vertical supports. A vertical reinforcement brace should cover the height of the top panel. Contact the garage door manufacturer or installing dealer for opener reinforcement instructions or reinforcement kit. NOTE: Many door reinforcement kits provide for - LiftMaster 8587WL | Owners Manual - English French Spanish - Page 16
Installation 9 Connect the Door Arm to the Trolley IMPORTANT: The groove on the straight door arm MUST face away from the curved door arm. 1. Close the - LiftMaster 8587WL | Owners Manual - English French Spanish - Page 17
opener is compatible with up to 2 Smart Control Panels or 4 of any other Security+ 2.0 control panels. NOTE: Older LiftMaster control panels and third party products are not compatible. Install door control within sight of garage door, out of reach of small children at a minimum height of 5 feet - LiftMaster 8587WL | Owners Manual - English French Spanish - Page 18
the wall and ceiling with staples (not applicable for gang box or pre-wired installations). Do not pierce the wire with the staple as this may cause a short door control with tacks or staples. 2. Attach the manual release/safety reverse test label in a visible location on the inside of the garage - LiftMaster 8587WL | Owners Manual - English French Spanish - Page 19
or DEATH from closing garage door: • Correctly connect and align the safety reversing sensor. This required safety device MUST NOT be disabled. • Install the safety reversing sensor so beam is NO HIGHER than 6" (15 cm) above garage floor. IMPORTANT: The safety reversing sensors MUST be connected - LiftMaster 8587WL | Owners Manual - English French Spanish - Page 20
Wing Nut (2) The safety reversing sensors are designed to clip onto the door track with the provided sensor brackets. If the door track will not support the sensor bracket a wall installation is recommended. The sensor beam should be NO HIGHER than 6" (15 cm) above the floor. DOOR TRACK - LiftMaster 8587WL | Owners Manual - English French Spanish - Page 21
other. 1 Inside 2 garage wall Not provided 2 Wire the Safety Reversing Sensors PRE-WIRED INSTALLATIONS: If your garage already has wires installed for the safety reversing sensors, see page 22. OPTION A - INSTALLATION WITHOUT PRE-WIRING 1. Run the wire from both sensors to the garage door - LiftMaster 8587WL | Owners Manual - English French Spanish - Page 22
insulation from each end. Choose two of the preinstalled wires and strip insulation from each end. Choose the same color pre-installed wires for each sensor. 3. Connect the pre-installed wires to the sensor wires with wire nuts making sure the colors correspond for each sensor. 4. At the garage door - LiftMaster 8587WL | Owners Manual - English French Spanish - Page 23
to make it fit outlet. Be sure the opener is grounded. To avoid installation difficulties, do not activate the garage door opener at this time. To the plug doesn't fit into your outlet, contact a qualified electrician to install the proper outlet. THERE ARE TWO OPTIONS FOR CONNECTING POWER: OPTION - LiftMaster 8587WL | Owners Manual - English French Spanish - Page 24
aligned and wired correctly, both LEDs will glow steadily. SAFETY SENSOR TROUBLESHOOTING If either of the sensor LEDs are off, there is no power to sunlight, switch the receiving sensor with the sending sensor and repeat 1 Install the Safety Reversing Sensors page 20 to assure proper operation. 3 - LiftMaster 8587WL | Owners Manual - English French Spanish - Page 25
Adjustments Introduction Without a properly installed safety reversal system, persons (particularly small children) could be SERIOUSLY INJURED or KILLED by a closing garage door. • Incorrect adjustment of garage door travel limits will - LiftMaster 8587WL | Owners Manual - English French Spanish - Page 26
1 - Program the Travel Without a properly installed safety reversal system, persons (particularly small children) . 2 - Automatic Force Set Up Once both the up and down positions have been manually set, the Safety Reversing Sensors will reconnect and become operational. Then, the opener will - LiftMaster 8587WL | Owners Manual - English French Spanish - Page 27
door fully open, place a 1-1/2 inch (3.8 cm) board (or a 2x4 laid flat) on the floor, centered under the garage door. Without a properly installed safety reversing sensor, persons (particularly small children) could be SERIOUSLY INJURED or KILLED by a closing garage door. 1 Open the door. Place an - LiftMaster 8587WL | Owners Manual - English French Spanish - Page 28
disconnect ALL electric power BEFORE performing ANY service or maintenance. 14. This operator system PATH OF THE MOVING DOOR. 15. DO NOT install on a one-piece door if using devices or features ONLY with sectional doors. 16. SAVE THESE INSTRUCTIONS. To avoid interference with the proper operation of - LiftMaster 8587WL | Owners Manual - English French Spanish - Page 29
open position. If the door is fully open, and the safety reversing sensors are not installed, or are misaligned, the door will not close from a remote control. However, you the Security Shield are compatible with the LiftMaster Automatic Garage Door Lock (Model 841LM). See Accessories, page 38. * - LiftMaster 8587WL | Owners Manual - English French Spanish - Page 30
include any combination of myQ® garage door openers, Wi-Fi garage door openers, myQ® light controls, myQ® gate operators or myQ® commercial door operators. A LiftMaster Internet Gateway (828LM) can be added if you need to control more than 10 devices using the myQ® App. Up to 6 devices can be paired - LiftMaster 8587WL | Owners Manual - English French Spanish - Page 31
button is pressed, and then it will display the menu options. If there is a problem with the garage door opener the screen will display the Diagnostic Code. Refer to the Troubleshooting section. The following features are accessible through the screen using the navigation buttons: LEARN A DEVICE - LiftMaster 8587WL | Owners Manual - English French Spanish - Page 32
The main screen displays the time, temperature, and current battery charge (if applicable). Navigation Buttons FEATURES Press the navigation contrast of the screen. SERVICE Press and hold the LIGHT button, then press the second navigation button to view the Service menu. Displays software version - LiftMaster 8587WL | Owners Manual - English French Spanish - Page 33
remote controls are NOT compatible, see page 38 for compatible accessories. To program additional accessories refer to the instructions provided with the accessory or visit LiftMaster.com. If your vehicle is equipped with a Homelink®, you may require an external adapter depending on the make - LiftMaster 8587WL | Owners Manual - English French Spanish - Page 34
the open position. 3. Pull the emergency release handle down and back (toward the garage door opener). The garage door can then be raised and lowered manually as necessary. 4. To reconnect the trolley, pull the emergency release handle straight down. The trolley will reconnect on the next UP or DOWN - LiftMaster 8587WL | Owners Manual - English French Spanish - Page 35
• Manually operate installation. This equipment generates, uses and can radiate radio frequency energy and, if not installed and used in accordance with the instructions 3V CR2032 coin batteries. • DO NOT recharge, disassemble, heat above 212°F (100°C) or incinerate. To replace the battery, pry open - LiftMaster 8587WL | Owners Manual - English French Spanish - Page 36
Troubleshooting The garage door opener will not close. Safety reversing sensors are not installed, connected, or wires may be cut. Inspect sensor wires for a travel module if necessary. No movement, only a single click. Manually open and close the door. Check for binding or obstructions, such - LiftMaster 8587WL | Owners Manual - English French Spanish - Page 37
Wi-Fi LEARN mode: • After the initial installation of the garage door opener, the garage door the garage, see 4 or visit LiftMaster.com/Customer-Support for more information. My door will not troubleshoot the optional automatic garage door lock model 841LM, see the instructions provided with it. 37 - LiftMaster 8587WL | Owners Manual - English French Spanish - Page 38
877MAX MAX Wireless Keyless Entry: 374UT For use outside of the home to enable access to the garage using a 4-digit PIN. Works with ALL LiftMaster® openers from 1993- present. Mini Universal Remote Control: The Mini Universal Remote Control can be programmed to activate up to two products, such as - LiftMaster 8587WL | Owners Manual - English French Spanish - Page 39
FOR REINSTALLING A REPAIRED OR REPLACED UNIT, REPLACEMENT OF CONSUMABLE ITEMS (E.G., BATTERIES IN REMOTE CONTROL TRANSMITTERS AND LIGHT BULBS), OR UNITS INSTALLED FOR NON-RESIDENTIAL USE. THIS LIMITED WARRANTY DOES NOT COVER ANY PROBLEMS WITH, OR RELATING TO, THE GARAGE DOOR OR GARAGE DOOR HARDWARE - LiftMaster 8587WL | Owners Manual - English French Spanish - Page 40
1 Smart Control Panel® 880LMW 2 Remote Control 893MAX 2 Installation Parts Description 1 Curved Door Arm 2 Door Bracket with Clevis White and Red/White Wire 10 3V CR2032 Lithium Battery 11 Extension Brackets Not Shown User's Guide Part Number 178B35 41A5047-1 41A2828 41A4353-1 29C151 41A5266-1 - LiftMaster 8587WL | Owners Manual - English French Spanish - Page 41
2 9 5 67 10 DESCRIPTION 1 Chassis Support Bracket 2 Chain spreader 3 Gear and Sprocket installation and service information, visit us online at: LiftMaster.com or myLiftMaster.com Before calling, please have the model number of the garage door opener. If you are calling about a troubleshooting - LiftMaster 8587WL | Owners Manual - English French Spanish - Page 42
Ouvreur-porte de garage pour Wi-Fi® Modèles 8587W et 8587WL à entraînement par chaîne USAGE RÉSIDENTIEL UNIQUEMENT ® ® Enregistrez votre ouvre-porte de garage pour recevoir les mises à jour et les offres de LiftMaster Prenez une photo de l'icône de l'appareil photo avec les points ( ). Envoyez - LiftMaster 8587WL | Owners Manual - English French Spanish - Page 43
Sommaire Préparation 3 Assemblage 7 Installation 9 Installer le contrôle de la porte 17 Installer le Protector System® 19 Alimentation 23 Ajustements 25 Opération 28 Entretien 36 Dépannage 37 Accessories 39 Garantie 41 Pièces détachées 42 2 - LiftMaster 8587WL | Owners Manual - English French Spanish - Page 44
é et des notes d'avertissement. Cet ouvre-porte de garage a été conçu et testé pour offrir un service sûr à condition qu'il soit installé, utilisé, entretenu et testé en stricte conformité avec les instructions et les avertissements de ce manuel. Lorsque vous voyez ces symboles de sécurité et notes - LiftMaster 8587WL | Owners Manual - English French Spanish - Page 45
é risque de ne pas fonctionner correctement. 5. L'ouvre-porte doit être installé au-dessus du centre de la porte. S'il y a un ressort de torsion ou une plaque d'appui centrale sur le chemin du support de linteau, il peut être installé à moins de 1,2 m (4 pi) à gauche ou à droite du centre de la - LiftMaster 8587WL | Owners Manual - English French Spanish - Page 46
Préparation Outils nécessaires 5/32 3/16 5/16 7/16 1/2 5/8 1/4 7/16 9/16 5 - LiftMaster 8587WL | Owners Manual - English French Spanish - Page 47
votre ouvre-porte de garage. Les instructions relatives aux accessoires ne sont pas incluses -porte de garage A. Support de linteau B. Poulie et support C. Support de porte D. Bras porte de Boulon avec rondelle 5/16 po-18x1/2 po (2) garage) Installation Boulon à six pans 5/16 po - 18 x 7/8 po (4) - LiftMaster 8587WL | Owners Manual - English French Spanish - Page 48
Assemblage 1 Fixer le rail à l'ouvre-porte de garage Pour éviter de GRAVES dommages à l'ouvre-porte de garage, utilisez UNIQUEMENT les boulons/attaches montés sur le dessus de l'ouvre-porte. REMARQUE : Utilisez UNIQUEMENT les boulons que vous avez retirés de l'ouvre-porte de garage. Placez l'ouvre- - LiftMaster 8587WL | Owners Manual - English French Spanish - Page 49
. Terminez la connexion en insérant la vis no 8-32 x 3/8 po dans la bride de fixation arrière et le trou du support du rail. Lock Washer Hex Bolt 1/4"-20x5/8" Screw #8-32x3/8" Washerd Bolt 5/16"-18x1/2" 3 Serrer la chaîne 1. Desserrez l'écrou intérieur et la rondelle de - LiftMaster 8587WL | Owners Manual - English French Spanish - Page 50
IMPORTANTES Pour réduire le risque de BLESSURES GRAVES voire MORTELLES : 1. LISEZ ET SUIVEZ TOUS LES AVERTISSEMENTS ET TOUTES LES INSTRUCTIONS D'INSTALLATION. 2. Installez l'ouvre-porte de garage UNIQUEMENT sur une porte de garage correctement équilibrée et lubrifiée. Une porte mal équilibr - LiftMaster 8587WL | Owners Manual - English French Spanish - Page 51
fixer au plafond lorsque le dégagement est minimal. (Il peut être monté au mur à l'envers si nécessaire, pour gagner environ 1 cm (1/2 po). Si vous devez installer le support de linteau sur un 2x4 (au mur ou au plafond), utilisez des tirefonds (non fournis) pour fixer solidement le 2x4 aux - LiftMaster 8587WL | Owners Manual - English French Spanish - Page 52
au-dessus de la porte de garage, soit au plafond. Suivez les instructions qui conviendront le mieux à vos besoins particuliers. N'installez pas le support de linteau sur une cloison sèche. Si vous effectuez l'installation dans de la maçonnerie, utilisez des chevilles à béton (non fournies). HARDWARE - LiftMaster 8587WL | Owners Manual - English French Spanish - Page 53
Installation 3 Fixer le rail au support de linteau 1. Alignez le rais avec le support de linteau. Insérez l'axe à épaulement dans les trous du support du linteau et le rail. Fixez avec l'anneau de fixation. REMARQUE : Utilisez le matériel d'emballage comme base protectrice pour l'ouvre-porte de - LiftMaster 8587WL | Owners Manual - English French Spanish - Page 54
de suspension pourraient être à angle (Figure 1) pour fournir un support rigide. Sur les plafonds finis (Figure 2), avant d'installer l'ouvre-porte, fixez un support de métal solide sur des supports de structure. Ce support ainsi que le matériel de fixation ne sont pas fournis. 1. Prenez le mesure - LiftMaster 8587WL | Owners Manual - English French Spanish - Page 55
Installation 6 Installation de l'ampoule 7 Fixer la corde et la poignée de déclenchement d'urgence Pour éviter toute SURCHAUFFE éventuelle du panneau d'extrémité ou de la douille d'éclairage : • - LiftMaster 8587WL | Owners Manual - English French Spanish - Page 56
de verre, en aluminium ou en acier léger DEVRONT être renforcées AVANT l'installation du support de porte. Contactez le fabricant de la porte de garage ou le revendeur qui s'est chargé de l'installation pour obtenir des instructions sur un renfort d'ouvre-porte ou un kit de renfort. Le fait de ne - LiftMaster 8587WL | Owners Manual - English French Spanish - Page 57
Installation 9 Connecter le bras de porte au chariot IMPORTANT : La rainure du bras l'aide de l'axe à épaulement. Fixez-le avec l'anneau de fixation. 3. Fixez le bras de porte incurvé au support de porte à l'aide de l'axe à épaulement. Fixez-le avec l'anneau de fixation. 4. Alignez le bras de porte - LiftMaster 8587WL | Owners Manual - English French Spanish - Page 58
autres panneaux de commande Security+ 2.0. REMARQUE : Les anciens LiftMaster et les produits tiers ne sont pas compatibles. Installez la commande . Les fils peuvent être connectés à l'une ou l'autre des vis. INSTALLATIONS PRÉ-CÂBLÉES : Choisissez deux fils à connecter, notez les fils utilisés - LiftMaster 8587WL | Owners Manual - English French Spanish - Page 59
2 Câblez la commande de porte à l'ouvre-porte de garage. INSTALLATIONS PRÉ-CÂBLÉES : Lorsque vous câblez la commande de porte à et au plafond avec l'agrafe (ne s'applique pas aux boîtes de commande ou aux installations pré-câblées). Ne percez pas le fil avec l'agrafe car ceci risquerait de créer - LiftMaster 8587WL | Owners Manual - English French Spanish - Page 60
la fermeture de la porte, la porte s'arrête, puis retourne en position complètement ouverte. En installant les capteurs d'inversion de sécurité, vérifiez ce qui suit : • Les capteurs sont installés À L'INTÉRIEUR du garage. • Les lentilles des capteurs se font face. IMPORTANT : Ne laissez pas la lumi - LiftMaster 8587WL | Owners Manual - English French Spanish - Page 61
capteurs d'inversion de sécurité sont conçus pour se clipser sur le rail de la porte avec les supports de capteur fournis. Si le rail de porte ne supporte pas le support du capteur, une installation murale est recommandée. Le faisceau du capteur ne doit PAS être à une HAUTEUR SUPÉRIEURE à 6 po (15 - LiftMaster 8587WL | Owners Manual - English French Spanish - Page 62
le système de protection® INSTALLATION AU SOL 1. Mesurez la position des deux supports de capteur afin qu'ils soient à la même distance du mur et sans obstruction. 2. Fixez le support au sol avec des chevilles à béton (non fournies). 3. Faites glisser la vis à six pans à travers le capteur - LiftMaster 8587WL | Owners Manual - English French Spanish - Page 63
capteur et dénudez l'isolant à chaque extrémité. Choisissez deux des fils préinstallés et dénudez l'isolant à chaque extrémité. Choisissez les fils préinstallés de la même couleur pour chaque capteur. 3. Connectez les fils préinstallés aux fils du capteur avec des serre-fils en vous assurant que les - LiftMaster 8587WL | Owners Manual - English French Spanish - Page 64
modifiez en AUCUN cas la fiche pour l'adapter à la prise. Assurez-vous que l'ouvre-porte est mis à la terre. Pour éviter les difficultés d'installation, assurez-vous de ne pas faire fonctionner l'ouvre-porte à ce moment-là. Pour réduire le risque de choc électrique, votre ouvre-porte de garage est - LiftMaster 8587WL | Owners Manual - English French Spanish - Page 65
(DEL vert) fait face à la lumière directe du soleil, interchangez le capteur de réception avec le capteur d'envoi et répétez l'étape 1 Installer les capteurs d'inversion de sécurité en page 20 pour assurer un fonctionnement adéquat. 3 S'assurer que le panneau de commande est correctement câbl - LiftMaster 8587WL | Owners Manual - English French Spanish - Page 66
Ajustements Introduction Si le capteur d'inversion de sécurité n'est pas installé correctement, les personnes (en particulier les jeunes enfants) peuvent SUBIR DES BLESSURES GRAVES voire MORTELLES par une porte de garage qui se ferme. • Un réglage - LiftMaster 8587WL | Owners Manual - English French Spanish - Page 67
Ajustements 1 - Programmez le déplacement Si le capteur d'inversion de sécurité n'est pas installé correctement, les personnes (en particulier les jeunes enfants) peuvent SUBIR DES BLESSURES GRAVES voire MORTELLES par une porte de garage qui se ferme. • Un réglage - LiftMaster 8587WL | Owners Manual - English French Spanish - Page 68
cm (1 1/2 po) ou un 2x4 posé à plat sur le sol, centré(e) sous la porte du garage. Si le capteur d'inversion de sécurité n'est pas installé correctement, les personnes (en particulier les jeunes enfants) peuvent SUBIR DES BLESSURES GRAVES voire MORTELLES causées pas une porte de garage qui se ferme - LiftMaster 8587WL | Owners Manual - English French Spanish - Page 69
: 1. LISEZ ET SUIVEZ TOUS LES AVERTISSEMENTS ET TOUTES LES INSTRUCTIONS. 2. Gardez TOUJOURS les télécommandes hors de portée des enfants cm (1-1/2 po) de haut (ou 2x4 posé à plat) sur le sol. Une installation inadéquate de l'ouvre-porte de garage augmente le risque de BLESSURE GRAVE ou MORTELLE. 11 - LiftMaster 8587WL | Owners Manual - English French Spanish - Page 70
Fonctionnement Pour éviter les interférences avec le bon fonctionnement de l'ouvre-porte de garage, lorsque vous utilisez une machine à souder dans le garage, débranchez l'ouvre-porte de garage avant de faire fonctionner la machine à souder. 29 - LiftMaster 8587WL | Owners Manual - English French Spanish - Page 71
la porte est complètement ouverte et que les capteurs d'inversion de sécurité ne sont pas installés ou sont mal alignés, la porte ne se fermera pas à l'aide d'une télécommande. serrure automatique de porte de garage LiftMaster (modèle 841LM). Voir la page Accessoires.39 * Le cas échéant. 30 - LiftMaster 8587WL | Owners Manual - English French Spanish - Page 72
Entrez setup.myqdevice.com dans la barre d'adresse du navigateur. Suivez les instructions à l'écran pour connecter l'ouvre-porte de garage à votre réseau à votre compte myQ, ou pour en savoir plus, allez sur WiFiHelp.LiftMaster.com. 4. Téléchargez l'application myQ sur l'App Store® ou la boutique - LiftMaster 8587WL | Owners Manual - English French Spanish - Page 73
La TTC ne fonctionnera pas si l'ouvre-porte de garage fonctionne sur batterie ou si les capteurs d'inversion de sécurité sont désalignés. Cette fermeture de la porte. Un système d'entrée sans clé doit être installé en cas de verrouillage accidentel lors de l'utilisation de cette fonction. Avant - LiftMaster 8587WL | Owners Manual - English French Spanish - Page 74
cran principal affiche l'heure, la température et la charge actuelle de la batterie (le cas échéant). LES PARAMÈTRES Appuyez sur le bouton de navigation sur le deuxième bouton de navigation pour afficher le menu Service. Displays software version information. Turn the Maintenance Alert (MAS) - LiftMaster 8587WL | Owners Manual - English French Spanish - Page 75
PAS compatibles, voir la page 39 pour les accessoires compatibles. Pour programmer des accessoires supplémentaires voir les instructions fournies avec l'accessoire ou visiter LiftMaster.com. Si votre véhicule est équipé d'un Homelink®, il est possible que vous ayez besoin d'un adaptateur externe - LiftMaster 8587WL | Owners Manual - English French Spanish - Page 76
le HAUT ou le BAS, soit de façon manuelle soit en utilisant la commande de la porte ou la télécommande. * Le cas échéant. Manual release 35 - LiftMaster 8587WL | Owners Manual - English French Spanish - Page 77
radiofréquente et, s'il n'est pas installé et utilisé conformément aux instructions, il risque de causer des interférences nuisibles cepteur est branché. • Consultez le revendeur ou un technicien radio/TV. Batterie de la télécommande Pour éviter d'éventuelles BLESSURES GRAVES voire MORTELLES : - LiftMaster 8587WL | Owners Manual - English French Spanish - Page 78
Flèche vers le haut clignote bas clignote 1 1 L'ouvre-porte de garage ne ferme pas la porte. Les capteurs d'inversion de sécurité ne sont pas installés, connectés ou les fils sont peut- être coupés. Inspectez les fils des capteurs pour vous assurer qu'ils sont connectés et ne sont pas coup - LiftMaster 8587WL | Owners Manual - English French Spanish - Page 79
et ne clignotent pas. Assurez-vous que rien n'est suspendu ou installé sur la porte de façon à interrompre le chemin du signal Wi-Fi atteint le garage, consultez 4 ou visitez LiftMaster.com/Customer-Support pour plus d'informations. Ma porte ne se ferme pas : instructions fournies avec celle-ci. 38 - LiftMaster 8587WL | Owners Manual - English French Spanish - Page 80
utilisation à l'extérieur de la maison pour permettre l'accès au garage en utilisant un code à 4 chiffres. Fonctionne avec TOUS les ouvreurs LiftMaster® de 1993 à aujourd'hui. 374UT Serrure automatique de porte de garage : 892LT/ 894LT Compatible avec les ouvre-portes de garage Security Shield - LiftMaster 8587WL | Owners Manual - English French Spanish - Page 81
Garantie GARANTIE LIMITÉE LIFTMASTER® LiftMaster®LiftMaster® (le « Vendeur ») garantit au premier acheteur au détail que ce produit installé pour la ses pièces en port payé et assuré selon les instructions de notre centre de services pour la réparation sous garantie. Veuillez inclure une brève - LiftMaster 8587WL | Owners Manual - English French Spanish - Page 82
d'installation Description 1 Bras de porte incurvé 2 Support de porte, axe à épaulement et attache 3 Corde et poignée de déclenchement d'urgence 4 Support de 9 Fil blanc et rouge/blanc 10 Batterie au lithium 3 V CR2032 11 Supports d'extension : Non illustré Guide d'utilisation Numéro de pièce 178B35 - LiftMaster 8587WL | Owners Manual - English French Spanish - Page 83
10 DESCRIPTION 1 Support de châ 8587WL Carte logique du récepteur 12 8587W 8587WL Panneau d'extrémité de la carte logique 13 8587W 8587WL LiftMaster 6050 S. Country Club Rd. Tucson, AZ 85706 Pour toute information sur l'installation et le service, visitez notre site en ligne : LiftMaster - LiftMaster 8587WL | Owners Manual - English French Spanish - Page 84
Transmisión por cadena Modelos 8587W y 8587WL SÓLO PARA USO RESIDENCIAL ® ® • ¡Lea con atención este manual y el material de seguridad adjunto! • . Registre su abrepuertas de garaje para recibir actualizaciones y ofertas de LiftMaster Tome una foto del icono de cámara que incluya los puntos - LiftMaster 8587WL | Owners Manual - English French Spanish - Page 85
Contenido Preparación 3 Ensamblaje 7 Instalación 9 Instalar el control de la puerta 17 Instalar el Protector System® 19 Alimentacion 23 Ajustes 25 Operación 28 Mantenimiento 36 Solución de problemas 37 Accesorios 39 Garantía 41 Piezas de repuesto 42 2 - LiftMaster 8587WL | Owners Manual - English French Spanish - Page 86
Este abrepuertas de garaje se diseñó y probó para ofrecer un servicio seguro siempre que se instale, opere, mantenga y pruebe en estricto cumplimiento de las instrucciones y advertencias de este manual. Cuando vea estos símbolos de seguridad y palabras de señalización en las páginas siguientes, le - LiftMaster 8587WL | Owners Manual - English French Spanish - Page 87
minimize interference from walls and other objects • Buy a Wi-Fi range extender Para obtener especificaciones de enrutadores compatibles y ayuda, visite support.chamberlaingroup.com. Consulte la página 31 para conectar el abrepuertas de garaje a un dispositivo móvil. Revisar la puerta Para evitar - LiftMaster 8587WL | Owners Manual - English French Spanish - Page 88
Preparación Herramientas necesarias 5/32 3/16 5/16 7/16 1/2 5/8 1/4 7/16 9/16 5 - LiftMaster 8587WL | Owners Manual - English French Spanish - Page 89
de garaje puede incluir otros accesorios. Las instrucciones para los accesorios estarán incluidas con el accesorio y no se incluyen en este manual. Las imágenes de este manual son de referencia y su producto podría tener un aspecto diferente. Montaje de abridor de puerta de garaje A. Soporte del - LiftMaster 8587WL | Owners Manual - English French Spanish - Page 90
Conjunto 1 Fijar el riel al abridor de la puerta del garaje Para evitar daños GRAVES al abrepuertas de garaje, use SOLO aquellos pernos/sujetadores montados en la parte superior del abrepuertas. NOTA: SOLO use los pernos que quitó del abrepuertas de garaje. Coloque el abrepuertas de garaje sobre la - LiftMaster 8587WL | Owners Manual - English French Spanish - Page 91
Conjunto 2 Fijar el soporte de apoyo del chasis Para evitar posibles LESIONES GRAVES en los dedos al mover el abrepuertas de garaje: • Mantenga SIEMPRE la mano alejada de la rueda dentada mientras opera el abrepuertas. • Ajuste con cuidado la cubierta de la rueda dentada ANTES de operar. 1. - LiftMaster 8587WL | Owners Manual - English French Spanish - Page 92
las trabas y quite TODAS las sogas conectadas a la puerta ANTES de instalar el abrepuertas de garaje para evitar enredos. 5. Donde sea posible, instale el abrepuertas a 7 pies (2.13 m) o más por encima del piso. 6. Monte la liberación de emergencia al alcance pero al menos a 6 pies (1.83 m) por - LiftMaster 8587WL | Owners Manual - English French Spanish - Page 93
lo contrario la puerta de garaje podría NO invertirse cuando esto se requiera. NO instale el soporte del cabezal sobre un panel de yeso. • DEBEN usarse anclajes para 2x4 2x4 OPTIONAL CEILING MOUNT FOR HEADER BRACKET Structural Supports Level (Optional) Header Wall 2" (5 cm) Track Highest Point of - LiftMaster 8587WL | Owners Manual - English French Spanish - Page 94
techo. Siga las instrucciones que sean mejores para sus requisitos particulares. No instale el soporte del cabezal sobre un panel de yeso. Si se instala en tornillos tirafondos. Wall Mount (Header Wall) 2x4 Structural Support Horizontal Line Header Bracket Vertical Centerline of Garage Door Lag - LiftMaster 8587WL | Owners Manual - English French Spanish - Page 95
Instalación 3 Conectar el riel al soporte del cabezal 1. ALinee el riel con el soporte del cabezal. Inserte el pasador de horquilla por los orificios en el soporte del cabezal y el riel. Fije con el sujetador de anillo. NOTA: Use el material de embalaje como base protectora para el abrepuertas de - LiftMaster 8587WL | Owners Manual - English French Spanish - Page 96
Instalación 5 Colgar el mando de la puerta del garaje Para evitar posibles LESIONES GRAVES debido a la caída de un abrepuertas de garaje, sujételo FIRMEMENTE a los soportes estructurales del garaje. DEBEN usarse anclajes para concreto si se instala CUALQUIER soporte en mampostería. La manera de - LiftMaster 8587WL | Owners Manual - English French Spanish - Page 97
Instalación 6 Instalación de las bombillas 7 Conectar la soga y manija de liberación de emergencia Para evitar un SOBRECALENTAMIENTO posible del panel del extremo o del portalámparas: • Use SOLO bombillas A19. • NO use bombillas incandescentes de más de 100 W. • NO use bombillas fluorescentes - LiftMaster 8587WL | Owners Manual - English French Spanish - Page 98
de la puerta, O BIEN directamente debajo de cualquier soporte estructural a través de la parte superior de la puerta. 3. Marque, taladre orificios e instale tal como sigue, dependiendo de la construcción de su puerta: Puertas metálicas o livianas que usan un soporte de hierro angular vertical entre - LiftMaster 8587WL | Owners Manual - English French Spanish - Page 99
Instalación 9 Conectar el brazo de la puerta al carro IMPORTANTE: La ranura en el brazo recto de la puerta DEBE estar orientado en dirección opuesta al brazo curvo de la puerta. 1. Cierre la puerta. Desconecte el carro jalando de la manija de liberación de emergencia. Deslice el carro exterior hacia - LiftMaster 8587WL | Owners Manual - English French Spanish - Page 100
garaje es compatible con hasta 2 paneles de control inteligentes o 4 de cualquier otro panel de control Security+ 2.0. NOTA: Los antiguos LiftMaster y productos de terceros no son compatibles. Instale el control de la puerta a la vista de la puerta de garaje, fuera del alcance de niños pequeños - LiftMaster 8587WL | Owners Manual - English French Spanish - Page 101
advertencia de atrapamiento en la pared cerca del panel de control con tachuelas o grapas. 2. Pegue la etiqueta de prueba de inversión de seguridad/liberación del manual en un lugar visible en el interior de la puerta del garaje. 1 2 7/16" (11 mm) Staple 3 RED WHITE WHITE GREY 18 - LiftMaster 8587WL | Owners Manual - English French Spanish - Page 102
de la puerta de garaje: • Conecte y alinee correctamente el sensor de inversión de seguridad. Este dispositivo de seguridad requerido NO SE DEBE desactivar. • Instale el sensor de inversión de seguridad de modo que el haz esté a una altura NO MAYOR a 6" (15 cm) sobre el piso del garaje. IMPORTANTE - LiftMaster 8587WL | Owners Manual - English French Spanish - Page 103
Instalar el Protector System® 1 Instale los sensores de inversión de seguridad Hex Screw 10-24 (2) HARDWARE Wing Nut (2) Los sensores de inversión de seguridad se diseñaron para engancharse en - LiftMaster 8587WL | Owners Manual - English French Spanish - Page 104
Instalar el Protector System® INSTALACIÓN EN EL SUELO 1. Mida la posición de ambos soportes del sensor de modo que queden a la misma distancia de la pared y sin obstrucciones. 2. Conecte el soporte al piso con anclajes para concreto (no se suministran). 3. Deslice el tornillo hexagonal por el - LiftMaster 8587WL | Owners Manual - English French Spanish - Page 105
blanco del sensor en el terminal blanco. Inserte el cable del otro color conectado al cable blanco/negro del sensor en el terminal gris. 1 Pre-installed 2 wires 7/16" (11 mm) Safety reversing sensor wires 3 Safety reversing sensor wires White White/Black 4 Pre - LiftMaster 8587WL | Owners Manual - English French Spanish - Page 106
Alimentacion 1 Conexión de la alimentación Para evitar posibles LESIONES GRAVES o la MUERTE por electrocución o incendio: • Asegúrese de que la alimentación NO esté conectada al abrepuertas, y de desconectar la alimentación al circuito ANTES de quitar la cubierta para establecer una conexión de - LiftMaster 8587WL | Owners Manual - English French Spanish - Page 107
Alimentacion 2 Alinee los sensores de inversión de seguridad IMPORTANTE: Los sensores de inversión de seguridad DEBEN estar conectados y alineados correctamente antes de que el abrepuertas de garaje se mueva en la dirección de bajada. Cuando el abrepuertas de garaje reciba alimentación, verifique - LiftMaster 8587WL | Owners Manual - English French Spanish - Page 108
Ajustes Introducción Sin un sistema de inversión de seguridad correctamente instalado, las personas (en particular, los niños pequeños) podrían sufrir GRAVES LESIONES o la MUERTE como consecuencia del cierre de la puerta del garaje. • Un ajuste incorrecto de los límites de recorrido de la puerta - LiftMaster 8587WL | Owners Manual - English French Spanish - Page 109
Ajustes 1 - Programar el recorrido Sin un sistema de inversión de seguridad correctamente instalado, las personas (en particular, los niños pequeños) podrían sufrir GRAVES LESIONES o la MUERTE como consecuencia del cierre de la puerta del garaje. • Un ajuste incorrecto de los límites de recorrido - LiftMaster 8587WL | Owners Manual - English French Spanish - Page 110
Ajustes 3 - Probar el sistema de inversión de seguridad Sin un sistema de inversión de seguridad correctamente instalado, las personas (en particular, los niños pequeños) podrían sufrir GRAVES LESIONES o la MUERTE como consecuencia del cierre de la puerta del garaje. • El sistema de inversión de - LiftMaster 8587WL | Owners Manual - English French Spanish - Page 111
Funcionamiento INSTRUCCIONES IMPORTANTES DE SEGURIDAD Para reducir el riesgo de LESIÓN GRAVE o MUERTE: 1. LEA Y SIGA TODAS LAS ADVERTENCIAS E INSTRUCCIONES. 2. SIEMPRE mantenga los controles remotos fuera del alcance de los niños. NUNCA permita que los niños operen o jueguen con los botones - LiftMaster 8587WL | Owners Manual - English French Spanish - Page 112
Funcionamiento Para evitar interferencias con la operación adecuada del abrepuertas de garaje al utilizar una soldadora en el garaje, desenchufe el abrepuertas de garaje antes de utilizar la soldadora. 29 - LiftMaster 8587WL | Owners Manual - English French Spanish - Page 113
PUERTAS DE GARAJE** Los modelos de abrepuertas de garaje que cuentan con Security Shield son compatibles con la cerradura automática para puertas de garaje LiftMaster (modelo 841LM). Consulte la página de accesorios.39 * Si es aplicable. 30 - LiftMaster 8587WL | Owners Manual - English French Spanish - Page 114
borrar los ajustes de Wi-Fi, vea la página 34. Si necesita ayuda para añadir dispositivos a su cuenta myQ, o para obtener más información, visite WiFiHelp.LiftMaster.com. 4. Descargue la aplicación myQ en la App Store® o en la tienda Google Play™. Regístrese en su cuenta myQ y añada el número de - LiftMaster 8587WL | Owners Manual - English French Spanish - Page 115
Funcionamiento Uso del control de la puerta SINCRONIZAR EL CONTROL DE LA PUERTA Para sincronizar el control de la puerta con el abrepuertas de garaje, presione el botón pulsador hasta que el abrepuertas de garaje se active (puede requerir presionarlo 3 veces). Pruebe el control de la puerta - LiftMaster 8587WL | Owners Manual - English French Spanish - Page 116
Funcionamiento Uso del Smart Control Panel®* CONFIGURACIÓN Las funciones del mando de la puerta se pueden programar a través de una serie de menús en la pantalla y de los botones de navegación. Consulte las descripciones siguientes. PANTALLA La pantalla principal muestra la hora, la temperatura y la - LiftMaster 8587WL | Owners Manual - English French Spanish - Page 117
, consulte la página 39 para ver los accesorios compatibles. Para programar accesorios adicionales, consulte las instrucciones provistas con el accesorio o visite LiftMaster.com. Si su vehículo está equipado con Homelink®, tal vez requiera un adaptador externo, dependiendo de la marca, el modelo - LiftMaster 8587WL | Owners Manual - English French Spanish - Page 118
841LM)* 1. La puerta debe estar completamente cerrada si es posible. 2. Desactive la cerradura automática de la puerta del garaje deslizando el desbloqueo manual a la posición de abierto. 3. Tire de la palanca de liberación de emergencia hacia abajo y hacia atrás (hacia el abrepuertas de garaje). La - LiftMaster 8587WL | Owners Manual - English French Spanish - Page 119
Mantenimiento Programa de mantenimiento MENSUAL • Opere la puerta manualmente. Si no está balanceada o está atascada, llame a un técnico capacitado en sistemas de puertas. • Verifique que la puerta se abra y cierre completamente. Ajústela si es necesario, vea la página 26. • Pruebe el sistema de - LiftMaster 8587WL | Owners Manual - English French Spanish - Page 120
Resolución de problemas Tabla de diagnóstico Su abrepuertas de garaje está programado con funciones de autodiagnóstico. Las flechas UP (SUBIDA) y DOWN (BAJADA) en el abrepuertas de garaje parpadearán los códigos de diagnóstico. CÓDIGO DE DIAGNÓSTICO SÍNTOMA SOLUCIÓN La flecha Up (Subida) - LiftMaster 8587WL | Owners Manual - English French Spanish - Page 121
señal Wi-Fi es débil en el garaje. Asegúrese de que la señal Wi-Fi llega al garaje, consulte 4 o visite LiftMaster.com/Customer-Support para obtener más información. Mi puerta no se cierra: El sensor de inversión de seguridad debe estar conectado y alineado correctamente antes de que el abrepuertas - LiftMaster 8587WL | Owners Manual - English French Spanish - Page 122
374UT MAX: Para usar fuera de la casa a fin de permitir el acceso al garaje mediante un PIN de 4 dígitos. Funciona con TODOS los motores LiftMaster® desde 1993 hasta la actualidad. Cerradura automática para puertas de garaje: Compatible con los abridores de puertas de garaje Security Shield. Ofrece - LiftMaster 8587WL | Owners Manual - English French Spanish - Page 123
Garantía GARANTÍA LIMITADA DE LIFTMASTER® LiftMaster® ("Vendedor") le garantiza al primer comprador minorista de este producto, para la residencia en la que este producto se instaló originalmente, que no tendrá defectos en los materiales y/o mano de obra durante un período específico de tiempo como - LiftMaster 8587WL | Owners Manual - English French Spanish - Page 124
Piezas de repuesto Piezas para montar el riel Descripción 1 Cadena - para puerta de 7 pies Cadena - para puerta de 8 pies Cadena - para puerta de 10 pies 2 Soporte de polea de cadena 3 conector maestro 4 Riel de una pieza 7 pies (2.1 m) Riel de una pieza 8 pies (2.4 m) Riel de una pieza 10 pies (3 - LiftMaster 8587WL | Owners Manual - English French Spanish - Page 125
Tapa 11 8587W 8587WL Placa lógica del receptor 12 8587W 8587WL Panel final de la placa lógica 13 8587W 8587WL No se Apple, Inc. Google Play es una marca registrada de Google, Inc. © 2022, LiftMaster Todos los derechos reservados Antes de llamar, tenga a mano el número de modelo del
-
 1
1 -
 2
2 -
 3
3 -
 4
4 -
 5
5 -
 6
6 -
 7
7 -
8
-
9
-
10
-
11
-
12
-
13
-
14
-
15
-
16
-
17
-
18
-
19
-
20
-
21
-
22
-
23
-
24
-
25
-
26
-
27
-
28
-
29
-
30
-
31
-
32
-
33
-
34
-
35
-
36
-
37
-
38
-
39
-
40
-
41
-
42
-
43
-
44
-
45
-
46
-
47
-
48
-
49
-
50
-
51
-
52
-
53
-
54
-
55
-
56
-
57
-
58
-
59
-
60
-
61
-
62
-
63
-
64
-
65
-
66
-
67
-
68
-
69
-
70
-
71
-
72
-
73
-
74
-
75
-
76
-
77
-
78
-
79
-
80
-
81
-
82
-
83
-
84
-
85
-
86
-
87
-
88
-
89
-
90
-
91
-
92
-
93
-
94
-
95
-
96
-
97
-
98
-
99
-
100
-
101
-
102
-
103
-
104
-
105
-
106
-
107
-
108
-
109
-
110
-
111
-
112
-
113
-
114
-
115
-
116
-
117
-
118
-
119
-
120
-
121
-
122
-
123
-
124
-
125
 |
 |
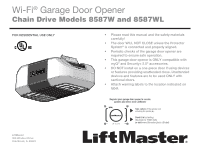
Wi-Fi
®
Garage Door Opener
Chain Drive Models 8587W and 8587WL
•
Please read this manual and the safety materials
carefully!
•
The door WILL NOT CLOSE unless the Protector
System
®
is connected and properly aligned.
•
Periodic checks of the garage door opener are
required to ensure safe operation.
•
This garage door opener is ONLY compatible with
myQ
®
and Security+ 2.0
®
accessories.
•
DO NOT install on a one-piece door if using devices
or features providing unattended close. Unattended
devices and features are to be used ONLY with
sectional doors.
•
Attach warning labels to the location indicated on
label.
FOR RESIDENTIAL USE ONLY
LiftMaster
300 Windsor Drive
Oak Brook, IL 60523
Register your garage door opener to receive
updates and offers from LiftMaster
Send it in
by texting
the photo to 71403 (US)
or visit
www.liftmaster.photo (Global)
Take a photo
of the camera icon
including the points (
).
®