Invacare XLT Owners Manual - Page 73
Adjusting the Handcycle Rack
 |
View all Invacare XLT manuals
Add to My Manuals
Save this manual to your list of manuals |
Page 73 highlights
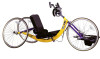
SECTION 9-OPTIONS Adjusting the Handcycle Rack Wheel Tray Bracket NOTE: To properly secure the handcycle, the wheel tray bracket should be adjusted to sit against the front wheel. 1. Remove the four mounting bolts and locknuts securing the wheel tray bracket to the wheel tray. 2. Position the wheel tray bracket in the desired position. 3. Secure the wheel tray bracket to the wheel tray with the four mounting bolts and locknuts. 4. If necessary, the wheel stop may be adjusted to one of three positions to sit against the front wheel. To adjust the wheel stop, perform the following steps: A. Remove the mounting bolt and locknut securing the wheel stop to the wheel tray bracket. B. Position the wheel stop in the desired mounting position. C. Secure the wheel stop to the wheel tray bracket with the mounting bolt and locknut. Rear Wheel Bar Brackets NOTE: To properly secure the handcycle, the rear wheel bar brackets should be adjusted to sit against the rear wheels. 1. Loosen the two screws securing the rear wheel bar bracket to the rear wheel bar. 2. Adjust the rear wheel bar bracket in/out until they sit against the rear wheel. 3. Secure the rear wheel bar bracket to the rear wheel bar with the two screws. 4. Repeat STEPS 1‐3 for the opposite side if necessary. Rear Wheel Bar NOTE: To properly secure the handcycle, the rear wheel bar should be adjusted so the rear wheels sit in the rear wheel bar brackets. 1. Remove the two mounting bolts and locknuts securing the rear wheel bar to the wheel tray. 2. Position the rear wheel bar to one of three mounting positions on the wheel tray. 3. Secure the rear wheel bar to the wheel tray with the two mounting bolts and locknuts. Part No 1114850 73 Recumbent Handcycle Series
-
 1
1 -
2
-
3
-
4
-
5
-
6
-
7
-
8
-
9
-
10
-
11
-
12
-
13
-
14
-
15
-
16
-
17
-
18
-
19
-
20
-
21
-
22
-
23
-
24
-
25
-
26
-
27
-
28
-
29
-
30
-
31
-
32
-
33
-
34
-
35
-
36
-
37
-
38
-
39
-
40
-
41
-
42
-
43
-
44
-
45
-
46
-
47
-
48
-
49
-
50
-
51
-
52
-
53
-
54
-
55
-
56
-
57
-
58
-
59
-
60
-
61
-
62
-
63
-
64
-
65
-
66
-
67
-
 68
68 -
 69
69 -
 70
70 -
 71
71 -
 72
72 -
 73
73 -
 74
74 -
 75
75 -
 76
76
 |
 |
