Invacare XLT Owners Manual - Page 45
Replacing Camber Inserts
 |
View all Invacare XLT manuals
Add to My Manuals
Save this manual to your list of manuals |
Page 45 highlights
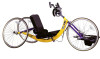
SECTION 7-WHEELS Adjusting Toe In/Toe Out 1. Loosen, but DO NOT remove the socket screws and clamps that secure camber inserts to the camber bar (Detail ʺAʺ). 2. Slowly rotate the camber insert until the rear wheels are approximately in a straight line. 3. Securely tighten the socket screws and clamps that secure the camber inserts to the camber bar. 4. Measure the distance between the center lines at the rear and front of the rear wheels at approximately 12 inches from the ground/floor. Refer to Determining Toe In/Toe Out on page 44. 5. Repeat STEPS 1‐4 until the toe in/toe out measurement is less than 1/8‐inch (for maximum rollability). Replacing Camber Inserts NOTE: For this procedure, refer to FIGURE 7.4. 1. Loosen, but DO NOT remove the socket screws and clamps that secure the camber inserts to the camber bar. 2. Remove the existing camber insert from the camber bar. 3. Install the new camber insert into the camber bar. 4. Adjust the toe in/toe out of the handcycle. Refer to Determining/Adjusting Toe In/Toe Out on page 44. Clamp Camber Camber Bar Insert Socket Screw Frame FIGURE 7.4 - Replacing Camber Inserts Part No 1114850 45 Recumbent Handcycle Series
-
 1
1 -
2
-
3
-
4
-
5
-
6
-
7
-
8
-
9
-
10
-
11
-
12
-
13
-
14
-
15
-
16
-
17
-
18
-
19
-
20
-
21
-
22
-
23
-
24
-
25
-
26
-
27
-
28
-
29
-
30
-
31
-
32
-
33
-
34
-
35
-
36
-
37
-
38
-
39
-
 40
40 -
 41
41 -
 42
42 -
 43
43 -
 44
44 -
 45
45 -
 46
46 -
 47
47 -
 48
48 -
 49
49 -
 50
50 -
51
-
52
-
53
-
54
-
55
-
56
-
57
-
58
-
59
-
60
-
61
-
62
-
63
-
64
-
65
-
66
-
67
-
68
-
69
-
70
-
71
-
72
-
73
-
74
-
75
-
76
 |
 |
