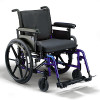
Invacare PATRIOT Owners Manual - Page 37
Removing/installing Back Upholstery
 |
View all Invacare PATRIOT manuals
Add to My Manuals
Save this manual to your list of manuals |
Page 37 highlights
SECTION 7-SEAT/BACK REMOVING/INSTALLING BACK UPHOLSTERY NOTE: For this procedure, refer to FIGURE 7.2. REMOVING BACK UPHOLSTERY 1. Rotate the flip back arms up and out of the way. Refer to Adjusting/Using Armrest on page 33. 2. Cut the tie wraps that secure the back upholstery to the wheelchair frame. 3. Remove the two mounting screws and washers that secure the existing back upholstery to the back canes. 4. Remove the one mounting screw and locknut that secures one back cane to the wheelchair frame. 5. Pull the loose back cane out of the existing back upholstery. 6. Slide the existing back upholstery up and over the mounted back cane. 7. Install the new/existing back upholstery. Refer to Installing Back Upholstery on page 37. INSTALLING BACK UPHOLSTERY 1. Install new/existing back upholstery over the mounted back cane. 2. Slide the loose back cane through the new/existing back upholstery. 3. Using the mounted back cane as a reference, position the loose back cane at the same height. 4. Secure the back cane to the wheelchair frame with the one mounting screw and locknut. 5. Secure the new/existing back upholstery to the back canes with the two existing mounting screws and washers. 6. Secure the new/existing back upholstery to the wheelchair frame with the tie wraps. Back Mounting Cane Screw Back Cane Washer Mounting Screw Locknut Back Upholstery Wheelchair Frame FIGURE 7.2 - REMOVING/ INSTALLING BACK UPHOLSTERY 7. Rotate the flip back arms down. Refer to Adjusting/Using Armrest on page 33. Part No 1088909 37 Patriot™
-
 1
1 -
 2
2 -
 3
3 -
 4
4 -
 5
5 -
 6
6 -
 7
7 -
 8
8 -
 9
9 -
 10
10 -
 11
11 -
 12
12 -
 13
13 -
 14
14 -
 15
15 -
 16
16 -
 17
17 -
 18
18 -
 19
19 -
 20
20 -
 21
21 -
 22
22 -
 23
23 -
 24
24 -
 25
25 -
 26
26 -
 27
27 -
 28
28 -
 29
29 -
 30
30 -
 31
31 -
 32
32 -
 33
33 -
 34
34 -
 35
35 -
 36
36 -
 37
37 -
 38
38 -
 39
39 -
 40
40 -
 41
41 -
 42
42 -
 43
43 -
 44
44 -
 45
45 -
 46
46 -
 47
47 -
 48
48 -
 49
49 -
 50
50 -
 51
51 -
 52
52 -
 53
53 -
 54
54 -
 55
55 -
 56
56 -
 57
57 -
 58
58 -
 59
59 -
 60
60 -
 61
61 -
 62
62 -
 63
63 -
 64
64 -
 65
65 -
 66
66 -
 67
67 -
 68
68 -
 69
69 -
 70
70 -
 71
71 -
 72
72 -
 73
73 -
 74
74 -
 75
75 -
 76
76 -
 77
77 -
 78
78 -
 79
79 -
 80
80 -
 81
81 -
 82
82 -
 83
83 -
 84
84 -
 85
85 -
 86
86 -
 87
87 -
 88
88 -
 89
89 -
 90
90 -
 91
91 -
 92
92 -
 93
93 -
 94
94 -
 95
95 -
 96
96 -
 97
97 -
 98
98 -
 99
99 -
 100
100 -
 101
101 -
 102
102 -
 103
103 -
 104
104 -
 105
105 -
 106
106 -
 107
107 -
 108
108
 |
 |

