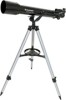
Celestron PowerSeeker 70AZ Telescope PowerSeeker 40AZ Manual (English, French, - Page 12
Image Orientation, Focusing, Calculating Magnification
 |
View all Celestron PowerSeeker 70AZ Telescope manuals
Add to My Manuals
Save this manual to your list of manuals |
Page 12 highlights
Image Orientation The image orientation changes depending on how the eyepiece is inserted into the telescope. When using a star diagonal with refractors, the image is right-side-up, but reversed from left-to-right (i.e., mirror image). If inserting the eyepiece directly into the focuser of a refractor (i.e., without the diagonal), the image is upside-down and reversed from left-to-right (i.e., inverted). However, when using the PowerSeeker refractor and the standard erect image diagonal, the image is correctly oriented in every aspect. Newtonian reflectors produce a right-side-up image but the image will appear rotated based on the location of the eyepiece holder in relation to the ground. However, by using the erect image eyepiece supplied with the PowerSeeker Newtonian, the image is correctly oriented. Image orientation as seen with the unaided eye & using erecting devices on refractors & Newtonians Focusing Reversed from left to right, as viewed using a Star Diagonal on a refractor Figure 3-3 Inverted image, normal with Newtonians & as viewed with eyepiece directly in a refractor To focus your refractor or Newtonian telescope, simply turn the focus knob located directly below the eyepiece holder (see Figures 2-13, 2-14 and 2-15). Turning the knob clockwise allows you to focus on an object that is farther than the one you are currently observing. Turning the knob counterclockwise from you allows you to focus on an object closer than the one you are currently observing. Note: If you wear corrective lenses (specifically glasses), you may want to remove them when observing with an eyepiece attached to the telescope. However, when using a camera you should always wear corrective lenses to ensure the sharpest possible focus. If you have astigmatism, corrective lenses must be worn at all times. Calculating Magnification You can change the power of your telescope just by changing the eyepiece (ocular). To determine the magnification of your telescope, simply divide the focal length of the telescope by the focal length of the eyepiece used. In equation format, the formula looks like this: Focal Length of Telescope (mm) Magnification Focal Length of Eyepiece (mm) Let's say, for example, you are using the 20mm eyepiece that came with your telescope. To determine the magnification you divide the focal length of your telescope (the PowerSeeker 60AZ for this example has a focal length of 700mm) by the focal length of the eyepiece, 20mm. Dividing 700 by 20 yields a magnification of 35x. Although the power is variable, each instrument under average skies has a limit to the highest useful magnification. The general rule is that 60 power can be used for every inch of aperture. For example, the PowerSeeker 60AZ is 2.4" inches in diameter. Multiplying 2.4 by 60 gives a maximum useful magnification of 144 power. Although this is the maximum useful magnification, most observing is done in the range of 20 to 35 power for every inch of aperture which is 48 to 84 times for the PowerSeeker 60AZ telescope. You can determine the magnification for your telescope the same way. Note on Using High Powers - Higher powers are used mainly for lunar and sometimes planetary observing where you can greatly enlarge the image, but remember that the contrast and brightness will be very low due to the high magnification. Using the 4mm eyepiece together with the 3x Barlow lens gives extremely high power and can be used on rare occasions - you will achieve the power but the image will be dark with low contrast because you have magnified it to the maximum possible. For the brightest images with the highest contrast levels, use lower powers. 12
-
 1
1 -
2
-
3
-
4
-
5
-
6
-
 7
7 -
 8
8 -
 9
9 -
 10
10 -
 11
11 -
 12
12 -
 13
13 -
 14
14 -
 15
15 -
 16
16 -
 17
17 -
18
-
19
-
20
-
21
-
22
-
23
-
24
-
25
-
26
-
27
-
28
-
29
-
30
-
31
-
32
-
33
-
34
-
35
-
36
-
37
-
38
-
39
-
40
-
41
-
42
-
43
-
44
-
45
-
46
-
47
-
48
-
49
-
50
-
51
-
52
-
53
-
54
-
55
-
56
-
57
-
58
-
59
-
60
-
61
-
62
-
63
-
64
-
65
-
66
-
67
-
68
-
69
-
70
-
71
-
72
-
73
-
74
-
75
-
76
-
77
-
78
-
79
-
80
-
81
-
82
-
83
-
84
-
85
-
86
-
87
-
88
-
89
-
90
-
91
-
92
-
93
-
94
-
95
-
96
-
97
-
98
-
99
-
100
-
101
-
102
-
103
-
104
-
105
-
106
-
107
-
108
-
109
-
110
-
111
-
112
-
113
-
114
-
115
-
116
-
117
-
118
-
119
-
120
-
121
-
122
-
123
-
124
-
125
-
126
 |
 |
