Singer Quantum Stylist 9960 Instruction Manual 2 - Page 22
Extra Wide Table - embroidery
 |
View all Singer Quantum Stylist 9960 manuals
Add to My Manuals
Save this manual to your list of manuals |
Page 22 highlights
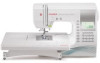
F. THREAD CUTTER BUTTON Press this button after sewing to cut the upper and bobbin threads. The machine will cut both threads automatically. CAUTION 1. Do not press this button when there is no fabric in the machine or no need to cut the threads. The thread may tangle, resulting in damage. 2. Do not use this button when cutting thread thicker than #30, nylon thread or other speciality threads. In this case, use the thread cutter (H). G.DROP FEED LEVER The fabric feed dogs project up through the needle plate, directly below the presser foot. Their function is to move the fabric being sewn. The drop feed lever controls the fabric feed dogs. For ordinary sewing, move the lever to the right. This raises feed dogs to their highest position. For most sewing, the lever should be in this position. For darning or free motion embroidery or whenever fabric is to be moved by hand, move the lever to the left to lower the fabric feed dogs. H.THREAD CUTTER Use this cutter if the thread cutter button is not used. 1. Raise the presser foot and bring fabric and threads backward after sewing. 2. Hook the threads to the thread cutter from back to front. 3. Pull fabric and cut threads. I. TOP COVER To open the top cover, lift up the right side of cover. J. HAND WHEEL By turning the hand wheel, the needle will raise or lower. You should turn hand wheel toward you. EXTRA WIDE TABLE If you need wide sewing space, attach the extra wide table as below. Set the machine and extra wide table on the stable table. 1. Remove the extension table (See Page 14) 2. Stand up the two legs of extra wide table. 3. Insert wide table to the machine sliding to the right. 4. Adjust the height of table by turning the four rubber feet. 22
-
 1
1 -
2
-
3
-
4
-
5
-
6
-
7
-
8
-
9
-
10
-
11
-
12
-
13
-
14
-
15
-
16
-
 17
17 -
 18
18 -
 19
19 -
 20
20 -
 21
21 -
 22
22 -
 23
23 -
 24
24 -
 25
25 -
 26
26 -
 27
27 -
28
-
29
-
30
-
31
-
32
-
33
-
34
-
35
-
36
-
37
-
38
-
39
-
40
-
41
-
42
-
43
-
44
-
45
-
46
-
47
-
48
-
49
-
50
-
51
-
52
-
53
-
54
-
55
-
56
-
57
-
58
-
59
-
60
-
61
-
62
-
63
-
64
-
65
-
66
-
67
-
68
-
69
-
70
-
71
-
72
-
73
-
74
-
75
-
76
-
77
-
78
-
79
-
80
-
81
-
82
-
83
-
84
-
85
-
86
-
87
-
88
-
89
-
90
-
91
-
92
-
93
-
94
-
95
-
96
-
97
-
98
-
99
-
100
-
101
-
102
-
103
-
104
-
105
-
106
-
107
-
108
 |
 |
