Marantz NA-11S1 Owner's Manual in English - Page 48

Part names and functions, Front panel, Rear panel

Page 48 highlights

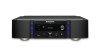
Preparation Part names and functions For buttons not explained here, see the page indicated in parentheses ( ). Front panel Q8 Q0 Q7 Q6 Q5 Q4 Q3 Q2 Q1 Q0 o i Rear panel o i u Operation Information qw e r ty u q w e rt y q DIMMER button 22) w USB port 32, 34) Used to connect iPod or USB memory devices. e INPUT button 21, 56) Selects the input source. r Power operation switch (X ON/STANDBY 21) t Headphones jack (PHONES 22) Used to connect headphones. NOTE To prevent hearing loss, do not raise the volume level excessively when using headphones. y Headphone volume control knob (LEVEL 22) u Information button (INFO 23, 25, 27, 28, 30, 33, 35, 37) i Stop button (2 23, 25, 27, 28, 30, 32, 35) o Play/Pause button (1/3 27, 28, 30, 32, 34, 43) Q0 Illumination lamp 22) Q1 Cursor buttons (uio p 11, 12, 15, 18, 23, 31, 32, 34, 42) Q2 ENTER button 11, 12, 15, 18, 23, 31, 32, 34, 42) Q3 Display Displays play status, settings, etc. Q4 STANDBY indicator 21) Turns power to this unit on and off (standby). The STANDBY indicator changes as shown below according to the status of the unit. • Power on : Off • Standby : Red • "Network Control" - "On" : Orange • iPod charge standby : Orange Q5 Digital out off indicator (DIGI. OUT OFF 18) Q6 DISPLAY OFF indicator 22) Q7 Remote control sensor 4) Q8 Skip/Search buttons (8, 9 31) q ANALOG OUT connectors (UNBALANCED/BALANCED 6) w DIGITAL OUT connectors 7) e DIGITAL IN connectors 7) r NETWORK connector 8) t REMOTE CONTROL connectors (IN/OUT 9) y External/Internal switch (EXT./INT 9) u AC inlet (AC IN 10) i RS-232C connector 9) o FLASHER IN jack (IN 9) 45

  • 1
  • 2
  • 3
  • 4
  • 5
  • 6
  • 7
  • 8
  • 9
  • 10
  • 11
  • 12
  • 13
  • 14
  • 15
  • 16
  • 17
  • 18
  • 19
  • 20
  • 21
  • 22
  • 23
  • 24
  • 25
  • 26
  • 27
  • 28
  • 29
  • 30
  • 31
  • 32
  • 33
  • 34
  • 35
  • 36
  • 37
  • 38
  • 39
  • 40
  • 41
  • 42
  • 43
  • 44
  • 45
  • 46
  • 47
  • 48
  • 49
  • 50
  • 51
  • 52
  • 53
  • 54
  • 55
  • 56
  • 57
  • 58
  • 59
  • 60
  • 61
  • 62
  • 63
  • 64
  • 65

45
Part names and functions
For buttons not explained here, see the page indicated in parentheses (
).
Front panel
q
w
e
r
t
y
u
i
o
Q
0
Q
1
Q
2
Q
6
Q
7
Q3
Q
5
Q
4
Q
8
Q
0
q
DIMMER button
································· (
22
)
w
USB port
······································· (
32
,
34
)
Used to connect iPod or USB memory
devices.
e
INPUT button
······························· (
21
,
56
)
Selects the input source.
r
Power operation switch
(
X
ON/STANDBY)
····························· (
21
)
t
Headphones jack (PHONES)
············· (
22
)
Used to connect headphones.
NOTE
To prevent hearing loss, do not raise the
volume level excessively when using
headphones.
y
Headphone volume control knob
(LEVEL)
················································ (
22
)
u
Information button (INFO)
··················· (
23
,
 
25
,
 
27
,
 
28
,
 
30
,
 
33
,
 
35
,
 
37
)
i
Stop button (
2
)
························· (
23
,
 
25
,
 
27
,
 
28
,
 
30
,
 
32
,
 
35
)
o
Play/Pause button (
1
/
3
)
······························· (
27
,
 
28
,
 
30
,
 
32
,
 
34
,
 
43
)
Q
0
Illumination lamp
······························ (
22
)
Q
1
Cursor buttons (
uio
p
)
············· (
11
,
 
12
,
 
15
,
 
18
,
 
23
,
 
31
,
 
32
,
 
34
,
 
42
)
Q
2
ENTER button
············· (
11
,
 
12
,
 
15
,
 
18
,
 
23
,
 
31
,
 
32
,
 
34
,
 
42
)
Q
3
Display
Displays play status, settings, etc.
Q
4
STANDBY indicator
··························· (
21
)
Turns power to this unit on and off
(standby).
The STANDBY indicator changes as shown
below according to the status of the unit.
Power on : Off
Standby : Red
“Network Control” – “On” : Orange
iPod charge standby : Orange
Q
5
Digital out off indicator
(DIGI. OUT OFF)
·································· (
18
)
Q
6
DISPLAY OFF indicator
······················ (
22
)
Q
7
Remote control sensor
························ (
4
)
Q
8
Skip/Search buttons
(
8
,
9
)
·········································· (
31
)
Rear panel
q
w
e
t
y
r
u
i
o
q
ANALOG OUT connectors
(UNBALANCED/BALANCED)
·············· (
6
)
w
DIGITAL OUT connectors
···················· (
7
)
e
DIGITAL IN connectors
························ (
7
)
r
NETWORK connector
·························· (
8
)
t
REMOTE CONTROL connectors
(IN/OUT)
··············································· (
9
)
y
External/Internal switch
(EXT./INT.)
············································ (
9
)
u
AC inlet (AC IN)
·································· (
10
)
i
RS-232C connector
······························ (
9
)
o
FLASHER IN jack (IN)
··························· (
9
)