Garmin Venu Sq 2 Owners Manual
Garmin Venu Sq 2 Manual
 |
View all Garmin Venu Sq 2 manuals
Add to My Manuals
Save this manual to your list of manuals |
Garmin Venu Sq 2 manual content summary:
- Garmin Venu Sq 2 | Owners Manual - Page 1
VENU® SQ 2 Owner's Manual - Garmin Venu Sq 2 | Owners Manual - Page 2
the written consent of Garmin. Garmin reserves the right to change or improve its products and to make changes in the content of this manual without obligation to notify any person or organization of such changes or improvements. Go to www.garmin.com for current updates and supplemental information - Garmin Venu Sq 2 | Owners Manual - Page 3
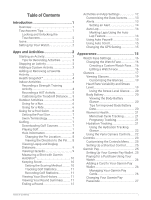
Table of Contents Introduction 1 Overview 1 Touchscreen Tips 1 Locking and Unlocking the Touchscreen 2 Icons 2 Setting Up Your Watch 2 Apps and Activities 2 Starting an Activity 3 Tips for Recording Activities 3 Stopping an Activity 3 Adding a Custom Activity 3 Adding or Removing a - Garmin Venu Sq 2 | Owners Manual - Page 4
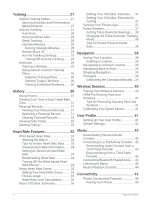
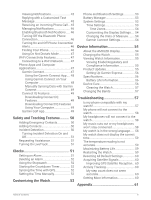
Deleting a Location 39 Navigating to a Saved Location........... 39 Navigating Back to Start 39 Stopping Navigation 39 Compass 39 Calibrating the Compass Manually.. 39 Wireless Sensors 40 Pairing Your Wireless Sensors 40 HRM-Pro Running Pace and Distance 41 Tips for Recording Running Pace and - Garmin Venu Sq 2 | Owners Manual - Page 5
Countdown Timer 52 Syncing the Time with GPS 52 Setting the Time Manually 52 Customizing the Watch 53 Phone and Bluetooth Settings 53 Battery Manager 56 Device Care 56 Cleaning the Watch 57 Changing the Bands 57 Troubleshooting 57 Is my phone compatible with my watch 57 My phone will not - Garmin Venu Sq 2 | Owners Manual - Page 6
Data Fields 61 VO2 Max. Standard Ratings 63 Wheel Size and Circumference 64 Symbol Definitions 66 iv Table of Contents - Garmin Venu Sq 2 | Owners Manual - Page 7
Introduction WARNING See the Important Safety and Product Information guide in the product box for product warnings and other important information. Always consult your physician before you begin or modify any exercise program. Overview Action - Garmin Venu Sq 2 | Owners Manual - Page 8
Locking and Unlocking the Touchscreen You can lock the touchscreen to prevent inadvertent screen touches. 1 Hold to view the controls menu. 2 Select . The touchscreen locks and does not respond to touches until you unlock it. 3 Hold any button to unlock the touchscreen. Icons A flashing icon means - Garmin Venu Sq 2 | Owners Manual - Page 9
Starting an Activity When you start an activity, GPS turns on automatically (if required). 1 Press . 2 If this is the first time you are starting an activity, select the checkbox next to each activity to add to your favorites, and select . 3 Select an option: • Select an activity from your favorites - Garmin Venu Sq 2 | Owners Manual - Page 10
Health Snapshot™ The Health Snapshot feature is an activity on your watch that records several key health metrics while you hold still for two minutes. It provides a glimpse of your overall cardiovascular status. The watch records metrics such as your average heart rate, stress level, and - Garmin Venu Sq 2 | Owners Manual - Page 11
Select Workouts to follow a saved workout. 4 If necessary, follow the on-screen instructions. 5 Press to start your first round. The watch displays a countdown timer and your current heart rate. 6 If necessary, press to manually move to the next round or rest. 7 After you finish the activity, press - Garmin Venu Sq 2 | Owners Manual - Page 12
Going for a Run Before you can use a wireless sensor for your run, you must pair the sensor with your watch (Pairing Your Wireless Sensors, page 40). 1 Put on your wireless sensors, such as a heart rate monitor (optional). 2 Press . 3 Select Run. 4 When using optional wireless sensors, wait while - Garmin Venu Sq 2 | Owners Manual - Page 13
. Critical swim speed (CSS): Your CSS is the theoretical speed that you can maintain continuously without exhaustion. You can use your CSS to guide your training pace and monitor your improvement. Golfing Downloading Golf Courses Before you play a course for the first time, you must download it - Garmin Venu Sq 2 | Owners Manual - Page 14
Hole Information The watch calculates the distance to the front and back of the green, and to the selected pin location (Changing the Pin Location, page 8). Current hole number Distance to the back of the green Distance to the selected pin location Distance to the front of the green Par for the - Garmin Venu Sq 2 | Owners Manual - Page 15
Viewing Layup and Dogleg Distances You can view a list of layup and dogleg distances for par 4 and 5 holes. 1 Press . 2 Select . NOTE: Distances and locations are removed from the list as you pass them. Viewing Hazards You can view distances to hazards along the fairway for par 4 and 5 holes. - Garmin Venu Sq 2 | Owners Manual - Page 16
Measuring a Shot with Garmin AutoShot™ Each time you take a shot along the fairway, the watch records your shot distance so you can view it later (Viewing Your Shot History, page 11). Putts are not detected. 1 While playing golf, wear the watch on your leading wrist for better shot detection. When - Garmin Venu Sq 2 | Owners Manual - Page 17
About Stableford Scoring When you select the Stableford scoring method (Setting the Scoring Method, page 10), points are awarded based on the number of strokes taken relative to par. At the end of a round, the highest score wins. The device awards points as specified by the United States Golf - Garmin Venu Sq 2 | Owners Manual - Page 18
Ending a Round 1 Press . 2 Select End Round. 3 Swipe up. 4 Select an option: • To save the round and return to watch mode, select Save. • To edit your scorecard, select Edit Score. • To discard the round and return to watch mode, select Discard. • To pause the round and resume it at a later time, - Garmin Venu Sq 2 | Owners Manual - Page 19
Customizing the Data Screens You can customize data screens based on your training goals or optional accessories. For example, you can customize one of the data screens to display your lap pace or heart rate zone. 1 Hold . 2 Select > Activities & Apps. 3 Select an activity. 4 Select the activity - Garmin Venu Sq 2 | Owners Manual - Page 20
Setting an Alert 1 Hold . 2 Select > Activities & Apps. 3 Select an activity. NOTE: This feature is not available for all activities. 4 Select the activity settings. 5 Select Alerts. 6 Select an option: • Select Add New to add a new alert for the activity. • Select the alert name to edit an existing - Garmin Venu Sq 2 | Owners Manual - Page 21
Using Auto Pause® You can use the Auto Pause feature to pause the timer automatically when you stop moving or when your pace or speed drops below a specified value. This feature is helpful if your activity includes stop lights or other places where you need to slow down or stop. NOTE: The watch does - Garmin Venu Sq 2 | Owners Manual - Page 22
Watch Face Settings You can customize the appearance of the watch face by selecting the layout, colors, and additional data. You can also download custom watch faces from the Connect IQ store. Changing the Watch Face You can choose from several preloaded watch faces or use a Connect IQ watch face - Garmin Venu Sq 2 | Owners Manual - Page 23
, page 19). Some glances require a Bluetooth® connection to a compatible phone. Some glances are not visible by default. You can add them to the glance loop manually (Customizing the Glances, page 19). Appearance 17 - Garmin Venu Sq 2 | Owners Manual - Page 24
(Enabling Bluetooth Notifications, page 46). Allows you to take a manual pulse oximeter reading (Getting Pulse Oximeter Readings, page 38). If your pulse oximeter reading, the measurements are not recorded. Allows you to manually take a photo and record a video clip (Using the Varia Camera Controls - Garmin Venu Sq 2 | Owners Manual - Page 25
Name Weather Women's health Description Displays the current temperature and weather forecast. Displays your current cycle or pregnancy tracking status. You can view and log your daily symptoms. Viewing Glances • From the watch face, swipe up or down. The watch scrolls through the glance loop. • - Garmin Venu Sq 2 | Owners Manual - Page 26
Using the Stress Level Glance The stress level glance displays your current stress level and a graph of your stress level since midnight. It can also guide you through a breathing activity to help you relax. 1 While you are sitting or inactive, swipe up or down to view the stress level glance. TIP: - Garmin Venu Sq 2 | Owners Manual - Page 27
levels before and after meals and before bed. • Select Movement to use a stopwatch or timer to log the baby's movements. 4 Follow the on-screen instructions. Hydration Tracking You can track your daily fluid intake, turn on goals and alerts, and enter the container sizes you use most often. If you - Garmin Venu Sq 2 | Owners Manual - Page 28
Using the Hydration Tracking Glance The hydration tracking glance displays your fluid intake and your daily hydration goal. 1 Swipe up or down to view the hydration glance. 2 Select the glance to add your fluid intake. 3 Select for each serving of fluid you consume (1 cup, 8 oz., or 250 mL). 4 - Garmin Venu Sq 2 | Owners Manual - Page 29
Controls The controls menu lets you quickly access watch features and options. You can add, reorder, and remove the options in the controls menu (Customizing the Controls Menu, page 25). From any screen, hold . Appearance 23 - Garmin Venu Sq 2 | Owners Manual - Page 30
Icon Name Alarms Description Select to add or edit an alarm (Setting an Alarm, page 51). Assistance Select to send an assistance request (Requesting Assistance, page 51). Battery Saver Select to enable or disable the battery saver feature. Brightness Broadcast Heart Rate Do Not Disturb Find My - Garmin Venu Sq 2 | Owners Manual - Page 31
garmin.com /garminpay/banks to find participating financial institutions. 1 From the Garmin Connect app, select or . 2 Select Garmin Pay > Get Started. 3 Follow the on-screen instructions. Appearance 25 - Garmin Venu Sq 2 | Owners Manual - Page 32
or debit cards to your Garmin Pay wallet. 1 From the Garmin Connect app, select or . 2 Select Garmin Pay > > Add Card. 3 Follow the on-screen instructions. After the card is added, you can select the card on your watch when you make a payment. Managing Your Garmin Pay Cards You can temporarily - Garmin Venu Sq 2 | Owners Manual - Page 33
reenter your card information. 1 From the Venu Sq 2 device page in the Garmin Connect app, select Garmin Pay > Change Passcode. 2 Follow the on-screen instructions. The next time you pay using your Venu Sq 2 watch, you must enter the new passcode. Training Unified Training Status When you use more - Garmin Venu Sq 2 | Owners Manual - Page 34
Auto Goal Your watch creates a daily step goal automatically, based on your previous activity levels. As you move during the day, the watch shows your progress toward your daily goal . If you choose not to use the auto goal feature, you can set a personalized step goal on your Garmin Connect - Garmin Venu Sq 2 | Owners Manual - Page 35
steps, intensity minutes, sleep tracking, and Move IQ events are not recorded. 1 Hold . 2 Select > Activity Tracking > Status > Off. Workouts Your watch can guide you through multiple-step workouts that include goals for each workout step, such as distance, time, reps, or other metrics. Your watch - Garmin Venu Sq 2 | Owners Manual - Page 36
view the workout steps, and swipe right when you are finished viewing the steps (optional). 5 Select Do Workout. 6 Follow the on-screen instructions. Viewing Scheduled Workouts You can view workouts scheduled in your training calendar and start a workout. 1 Press . 2 Select an activity. 3 Swipe up - Garmin Venu Sq 2 | Owners Manual - Page 37
Using History 1 Hold . 2 Select History. 3 Select an option: • To view an activity from this week, select This Week. • To view an older activity, select Previous Weeks. 4 Select an activity. 5 Swipe up, and select an option: • Select Laps to view additional information about each lap. • Select Sets - Garmin Venu Sq 2 | Owners Manual - Page 38
Clearing Personal Records 1 From the watch face, hold . 2 Select History > Records. 3 Select a sport. 4 Select an option: • To delete one record, select a record, and select Clear Record > . • To delete all records for the sport, select Clear All Records > . NOTE: This does not delete any saved - Garmin Venu Sq 2 | Owners Manual - Page 39
Wrist-based Heart Rate Wearing the Watch CAUTION Some users may experience skin irritation after prolonged use of the watch, especially if the user has sensitive skin or allergies. If you notice any skin irritation, remove the watch and give your skin time to heal. To help prevent skin irritation, - Garmin Venu Sq 2 | Owners Manual - Page 40
(Starting an Activity, page 3). • Select Broadcast to start broadcasting heart rate data now. 4 Pair your Venu Sq 2 watch with your compatible device. NOTE: The pairing instructions differ for each Garmin compatible device. See your owner's manual. 34 Heart Rate Features - Garmin Venu Sq 2 | Owners Manual - Page 41
data during your activity, set your maximum heart rate. You can also set each heart rate zone and enter your resting heart rate manually. You can manually adjust your zones on the watch or using your Garmin Connect account. 1 Hold . 2 Select > User Profile > Heart Rate Zones. 3 Select Max. HR, and - Garmin Venu Sq 2 | Owners Manual - Page 42
Heart Rate Zone Calculations Zone % of Maximum Heart Rate Perceived Exertion 1 50-60% Relaxed, easy pace, rhythmic breathing 2 60-70% 3 70-80% 4 80-90% 5 90-100% Comfortable pace, slightly deeper breathing, conversation possible Moderate pace, more difficult to hold conversation Fast pace and - Garmin Venu Sq 2 | Owners Manual - Page 43
time you complete an outdoor walk or run of 15 minutes or longer. You can manually start a VO2 max. test to get an updated estimate. 3 To start a VO2 max. test, tap the screen. 4 Follow the on-screen instructions to get your VO2 max. estimate. A message appears when the test is complete. Getting - Garmin Venu Sq 2 | Owners Manual - Page 44
Getting Pulse Oximeter Readings You can manually begin a pulse oximeter reading from the pulse oximeter glance. The accuracy of the pulse oximeter reading can vary based on your blood flow, the watch - Garmin Venu Sq 2 | Owners Manual - Page 45
example, after moving long distances or after extreme temperature changes, you can manually calibrate the compass. 1 Hold . 2 Select > Sensors & Accessories > Compass > Start Calibration. 3 Follow the on-screen instructions. TIP: Move your wrist in a small figure eight motion until a message appears - Garmin Venu Sq 2 | Owners Manual - Page 46
22). Speed/ Cadence You can attach speed or cadence sensors to your bike and view the data during your ride. If necessary, you can manually enter your wheel circumference (Calibrating Your Speed Sensor, page 41). tempe You can attach the tempe temperature sensor to a secure strap or loop where - Garmin Venu Sq 2 | Owners Manual - Page 47
to the sensor settings, and select HRM Pace & Distance > Reset Calibration Data. NOTE: You can try turning off Auto Calibrate, and then manually calibrate again (Calibrating the Treadmill Distance, page 5). Calibrating Your Speed Sensor Before you can calibrate your speed sensor, you must pair your - Garmin Venu Sq 2 | Owners Manual - Page 48
can download music or other audio files to your watch from a supported third-party provider, you must connect the provider to your watch. page 49). 1 Press . 2 Select Connect IQ Store. 3 Follow the on-screen instructions to install a third-party music provider. 4 From the controls menu on the watch - Garmin Venu Sq 2 | Owners Manual - Page 49
6 If necessary, press until you are prompted to sync with the service. NOTE: Downloading audio content can drain the battery. You may be required Select an installed third-party provider, and follow the on-screen instructions to disconnect the third-party provider from your watch. Connecting - Garmin Venu Sq 2 | Owners Manual - Page 50
Music Playback Controls NOTE: Some music playback controls are available on a Venu Sq 2 Music watch only. NOTE: Music playback controls may look different, depending on the selected music source. Select to view more music playback controls. Select to adjust the volume. Select to play and pause the - Garmin Venu Sq 2 | Owners Manual - Page 51
process, you can hold , and select > Connectivity > Phone > Pair Phone. 2 Scan the QR code with your phone, and follow the on-screen instructions to complete the pairing and setup process. Viewing Notifications 1 From the watch face, swipe up or down to view the notifications glance. 2 Select the - Garmin Venu Sq 2 | Owners Manual - Page 52
, page 25). 1 Hold to view the controls menu. 2 Select to turn off the Bluetooth phone connection on your Venu Sq 2 watch. Refer to the owner's manual for your phone to turn off Bluetooth technology on your phone. Turning On and Off Phone Connection Alerts You can set the Venu Sq 2 watch - Garmin Venu Sq 2 | Owners Manual - Page 53
mode disables the gesture setting (Customizing the Display Settings, page 54). For example, you can use this mode while sleeping or watching a movie. • To manually turn on or off do not disturb mode, hold , and select . • To automatically turn on do not disturb mode during your sleep hours, open - Garmin Venu Sq 2 | Owners Manual - Page 54
to www.garmin.com/express. 3 Download and install the Garmin Express application. 4 Open the Garmin Express application, and select Add Device. 5 Follow the on-screen instructions. 48 Connectivity - Garmin Venu Sq 2 | Owners Manual - Page 55
Garmin Express sends it to your device. 2 Follow the on-screen instructions. 3 Do not disconnect your device from the computer during the update process. available software updates to your device when it connects using Wi‑Fi. Manually Syncing Data with Garmin Connect NOTE: You can add options to - Garmin Venu Sq 2 | Owners Manual - Page 56
emergency assistance. The Garmin Connect app does not contact emergency services on your behalf. NOTICE To use the safety and tracking features Connect app, select or . 2 Select Contacts. 3 Follow the on-screen instructions. After you add contacts, you must sync your data to apply the changes - Garmin Venu Sq 2 | Owners Manual - Page 57
Turning Incident Detection On and Off NOTE: Your paired phone must be equipped with a data plan and be in an area of network coverage where data is available. Before you can enable incident detection on your watch, you must set up emergency contacts in the Garmin Connect app (Adding Emergency - Garmin Venu Sq 2 | Owners Manual - Page 58
time you turn on the watch and acquire satellites, the watch automatically detects your time zones and the current time of day. You can also manually sync the time with GPS when you change time zones and to update for daylight saving time. 1 Hold . 2 Select Clocks > Time > Time Sync. 3 Wait while - Garmin Venu Sq 2 | Owners Manual - Page 59
to show time in a 12-hour or a 24-hour format. Time Source: Allows you to set the time manually or automatically based on the time on your phone. Time Sync: Allows you to manually sync the time when you change time zones and update for daylight saving time. Customizing the Watch 53 - Garmin Venu Sq 2 | Owners Manual - Page 60
Time Zones Each time you turn on the watch and acquire satellites or sync with your phone, the watch automatically detects your time zone and the current time of day. Customizing the Display Settings 1 Hold . 2 Select > System > Display. 3 Select Brightness to set the brightness level of the display - Garmin Venu Sq 2 | Owners Manual - Page 61
and Product Information guide in the product box connecting to a computer. Refer to the cleaning instructions (Device Care, page 56). 1 Plug the Bluetooth or Wi‑Fi. You can manually check for updates from the system This provides easy access to these services for Garmin devices: • Software updates - Garmin Venu Sq 2 | Owners Manual - Page 62
Up Garmin Express 1 Connect the device to your computer using a USB cable. 2 Go to www.garmin.com/express. 3 Follow the on-screen instructions. Specifications Battery type Rechargeable, built-in lithium-ion battery Battery life Up to 11 days in smartwatch mode Operating temperature range From - Garmin Venu Sq 2 | Owners Manual - Page 63
Slide the quick-release pin, and align the spring bar with the opposite side of the watch. 4 Repeat steps 1 through 3 to change the other band. Troubleshooting Is my phone compatible with my watch? The Venu Sq 2 watch is compatible with phones using Bluetooth technology. Go to www.garmin.com/ble for - Garmin Venu Sq 2 | Owners Manual - Page 64
your watch. You can try these tips. • Turn off Bluetooth technology on your phone. Refer to the owner's manual for your phone for more information. • Stay 10 m (33 ft.) away from your phone while connecting your the second item in the list, and select it. 5 Select your language. 58 Troubleshooting - Garmin Venu Sq 2 | Owners Manual - Page 65
the watch may erase your data or settings. 1 Hold for 15 seconds. The watch turns off. 2 Hold for one second to turn on the watch. Troubleshooting 59 - Garmin Venu Sq 2 | Owners Manual - Page 66
folding laundry, or clapping your hands, as steps. Getting More Information • Go to support.garmin.com for additional manuals, articles, and software updates. • Go to buy.garmin.com, or contact your a medical device. The pulse oximeter feature is not available in all countries. 60 Troubleshooting - Garmin Venu Sq 2 | Owners Manual - Page 67
Appendix Data Fields Some data fields require ANT+ accessories to display data. 24-Hour Max.: The maximum temperature recorded in the last 24 hours from a compatible temperature sensor. 24-Hour Min.: The minimum temperature recorded in the last 24 hours from a compatible temperature sensor. Average - Garmin Venu Sq 2 | Owners Manual - Page 68
L. Len. Strokes: The total number of strokes for the last completed pool length. Lap Cadence: Cycling. The average cadence for the current lap. Lap Cadence: Running. The average cadence for the current lap. Lap Distance: The distance traveled for the current lap. Lap HR: The average heart rate for - Garmin Venu Sq 2 | Owners Manual - Page 69
Vertical Speed: The rate of ascent or descent over time. Vigorous Minutes: The number of vigorous intensity minutes. VO2 Max. Standard Ratings These tables include standardized classifications for VO2 max. estimates by age and sex. Males Percentile 20-29 30-39 40-49 50-59 60-69 Superior 95 - Garmin Venu Sq 2 | Owners Manual - Page 70
Wheel Size and Circumference Your speed sensor automatically detects your wheel size. If necessary, you can manually enter your wheel circumference in the speed sensor settings. The tire size is marked on both sides of the tire. This is not a comprehensive list. - Garmin Venu Sq 2 | Owners Manual - Page 71
Tire Size 20 × 1.75 20 × 1-3/8 22 × 1-3/8 22 × 1-1/2 24 × 1 24 × 3/4 Tubular 24 × 1-1/8 24 × 1.75 24 × 1-1/4 24 × 2.00 24 × 2.125 26 × 7/8 26 × 1-1.0 26 × 1 26 × 1.25 26 × 1-1/8 26 × 1.40 26 × 1.50 26 × 1.75 26 × 1.95 26 × 2.00 26 × 1-3/8 26 × 2.10 26 × 2.125 26 × 2.35 26 × 1-1/2 26 × 3.00 27 × 1 27 - Garmin Venu Sq 2 | Owners Manual - Page 72
Tire Size 29 x 2.2 29 x 2.3 650 x 20C 650 x 23C 650 × 35A 650 × 38B 650 × 38A 700 × 18C 700 × 19C 700 × 20C 700 × 23C 700 × 25C 700C Tubular 700 × 28C 700 × 30C 700 × 32C 700 × 35C 700 × 38C 700 × 40C 700 × 44C 700 × 45C 700 × 47C Wheel Circumference (mm) 2298 2326 1938 1944 2090 2105 2125 2070 - Garmin Venu Sq 2 | Owners Manual - Page 73
- Garmin Venu Sq 2 | Owners Manual - Page 74
support.garmin.com March 2023 GUID-C3225F6F-DF15-4404-9E20-05C4FDCD1207 v3
-
 1
1 -
 2
2 -
 3
3 -
 4
4 -
 5
5 -
 6
6 -
 7
7 -
8
-
9
-
10
-
11
-
12
-
13
-
14
-
15
-
16
-
17
-
18
-
19
-
20
-
21
-
22
-
23
-
24
-
25
-
26
-
27
-
28
-
29
-
30
-
31
-
32
-
33
-
34
-
35
-
36
-
37
-
38
-
39
-
40
-
41
-
42
-
43
-
44
-
45
-
46
-
47
-
48
-
49
-
50
-
51
-
52
-
53
-
54
-
55
-
56
-
57
-
58
-
59
-
60
-
61
-
62
-
63
-
64
-
65
-
66
-
67
-
68
-
69
-
70
-
71
-
72
-
73
-
74
 |
 |
VENU
®
SQ 2
Owner’s Manual