Campbell Scientific AVW200 AVW200-series Vibrating Wire Interfaces - Page 19
Quick Start Guides, 3.1 One or Two Sensors (no multiplexers), 3.1.1 Direct RS-232 Connection
 |
View all Campbell Scientific AVW200 manuals
Add to My Manuals
Save this manual to your list of manuals |
Page 19 highlights
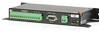
AVW200-series 2-Channel Vibrating Wire Spectrum Analyzer Modules Read more! You can find an example program that converts resistance to temperature in Section 7.1.2, and detailed information about the thermistors in Appendix B. 3. Quick Start Guides The AVW200 can be used in many types of systems-from simple to complex. The following quick start guides provide steps used to set up a system for some example configurations. 3.1 One or Two Sensors (no multiplexers) 3.1.1 Direct RS-232 Connection Sensors AVW200 Datalogger Sensors Power Supply Cable that Comes with Sensor 17855 Pigtailed Cable or 18663 Null Modem Cable 19246 Power Cable For this simple configuration, the AVW200 can be used straight from the box (i.e., settings do not need to be changed in DevConfig). The sensor(s) are attached directly to the AVW200. The AVW200 is connected directly with the datalogger via the 17855 cable or 18663 cable. The 17855 cable terminates in pigtails for connection to datalogger control port pairs (C1/C2...C7/C8). The 18663 Null Modem Cable has a DB9 connector for attachment to the datalogger's RS-232 port. The following steps are used to measure the sensor(s): 1. Attach the vibrating wire sensor(s) to the AVW200 as shown in FIGURE 4-1. 2. Use the 17855 cable to attach the AVW200 to a control port pair on the datalogger (i.e., C1/C2, C3/C4, C5/C6, C7/C8), or use the 18663 Null Modem cable to attach the AVW200 to the RS-232 port on the datalogger. 3. Connect one end of the 19246 power cable to the 12V and G terminals on the AVW200 and the other end to the 12V and G terminals on the datalogger or external power supply. Read more! You can find power connection information in Section 4.2, and datalogger connection information in Section 4.3. 4. Create a CRBasic program that includes an AVW200() instruction for each of the sensors. 11
-
 1
1 -
2
-
3
-
4
-
5
-
6
-
7
-
8
-
9
-
10
-
11
-
12
-
13
-
 14
14 -
 15
15 -
 16
16 -
 17
17 -
 18
18 -
 19
19 -
 20
20 -
 21
21 -
 22
22 -
 23
23 -
 24
24 -
25
-
26
-
27
-
28
-
29
-
30
-
31
-
32
-
33
-
34
-
35
-
36
-
37
-
38
-
39
-
40
-
41
-
42
-
43
-
44
-
45
-
46
-
47
-
48
-
49
-
50
-
51
-
52
-
53
-
54
-
55
-
56
-
57
-
58
-
59
-
60
-
61
-
62
-
63
-
64
-
65
-
66
-
67
-
68
-
69
-
70
-
71
-
72
-
73
-
74
-
75
-
76
-
77
-
78
-
79
-
80
-
81
-
82
-
83
-
84
-
85
-
86
-
87
-
88
-
89
-
90
-
91
-
92
-
93
-
94
-
95
-
96
-
97
-
98
-
99
-
100
-
101
-
102
-
103
-
104
-
105
-
106
-
107
-
108
-
109
-
110
-
111
-
112
 |
 |
