URC MX-350 Owners Manual - Page 3
Getting Started - replacement batteries
 |
View all URC MX-350 manuals
Add to My Manuals
Save this manual to your list of manuals |
Page 3 highlights
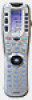
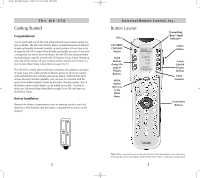
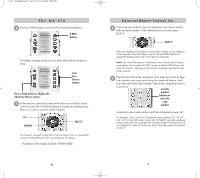
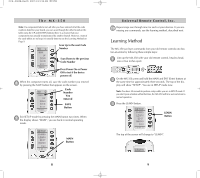
The MX-350 Getting Started Congratulations! You've purchased one of the most advanced and easy to setup control systems available. The MX-350's built-in library includes thousands of different brands and models of remote controls. In most systems, all you have to do to setup the MX-350 is enter which brands and models you own. If you own a component too new to be in the library, the MX-350 uses advanced learning technology to quickly set each MX-350 button, one at at time. Setting up your MX-350 to replace all your existing remote controls can be done in a few minutes. Basic Setup is described on pages 5 to 13. The MX-350's exciting advanced features automate and customize operation in many ways. You could use Macro Setup to power on all of your components and start the show with the press of one button! With the MX-350's unique Favorite Channel capability, you can tune in a channel with the press of one button instead of entering the entire channel number. Any of the button names on the display can be edited as you like. It is best to delay any Advanced Setup (described on pages 14 to 36) until after you finish Basic Setup. Battery Installation Remove the battery compartment cover by pressing up the cover lock. Insert four AAA batteries into the battery compartment as shown in the diagram. -+ +-+ +- 2 Universal Remote Control, Inc. Button Layout TITLE Transmitting "Busy" Signal Indicator* FAVORITE CHANNEL Button LIGHT Button PAGE Buttons change the page of Display Buttons. MAIN Button takes you to the MAIN Menu. Screen Labeled Display Buttons PAGE Numbers FUNCTION Buttons *Note: When a command, macro or favorite channel is being transmitted, an icon will appear in the top right corner of the display. While the MX-350 is "busy", it will ignore a button push. 3
-
 1
1 -
 2
2 -
 3
3 -
 4
4 -
 5
5 -
 6
6 -
 7
7 -
 8
8 -
 9
9 -
10
-
11
-
12
-
13
-
14
-
15
-
16
-
17
-
18
-
19
-
20
-
21
-
22
-
23
-
24
-
25
-
26
-
27
-
28
-
29
-
30
-
31
-
32
-
33
 |
 |
