Panasonic AJ-PX800G Basic Operating Instructions - Page 106
Changing thumbnails, Shot mark, Displaying the number of clips and playback time
 |
View all Panasonic AJ-PX800G manuals
Add to My Manuals
Save this manual to your list of manuals |
Page 106 highlights
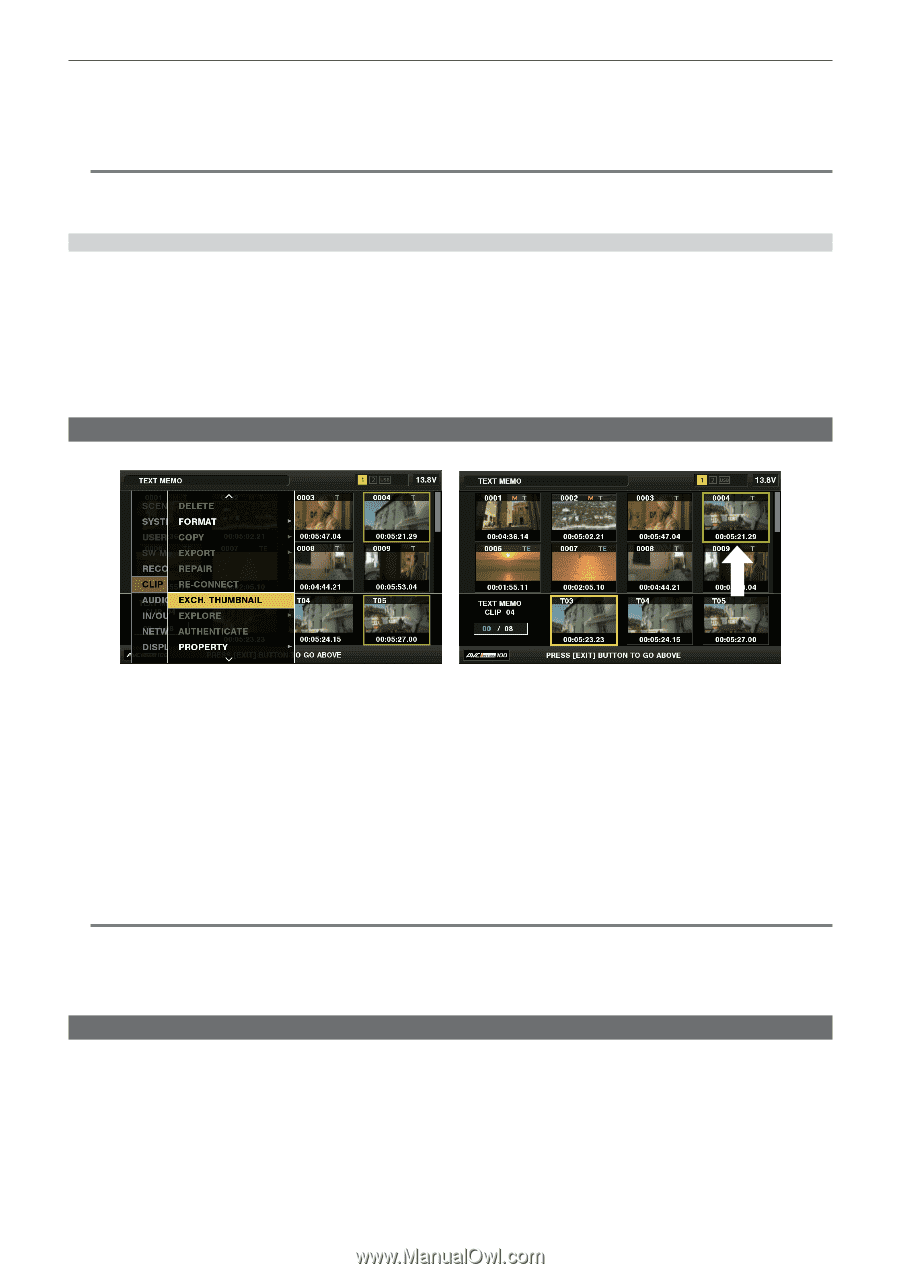
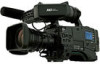
Chapter 5 Playback - Thumbnail operations 3 Press the button to enter the item menu. (Fig. 2) The selected item has a check mark on it. 4 Press the button. Pressing the button will check unchecked items and uncheck items that are already checked. @@NOTE tt Property items can be displayed by selecting [SMALL] in the main menu → [CLIP] → [THUMBNAIL SETUP] → [THUMBNAIL SIZE]. tt A maximum of six items can be displayed at the same time. tt When six items are already selected, all unchecked items cannot be selected. You can change your item selection by unchecking selected items. Displaying the number of clips and playback time Display the number of selected clips and playback time of clip, etc. 1 Select [THUMBNAIL INFO.] from the main menu → [CLIP] → [THUMBNAIL SETUP]. 2 Use the cursor buttons to place the cursor on the item you want to set. [NUM. OF CLIPS]: Displays the number of selected clips. [DUR. OF SEL CLIPS]: Displays the total playback time of selected clips. [TOTAL DURATION]: Displays the total playback time of the displayed clip. 3 Press the button. Changing thumbnails Replace thumbnails with images that include previously attached text memos while images are recorded or played back. Fig. 1 Fig. 2 1 Add text memos to images to be changed. For details on adding text memos, refer to "Text memo recording function" (page 70). 2 Select [TEXT MEMO CLIPS] in the main menu → [CLIP] → [REPOSITION] and display the thumbnails of clips with text memos. 3 Move the cursor over the clip where you want to change the thumbnail and press the button, and then move the cursor to the text memo display on the lower row. 4 Select the thumbnail to be replaced from the text memos, place the cursor on it, and select [EXCH. THUMBNAIL] in the main menu → [CLIP]. (Fig. 1) 5 Press the button, and select [YES] using the cursor buttons on the confirmation screen that is displayed. The menu closes and the thumbnail for the clip is replaced. (Fig. 2) @@NOTE tt You can view the thumbnail position (number of frames from the top of the clip) from the [THUMBNAIL] item of the clip information display. Since thumbnails usually come from the top of the clip, 0 is displayed. tt Even if you change the thumbnail, playback from the thumbnail screen will still start from the beginning of the clip. tt The thumbnail image with the [!] mark may be displayed for clips of a format with a different number of lines and frequencies when displaying a text memo clip without displaying the thumbnail of the text memo position displayed at the bottom section. Shot mark Shot marks can be added to a clip thumbnail to distinguish the clip from other clips. You must assign [SHOT MARK] to the USER button beforehand. For details, refer to "Assigning functions to USER buttons" (page 60). 1 Use the cursor buttons to move the cursor over the clip to which you want to add a shot mark. 2 Press the USER button to which [SHOT MARK] is assigned. ffA shot mark is added to the thumbnail of the clip at the cursor position. ffTo delete a shot mark, place the cursor on the clip again and press the USER button to which [SHOT MARK] is assigned. - 106 -
-
 1
1 -
2
-
3
-
4
-
5
-
6
-
7
-
8
-
9
-
10
-
11
-
12
-
13
-
14
-
15
-
16
-
17
-
18
-
19
-
20
-
21
-
22
-
23
-
24
-
25
-
26
-
27
-
28
-
29
-
30
-
31
-
32
-
33
-
34
-
35
-
36
-
37
-
38
-
39
-
40
-
41
-
42
-
43
-
44
-
45
-
46
-
47
-
48
-
49
-
50
-
51
-
52
-
53
-
54
-
55
-
56
-
57
-
58
-
59
-
60
-
61
-
62
-
63
-
64
-
65
-
66
-
67
-
68
-
69
-
70
-
71
-
72
-
73
-
74
-
75
-
76
-
77
-
78
-
79
-
80
-
81
-
82
-
83
-
84
-
85
-
86
-
87
-
88
-
89
-
90
-
91
-
92
-
93
-
94
-
95
-
96
-
97
-
98
-
99
-
100
-
 101
101 -
 102
102 -
 103
103 -
 104
104 -
 105
105 -
 106
106 -
 107
107 -
 108
108 -
 109
109 -
 110
110 -
 111
111 -
112
-
113
-
114
-
115
-
116
-
117
-
118
-
119
-
120
-
121
-
122
-
123
-
124
-
125
-
126
-
127
-
128
-
129
-
130
-
131
-
132
-
133
-
134
-
135
-
136
-
137
-
138
-
139
-
140
-
141
-
142
-
143
-
144
-
145
-
146
-
147
-
148
-
149
-
150
-
151
-
152
-
153
-
154
-
155
-
156
-
157
-
158
-
159
-
160
-
161
-
162
-
163
-
164
-
165
-
166
-
167
-
168
-
169
-
170
-
171
-
172
-
173
-
174
-
175
-
176
-
177
-
178
-
179
-
180
-
181
-
182
-
183
-
184
-
185
-
186
-
187
-
188
-
189
-
190
-
191
-
192
-
193
-
194
-
195
-
196
-
197
-
198
-
199
-
200
-
201
-
202
-
203
-
204
-
205
-
206
-
207
-
208
-
209
-
210
-
211
-
212
-
213
-
214
-
215
-
216
-
217
-
218
-
219
-
220
 |
 |