LiftMaster CAPXLV2 Installation Manual - English French Spanish - Page 19
Door Access, Request To Exit, Supervised Door Status, Primary Relay, Auxiliary Relay, Wiegand
 |
View all LiftMaster CAPXLV2 manuals
Add to My Manuals
Save this manual to your list of manuals |
Page 19 highlights
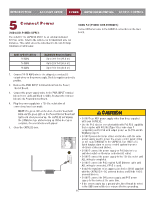
INTRODUCTION ACCOUNT SETUP POWER NETWORK/MOUNTING ACCESS CONTROL Door Access Disconnect power BEFORE making electrical connections. Below is an example of a wiring setup for door access. Door access can be wired to Relay 1, 2, 3, or 4 on the Door of Control Board. Input and output port functions on CAPXLV2 can be configured via myQ Community web portal. Below is an example use case of connections to various external devices. 12Vdc - red GROUND - black DATA 0 - green DATA 1 - white GREEN LED - orange RED LED - brown RFID ANTENNA with Wiegand output WIEGAND KEYPAD READER NOTE: The length of the unshielded wires should be kept to a minimum to avoid electrical noise. Power for RFID ANTENNA (Not Provided) DO NOT use the power supply for the controller OR NOTE: For the LiftMaster RFID reader, follow the wiring diagram in the manual for the LMSC1000. OR NOTE: For KPR2000 keypad, wire the pink and black (ground) wires together. REQUEST TO EXIT PROXIMITY PUSH SENSOR BUTTON NOTE: When wiring a LiftMaster Smart Reader, follow the wiring diagram colors in the Smart Reader install guide. Do not use the color guide here. SUPERVISED (DOOR STATUS) OR DOOR SENSOR (SUPERVISED) OR DOOR SENSOR (NON-SUPERVISED) EOL (End of Line) Resistor (1k ohm) *PRIMARY RELAY DOOR STRIKE For AC Power: Install a Siemens S10K30MOV (Metal Oxide Varistor) (provided) or equivalent Power for Door Strike (Not Provided) Use 18-22 AWG COMMON + REQUEST TO EXIT COMMON SUPERVISED NORMALLY OPEN COMMON NORMALLY CLOSED NORMALLY OPEN COMMON - - NORMALLY OPEN For DC Power: Install a 1N4005 diode or equivalent OR MAGLOCK For AC Power: Install a Siemens S10K30MOV (Metal Oxide Varistor) (provided) or equivalent Use 18-22 AWG NORMALLY CLOSED For DC Power: Install a 1N4005 diode or equivalent COMMON + Power for Maglock (Not Provided) DO NOT use the power supply for the controller AUXILIARY RELAY Low Voltage Power Supply LIGHT NEUTRAL Isolation Relay LOAD LINE NOTE: DO NOT run high voltage power within OR the CAPXL enclosure. ALARM BYPASS COMMON NORMALLY OPEN 19 * NOTE: MAGLOCK, door strike and ALARM BYPASS not evaluated by UL.
-
 1
1 -
2
-
3
-
4
-
5
-
6
-
7
-
8
-
9
-
10
-
11
-
12
-
13
-
 14
14 -
 15
15 -
 16
16 -
 17
17 -
 18
18 -
 19
19 -
 20
20 -
 21
21 -
 22
22 -
 23
23 -
 24
24 -
25
-
26
-
27
-
28
-
29
-
30
-
31
-
32
-
33
-
34
-
35
-
36
-
37
-
38
-
39
-
40
-
41
-
42
-
43
-
44
-
45
-
46
-
47
-
48
-
49
-
50
-
51
-
52
-
53
-
54
-
55
-
56
-
57
-
58
-
59
-
60
-
61
-
62
-
63
-
64
-
65
-
66
-
67
-
68
-
69
-
70
-
71
-
72
-
73
-
74
-
75
-
76
-
77
-
78
-
79
-
80
-
81
-
82
-
83
-
84
 |
 |
