LiftMaster CAPXLV Installation Manual - English French Spanish - Page 14
Install Antennas, Security+ 2.0, Radio Antenna if applicable, Wi-Fi
 |
View all LiftMaster CAPXLV manuals
Add to My Manuals
Save this manual to your list of manuals |
Page 14 highlights
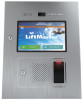
INTRODUCTION PRE-INSTALL INSTALL NETWORK ACCESS CONTROL 3 Install Antennas The Security+ 2.0® radio antenna and Wi-Fi® antennas must be a minimum of 8 inches (20 cm) apart. Install the antennas on opposite sides of the CAPXL / CAPXLV. Optional antenna cable kits are available for remote antenna mounting (refer to accessories). Security+ 2.0® Radio Antenna (if applicable) Used with LiftMaster Passport Security+ 2.0® and wireless communication with LiftMaster UL325 2016 compliant gate operators. 1. Remove 3/8" knockout on the side or back of the CAPXL / CAPXLV. Security+ 2.0® Radio Antenna 2. Secure the radio ON antenna to the desired knockout on the CAPXL / CAPXLV. 3. Connect the radio antenna cable to the Power/Internet Board as shown. Power/Internet Board Wi-Fi® Antenna (if applicable) Used for Wi-Fi® Internet. 1. Remove 1/4" knockout on the side or back of the module. 2. Secure the Wi-Fi® antenna to the desired knockout on the CAPXL / CAPXLV with the ON provided gasket, washer, and nut. 3. Connect the Wi-Fi® antenna cable to the control board as shown. Wi-Fi® Antenna Control Board 14
-
 1
1 -
2
-
3
-
4
-
5
-
6
-
7
-
8
-
 9
9 -
 10
10 -
 11
11 -
 12
12 -
 13
13 -
 14
14 -
 15
15 -
 16
16 -
 17
17 -
 18
18 -
 19
19 -
20
-
21
-
22
-
23
-
24
-
25
-
26
-
27
-
28
-
29
-
30
-
31
-
32
-
33
-
34
-
35
-
36
-
37
-
38
-
39
-
40
-
41
-
42
-
43
-
44
-
45
-
46
-
47
-
48
-
49
-
50
-
51
-
52
-
53
-
54
-
55
-
56
-
57
-
58
-
59
-
60
-
61
-
62
-
63
-
64
-
65
-
66
-
67
-
68
-
69
-
70
-
71
-
72
-
73
-
74
-
75
-
76
-
77
-
78
-
79
-
80
-
81
-
82
-
83
-
84
-
85
-
86
-
87
-
88
-
89
-
90
-
91
-
92
 |
 |
