Epson LS100 Operation Guide - EasyMP Network Updater v1.24 - Page 43
Add Schedule/Change Schedule Screen, Change Schedule
 |
View all Epson LS100 manuals
Add to My Manuals
Save this manual to your list of manuals |
Page 43 highlights
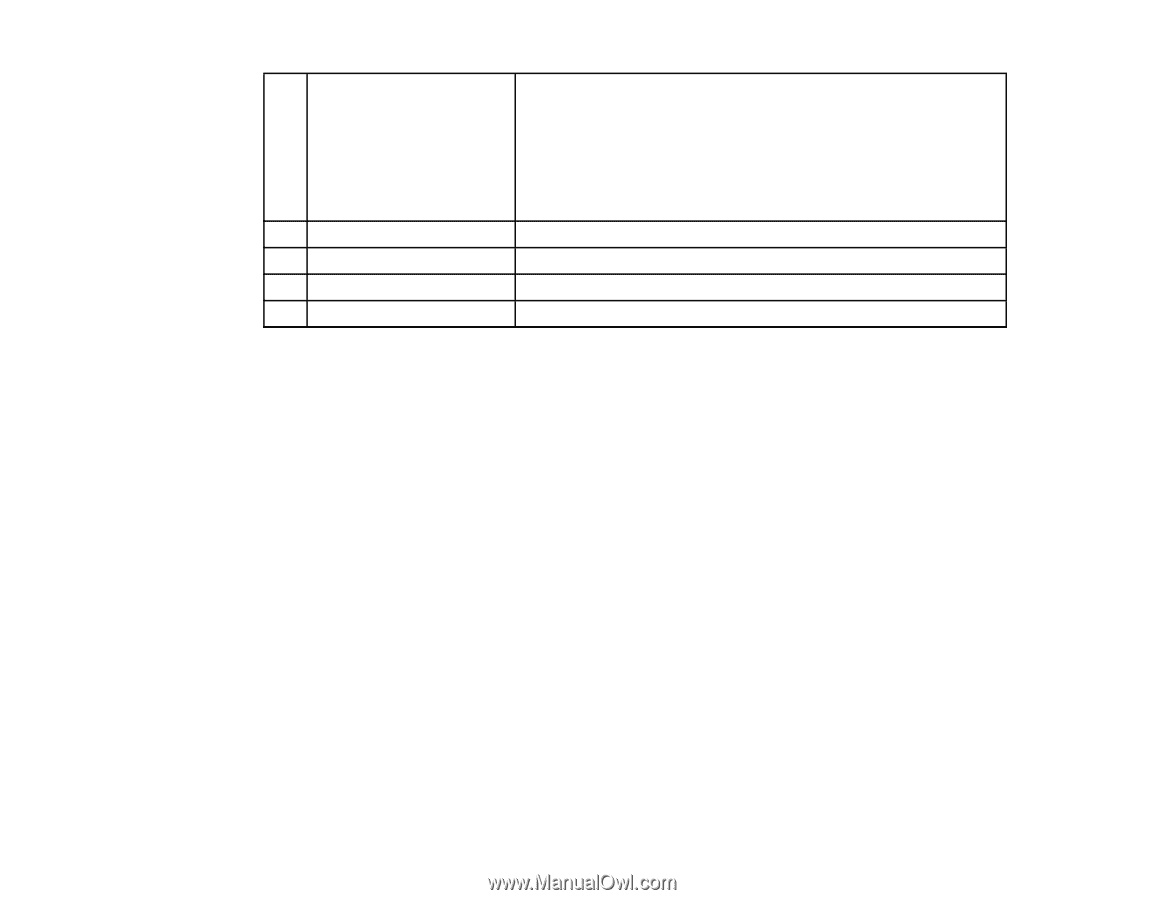
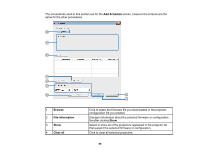
11 Status 12 Delete 13 Cancel 14 Change 15 Add Displays the status of the schedule. Waiting: An update schedule has been registered. Executing: The firmware or configuration is being updated. Finish: The firmware or configuration has finished updating. Error: An error occurred during the update and the firmware or configuration could not be updated. Click to delete an update schedule. Click to cancel an update schedule. Click to change an update schedule. Click to display the Add Schedule screen. Parent topic: Screen Summary Related references Error Status Related tasks Restricting the Use of the Application Setting the Password Updating the Firmware Copying Projector Menu Settings Using Batch Setup Changing an Update Schedule Canceling an Update Schedule Deleting an Update Schedule Related topics Making a Projector List Add Schedule/Change Schedule Screen You can display these screens by performing one of the following operations. • To display the Add Schedule screen, click Add on the main screen. • To display the Change Schedule screen, click Change on the main screen. 43
-
 1
1 -
2
-
3
-
4
-
5
-
6
-
7
-
8
-
9
-
10
-
11
-
12
-
13
-
14
-
15
-
16
-
17
-
18
-
19
-
20
-
21
-
22
-
23
-
24
-
25
-
26
-
27
-
28
-
29
-
30
-
31
-
32
-
33
-
34
-
35
-
36
-
37
-
 38
38 -
 39
39 -
 40
40 -
 41
41 -
 42
42 -
 43
43 -
 44
44 -
 45
45 -
 46
46 -
 47
47 -
 48
48 -
49
-
50
-
51
-
52
-
53
-
54
 |
 |