Rane HAL1x Installation Guide - Page 7
Getting Started, The Installation Workflow
 |
View all Rane HAL1x manuals
Add to My Manuals
Save this manual to your list of manuals |
Page 7 highlights
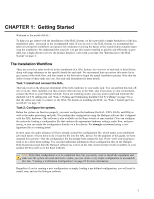
CHAPTER 1: Getting Started Welcome to the world of HAL! To help you get started with the installation of the HAL System, we have provided a simple breakdown of the key installation tasks-presented in the recommended order. If you are new to the HAL System, we recommend that (after reviewing this workflow) you spend a few moments reviewing the basics of the system before actually beginning the installation. We understand that your job is to get this system installed as quickly and efficiently as possible, but a slight detour to review the product details is well worth your time. See "Introduction to the HAL System" on page 4. The Installation Workflow There are seven key tasks involved in the installation of a HAL System. An overview of each task is listed below, along with page references to the specific details for each task. We recommend that you review this entire list to get a sense of the work flow, and then return to the first task to begin the actual installation process. Note that the order of some of these tasks can vary. See each task description for more details. Task 1: Install and connect the HAL. This task involves the physical attachment of the HAL hardware to your audio rack. You can perform this task offsite or on-site. Once installed, you then connect other devices to the HAL and, if necessary in your environment, connect the HAL to your Ethernet network. If you are installing onsite, you may want to pull and terminate the shielded CAT 5e cabling first (see "Task 3: Pulling and Terminating shielded CAT 5e Cabling" on page 76) so that the cables are ready to connect to the HAL. For details on installing the HAL, see "Task 1: Install and Connect HAL" on page 72. Task 2: Configure the system. Before the system can function properly, you must configure the hardware (the HAL, EXPs, RADs, and DRs) as well as the audio processing and path. You perform this configuration using the Halogen software that is shipped with the HAL hardware. (The software is also available on the Rane website at rane.com/hal.) You can configure the system by loading a configuration file that contains the appropriate hardware settings, audio flow, and processing; or you can create the configuration directly on a live device. We strongly recommend using a configuration file as a starting point! In most cases, the audio designer will have already created this configuration file, which makes your installation job much easier. All you have to do is load the file into the HAL device. For the purposes of this guide, we have assumed this scenario-that the configuration file has already been created for you. If not-well, you're going to need to do a little more reading. You can find additional information about configuration files in the Halogen Help System (accessed from the Halogen software) as well as in the HAL System Design Guide (available on your product DVD as well as on the Rane website). NOTE: If the final configuration is to be completed later, but you merely want to install the equipment and make sure the system can send and receive audio, you can create a very simple configuration to accomplish this. See "Creating a Verification Configuration" on page 85 for more information. Regardless if you're creating a new configuration or simply loading a pre-defined configuration, you will need to install, start, and use the Halogen software. 1
-
 1
1 -
 2
2 -
 3
3 -
 4
4 -
 5
5 -
 6
6 -
 7
7 -
 8
8 -
 9
9 -
 10
10 -
 11
11 -
 12
12 -
13
-
14
-
15
-
16
-
17
-
18
-
19
-
20
-
21
-
22
-
23
-
24
-
25
-
26
-
27
-
28
-
29
-
30
-
31
-
32
-
33
-
34
-
35
-
36
-
37
-
38
-
39
-
40
-
41
-
42
-
43
-
44
-
45
-
46
-
47
-
48
-
49
-
50
-
51
-
52
-
53
-
54
-
55
-
56
-
57
-
58
-
59
-
60
-
61
-
62
-
63
-
64
-
65
-
66
-
67
-
68
-
69
-
70
-
71
-
72
-
73
-
74
-
75
-
76
-
77
-
78
-
79
-
80
-
81
-
82
-
83
-
84
-
85
-
86
-
87
-
88
-
89
-
90
-
91
-
92
-
93
-
94
-
95
-
96
-
97
-
98
-
99
-
100
-
101
-
102
-
103
-
104
-
105
-
106
-
107
-
108
-
109
-
110
-
111
-
112
-
113
-
114
-
115
-
116
-
117
-
118
-
119
-
120
-
121
-
122
-
123
-
124
-
125
-
126
-
127
-
128
 |
 |
