HP D2D4009fc HP StoreOnce Enterprise Manager User Guide (TC458-96012, December - Page 90
Report At, Select ServiceSet, Select Interface, Search, Clear, Period, Window
 |
View all HP D2D4009fc manuals
Add to My Manuals
Save this manual to your list of manuals |
Page 90 highlights
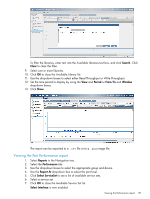
3. Use the drop-down boxes to select the appropriate group and device. 4. Use the Report At drop-down box to select the NAS share level. 5. Click Select ServiceSet to see a list of available service sets. 6. Select a service set. 7. Click OK to close the Available Service Set list. Select Interface is now enabled. 8. Click Select Interface to see a list of available NAS shares. To filter the NAS shares, enter text into the Available NAS Shares text box, and click Search. Click Clear to clear the filter. 9. Select one or more NAS shares. 10. Click OK to close the Available NAS Shares list. 11. Use the drop-down boxes to select either Read Throughput or Write Throughput. 12. Set the time period to display by using the View and Period or From/To and Window drop-down boxes. 13. Click Show. The report can be exported to a .csv file or to a .png image file. 90 Accessing and viewing reports
-
 1
1 -
2
-
3
-
4
-
5
-
6
-
7
-
8
-
9
-
10
-
11
-
12
-
13
-
14
-
15
-
16
-
17
-
18
-
19
-
20
-
21
-
22
-
23
-
24
-
25
-
26
-
27
-
28
-
29
-
30
-
31
-
32
-
33
-
34
-
35
-
36
-
37
-
38
-
39
-
40
-
41
-
42
-
43
-
44
-
45
-
46
-
47
-
48
-
49
-
50
-
51
-
52
-
53
-
54
-
55
-
56
-
57
-
58
-
59
-
60
-
61
-
62
-
63
-
64
-
65
-
66
-
67
-
68
-
69
-
70
-
71
-
72
-
73
-
74
-
75
-
76
-
77
-
78
-
79
-
80
-
81
-
82
-
83
-
84
-
 85
85 -
 86
86 -
 87
87 -
 88
88 -
 89
89 -
 90
90 -
 91
91 -
 92
92 -
 93
93 -
 94
94 -
 95
95 -
96
-
97
-
98
-
99
-
100
-
101
-
102
-
103
-
104
-
105
-
106
-
107
-
108
-
109
-
110
-
111
-
112
-
113
-
114
-
115
-
116
-
117
-
118
-
119
-
120
-
121
-
122
-
123
-
124
-
125
-
126
-
127
-
128
-
129
-
130
-
131
-
132
-
133
-
134
-
135
-
136
-
137
-
138
-
139
-
140
-
141
-
142
-
143
-
144
-
145
-
146
-
147
-
148
-
149
-
150
-
151
-
152
-
153
-
154
-
155
-
156
-
157
-
158
-
159
-
160
 |
 |
