Epson TM-T88IV TM-T88IV Technical Reference Guide - Page 69
Attaching/Removing the Connector Cover
 |
View all Epson TM-T88IV manuals
Add to My Manuals
Save this manual to your list of manuals |
Page 69 highlights
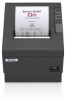
Chapter 4 Handling Attaching/Removing the Connector Cover Attaching the Connector Cover 1 Connect all the cables. The connector cover has three possible cable exits: on the right, left, and back. 2 Position the two hooks on the connector cover so that they hook the holes on the printer case. Push the connector cover down until it clicks. Hooks 4 Removing the Connector Cover Place the printer with its bottom up. While pushing the both sides of the connector cover toward inside, push it down to detach the two hooks on it from the printer case. 69
-
 1
1 -
2
-
3
-
4
-
5
-
6
-
7
-
8
-
9
-
10
-
11
-
12
-
13
-
14
-
15
-
16
-
17
-
18
-
19
-
20
-
21
-
22
-
23
-
24
-
25
-
26
-
27
-
28
-
29
-
30
-
31
-
32
-
33
-
34
-
35
-
36
-
37
-
38
-
39
-
40
-
41
-
42
-
43
-
44
-
45
-
46
-
47
-
48
-
49
-
50
-
51
-
52
-
53
-
54
-
55
-
56
-
57
-
58
-
59
-
60
-
61
-
62
-
63
-
 64
64 -
 65
65 -
 66
66 -
 67
67 -
 68
68 -
 69
69 -
 70
70 -
 71
71 -
 72
72 -
 73
73 -
 74
74 -
75
-
76
-
77
-
78
-
79
-
80
-
81
-
82
-
83
-
84
-
85
-
86
-
87
-
88
-
89
-
90
-
91
-
92
-
93
-
94
-
95
-
96
-
97
-
98
-
99
-
100
-
101
-
102
-
103
-
104
 |
 |

Chapter 4
Handling
69
4
Attaching/Removing the Connector Cover
Attaching the Connector Cover
1
Connect all the cables.
The co
nn
ec
t
or cover has
t
hree poss
i
ble cable ex
it
s: o
n
t
he r
ig
h
t
, lef
t
, a
n
d back.
2
Position the two hooks on the connector cover so that they hook the
holes on the printer case. Push the connector cover down until it clicks.
Removing the Connector Cover
Place
t
he pr
int
er w
it
h
it
s bo
tt
om
u
p. Wh
i
le p
u
sh
ing
t
he bo
t
h s
i
des of
t
he co
nn
ec
t
or cover
t
oward
in
s
i
de, p
u
sh
it
dow
n
t
o de
t
ach
t
he
t
wo hooks o
n
it
from
t
he pr
int
er case.
Hooks