DeLonghi ESAM6620 Owner Manual - Page 13
Turning The Appliance On, Turning The Appliance Off, Changing The Menu Settings
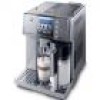 |
View all DeLonghi ESAM6620 manuals
Add to My Manuals
Save this manual to your list of manuals |
Page 13 highlights
Please note: When using the appliance for the first time, you need to make 4-5 cups of coffee or 4-5 cappuccinos before the appliance starts to give satisfactory results. TURNING THE APPLIANCE ON Please note: Before turning the appliance on, make sure the main switch at the back of the appliance is in the I position (fig. 1). Each time the appliance is turned on, it performs an automatic preheat and rinse cycle which cannot be interrupted. The appliance is ready for use only after completion of this cycle. Danger of burns! During rinsing, a little hot water flows from the coffee spouts and is collected in the drip tray. Avoid contact with splashes of water. • To turn the appliance on, press the button (fig. 5). The message "HEATING UP PLEASE WAIT" is displayed. After heating, the message "RINSING..." is displayed. As well as heating the boiler, the appliance also heats the internal circuits by circulating hot water. The appliance is at temperature when the message "READY" is displayed. TURNING THE APPLIANCE OFF Each time the appliance is turned off, it performs an automatic rinse cycle which cannot be interrupted. Danger of burns! During rinsing, a little hot water flows from the coffee spouts. Avoid contact with splashes of water. To turn the appliance off, press the button (fig. 5). The appliance performs the rinse cycle then goes off. Please note: If the appliance is not used for an extended period, place the main switch on the back of the appliance in the 0 position (fig. 6). CHANGING THE MENU SETTINGS Press the P button to access the programming menu. The following items can be selected: Clock, Auto-start, Auto-start time, Descale, Temperature, Auto-off, Water hardness, Default values, Beep ON/OFF, Energy saving. Energy Saving Use this function to enable or disable energy saving mode. When enabled, the function reduces energy consumption. • Press the P button. • Press the button (corresponding to the symbol flashing on the display) repeatedly until the menu arrow is on "ENERGY SAVING". • Press the button (corresponding to the SET symbol flashing on the display) to modify the function (the appliance displays ENERGY SAVING YES or ENERGY SAVING NO); • Press the OK button to confirm the function; • Press the P icon to exit the menu. When the function is enabled, if the appliance is not used for about 1 minute, "Energy Saving" is displayed. Please note: • A few seconds may elapse between "Energy Saving" mode and delivery of the first drink. This is indicated by the display of the message "Preparation in progress". • When "Energy Saving" is disabled, the appliance turns the cup warmer on automatically. Setting the clock To set the time displayed, proceed as follows: • Press the P button. • Press the button (corresponding to the SET symbol flashing on the display) to set the time on the clock. (If you hold the button down, the time changes rapidly). • Press the OK button to confirm; • Press the P button (corresponding to the ESC symbol flashing on the display) to exit programming mode or to change other parameters. 11
-
 1
1 -
2
-
3
-
4
-
5
-
6
-
7
-
 8
8 -
 9
9 -
 10
10 -
 11
11 -
 12
12 -
 13
13 -
 14
14 -
 15
15 -
 16
16 -
 17
17 -
 18
18 -
19
-
20
-
21
-
22
-
23
-
24
-
25
 |
 |
