Lenovo ThinkServer TD200x Hardware Maintenance Manual for TD200x - Page 161
Installing the left-side cover, Opening the power-supply cage
 |
View all Lenovo ThinkServer TD200x manuals
Add to My Manuals
Save this manual to your list of manuals |
Page 161 highlights
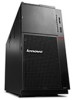
3. Turn off the server and all attached devices. 4. Disconnect all external cables and power cords. 5. Using the supplied key, unlock the left-side cover. 6. Pull the cover-release latch down and rotate the top edge of the cover away from the server. Attention: For proper cooling and airflow, replace the cover before you turn on the server. Operating the server for extended periods of time (more than 30 minutes) with the cover removed might damage server components. 7. Remove the left-side cover from the server. Installing the left-side cover 000 000 000000 000000 000000 000000 000000 000000 000000 000000 000000 To install the left-side cover, complete the following steps: 1. Set the bottom edge of the left-side cover on the bottom ledge of the server. 2. Rotate the top edge of the cover toward the server and press inward on the cover until it clicks into place. 3. Lock the cover, using the key that comes with the server. Opening the power-supply cage Opening the power-supply cage allows access to the air baffle, microprocessors, and DIMMs. To open the power-supply cage, do the following: 1. Read the safety information that begins on page Safety information. 2. Turn off the server and peripheral devices, and disconnect the power cords and all external cables. 3. Press the release latch on the power supplies and filler panels and pull them out of the power-supply cage. Chapter 7. Installing optional devices and replacing customer replaceable units 153
-
 1
1 -
2
-
3
-
4
-
5
-
6
-
7
-
8
-
9
-
10
-
11
-
12
-
13
-
14
-
15
-
16
-
17
-
18
-
19
-
20
-
21
-
22
-
23
-
24
-
25
-
26
-
27
-
28
-
29
-
30
-
31
-
32
-
33
-
34
-
35
-
36
-
37
-
38
-
39
-
40
-
41
-
42
-
43
-
44
-
45
-
46
-
47
-
48
-
49
-
50
-
51
-
52
-
53
-
54
-
55
-
56
-
57
-
58
-
59
-
60
-
61
-
62
-
63
-
64
-
65
-
66
-
67
-
68
-
69
-
70
-
71
-
72
-
73
-
74
-
75
-
76
-
77
-
78
-
79
-
80
-
81
-
82
-
83
-
84
-
85
-
86
-
87
-
88
-
89
-
90
-
91
-
92
-
93
-
94
-
95
-
96
-
97
-
98
-
99
-
100
-
101
-
102
-
103
-
104
-
105
-
106
-
107
-
108
-
109
-
110
-
111
-
112
-
113
-
114
-
115
-
116
-
117
-
118
-
119
-
120
-
121
-
122
-
123
-
124
-
125
-
126
-
127
-
128
-
129
-
130
-
131
-
132
-
133
-
134
-
135
-
136
-
137
-
138
-
139
-
140
-
141
-
142
-
143
-
144
-
145
-
146
-
147
-
148
-
149
-
150
-
151
-
152
-
153
-
154
-
155
-
 156
156 -
 157
157 -
 158
158 -
 159
159 -
 160
160 -
 161
161 -
 162
162 -
 163
163 -
 164
164 -
 165
165 -
 166
166 -
167
-
168
-
169
-
170
-
171
-
172
-
173
-
174
-
175
-
176
-
177
-
178
-
179
-
180
-
181
-
182
-
183
-
184
-
185
-
186
-
187
-
188
-
189
-
190
-
191
-
192
-
193
-
194
-
195
-
196
-
197
-
198
-
199
-
200
-
201
-
202
-
203
-
204
-
205
-
206
-
207
-
208
-
209
-
210
-
211
-
212
-
213
-
214
-
215
-
216
-
217
-
218
-
219
-
220
-
221
-
222
-
223
-
224
-
225
-
226
-
227
-
228
-
229
-
230
-
231
-
232
-
233
-
234
-
235
-
236
-
237
-
238
-
239
-
240
-
241
-
242
-
243
-
244
-
245
-
246
-
247
-
248
-
249
-
250
-
251
-
252
-
253
-
254
-
255
-
256
-
257
-
258
-
259
-
260
-
261
-
262
-
263
-
264
-
265
-
266
-
267
-
268
-
269
-
270
-
271
-
272
-
273
-
274
-
275
-
276
-
277
-
278
-
279
-
280
-
281
-
282
-
283
-
284
-
285
-
286
-
287
-
288
-
289
-
290
 |
 |
