Invacare R51 Owners Manual - Page 44
BACK, Changing the Back Angle
 |
View all Invacare R51 manuals
Add to My Manuals
Save this manual to your list of manuals |
Page 44 highlights
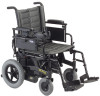
SECTION 8-BACK 3. Position the back angle plate to one of six back angles. Refer to Detail "A" of FIGURE 8.3. 4. Reinstall the front hex screw and washer, securely tighten with locknut. Refer to FIGURE 8.3 for correct hardware orientation. 5. Securely tighten the rear hex screw that secures the back adjustment plate to the wheelchair frame. Back Angle Plate Rear Hex Screw (Loosen, but do not Remove) Detail "A" Washer Locknut Front Hex Screw Wheelchair Frame Back Angle Plate Back Angles 85º 90º 95º 100º 105º 110º FIGURE 8.3 Changing the Back Angle R51™and R51LXP 44 Part No. 1106645
-
 1
1 -
2
-
3
-
4
-
5
-
6
-
7
-
8
-
9
-
10
-
11
-
12
-
13
-
14
-
15
-
16
-
17
-
18
-
19
-
20
-
21
-
22
-
23
-
24
-
25
-
26
-
27
-
28
-
29
-
30
-
31
-
32
-
33
-
34
-
35
-
36
-
37
-
38
-
 39
39 -
 40
40 -
 41
41 -
 42
42 -
 43
43 -
 44
44 -
 45
45 -
 46
46 -
 47
47 -
 48
48 -
 49
49 -
50
-
51
-
52
-
53
-
54
-
55
-
56
-
57
-
58
-
59
-
60
-
61
-
62
-
63
-
64
-
65
-
66
-
67
-
68
-
69
-
70
-
71
-
72
-
73
-
74
-
75
-
76
 |
 |

SECTION 8—BACK
R51™and R51LXP
44
Part No. 1106645
3.
Position the back angle plate to one of six back angles. Refer to Detail “A” of
FIGURE 8.3.
4.
Reinstall the front hex screw and washer, securely tighten with locknut. Refer to
FIGURE 8.3 for correct hardware orientation.
5.
Securely tighten the rear hex screw that secures the back adjustment plate to the
wheelchair frame.
FIGURE 8.3
Changing the Back Angle
Back
Angle
Plate
Rear Hex
Screw
(Loosen, but
do not
Remove)
Wheelchair
Frame
Locknut
Washer
Back Angles
85º
90º
95º
100º
105º
110º
Front
Hex
Screw
Back
Angle
Plate
Detail “A”