2006 Polaris Scrambler 500 2x4 Owners Manual - Page 92
2006 Polaris Scrambler 500 2x4 Manual

Page 92 highlights
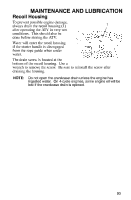
Lights MAINTENANCE AND LUBRICATION Taillight/Brakelight Lamp Replacement If the taillight/brakelight does not work the lamp may need to be replaced. 1. Remove the taillight lens cover mounting screws. Remove the lens cover and gasket and set aside for reassembly. 2. Remove the lamp (1). 3. Apply dielectric grease to the socket and install the new 1 lamp. 4. Test the taillight/brakelight for proper operation. 5. Reinstall the gasket and lens cover. Indicator Lamp Replacement 1. Remove the instrument panel, if necessary, to access the back of the indicator panel. 2. Using a small, straight-blade screwdriver, turn the base of the bulb 1/4 turn counterclockwise. 3. Using a needle-nose plier or similar tool, pull the lamp out of the indicator panel housing. 4. Insert the new bulb and seat it by turning it 1/4 turn clockwise. 5. Reinstall the instrument panel if removed. 89
-
 1
1 -
2
-
3
-
4
-
5
-
6
-
7
-
8
-
9
-
10
-
11
-
12
-
13
-
14
-
15
-
16
-
17
-
18
-
19
-
20
-
21
-
22
-
23
-
24
-
25
-
26
-
27
-
28
-
29
-
30
-
31
-
32
-
33
-
34
-
35
-
36
-
37
-
38
-
39
-
40
-
41
-
42
-
43
-
44
-
45
-
46
-
47
-
48
-
49
-
50
-
51
-
52
-
53
-
54
-
55
-
56
-
57
-
58
-
59
-
60
-
61
-
62
-
63
-
64
-
65
-
66
-
67
-
68
-
69
-
70
-
71
-
72
-
73
-
74
-
75
-
76
-
77
-
78
-
79
-
80
-
81
-
82
-
83
-
84
-
85
-
86
-
 87
87 -
 88
88 -
 89
89 -
 90
90 -
 91
91 -
 92
92 -
 93
93 -
 94
94 -
 95
95 -
 96
96 -
 97
97 -
98
-
99
-
100
-
101
-
102
-
103
-
104
-
105
-
106
-
107
-
108
-
109
-
110
-
111
-
112
-
113
-
114
-
115
-
116
-
117
-
118
-
119
-
120
-
121
-
122
 |
 |
