2006 Polaris 600 Switchback Owners Manual - Page 97
2006 Polaris 600 Switchback Manual

Page 97 highlights
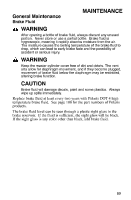
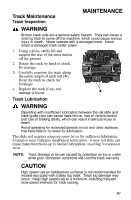
MAINTENANCE General Maintenance Drive Belt Installation 1. Drop the drive belt over the drive clutch and pull back the slack. NOTE: To ensure satisfactory belt life, install belts so they operate in the same direction of rotation by positioning the identification numbers so that you can read them. If required, separate the sheaves as outlined in the belt removal procedures. 2. Rotate the L-wrench counter-clockwise to tighten the sheaves while working the belt to the outer edge of the sheaves. 3. Remove the wrench and store it in the tool kit. 4. Reinstall the side panel. 5. Close and secure the hood. 94
-
 1
1 -
2
-
3
-
4
-
5
-
6
-
7
-
8
-
9
-
10
-
11
-
12
-
13
-
14
-
15
-
16
-
17
-
18
-
19
-
20
-
21
-
22
-
23
-
24
-
25
-
26
-
27
-
28
-
29
-
30
-
31
-
32
-
33
-
34
-
35
-
36
-
37
-
38
-
39
-
40
-
41
-
42
-
43
-
44
-
45
-
46
-
47
-
48
-
49
-
50
-
51
-
52
-
53
-
54
-
55
-
56
-
57
-
58
-
59
-
60
-
61
-
62
-
63
-
64
-
65
-
66
-
67
-
68
-
69
-
70
-
71
-
72
-
73
-
74
-
75
-
76
-
77
-
78
-
79
-
80
-
81
-
82
-
83
-
84
-
85
-
86
-
87
-
88
-
89
-
90
-
91
-
 92
92 -
 93
93 -
 94
94 -
 95
95 -
 96
96 -
 97
97 -
 98
98 -
 99
99 -
 100
100 -
 101
101 -
 102
102 -
103
-
104
-
105
-
106
-
107
-
108
-
109
-
110
-
111
-
112
-
113
-
114
-
115
-
116
-
117
-
118
-
119
-
120
-
121
-
122
-
123
-
124
-
125
-
126
-
127
 |
 |

94
MAINTENANCE
General Maintenance
Drive Belt Installation
1.
Drop the drive belt over the
drive clutch and pull back the
slack.
NOTE:
To ensure satisfactory belt
life, install belts so they
operate in the same
direction of rotation by
positioning the
identification numbers so
that you can read them. If
required, separate the
sheaves as outlined in the
belt removal procedures.
2.
Rotate the L-wrench counter-clockwise to tighten the sheaves
while working the belt to the outer edge of the sheaves.
3.
Remove the wrench and store it in the tool kit.
4.
Reinstall the side panel.
5.
Close and secure the hood.