2014 Honda CR-V 2014 CR-V Navigation Manual - Page 126
2014 Honda CR-V Manual

Page 126 highlights
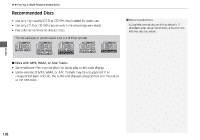
Playing a Disc Selecting Disc Mode 1. Press the CD/XM button. 2. Insert a disc into the disc slot. The disc automatically begins playing. 1 Playing a Disc d "Display audio screen" You can control the disc using voice commands. 2 Disc Commands P. 202 A visual guide helps you operate the audio system. 2 System Controls P. 4 2 Basic Operation P. 6 Audio 3. Select AUDIO/STREET until AUDIO is highlighted in blue. 4. Select c or x to select a track. You can also select a track using the SEEK/SKIP button. The track number and elapsed time are displayed on the display. Text information stored on MP3/WMA/AAC discs is also displayed. In some cases, the name of the artist, album, or track may not appear correctly. Do not use discs with adhesive labels. The label can cause the disc to jam in the unit. WMA tracks protected by digital rights management (DRM) cannot be played. The audio system displays Unplayable File, then skips to the next track. If there is a problem, you may see an error message on the display. 2 Error Messages P. 181 If you eject the disc but do not remove it from the slot, the system reloads the disc automatically after several seconds. Audio control 125
-
 1
1 -
2
-
3
-
4
-
5
-
6
-
7
-
8
-
9
-
10
-
11
-
12
-
13
-
14
-
15
-
16
-
17
-
18
-
19
-
20
-
21
-
22
-
23
-
24
-
25
-
26
-
27
-
28
-
29
-
30
-
31
-
32
-
33
-
34
-
35
-
36
-
37
-
38
-
39
-
40
-
41
-
42
-
43
-
44
-
45
-
46
-
47
-
48
-
49
-
50
-
51
-
52
-
53
-
54
-
55
-
56
-
57
-
58
-
59
-
60
-
61
-
62
-
63
-
64
-
65
-
66
-
67
-
68
-
69
-
70
-
71
-
72
-
73
-
74
-
75
-
76
-
77
-
78
-
79
-
80
-
81
-
82
-
83
-
84
-
85
-
86
-
87
-
88
-
89
-
90
-
91
-
92
-
93
-
94
-
95
-
96
-
97
-
98
-
99
-
100
-
101
-
102
-
103
-
104
-
105
-
106
-
107
-
108
-
109
-
110
-
111
-
112
-
113
-
114
-
115
-
116
-
117
-
118
-
119
-
120
-
 121
121 -
 122
122 -
 123
123 -
 124
124 -
 125
125 -
 126
126 -
 127
127 -
 128
128 -
 129
129 -
 130
130 -
 131
131 -
132
-
133
-
134
-
135
-
136
-
137
-
138
-
139
-
140
-
141
-
142
-
143
-
144
-
145
-
146
-
147
-
148
-
149
-
150
-
151
-
152
-
153
-
154
-
155
-
156
-
157
-
158
-
159
-
160
-
161
-
162
-
163
-
164
-
165
-
166
-
167
-
168
-
169
-
170
-
171
-
172
-
173
-
174
-
175
-
176
-
177
-
178
-
179
-
180
-
181
-
182
-
183
-
184
-
185
-
186
-
187
-
188
-
189
-
190
-
191
-
192
-
193
-
194
-
195
-
196
-
197
-
198
-
199
-
200
-
201
-
202
-
203
-
204
-
205
-
206
-
207
-
208
-
209
-
210
-
211
-
212
 |
 |
