Sharp PN-M501 SHARP E-Signage S Manual - Page 91
Network] tab, Panel Control] tab, Connection Setting], Test connection], Setting, Default
 |
View all Sharp PN-M501 manuals
Add to My Manuals
Save this manual to your list of manuals |
Page 91 highlights
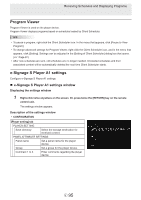
Receiving Schedules and Displaying Programs [Network] tab In SHARP e-Signage S Standalone Edition, this tab is not used. [Panel Control] tab Select the panel control method (RS-232C/LAN/USB). TIPS If you set this to a value other than "No panel", it may take a long time to access the panel when starting or exiting Client Scheduler if the setting is not correct. • "No panel" option button Panels will not be controlled. • "Single panel" option button Click [Connection Setting] and select the panel control method (RS-232C/LAN/USB). • [Connection Setting] From the "Connecting Interface" option button, select and set "RS-232C", "LAN", or "USB". RS-232C LAN USB Setting COM port Baud Rate Host name or IP address Data port User name Password Description COM1 to COM256 9600, 19200, 38400, 115200 Enter up to 32 alphanumeric characters for the host name or IP address of the panel to be controlled. Enter a data port number between 1025 and 65535 for the panels to be controlled. If a user name has been set for the panel to be controlled, enter up to 8 characters for the user name. If a password has been set for the panel to be controlled, enter up to 8 characters for the password. - Default COM1 9600 - 10008 - - • [Test connection] Check the connection to confirm that the panel can be controlled. After the connection is established successfully, the model name of the panel is acquired and displayed. Operate the panel with the panel power turned on. E 91
-
 1
1 -
2
-
3
-
4
-
5
-
6
-
7
-
8
-
9
-
10
-
11
-
12
-
13
-
14
-
15
-
16
-
17
-
18
-
19
-
20
-
21
-
22
-
23
-
24
-
25
-
26
-
27
-
28
-
29
-
30
-
31
-
32
-
33
-
34
-
35
-
36
-
37
-
38
-
39
-
40
-
41
-
42
-
43
-
44
-
45
-
46
-
47
-
48
-
49
-
50
-
51
-
52
-
53
-
54
-
55
-
56
-
57
-
58
-
59
-
60
-
61
-
62
-
63
-
64
-
65
-
66
-
67
-
68
-
69
-
70
-
71
-
72
-
73
-
74
-
75
-
76
-
77
-
78
-
79
-
80
-
81
-
82
-
83
-
84
-
85
-
 86
86 -
 87
87 -
 88
88 -
 89
89 -
 90
90 -
 91
91 -
 92
92 -
 93
93 -
 94
94 -
 95
95 -
 96
96 -
97
-
98
-
99
-
100
-
101
-
102
-
103
-
104
-
105
-
106
 |
 |
