Panasonic PT-EX520 Operating Instructions - Page 99
[test Pattern], [filter Counter], English - 99
 |
View all Panasonic PT-EX520 manuals
Add to My Manuals
Save this manual to your list of manuals |
Page 99 highlights
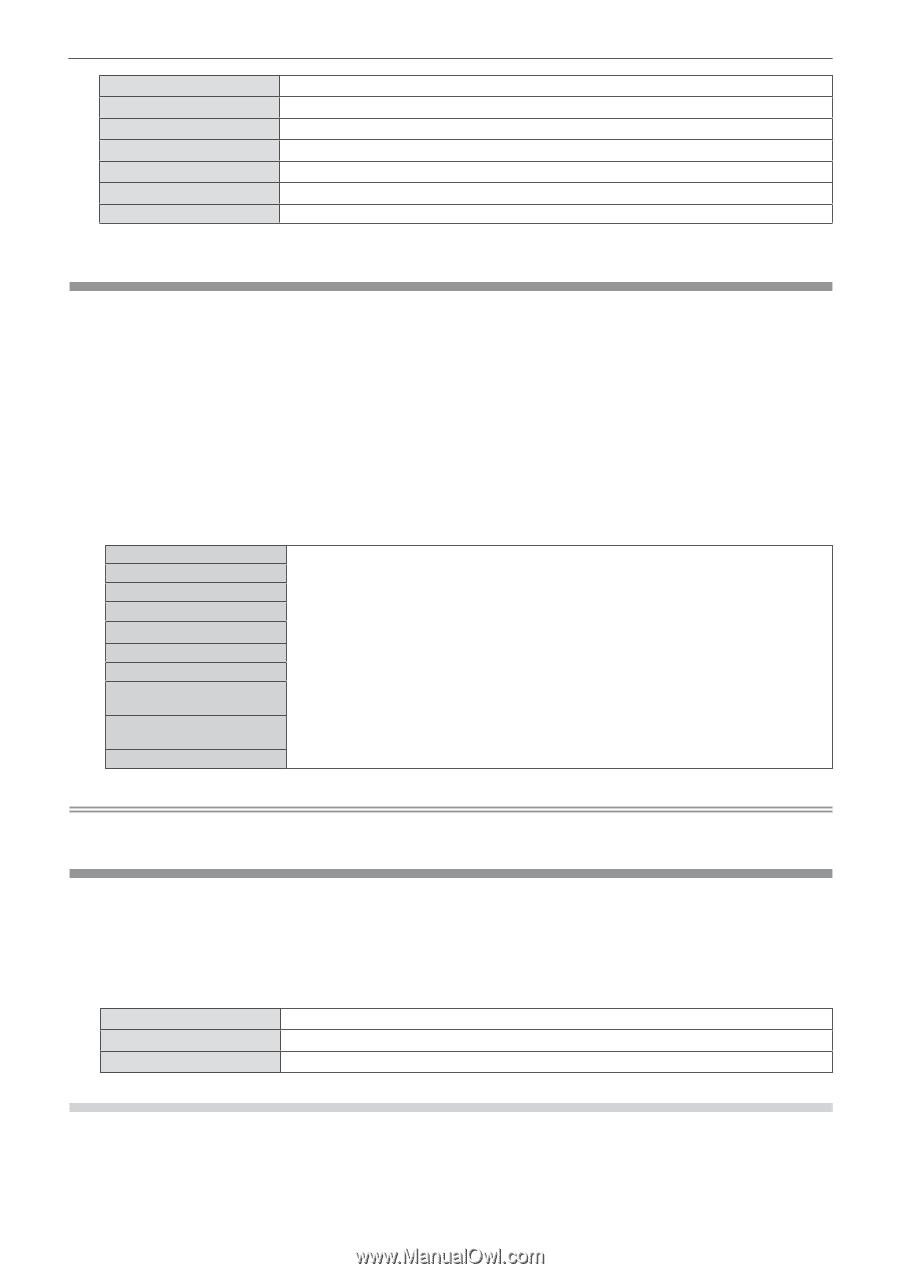
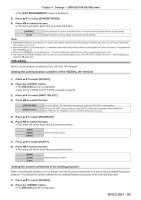
Chapter 4 Settings - [PROJECTOR SETUP] menu [RGB1] [RGB2] [VIDEO] [HDMI1] [HDMI2] [DIGITAL LINK]*1 [NETWORK] Select one item among [AUDIO IN 1], [AUDIO IN 2] or [AUDIO IN 3]. Select one item among [AUDIO IN 1], [AUDIO IN 2] or [AUDIO IN 3]. Select one item among [AUDIO IN 1], [AUDIO IN 2] or [AUDIO IN 3]. Select one item among [HDMI1 AUDIO IN], [AUDIO IN 1], [AUDIO IN 2] or [AUDIO IN 3]. Select one item among [HDMI2 AUDIO IN], [AUDIO IN 1], [AUDIO IN 2] or [AUDIO IN 3]. Select one item among [DIGITAL LINK AUDIO IN], [AUDIO IN 1], [AUDIO IN 2] or [AUDIO IN 3]. Select one item among [NETWORK AUDIO IN], [AUDIO IN 1], [AUDIO IN 2] or [AUDIO IN 3]. *1 Only for PT-EZ590, PT-EW650 and PT-EX620 [TEST PATTERN] Displays the test pattern built-in to the projector. Settings of position, size, and other factors will not be reflected in test patterns. Make sure to display the input signal before performing various adjustments. 1) Press as to select [TEST PATTERN]. 2) Press the button. ffThe test pattern with the [PATTERN CHANGE] individual adjustment screen is displayed. 3) Press qw to switch the test pattern. ffThe test pattern will switch each time you press the button. ffWhen you press the button or the button, it will exit the test pattern and return to the sub menu of [PROJECTOR SETUP]. All white Color bars (vertical) Color bars (horizontal) 16 gradations (vertical 1) 16 gradations (vertical 2) 16 gradations (horizontal 1) 16 gradations (horizontal 2) White cross on the black background Black cross on the white background Cross hatch Select a test pattern so that it is easy to make various adjustments. Note ff The initial setting is All white. The initial screen is Cross hatch if you have assigned it to the button. ff Press the button on the remote control while the test pattern is displayed to hide the menu screen. [FILTER COUNTER] You can check the filter usage time and set the cleaning cycle for the air filter. Also, reset the filter usage time. 1) Press as to select [FILTER COUNTER]. 2) Press the button. ffThe [FILTER COUNTER] screen is displayed. [FILTER COUNTER] [TIMER] [FILTER COUNTER RESET] Displays the using time of the filter. Sets the cleaning cycle (time) for the air filter. Resets the filter usage time. Setting [TIMER] Sets the cleaning cycle (time) if you want to clean the air filter periodically. When the time reaches, an alert message "FILTER COUNTER has reached the set time." for filter cleaning is displayed on the projected screen. 1) Press as to select [FILTER COUNTER]. ENGLISH - 99
-
 1
1 -
2
-
3
-
4
-
5
-
6
-
7
-
8
-
9
-
10
-
11
-
12
-
13
-
14
-
15
-
16
-
17
-
18
-
19
-
20
-
21
-
22
-
23
-
24
-
25
-
26
-
27
-
28
-
29
-
30
-
31
-
32
-
33
-
34
-
35
-
36
-
37
-
38
-
39
-
40
-
41
-
42
-
43
-
44
-
45
-
46
-
47
-
48
-
49
-
50
-
51
-
52
-
53
-
54
-
55
-
56
-
57
-
58
-
59
-
60
-
61
-
62
-
63
-
64
-
65
-
66
-
67
-
68
-
69
-
70
-
71
-
72
-
73
-
74
-
75
-
76
-
77
-
78
-
79
-
80
-
81
-
82
-
83
-
84
-
85
-
86
-
87
-
88
-
89
-
90
-
91
-
92
-
93
-
 94
94 -
 95
95 -
 96
96 -
 97
97 -
 98
98 -
 99
99 -
 100
100 -
 101
101 -
 102
102 -
 103
103 -
 104
104 -
105
-
106
-
107
-
108
-
109
-
110
-
111
-
112
-
113
-
114
-
115
-
116
-
117
-
118
-
119
-
120
-
121
-
122
-
123
-
124
-
125
-
126
-
127
-
128
-
129
-
130
-
131
-
132
-
133
-
134
-
135
-
136
-
137
-
138
-
139
-
140
-
141
-
142
-
143
-
144
-
145
-
146
-
147
-
148
-
149
-
150
-
151
-
152
-
153
-
154
-
155
-
156
-
157
-
158
-
159
-
160
-
161
-
162
-
163
-
164
 |
 |