Panasonic PT-EX520 Operating Instructions - Page 93
[projection Method], [lamp Power], [eco Management], English - 93
 |
View all Panasonic PT-EX520 manuals
Add to My Manuals
Save this manual to your list of manuals |
Page 93 highlights
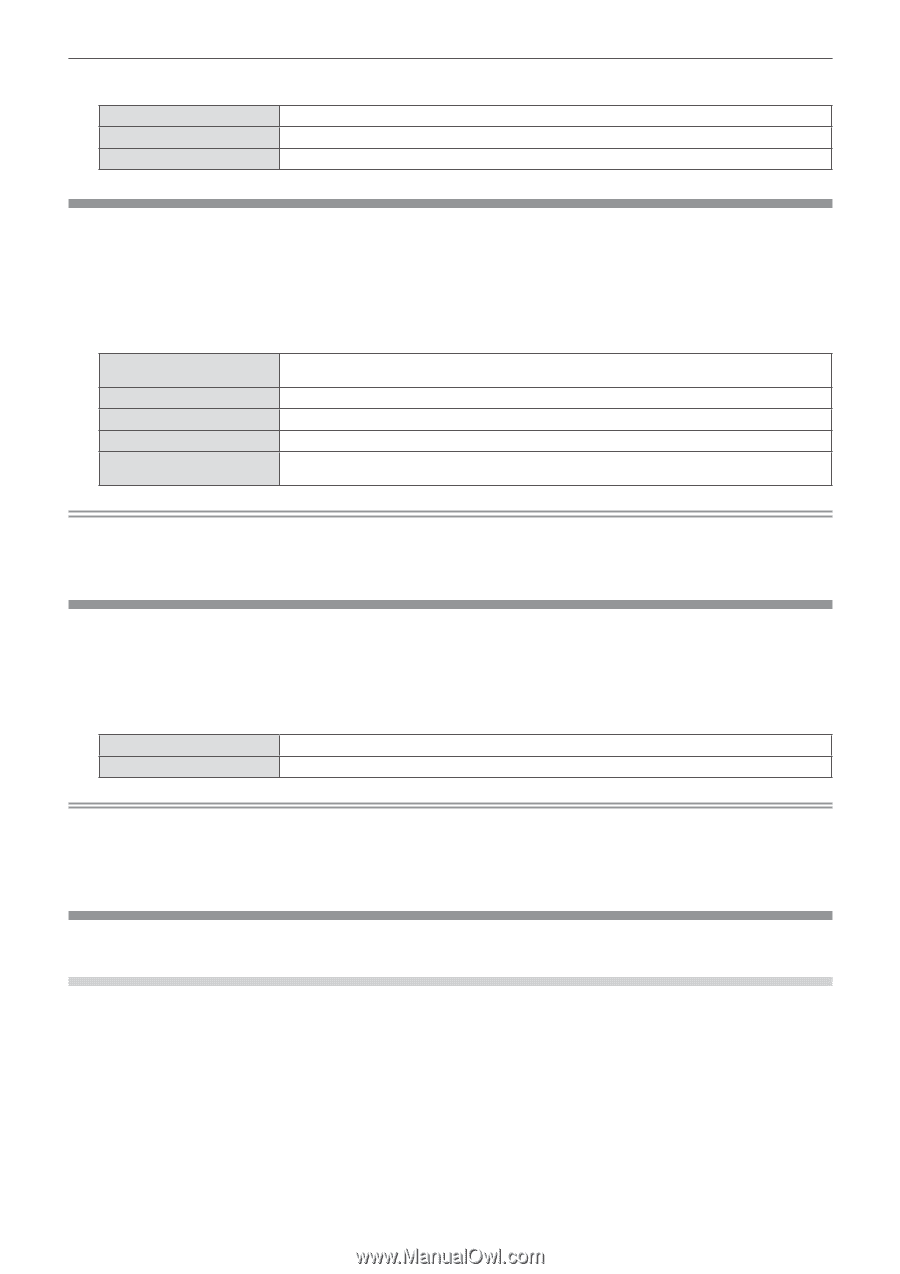
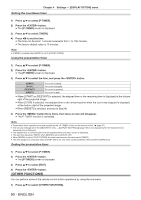
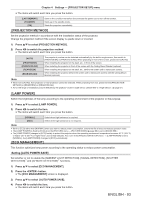
Chapter 4 Settings - [PROJECTOR SETUP] menu ffThe items will switch each time you press the button. [LAST MEMORY] [STANDBY] [ON] Starts in the condition that before disconnected the power cord or turn off the breaker. Starts up in the standby mode. Starts the projection immediately. [PROJECTION METHOD] Set the projection method in accordance with the installation status of the projector. Change the projection method if the screen display is upside down or inverted. 1) Press as to select [PROJECTION METHOD]. 2) Press qw to switch the projection method. ffThe items will switch each time you press the button. [AUTO] [FRONT/DESK] [FRONT/CEILING] [REAR/DESK] [REAR/CEILING] The projector's posture can be detected automatically by the built-in angle sensor, then switch to [FRONT/DESK] or [FRONT/CEILING]. When projecting in front of the screen, please set to [AUTO]. When installing the projector on the desk, etc., in front of the screen. When installing the projector in front of the screen with the Ceiling Mount Bracket (optional). When installing the projector on the desk, etc., behind the screen (with a translucent screen). When installing the projector behind the screen (with a translucent screen) with the Ceiling Mount Bracket (optional). Note ff When set to [AUTO], front projection or rear projection cannot be detected. When projecting from rear, please set the [PROJECTION METHOD] to [REAR/DESK] or [REAR/CEILING]. ff As for the range of installation posture detected by the projector's built-in angle sensor, please refer to "Angle sensor". (x page 31) [LAMP POWER] Switch the brightness of the lamp according to the operating environment of the projector or the purpose. 1) Press as to select [LAMP POWER]. 2) Press qw to switch the item. ffThe items will switch each time you press the button. [NORMAL] [ECO] Select when high luminance is required. Select when high luminance is not required. Note ff Set it to [ECO] rather than [NORMAL] when you want to reduce power consumption, extend the life of lamp and reduce operation noise. ff The [LAMP POWER] is fixed to [ECO] when the [PICTURE] menu → [PICTURE MODE] (x page 66) is set to [DICOM SIM.]. ff The [LAMP POWER] changes to [ECO] forcibly to protect the projector when the operating environment temperature becomes 40 °C (104 °F) or higher (35 °C (95 °F) or higher when used at high altitude). And, even if the [PROJECTOR SETUP] menu → [LAMP POWER] is set to [NORMAL], the [LAMP POWER] changes to [ECO] automatically. [ECO MANAGEMENT] This function optimizes lamp power according to the operating status to reduce power consumption. Setting [AUTO POWER SAVE] Set whether or not to enable the [AMBIENT LIGHT DETECTION], [SIGNAL DETECTION], [SHUTTER DETECTION]*1 and [AV MUTE DETECTION]*2 functions. 1) Press as to select [ECO MANAGEMENT]. 2) Press the button. ffThe [ECO MANAGEMENT] screen is displayed. 3) Press as to select [AUTO POWER SAVE]. 4) Press qw to switch the item. ffThe items will switch each time you press the button. ENGLISH - 93
-
 1
1 -
2
-
3
-
4
-
5
-
6
-
7
-
8
-
9
-
10
-
11
-
12
-
13
-
14
-
15
-
16
-
17
-
18
-
19
-
20
-
21
-
22
-
23
-
24
-
25
-
26
-
27
-
28
-
29
-
30
-
31
-
32
-
33
-
34
-
35
-
36
-
37
-
38
-
39
-
40
-
41
-
42
-
43
-
44
-
45
-
46
-
47
-
48
-
49
-
50
-
51
-
52
-
53
-
54
-
55
-
56
-
57
-
58
-
59
-
60
-
61
-
62
-
63
-
64
-
65
-
66
-
67
-
68
-
69
-
70
-
71
-
72
-
73
-
74
-
75
-
76
-
77
-
78
-
79
-
80
-
81
-
82
-
83
-
84
-
85
-
86
-
87
-
 88
88 -
 89
89 -
 90
90 -
 91
91 -
 92
92 -
 93
93 -
 94
94 -
 95
95 -
 96
96 -
 97
97 -
 98
98 -
99
-
100
-
101
-
102
-
103
-
104
-
105
-
106
-
107
-
108
-
109
-
110
-
111
-
112
-
113
-
114
-
115
-
116
-
117
-
118
-
119
-
120
-
121
-
122
-
123
-
124
-
125
-
126
-
127
-
128
-
129
-
130
-
131
-
132
-
133
-
134
-
135
-
136
-
137
-
138
-
139
-
140
-
141
-
142
-
143
-
144
-
145
-
146
-
147
-
148
-
149
-
150
-
151
-
152
-
153
-
154
-
155
-
156
-
157
-
158
-
159
-
160
-
161
-
162
-
163
-
164
 |
 |