LiftMaster 61LM Owners Manual - Page 172
Model 99LM, Remote Control Security Transmitter, OWNER'S MANUAL
 |
View all LiftMaster 61LM manuals
Add to My Manuals
Save this manual to your list of manuals |
Page 172 highlights
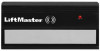
Model 99LM © Remote Control Security Transmitter OWNER'S MANUAL To comply with FCC rules, adjustment or modification of receiver and/or transmitter is prohibited, except for changing the code setting or replacing the battery. THERE ARE NO OTHER USER SERVICEABLE PARTS. WARNING Features: • This Remote Control Security Transmitter can be used with most 390 MHz Lift-Master garage door openers sold since 1987. This includes "Smart" openers as well as openers with 9 switch-settable codes. (It is not compatible with 8 switchsettable codes.) This transmitter can be used as a replacement for, or in addition to, most older style transmitters. • Personalized codes: Up to 3900 possible combinations. Code can be easily changed. Different codes can be programmed for use with more than one "Smart" opener. • Flexible code length: Codes can be 2, 3, 4, or 5 digits. • Power Supply: 9 volt battery. Operation: To activate the opener, press the numbers for your security code and then press ENTER. The buttons will blink for 15 seconds after the code is transmitted. During that time, the door can be stopped or reversed by pressing ENTER again. If you accidentally press a wrong number, press ENTER and start again. For convenient operation in the dark, the buttons will light when any button is pressed. Setting the code: The opener and transmitter must be set to the same code before they will work together. If you have a "Smart" opener (with controls resembling Figure 3, below right), it will learn any code you choose. Just follow the numbered instructions below. If you have a "Smart" opener and also wish to continue using older transmitters (the kind with a red light on the front and switches inside for setting the code), then you must choose a 4-digit code. Follow the numbered instructions below to teach your opener the code you choose, then use the instructions on the other side to set the switches inside your older transmitters to work with this new code. If you have an older style opener which has switches for setting the code, then skip the instructions below. Follow the instructions on the other side to set the switches inside your opener. Children operating or playing with a garage door opener can injure themselves or others. The garage door could close and cause serious injury or death. Do not allow children to operate the wall push button(s) or remote control(s). A moving garage door could injure or kill someone under it. Activate the opener only when you can see the door clearly, it is free of obstructions, and is properly adjusted. Battery: The 9 volt battery should produce power for at least one year. As long as there is Battery Compartment Cover adequate power, the buttons will illuminate and the opener will operate when the code followed by the ENTER key is pressed. Replace the Connector battery when button Battery illumination becomes dim. Test Light 3 4 1 2 7 8 5 6 ENTER 9 0 Figure 1 To change the battery, remove the battery compartment cover and unsnap the connector (see Figure 1). Remove the battery and replace with a fresh 9V alkaline battery only. Snap the connector onto the new battery and replace the compartment cover. Figure 2 Clip Holder Visor Clip Case Screw Bottom of Remote Case Tab Label Case Screw Slide Clip Holder 1. Decide on a 2, 3, 4 or 5 digit code using numbers from 0 to 9. Numbers may be used more than once (for example, 4, 0, 4, 1). Numbers that share the same button produce the same code (i.e., 1 and 2, 3 and 4, etc.). 2. Press the selected digits on the transmitter buttons. (Do not pause for more than 10 seconds, or the button light will turn off and you will have to begin again.) Then press the ENTER button and hold it down. (Do not hold it for more than two minutes.) To attach the transmitter to your car visor: • Remove the visor clip from the clip holder. • Remove the case screw. Insert tab on clip holder through circular label and into case (Figure 2). Slide clip holder forward. • Replace the case screw (do not overtighten). Slide visor clip onto clip holder. 3. While holding the ENTER button, press and release the "Smart" button on the opener end panel (see Figure 3). The green indicator light on the opener will flash and the door may move. Release the ENTER button on the transmitter. To stop or reverse the door press ENTER again. Now the opener will operate whenever the transmitter code followed by the ENTER button is pressed. If you have any other transmitters, test to make sure they can open the door. If they are the old style with a red light, reprogram them according to the instructions on the other side. Figure 3 Representative Garage Door Opener with "Smart" Button 1 2 3 9 1 7 3 5 KG "Smart" Green Button Indicator Light 9 1 7 3 5 KG To change codes at any time, repeat steps 1-3. 1
-
 1
1 -
2
-
3
-
4
-
5
-
6
-
7
-
8
-
9
-
10
-
11
-
12
-
13
-
14
-
15
-
16
-
17
-
18
-
19
-
20
-
21
-
22
-
23
-
24
-
25
-
26
-
27
-
28
-
29
-
30
-
31
-
32
-
33
-
34
-
35
-
36
-
37
-
38
-
39
-
40
-
41
-
42
-
43
-
44
-
45
-
46
-
47
-
48
-
49
-
50
-
51
-
52
-
53
-
54
-
55
-
56
-
57
-
58
-
59
-
60
-
61
-
62
-
63
-
64
-
65
-
66
-
67
-
68
-
69
-
70
-
71
-
72
-
73
-
74
-
75
-
76
-
77
-
78
-
79
-
80
-
81
-
82
-
83
-
84
-
85
-
86
-
87
-
88
-
89
-
90
-
91
-
92
-
93
-
94
-
95
-
96
-
97
-
98
-
99
-
100
-
101
-
102
-
103
-
104
-
105
-
106
-
107
-
108
-
109
-
110
-
111
-
112
-
113
-
114
-
115
-
116
-
117
-
118
-
119
-
120
-
121
-
122
-
123
-
124
-
125
-
126
-
127
-
128
-
129
-
130
-
131
-
132
-
133
-
134
-
135
-
136
-
137
-
138
-
139
-
140
-
141
-
142
-
143
-
144
-
145
-
146
-
147
-
148
-
149
-
150
-
151
-
152
-
153
-
154
-
155
-
156
-
157
-
158
-
159
-
160
-
161
-
162
-
163
-
164
-
165
-
166
-
 167
167 -
 168
168 -
 169
169 -
 170
170 -
 171
171 -
 172
172 -
 173
173 -
 174
174 -
 175
175 -
 176
176 -
 177
177 -
178
-
179
-
180
-
181
-
182
-
183
-
184
-
185
-
186
-
187
-
188
-
189
-
190
-
191
-
192
-
193
-
194
-
195
-
196
-
197
-
198
-
199
-
200
-
201
-
202
-
203
-
204
-
205
-
206
-
207
-
208
-
209
-
210
-
211
-
212
-
213
-
214
-
215
-
216
-
217
-
218
-
219
-
220
-
221
-
222
-
223
-
224
-
225
-
226
-
227
-
228
-
229
-
230
-
231
-
232
-
233
-
234
-
235
-
236
-
237
-
238
-
239
-
240
-
241
-
242
-
243
-
244
-
245
-
246
-
247
-
248
-
249
-
250
-
251
-
252
-
253
-
254
-
255
-
256
-
257
-
258
-
259
-
260
-
261
-
262
-
263
-
264
-
265
-
266
-
267
-
268
-
269
-
270
-
271
-
272
-
273
-
274
-
275
-
276
-
277
-
278
-
279
-
280
-
281
-
282
-
283
-
284
-
285
-
286
 |
 |
