LiftMaster 61LM Owners Manual - Page 141
Lift-Master
 |
View all LiftMaster 61LM manuals
Add to My Manuals
Save this manual to your list of manuals |
Page 141 highlights
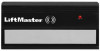
Lift-Master OWNERS MANUAL MODEL 53LM MULTI-FUNCTION REMOTE CONTROL The 3-channel transmitter has three push buttons. Each button can activate one or more remote control devices as well as any Chamberlain or Lift-Master garage door opener which has the receiver in the opener end panel SETTING/CHANGING YOUR CODE IN RECEIVER(S) AND TRANSMITTERS DISCONNECT POWER TO THE OPENER (OR OTHER DEVICES) BEFORE SETTING OR CHANGING RECEIVER CODE. RECEIVER Locate the receiver code switch block. TRANSMITTER The transmitter's large push button is recommended for use with a garage door opener. Decide which transmitter push button you want to use to operate an additional receiver. 1. Remove the transmitter cover screw. Carefully turn the case over (push button side up). 2. Remove the case top. CAUTION: Be careful not to move circuit board components. SETTING THE CODE 1. Use a pen or screwdriver to slide one or more of the TRANSMITTER code switches to a plus(+), center(0) or minus(-) position. 2. Set RECEIVER code switch #1 to match transmitter push button you want to use with that receiver (+ ,0 or -). Refer to illustration. 3. Hold transmiter circuit board alongside receiver. Beginning with RECEIVER code switch #2, match the position of each transmiter switch. 4. If you have additional receivers, match code settings of the transmitter (2 through 9) and slide receiver code switch #1 to the position which matches an unused push button. NOTE 1: For receivers with less code switches than the transmitter, set excess transmitter switches to the center (0) position. NOTE 2: Code switches 2 through 9 on ALL receivers operated by this transmitter must MATCH switches 2 through 9 in transmitter. CAUTION: If you press more than ONE push button at
-
 1
1 -
2
-
3
-
4
-
5
-
6
-
7
-
8
-
9
-
10
-
11
-
12
-
13
-
14
-
15
-
16
-
17
-
18
-
19
-
20
-
21
-
22
-
23
-
24
-
25
-
26
-
27
-
28
-
29
-
30
-
31
-
32
-
33
-
34
-
35
-
36
-
37
-
38
-
39
-
40
-
41
-
42
-
43
-
44
-
45
-
46
-
47
-
48
-
49
-
50
-
51
-
52
-
53
-
54
-
55
-
56
-
57
-
58
-
59
-
60
-
61
-
62
-
63
-
64
-
65
-
66
-
67
-
68
-
69
-
70
-
71
-
72
-
73
-
74
-
75
-
76
-
77
-
78
-
79
-
80
-
81
-
82
-
83
-
84
-
85
-
86
-
87
-
88
-
89
-
90
-
91
-
92
-
93
-
94
-
95
-
96
-
97
-
98
-
99
-
100
-
101
-
102
-
103
-
104
-
105
-
106
-
107
-
108
-
109
-
110
-
111
-
112
-
113
-
114
-
115
-
116
-
117
-
118
-
119
-
120
-
121
-
122
-
123
-
124
-
125
-
126
-
127
-
128
-
129
-
130
-
131
-
132
-
133
-
134
-
135
-
 136
136 -
 137
137 -
 138
138 -
 139
139 -
 140
140 -
 141
141 -
 142
142 -
 143
143 -
 144
144 -
 145
145 -
 146
146 -
147
-
148
-
149
-
150
-
151
-
152
-
153
-
154
-
155
-
156
-
157
-
158
-
159
-
160
-
161
-
162
-
163
-
164
-
165
-
166
-
167
-
168
-
169
-
170
-
171
-
172
-
173
-
174
-
175
-
176
-
177
-
178
-
179
-
180
-
181
-
182
-
183
-
184
-
185
-
186
-
187
-
188
-
189
-
190
-
191
-
192
-
193
-
194
-
195
-
196
-
197
-
198
-
199
-
200
-
201
-
202
-
203
-
204
-
205
-
206
-
207
-
208
-
209
-
210
-
211
-
212
-
213
-
214
-
215
-
216
-
217
-
218
-
219
-
220
-
221
-
222
-
223
-
224
-
225
-
226
-
227
-
228
-
229
-
230
-
231
-
232
-
233
-
234
-
235
-
236
-
237
-
238
-
239
-
240
-
241
-
242
-
243
-
244
-
245
-
246
-
247
-
248
-
249
-
250
-
251
-
252
-
253
-
254
-
255
-
256
-
257
-
258
-
259
-
260
-
261
-
262
-
263
-
264
-
265
-
266
-
267
-
268
-
269
-
270
-
271
-
272
-
273
-
274
-
275
-
276
-
277
-
278
-
279
-
280
-
281
-
282
-
283
-
284
-
285
-
286
 |
 |
