BenQ W1090 User Manual - Page 27
Operation, Starting up the projector
 |
View all BenQ W1090 manuals
Add to My Manuals
Save this manual to your list of manuals |
Page 27 highlights
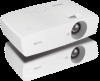
Operation Starting up the projector 1. Plug the power cord into the projector and into a wall socket. Turn on the wall socket switch (where fitted). Check that the POWER indicator light on the projector lights orange after power has been applied. Please use the original accessories (e.g. power cable) only with the device to avoid possible dangers such as electric shock and fire. 2. Press POWER on the projector or remote control to start the projector and a start up tone sounds. The POWER indicator light flashes green and stays green when the projector is on. The fans starts operating, and a start-up image display on the screen while it warms up. The projector does not respond to further commands whiles it is warm up. (If necessary) Rotate the focus ring to adjust the image clearness. To turn off the ring tone, see "Power On/Off Ring Tone" on page 56 for details. If the projector is still hot from previous activity, it will run the cooling fan for approximately 90 seconds before energizing the lamp. 3. If this is the first time you turn on the projector, the setup wizard appears to guide you through setting up the projector. If you have already done this, skip this step and move on to step 5. • Use the arrow keys on the projector or remote control to move through the menu items. • Use OK to confirm the selected menu item. The Setup Wizard screenshots below are for reference only and may differ from the actual design. i. Specify Projector Position. For more information about projector position, see "Choosing a location" on page 16. Operation 27
-
 1
1 -
2
-
3
-
4
-
5
-
6
-
7
-
8
-
9
-
10
-
11
-
12
-
13
-
14
-
15
-
16
-
17
-
18
-
19
-
20
-
21
-
 22
22 -
 23
23 -
 24
24 -
 25
25 -
 26
26 -
 27
27 -
 28
28 -
 29
29 -
 30
30 -
 31
31 -
 32
32 -
33
-
34
-
35
-
36
-
37
-
38
-
39
-
40
-
41
-
42
-
43
-
44
-
45
-
46
-
47
-
48
-
49
-
50
-
51
-
52
-
53
-
54
-
55
-
56
-
57
-
58
-
59
-
60
-
61
-
62
-
63
-
64
-
65
-
66
-
67
-
68
-
69
-
70
-
71
-
72
-
73
-
74
-
75
 |
 |
