2012 Yamaha Motorsports RS Venture Owners Manual - Page 22
2012 Yamaha Motorsports RS Venture Manual

Page 22 highlights
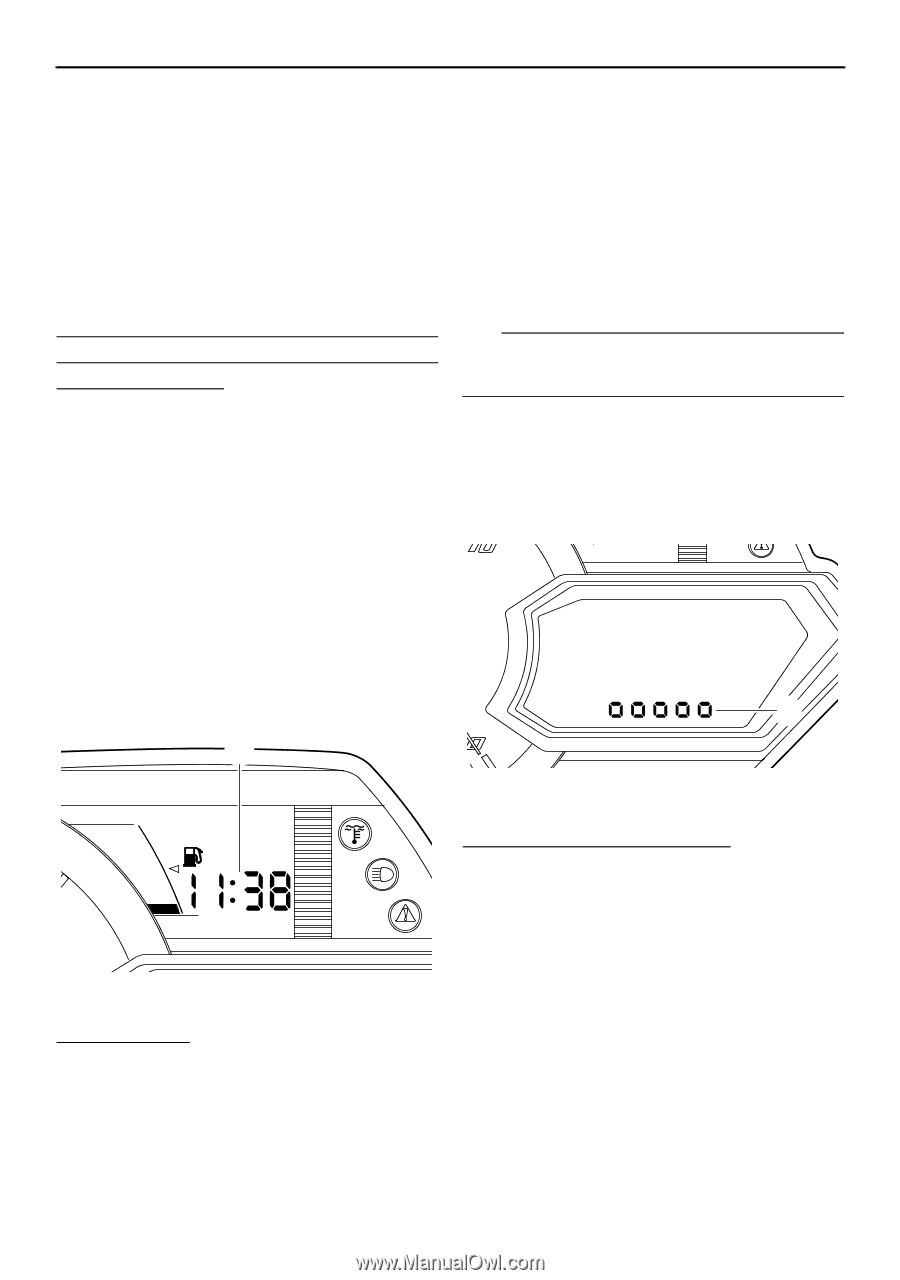
Control functions If the engine oil is changed before the oil change tripmeter appears in the display (i.e., before the periodic oil change interval has been reached), the tripmeter must be reset after the oil change for the next periodic oil change to be indicated at the correct time. In that case, reset the oil change tripmeter as follows. To reset the oil change tripmeter (when the engine oil was changed before the oil change tripmeter appeared) 1. Push the "SELECT" button until "ODO" is displayed, and then push the "RESET" button for at least 1 second. The distance traveled since the last oil change and "OIL" will flash alternately in the odometer display. 2. Push the "RESET" button for approximately 3 seconds. "00000" and "OIL" will flash alternately in the odometer display 3 times, and then the display will return to the previous display mode. 3. Push the "RESET" button to change the hour setting, and then push the "SELECT" button. The minute digits will start flashing. Push the "RESET" button to change the minute setting, and then push the "SELECT" button. The clock starts when the "SELECT" button is released. 4. TIP The clock must be set again when the battery is disconnected. Display brightness control This function allows you to adjust the brightness of the meter unit display to suit the outdoor lighting conditions. Clock 1 1 1. Display brightness level F E 1. Clock To set the clock 1. Turn the key to the on position. 2. Push the "SELECT" button and "RESET" button simultaneously until the hour digits start flashing. To adjust the display brightness 1. Turn the key to the off position. 2. Push and hold down the "SELECT" button. 3. Turn the key to the on position, and then, after 5 seconds, release the "SELECT" button. 4. Push the "RESET" button to select the desired display brightness level, and then push the "SELECT" button. The display returns to the previous display mode. RST90 The multi-function meter unit is equipped with the following: 16
-
 1
1 -
2
-
3
-
4
-
5
-
6
-
7
-
8
-
9
-
10
-
11
-
12
-
13
-
14
-
15
-
16
-
 17
17 -
 18
18 -
 19
19 -
 20
20 -
 21
21 -
 22
22 -
 23
23 -
 24
24 -
 25
25 -
 26
26 -
 27
27 -
28
-
29
-
30
-
31
-
32
-
33
-
34
-
35
-
36
-
37
-
38
-
39
-
40
-
41
-
42
-
43
-
44
-
45
-
46
-
47
-
48
-
49
-
50
-
51
-
52
-
53
-
54
-
55
-
56
-
57
-
58
-
59
-
60
-
61
-
62
-
63
-
64
-
65
-
66
-
67
-
68
-
69
-
70
-
71
-
72
-
73
-
74
-
75
-
76
-
77
-
78
-
79
-
80
-
81
-
82
-
83
-
84
-
85
-
86
-
87
-
88
-
89
-
90
-
91
-
92
-
93
-
94
-
95
-
96
-
97
-
98
-
99
-
100
-
101
-
102
-
103
-
104
-
105
-
106
-
107
-
108
-
109
-
110
-
111
-
112
-
113
-
114
-
115
-
116
-
117
-
118
-
119
-
120
-
121
-
122
-
123
-
124
-
125
-
126
-
127
-
128
-
129
-
130
-
131
-
132
-
133
-
134
-
135
-
136
-
137
-
138
-
139
-
140
-
141
-
142
 |
 |