2009 Mercedes CLS-Class Owner's Manual
2009 Mercedes CLS-Class Manual

2009 Mercedes CLS-Class manual content summary:
- 2009 Mercedes CLS-Class | Owner's Manual - Page 1
CLS Operator's Manual - 2009 Mercedes CLS-Class | Owner's Manual - Page 2
in the type shown here. The following symbols are found in this Operator's Manual: G Warning! Warning notices draw your attention to hazards that may endanger your information you may find useful. This symbol points to instructions X for you to follow. A number of these symbols appearX ing in - 2009 Mercedes CLS-Class | Owner's Manual - Page 3
and provide years of service. Your Mercedes-Benz represents the efforts of many skilled engineers and craftsmen. To help assure your driving pleasure, and also the safety of you and your passengers, we ask you to make a small investment of time: RPlease read this manual carefully, then return it - 2009 Mercedes CLS-Class | Owner's Manual - Page 4
Contents Index ...3 Introduction ...18 At a glance ...25 Safety and security ...41 Controls in detail ...71 Operation ...195 Practical hints ...249 Technical data ...331 2 - 2009 Mercedes CLS-Class | Owner's Manual - Page 5
250, 317 Alternator ...341 Messages in the multifunction display ...281 AMG menu ...127 Anticorrosion/antifreeze ...348 Antilock Brake System see ABS the multifunction display ...283 see Headlamps Active head restraints ...57 Resetting ...305 Adaptive Brake ...66 Adaptive Damping System see ADS - 2009 Mercedes CLS-Class | Owner's Manual - Page 6
112 Gearshifting malfunctions ...120 Kickdown ...115 Kickdown (manual shift program) . 120 Manual shift program ...118 One-touch gearshifting ...117 Air bags ...43 Blocking of rear window operation . . 63 Child safety locks (rear doors) ...63 Indicator lamp, front passenger front air bag ...50 Infant - 2009 Mercedes CLS-Class | Owner's Manual - Page 7
instructions Combination switch ...97 Control system ...122 Multifunction display ...124 Multifunction steering wheel ...122 Resetting to factory settings ...132 Control system menus ...125 AMG 99 Cruise control ...142 Last stored speed ...144 Resume function ...144 Cup service indicator ...239 5 - 2009 Mercedes CLS-Class | Owner's Manual - Page 8
...153 Driving hints ...151 Last stored speed ...150 Menu ...148 Messages in the Door handles ...40 Doors Child safety locks ...63 Locking/unlocking (SmartKey) ...72 Locking/unlocking ( ...237 Hydroplaning ...236 Instructions ...106, 233 In winter ...232 Problems ...109 Safety systems ... - 2009 Mercedes CLS-Class | Owner's Manual - Page 9
Device see ETD Emission control ...238 Information label ...334 System warranties ...19 Engine Brake-in recommendations ...196 Cleaning ...242 Compartment ...199 Malfunction indicator lamp ...31, 298 Maximum engine speed ...335 Messages in the multifunction display ...277 Number ...334 Starting - 2009 Mercedes CLS-Class | Owner's Manual - Page 10
Index Capacities, fuel tank ...344 Fuel consumption statistics ...139 Fuel filler flap and cap ...197 Fuel tank reserve warning lamp ...31, 297 Premium unleaded gasoline ...197, 344, 346 Requirements ...347 Fuel filler flap ...197 Locking/unlocking ...197 Opening ...198 Opening in an emergency ... - 2009 Mercedes CLS-Class | Owner's Manual - Page 11
Index High-beam headlamps ...97, 308 Indicator lamp ...31 Replacing bulbs ...308 High-mounted brake lamp ...308 Replacing bulbs ...308 High-performance brake system ...235 Hood ...199 Messages in the multifunction display ...274 Horn ...29 HVAC see Climate control system Hydroplaning ...236 Lamps - 2009 Mercedes CLS-Class | Owner's Manual - Page 12
Manually ...304 Loss of Key ...76 Service and Warranty service indicator ...240 Clearing service indicator message ...239 Resetting service indicator ...240 Service indicator ...239 Service indicator message ...239 Service term exceeded ...239 Manual headlamp mode (Lowbeam headlamps) ...95 Manual - 2009 Mercedes CLS-Class | Owner's Manual - Page 13
280 Corner-illuminating front fog lamps ...286 Cruise control ...263 Display malfunction ...255 Distronic ...263 Doors ...275 EBP ...271 Engine oil ...282 Engine service ...277 ESP® ...256, 271 Fog lamps ...284, 286 Front passenger front air bag ...258 Gas cap ...283 Gear selector lever ...266 High - 2009 Mercedes CLS-Class | Owner's Manual - Page 14
Rear door window, Blocking operation ...63 Synchronizing ...104 Practical hints ...250 PRE-SAFE® ...56 Messages in the multifunction display ...257 Problems While driving ...109 With vehicle ...22 ...157 Range ...157 System sensors ...156, 244 Warning indicators ...29, 157 Parts service ...332 12 - 2009 Mercedes CLS-Class | Owner's Manual - Page 15
switch Automatic shift program ...116 Manual shift program ...118 Proximity inflation pressure ...210, 229 Recovery services, Stolen vehicle (Tele Aid) display ...282 Reset button ...31, 121, 132 Reset tool (active Child safety locks ...63 Rear door window Blocking operation ...63 Rear fog lamp see - 2009 Mercedes CLS-Class | Owner's Manual - Page 16
Service see Maintenance Service, parts ...332 Service and warranty information ...19 Service intervals see Maintenance System, Service indicator Service Spare wheel ...252, 336 Mounting ...314 Speedometer ...31, 147 Speed settings Distronic ...149 Resume function ...150 SRS ...43 Indicator lamp - 2009 Mercedes CLS-Class | Owner's Manual - Page 17
calls ...186 Information button ...188 Initiating an emergency call manually ...186 Messages in the multifunction display ...273 Remote door 189 Roadside Assistance button ...187 SOS button ...186 Stolen Vehicle Recovery services . 190 System self-test ...185 Telephone ...34 Answering/ending a - 2009 Mercedes CLS-Class | Owner's Manual - Page 18
Problems under-/overinflation ...211 Retreads ...204 Rims and tires (technical data) ...336 Rotation ...230 Run Flat Indicator ...213 Service life ...205 Sizes ...336 Snow chains ...231 Speed Tire speed rating ...222, 229 Top odometer, resetting ...122 Manually ...303 Upholstery, cleaning ...246 16 - 2009 Mercedes CLS-Class | Owner's Manual - Page 19
Recovery services, unlocking ...72, 74 Locking/unlocking manually ...303 Lowering (wheel change) (Dual Control) Vehicle lighting ...94 Vehicle loading Instructions ...173 Load limit ...208 Roof rack ...174 system ...159 Seat belt telltale ...293 Warranty coverage ...332 Washer fluid Messages in - 2009 Mercedes CLS-Class | Owner's Manual - Page 20
and warnings contained in this Operator's Manual. Ignoring them could result in damage to the vehicle or personal injury to you or others. Vehicle damage caused by failure to follow instructions is not covered by the Mercedes-Benz Limited Warranty. We continuously strive to improve our product - 2009 Mercedes CLS-Class | Owner's Manual - Page 21
Introduction Operator's Manual Service and warranty information The Service and Warranty Information booklet contains detailed information about the warranties covering your Mercedes-Benz, including: RNew Important notice for California retail buyers and lessees of Mercedes-Benz automobiles Under - 2009 Mercedes CLS-Class | Owner's Manual - Page 22
in the Service and Warranty Information Booklet, or call the Mercedes-Benz Customer Assistance Center (in the USA) at 1-800-FOR-MERCedes, or Customer Service (in Canada fuel can cause engine damage. Runleaded Rgasoline Certain Mercedes-Benz models are available for delivery in Europe under our - 2009 Mercedes CLS-Class | Owner's Manual - Page 23
it towed to the nearest authorized Mercedes-Benz Center or other qualified maintenance or repair facility for further inspection or repairs. to make you and others aware of various risks. You should not remove any of these warning labels unless explicitly instructed to do so by information on the - 2009 Mercedes CLS-Class | Owner's Manual - Page 24
Mercedes-Benz USA, LLC One Mercedes Drive Montvale, NJ 07645-0350 In Canada: Customer Relations Department Mercedes-Benz Canada, Inc. 98 Vanderhoof Avenue Toronto, Ontario M4G 4C9 1200 New cannot become involved in individual problems between you, your dealer, or Mercedes-Benz USA, LLC. To contact - 2009 Mercedes CLS-Class | Owner's Manual - Page 25
vehicle owner or lessee response to an official request by law enforcement or other government agency use in dispute resolution involving Daimler, its affiliates or sales/service organization and/or otherwise required or permitted by law. Z Rfor Ras Please check the Tele Aid subscription - 2009 Mercedes CLS-Class | Owner's Manual - Page 26
24 - 2009 Mercedes CLS-Class | Owner's Manual - Page 27
At a glance Exterior view ...Cockpit ...Instrument cluster ...Storage compartments ...Multifunction steering wheel ...Center console ...Overhead control panel ...Door control panel ...26 28 30 32 34 36 39 40 25 - 2009 Mercedes CLS-Class | Owner's Manual - Page 28
At a glance Exterior view Exterior view 26 - 2009 Mercedes CLS-Class | Owner's Manual - Page 29
At a glance Exterior view Function 1 Trunk: Unlocking Opening and closing Vehicle tool kit 2 3 4 Rear lamps Rear window, defroster Fuel filler flap Fuel requirements 5 Doors: Locking and unlocking Opening 6 7 Towing eye bolt Tires and wheels Checking tire inflation pressure 72 76 327 204, 336 212 c - 2009 Mercedes CLS-Class | Owner's Manual - Page 30
At a glance Cockpit Cockpit 28 - 2009 Mercedes CLS-Class | Owner's Manual - Page 31
b c Page 8 Function Front Parktronic warning indicator Climate control panel Overhead control panel Glove box COMAND system, see separate operating instructions Center console Starter switch Steering wheel adjustment stalk Heated steering wheel (Canada only) Parking brake pedal Parking brake release - 2009 Mercedes CLS-Class | Owner's Manual - Page 32
At a glance Instrument cluster Instrument cluster 30 - 2009 Mercedes CLS-Class | Owner's Manual - Page 33
/TPMS malfunction telltale, USA only H Low tire pressure telltale, Canada only Fuel display with: A Fuel tank reserve warning lamp Reset button for: Resetting trip odometer Adjusting instrument cluster illumination 122 121 297 Page 298 300 300 1 Vehicles without Distronic: Warning lamp without - 2009 Mercedes CLS-Class | Owner's Manual - Page 34
At a glance Storage compartments Storage compartments 32 - 2009 Mercedes CLS-Class | Owner's Manual - Page 35
At a glance Storage compartments Function 1 2 Glove box Front passenger seat storage compartment with first aid kit Door pocket Storage bag Ashtray Door pocket Side storage pocket in trunk Luggage box under the trunk floor Door pocket Ashtray Storage bag Door pocket 183 178 m n 254 178 183 g h j - 2009 Mercedes CLS-Class | Owner's Manual - Page 36
operate the RACETIMER3 • to set the volume Press button è or · to select next/previous menu 133 Page 128 122 2 3 Function only available in telephone menu. AMG vehicles only. 34 - 2009 Mercedes CLS-Class | Owner's Manual - Page 37
At a glance Multifunction steering wheel Function Press button j or k briefly • to move within a menu • to select previous or next track, scene or stored station within Audio/DVD menu • to switch to the phone book and select a name or number within Telephone menu Page Function Press and hold button - 2009 Mercedes CLS-Class | Owner's Manual - Page 38
At a glance Center console Center console Upper part 36 - 2009 Mercedes CLS-Class | Owner's Manual - Page 39
At a glance Center console Function 1 2 3 4 5 6 7 8 9 a Seat heating, driver's side Rear window sunshade switch Rear seat head restraints switch, folding down Hazard warning flasher switch Front passenger front air bag off indicator lamp Central unlocking switch Alarm system indicator lamp - 2009 Mercedes CLS-Class | Owner's Manual - Page 40
At a glance Center console Lower part 1 2 3 4 Function Ashtray KEYLESS-GO start/stop button Gear selector lever for automatic transmission Parking assist (Parktronic system) deactivation switch Adaptive Damping System (ADS) switch Vehicle level control switch Thumbwheel for setting distance for - 2009 Mercedes CLS-Class | Owner's Manual - Page 41
Front reading lamps Garage door opener Hands-free microphone for Tele Aid (emergency call system), telephone, and Voice Control System, see separate operating instructions Interior lighting Page 100 100 d 100 170 186 100 92 100 190 c Function Left front reading lamp on/ off Ambient lighting Page 100 - 2009 Mercedes CLS-Class | Owner's Manual - Page 42
At a glance Door control panel Door control panel 1 2 3 Function Inside door handle Seat adjustment Memory function (for storing seat, exterior mirror and steering wheel settings) Exterior rear view mirror adjustment Switches for opening/closing front and rear side windows, rear window override - 2009 Mercedes CLS-Class | Owner's Manual - Page 43
Safety and security Vehicle equipment ...Occupant safety ...Panic alarm ...Driving safety systems ...Anti-theft systems ...42 42 64 64 69 41 - 2009 Mercedes CLS-Class | Owner's Manual - Page 44
for your vehicle at the time of purchase. Please be aware that your vehicle might not be equipped with all features described in this manual. Occupant safety Introduction In this section you will learn the most important facts about the restraint system components of the vehicle. The restraint - 2009 Mercedes CLS-Class | Owner's Manual - Page 45
with disabilities, contact an authorized Mercedes-Benz Center or call our Customer Assistance Center at 1-800-FOR-MERCedes (1-800-367-6372) for details cause some temporary breathing difficulty for people with asthma or other breathing trouble. To avoid this, you may wish to get out of the vehicle - 2009 Mercedes CLS-Class | Owner's Manual - Page 46
the air bag inflates with considerable speed and force, a proper seating position , please contact an authorized Mercedes-Benz Center. RDo not lean give the buyer this Operator's Manual. RKeep hands on the outside and steering Failure to follow these instructions can result in severe injuries to - 2009 Mercedes CLS-Class | Owner's Manual - Page 47
out upon your written request at an authorized Mercedes-Benz Center at an additional cost. Please contact an local authorized Mercedes-Benz Center or call the Customer Assistance Center (in the USA) at 1-800FOR-MERCedes (1-800-367-6372), or Customer Service (in Canada) at 1-800-387-0100 for details - 2009 Mercedes CLS-Class | Owner's Manual - Page 48
bag unit or ETD, our safety instructions must be followed. These instructions are available from any authorized Mercedes-Benz Center. RGiven not hang items such seat covers which have been tested and approved by Mercedes-Benz for your vehicle model. Using other seat covers may interfere with or - 2009 Mercedes CLS-Class | Owner's Manual - Page 49
Safety and security Occupant safety Rif the system determines that air bag deployment can offer additional protection to that provided by the seat belt on whether the seat belt is in use Rdepending exceeds the preset deployment threshold for the front air bags. The front passenger front air bag 2 - 2009 Mercedes CLS-Class | Owner's Manual - Page 50
Safety and security Occupant safety Rindependently Rindependently of the front air bags of the ETDs The side impact air bags are not deployed in side impacts which do not exceed the system's deployment threshold. The side air bags will not deployed in the event of a rollover unless the vehicle's - 2009 Mercedes CLS-Class | Owner's Manual - Page 51
and security Occupant safety i If your seat, including the trim cover and cushion, needs to be serviced in any way, take the vehicle to an authorized Mercedes-Benz Center. Only seat accessories approved by Mercedes-Benz may be used. Both the driver and the front passenger should always use the 75 - 2009 Mercedes CLS-Class | Owner's Manual - Page 52
passenger's weight category as tem checked as soon as possible by qualified technicians. Contact an authorized Mercedes-Benz Center. Only have the seat repaired or replaced at an authorized Mercedes-Benz Center. In order to ensure proper operation of the air bag system and OCS RDo For information - 2009 Mercedes CLS-Class | Owner's Manual - Page 53
illuminate, the system is not functioning. You must contact an authorized Mercedes-Benz Center before seating any child on the front passenger seat. For instead of increasing protection for the child. Follow the manufacturer's instructions for installation of child seats. G Warning! Always fasten - 2009 Mercedes CLS-Class | Owner's Manual - Page 54
highly stressed in an accident must be replaced and their anchoring points must also be checked. Only use seat belts which have been approved by Mercedes-Benz. Do not make any modifications to the seat belts. This can lead to unintended activation of the ETDs or to their failure to activate when - 2009 Mercedes CLS-Class | Owner's Manual - Page 55
in front of the seat. using a seat belt to secure infant restraints, toddler restraints, or children in booster seats, always follow the child seat manufacturer's instructions. Do not allow the seat belt to get caught in the door or in the seat adjustment mechanism. This could damage the seat belt - 2009 Mercedes CLS-Class | Owner's Manual - Page 56
belt release button X X With a smooth motion, pull the seat belt out of seat belt outlet 1. Place the shoulder portion of the seat belt across the top of your shoulder and the lap portion across your hips. Push latch plate 2 into buckle 3 until it clicks. X 54 - 2009 Mercedes CLS-Class | Owner's Manual - Page 57
rewind the seat belt by guiding the latch plate. 1 Benz Limited Warranty. Damaged seat belts must be replaced. Contact an authorized Mercedes-Benz Center. seat belt telltale < remains illuminated for as long as either the driver's or front passenger's seat belt is not fastened. if the vehicle speed - 2009 Mercedes CLS-Class | Owner's Manual - Page 58
is reactivated and the seat belt telltale < is flashing again if the vehicle speed once exceeds 15 mph (25 km/h). The seat belt telltale < will only go of the ETD allways follow our safety instructions. These are available at any authorized Mercedes-Benz Center. frontal or rear-end impacts - 2009 Mercedes CLS-Class | Owner's Manual - Page 59
evasive steering maneuvers at speeds above approximately 85 mph active head restraints must be reset. Otherwise, the active head restraints travel, providing the head with increased support earlier on in the collision sequence. tested and approved by Mercedes-Benz for your vehicle model. Using other seat or - 2009 Mercedes CLS-Class | Owner's Manual - Page 60
of the front side impact air bags. Contact an authorized Mercedes-Benz Center for availability. Correct driver seat adjustment G Warning! In . RAdjust the seat cushion so that the front edge of the seat cushion lightly supports your legs. the head restraint so that it is as close to the head as - 2009 Mercedes CLS-Class | Owner's Manual - Page 61
Safety and security Occupant safety ter of the head restraint supports the back of the head at eye level. RNever place hands under seat 3 or near any moving parts while seat 3 is being adjusted. Properly position - 2009 Mercedes CLS-Class | Owner's Manual - Page 62
and 210.2. A statement by the child restraint manufacturer of compliance with these standards can be found on the instruction label on the restraint and in the instruction manual provided with the restraint. When using any infant restraint, toddler restraint, or booster seat, make sure to carefully - 2009 Mercedes CLS-Class | Owner's Manual - Page 63
an additional connection to be made between child restraint systems secured with LATCH-type anchors X Guide top tether strap 4 between head restraint and top of the seat backrest. The head restraint must be positioned such that the top tether strap 4 can pass freely between the head restraint and - 2009 Mercedes CLS-Class | Owner's Manual - Page 64
itself can be secured. X Install the child restraint system and tighten top tether strap 4 according to the child restraint manufacturer's instructions. After removing the child restraint system and the top tether strap 4. X Reinstall the anchorage ring cover 1. a lap/shoulder belt fits - 2009 Mercedes CLS-Class | Owner's Manual - Page 65
2 goes out. The functions in the rear are enabled again. For more information on power windows, see the "Controls in detail" section (Y page 103). Z 1 Securing 63 - 2009 Mercedes CLS-Class | Owner's Manual - Page 66
this section is only achieved with winter tires, or snow chains as required. Safety notes G Warning! The following factors increase the risk of accidents: RExcessive speed, especially in turns RWet and slippery road surfaces RFollowing another vehicle too closely X or X or X 64 - 2009 Mercedes CLS-Class | Owner's Manual - Page 67
so that the wheels do not lock during braking. This allows you to maintain the ability to steer your vehicle. The ABS is functional above a speed of approximately 5 mph (8 km/h) independent of road surface conditions. On slippery road surfaces, the ABS will respond even to light brake pressure. The - 2009 Mercedes CLS-Class | Owner's Manual - Page 68
Safety and security Driving safety systems For more information, see "What to do if ...?" (Y page 291). Adaptive Brake Adaptive Brake provides a high level of braking safety as well as increased braking comfort. It is coupled with ABS, ESP® and BAS. Adaptive Brake takes driver and vehicle - 2009 Mercedes CLS-Class | Owner's Manual - Page 69
system which is not covered by the Mercedes-Benz Limited Warranty. When you switch off the ESP the accelerator pedal. RAdapt your speed and driving style to the data" section of this Operator's Manual. i The Distronic system and CLS 63 AMG: 1 ESP® switch Switching off the ESP® (except CLS 63 AMG - 2009 Mercedes CLS-Class | Owner's Manual - Page 70
by the Mercedes-Benz Limited Warranty. Switching off the ESP® (CLS 63 AMG only) driving restriction to engine torque Rloss of system supported traction control ESP® does not stabilize the standard driving maneuvers is reduced. Adapt your speed and driving to the prevailing road conditions and - 2009 Mercedes CLS-Class | Owner's Manual - Page 71
Vehicle stability in standard driving maneuvers is reduced. Adapt your speed and driving to the prevailing road conditions and to the may cause serious damage to the drivetrain which is not covered by the Mercedes-Benz Limited Warranty. Switching on the X Activating X X ESP® With the SmartKey: - 2009 Mercedes CLS-Class | Owner's Manual - Page 72
than 30 seconds, a call to the Response Center is initiated automatically by the Tele Aid system provided that you have subscribed to the Tele Aid service and that it has been activated properly, and that the necessary i If the turn signal lamps do not flash three times, a door or the trunk - 2009 Mercedes CLS-Class | Owner's Manual - Page 73
Controls in detail Vehicle equipment ...72 Locking and unlocking ...72 Starter switch positions ...83 Seats ...84 Multifunction steering wheel ...90 Mirrors ...92 Memory function ...93 Lighting ...94 Wipers ...101 Power windows ...103 Driving and parking ...Automatic transmission ...Instrument - 2009 Mercedes CLS-Class | Owner's Manual - Page 74
your vehicle might not be equipped with all features described in this manual. Locking and unlocking Notes G Observe Safety notes, see page 59. deactivate the feature, or adjust its signal volume, contact an authorized Mercedes-Benz Center. When unlocking the vehicle, all turn signal lamps flash once - 2009 Mercedes CLS-Class | Owner's Manual - Page 75
Controls in detail Locking and unlocking i USA only: This device complies with Part 15 of the FCC Rules. Operation is subject to the following two conditions: 1. This device may not cause harmful interference, and 2. this device must accept any interference received, including interference that may - 2009 Mercedes CLS-Class | Owner's Manual - Page 76
Controls in detail Locking and unlocking KEYLESS-GO Vehicles equipped with KEYLESS-GO come with two SmartKeys with KEYLESS-GO, each with remote control and a removable mechanical key. The KEYLESS-GO function is integrated into the SmartKey. On these vehicles, the validity of the SmartKey with - 2009 Mercedes CLS-Class | Owner's Manual - Page 77
Controls in detail Locking and unlocking be locked or the engine started via the KEYLESS-GO system. RIf and the automatic transmission is in park position P RThe Factory setting X the SmartKey with KEYLESS-GO is removed from the vehicle (e.g. if a passenger exits the vehicle with the SmartKey - 2009 Mercedes CLS-Class | Owner's Manual - Page 78
i If the batteries are checked within signal range of the vehicle, pressing button j or k will lock or unlock the vehicle accordingly. Any authorized Mercedes-Benz Center will be glad to supply you with a replacement. X Opening the doors from the inside You can open a locked door from the inside - 2009 Mercedes CLS-Class | Owner's Manual - Page 79
the force of the impact exceeds a preset threshold. The vehicle locks automatically when the ignition is switched on and the wheels are turning at vehicle speeds of approximately 9 mph (15 km/h) or more. You could therefore lock yourself out when the vehicle is pushed or towed or is on a test stand - 2009 Mercedes CLS-Class | Owner's Manual - Page 80
Controls in detail Locking and unlocking You can open a locked door from inside at any time. Open door only when conditions are safe to do so. If the vehicle was previously locked with the central locking switch: Rand the SmartKey is set to factory settings, ! The trunk lid swings open upwards - 2009 Mercedes CLS-Class | Owner's Manual - Page 81
. If you are carrying a second SmartKey with KEYLESS-GO with you, you can still lock the vehicle. Closing the trunk from the outside manually Vehicles with trunk opening/closing system 1 Indicator lamp 2 Remote trunk opening/closing switch X Pull switch 2 until the trunk begins to open. Indicator - 2009 Mercedes CLS-Class | Owner's Manual - Page 82
Controls in detail Locking and unlocking Closing the trunk from the inside automatically G Warning! Maintain sight of the area around the rear of the vehicle while operating the trunk lid with the door mounted switch. Monitor the closing procedure carefully to make sure no one is in danger of being - 2009 Mercedes CLS-Class | Owner's Manual - Page 83
Controls in detail Locking and unlocking been piled too high) in the upper motion sequence, the closing procedure is stopped and the trunk lid reopens slightly. Closing the trunk and locking vehicle from outside In vehicles with trunk opening/closing system and KEYLESS-GO, you can close the trunk - 2009 Mercedes CLS-Class | Owner's Manual - Page 84
Controls in detail Locking and unlocking opening the trunk from the inside using the emergency release button will trigger the anti-theft alarm system. To cancel the alarm, see (Y page 70). X X Insert the mechanical key in the trunk lid lock. Turn the mechanical key clockwise to position % and - 2009 Mercedes CLS-Class | Owner's Manual - Page 85
Controls in detail Starter switch positions Starter switch positions SmartKey G Observe Safety notes, see page 59. on when the ignition is switched on, have it checked and replaced if necessary. If a lamp in the instrument cluster remains on after starting the engine or comes on while driving, refer - 2009 Mercedes CLS-Class | Owner's Manual - Page 86
Controls in detail Seats i If you now press the KEYLESS-GO start/ stop button Ronce more, the ignition (position 2) is switched on Rtwice more the power supply is again switched off Ignition (or position 2) KEYLESS-GO start/stop button 1 USA only 2 Canada only X Seats Safety notes G Warning! In - 2009 Mercedes CLS-Class | Owner's Manual - Page 87
the controls properly. RAdjust the head restraint so that it is as close to the head as possible and the center of the head restraint supports the back of the head at eye level. RNever place hands under the seat or near any moving parts while a seat is being adjusted. Failure - 2009 Mercedes CLS-Class | Owner's Manual - Page 88
switch up or down in direction of arrow 2 until your upper legs are lightly supported. Head restraint height: Press the switch up or down in direction of arrow 1. close to the head as possible and the center of the head restraint supports the back of the head at eye level. This will reduce the - 2009 Mercedes CLS-Class | Owner's Manual - Page 89
during an accident. G Warning! Make sure the rear seat head restraints engage when placing them upright manually. Otherwise their protective function cannot be ensured. The back of the head will not be supported in the event of a collision. That could cause serious or even fatal injuries. Rear seat - 2009 Mercedes CLS-Class | Owner's Manual - Page 90
seat The multicontour seat has a movable seat cushion and inflatable air cushions built into the seat backrest to provide additional lumbar and side support. Switch on the ignition. Seat cushion depth: Adjust the seat cushion depth to the length of your upper leg using switch 4. Seat backrest - 2009 Mercedes CLS-Class | Owner's Manual - Page 91
with button 3 or to the center with button 2. Seat backrest side bolsters: Adjust the side bolsters so that they provide good lateral support using switch 1. i The seat ventilation for the driver's seat can be activated using summer opening feature (Y page 105). X X Seat heating X Switch on - 2009 Mercedes CLS-Class | Owner's Manual - Page 92
Controls in detail Multifunction steering wheel The seat heating switches from level 3 (high) to level 2 after approximately 5 minutes. The seat heating switches from level 2 to level 1 (low) after approximately 10 minutes. The seat heating automatically switches off after approximately 20 minutes. - 2009 Mercedes CLS-Class | Owner's Manual - Page 93
Controls in detail Multifunction steering wheel Easy-entry/exit feature This feature allows for easier entry into and exit from the vehicle. When entering and exiting the vehicle, the steering wheel is in its uppermost position. The easy-entry/exit feature can be activated or deactivated in the - 2009 Mercedes CLS-Class | Owner's Manual - Page 94
switch at the tip of stalk in direction of arrow 2. Indicator lamp 3 goes out. Interior rear view mirror X Adjust the interior rear view mirror manually. 1 Passenger-side exterior rear view mirror i Indicator lamp 3 flashes or goes out in case of power surge or undervoltage or if the steering - 2009 Mercedes CLS-Class | Owner's Manual - Page 95
Controls in detail Memory function i At low ambient temperatures, the exterior rear view mirrors will be heated automatically. Auto-dimming rear view mirrors The reflection brightness of the exterior rear view mirror on the driver's side and the interior rear view mirror will respond automatically - 2009 Mercedes CLS-Class | Owner's Manual - Page 96
symmetrical low beams. Relevant information can be obtained at any authorized Mercedes-Benz Center. i Vehicles equipped with active Bi-Xenon headlamps: The active Bi-Xenon headlamps monitor the vehicle's steering angle and speed, then automatically shift their beams to either side to better follow - 2009 Mercedes CLS-Class | Owner's Manual - Page 97
result in a discharged battery. Low-beam headlamps The low-beam headlamps can be switched on and off with the exterior lamp switch using the manual headlamp mode. X Switch on the ignition. X Automatic headlamp mode The following lamps come on and go out automatically depending on the brightness of - 2009 Mercedes CLS-Class | Owner's Manual - Page 98
U to permit activation of the high-beam headlamps. When the engine is running, and you turn the exterior lamp switch to position C or B, the manual headlamp mode has priority over the daytime running lamp mode. The corresponding exterior lamps come on (Y page 94). tion N or park position P with the - 2009 Mercedes CLS-Class | Owner's Manual - Page 99
Controls in detail Lighting lamps should only be used in conjunction with low-beam headlamps. Consult your State or Province Motor Vehicle Regulations regarding permissible lamp operation. X Switch on the ignition. X X illumination (Headlamps delayed shut-off feature)" (Y page 136). High beam X X - 2009 Mercedes CLS-Class | Owner's Manual - Page 100
five times Switching on: Press hazard warning flasher switch 1. All turn signal lamps are flashing. When you switch off the ignition, the counter resets. For information on filling up the washer reservoir, see "Washer system and headlamp cleaning system" (Y page 203). i To signal minor directional - 2009 Mercedes CLS-Class | Owner's Manual - Page 101
Switching off X Switch off the left or right turn signal. Steer straight ahead. The front fog lamp goes out. low ambient lighting conditions driving speeds below 25 mph (40 km/h) the front fog lamps switched off Turn steering wheel in desired direction. Driving forward: The front fog lamp on the - 2009 Mercedes CLS-Class | Owner's Manual - Page 102
X Right front reading lamp on/off 6 Interior lighting 7 Ambient lighting 8 Front reading lamps Interior lighting in the rear ! An interior lamp switched on manually does not go out automatically. Leaving an interior lamp switch in the ON position for extended periods of time with the engine turned - 2009 Mercedes CLS-Class | Owner's Manual - Page 103
Controls in detail Wipers The overhead control panel is located above the rear seat bench. Wipers Notes ! Do not operate the wipers when the windshield is dry. Dust that accumulates on a windshield might scratch the glass and/or damage the wiper blades when wiping occurs on a dry windshield. If it - 2009 Mercedes CLS-Class | Owner's Manual - Page 104
system" (Y page 203). For information on cleaning the headlamps with washer fluid, see "Headlamp cleaning system" (Y page 98). bination switch Problems with wipers Single wipe X Press the combination switch briefly in direction of arrow 1 to the resistance point. The windshield wipers wipe one - 2009 Mercedes CLS-Class | Owner's Manual - Page 105
combination switch to the next higher wiper speed the windshield wipers checked at the nearest authorized Mercedes-Benz Center Rhave i Operating the rear door windows from the rear is not possible if you activate the override switch (Y page 63). - 2009 Mercedes CLS-Class | Owner's Manual - Page 106
Controls in detail Power windows i After switching off the ignition or removing the SmartKey from the starter switch, you can operate the door windows until you open the driver's or front passenger door. If no door was opened you can operate the door windows for up to 5 minutes. X Express operation - 2009 Mercedes CLS-Class | Owner's Manual - Page 107
Controls in detail Power windows X Pull and hold the respective switch once more immediately until the door window is completely closed. Hold the respective switch for approximately 1 second. The door window is synchronized. sliding sunroof have reached the desired position. X closing procedure, - 2009 Mercedes CLS-Class | Owner's Manual - Page 108
Controls in detail Driving and parking X X Close all doors. Press and hold the lock button on an outside door handle (Y page 74) until the door windows and the tilt/sliding sunroof are completely closed. Release the lock button on the outside door handle to interrupt the closing procedure. Driving - 2009 Mercedes CLS-Class | Owner's Manual - Page 109
Controls in detail Driving and parking Automatic transmission X Turn the SmartKey in the starter switch to position 3 (Y page 83) and release it. The engine starts automatically. Starting with KEYLESS-GO G Warning! As long as the SmartKey is in your vehicle, the vehicle can be started. Therefore, - 2009 Mercedes CLS-Class | Owner's Manual - Page 110
Mercedes-Benz Limited Warranty. CLS 63 AMG: At engine temperatures below 68‡ (20†), the engine's maximum speed is speeds. Running a cold engine at high engine speeds may shorten the service life X If the engine does not start after several starting attempts: X Contact an authorized Mercedes-Benz - 2009 Mercedes CLS-Class | Owner's Manual - Page 111
problem checked at an authorized Mercedes-Benz Center as soon as possible. After a cold start, the automatic transmission shifts at a higher engine revolution. This allows the catalytic converter to reach its operating temperature earlier. For more information on driving, see "Driving instructions - 2009 Mercedes CLS-Class | Owner's Manual - Page 112
Notify local fire and/or police authorities. vehicle when leaving. If the extent of the damage cannot be determined: X Contact an authorized Mercedes-Benz Center or call Roadside Assistance. assemblies mount: If no damage can be determined on the Rmajor Rfuel system Rengine X Start the engine - 2009 Mercedes CLS-Class | Owner's Manual - Page 113
Controls in detail Driving and parking the vehicle's brake lights do not light up when the parking brake is engaged. X G Warning! When leaving the vehicle, always remove the SmartKey from the starter switch, take it with you, and lock the vehicle. Do not leave children unattended in the vehicle, or - 2009 Mercedes CLS-Class | Owner's Manual - Page 114
not in park position P. Read and observe messages that may appear in the multifunction display (Y page 266). ered by the Mercedes-Benz Limited Warranty. Automatic transmission Introduction For information on driving with an automatic transmission, see "Driving and parking" (Y page 106). G Warning - 2009 Mercedes CLS-Class | Owner's Manual - Page 115
63 AMG only) (Y page 118) position of the accelerator pedal vehicle speed 1 Transmission position indicator Rthe Rthe With drive position D selected, you can influence transmission shifting by: Rlimiting the gear range the gear range Z Rextending Rchanging the gears manually (CLS 63 AMG only - 2009 Mercedes CLS-Class | Owner's Manual - Page 116
vehicle, or driving for any other reason with the automatic transmission in neutral position N can result in transmission damage that is not covered by the Mercedes-Benz Limited Warranty. ê Drive position í 114 - 2009 Mercedes CLS-Class | Owner's Manual - Page 117
display. Driving tips Kickdown Use the kickdown when you want maximum acceleration. X Fully depress the accelerator pedal. Depending on the engine speed the automatic transmission shifts into a lower gear. You may encounter a resistance point. If so, depress the accelerator pedal past this - 2009 Mercedes CLS-Class | Owner's Manual - Page 118
current program mode appears in the multifunction display. Program mode selector switch on CLS 63 AMG Program mode selector switch C Comfort S Sport M Manual For standard driving For sporty driving For manual gearshifting (Y page 118) C Comfort S Sport For comfort driving For standard driving - 2009 Mercedes CLS-Class | Owner's Manual - Page 119
AMG Sport Package and on CLS 63 AMG only. CLS 63 AMG: For information on using the gear selector lever or the steering wheel gearshift control in manual program mode M, see "Manual not shift into a lower gear if the engine's max. speed would be exceeded. Extending gear range X Briefly press the gear - 2009 Mercedes CLS-Class | Owner's Manual - Page 120
, the automatic transmission will upshift beyond any gear range limit selected. Canceling gear range limit X Manual shift program The manual shift program is available on CLS 63 AMG only. Manual program mode M differs with regard to spontaneity, response time, and shifting smoothness from automatic - 2009 Mercedes CLS-Class | Owner's Manual - Page 121
will not prevent this type of loss of control. Upshifting ! In manual program mode M, the automatic transmission will not upshift, even if the speed does not reach the red marking on the tachometer. Otherwise the engine could be damaged which is not covered by the Mercedes-Benz Limited Warranty - 2009 Mercedes CLS-Class | Owner's Manual - Page 122
R. Have the automatic transmission checked at an authorized Mercedes-Benz Center as soon as possible. Instrument cluster Introduction For a full view illustration of the instrument cluster, see "Instrument cluster" (Y page 30). Deactivating manual shift program X Press the program mode selector - 2009 Mercedes CLS-Class | Owner's Manual - Page 123
can occur just by opening the engine hood. Stay away reset button 1 ! Excessive coolant temperature triggers a warning in the may cause serious engine damage which is not covered by the Mercedes-Benz Limited Warranty. Rswitch For information on changing the instrument cluster settings, e.g. the - 2009 Mercedes CLS-Class | Owner's Manual - Page 124
is next due for maintenance service, to set the language reset. X Tachometer The red marking on the tachometer (Y page 30) denotes excessive engine speed. ! Avoid driving at excessive engine speeds, as it may result in serious engine damage that is not covered by the Mercedes-Benz Limited Warranty - 2009 Mercedes CLS-Class | Owner's Manual - Page 125
, in the current menu. In the Settings menu, instead of functions, you will find a number of submenus for calling up and changing settings. For instructions on using these submenus, see "Settings menu" (Y page 132). The number of menus available in the system depends on which optional equipment is - 2009 Mercedes CLS-Class | Owner's Manual - Page 126
Controls in detail Control system Multifunction display 2 Trip odometer 3 Automatic transmission program mode indicator 4 Transmission position/gear range indica- tor 5 Main odometer For more information on menus displayed in the multifunction display, see "Menus and submenus" (Y page 125). 1 - 2009 Mercedes CLS-Class | Owner's Manual - Page 127
Controls in detail Control system Menus and submenus Z 125 - 2009 Mercedes CLS-Class | Owner's Manual - Page 128
) up digital speedometer or outside temperature (Y page 126) up maintenance service indicator (Y page 240) The following functions are available: RChecking RCalling is free of ice. The road may still 6 7 AMG vehicles only. The vehicle status message memory menu is only displayed if there is a - 2009 Mercedes CLS-Class | Owner's Manual - Page 129
Vehicle supply voltage X Press button è or ÿ repeatedly until the AMG menu appears in the multifunction display. Press button j repeatedly until During this time, avoid driving at full engine speed. If the engine reaches the overspeed range in the manual shift program, the menu will be shown in red - 2009 Mercedes CLS-Class | Owner's Manual - Page 130
posted speed limits. The RACETIMER allows you to time and save driving stretches. X Press button è or ÿ repeatedly until the AMG menu appears shown will be saved as a lap time. The RACETIMER begins timing the new lap. The new lap begins to be timed as soon as the intermediate time is called - 2009 Mercedes CLS-Class | Owner's Manual - Page 131
multifunction display. X Press button è or ÿ repeatedly until the AMG menu appears in the multifunction display. Press button j repeatedly speed 4 Overall distance driven 5 Average speed 1 Lap number 2 Lap time 3 Maximum speed during lap 4 Lap length 5 Average speed during lap X Press the reset - 2009 Mercedes CLS-Class | Owner's Manual - Page 132
and a subscription to satellite radio service provider are required for satellite radio operation. Contact an authorized Mercedes-Benz Center for details and availability for your vehicle. For more information, refer to separate COMAND system operating instructions. radio station (Y page 130 - 2009 Mercedes CLS-Class | Owner's Manual - Page 133
display depends on whether the Distronic system is activated or deactivated. Please refer to the "Driving systems" section of this manual (Y page 144) for instructions on how to activate Distronic. The current track does not appear during Audio AUX mode operation. Operating video DVD X Turn - 2009 Mercedes CLS-Class | Owner's Manual - Page 134
checks performed on the vehicle. Bring the vehicle to an authorized Mercedes-Benz Center to address the malfunction and warning messages. X For safety reasons, the function Headlamp Mode in the Lighting submenu cannot be reset while driving. X Press button è or ÿ repeatedly until the Settings menu - 2009 Mercedes CLS-Class | Owner's Manual - Page 135
speed display or outside temperature) for standarf display (Y page 135) The settings you have changed will not be reset unless you confirm the action by pressing the reset settings can be changed within the various menus. Detailed instructions on making individual settings can be found on the - 2009 Mercedes CLS-Class | Owner's Manual - Page 136
ç to select the language to be used for the multifunction display messages. speedometer display mode (Y page 134) language (Y page 134) display (speed display or outside temperature) for status line (Y page 134) X RSelecting RSelecting RSelecting Press button æ or ç to set speedometer unit to Km - 2009 Mercedes CLS-Class | Owner's Manual - Page 137
functions are available: RSetting Selecting display (speed display or outside temperature) for standard display Press button æ or ç to select manual operation (Manual) or daytime running lamp mode (Constant Lighting" (Y page 96). For safety reasons, resetting all the functions of all submenus to the - 2009 Mercedes CLS-Class | Owner's Manual - Page 138
Controls in detail Control system The following message appears in the multifunction display: Lighting - Cannot be completely reset to factory settings while driving. Setting locator lighting With the locator lighting feature activated and the exterior lamp switch in position U, the following lamps - 2009 Mercedes CLS-Class | Owner's Manual - Page 139
Controls in detail Control system With the headlamps delayed shut-off feature activated and the exterior lamp switch in position U before the engine is turned off, the following lamps will come on when the engine is turned off: RParking RTail lamps plate lamps X lamps marker lamps fog lamps - 2009 Mercedes CLS-Class | Owner's Manual - Page 140
to activate or deactivate the automatic central locking. With the automatic central locking system activated, the vehicle is centrally locked at vehicle speeds of approximately 9 mph (15 km/h). X Move the selection marker with button æ or ç to the Vehicle submenu. X Convenience submenu Access the - 2009 Mercedes CLS-Class | Owner's Manual - Page 141
since start 4 Average fuel consumption since start 1 Distance driven since last reset 2 Time elapsed since last reset 3 Average speed since last reset 4 Average fuel consumption since last reset fuel consumption statistics (Y page 139) to empty (Y page 140) Fuel consumption statistics since start - 2009 Mercedes CLS-Class | Owner's Manual - Page 142
vehicle. Bear in mind that at a speed of just 30 mph (approximately 50 km instructions. X Press button ÿ or è on the multifunction steering wheel repeatedly until the message TEL appears in the multifunction display. One of the following messages will appear in the multifunction display: RNo Service - 2009 Mercedes CLS-Class | Owner's Manual - Page 143
or descending alphabetical order. Press button s. The control system dials the selected phone number. If the connection is successful and this feature is supported by your network provider, the name of the party (if stored in your phone book) you are calling will appear in the multifunction - 2009 Mercedes CLS-Class | Owner's Manual - Page 144
and for safe brake operation. Only use the cruise control if the road, traffic, and weather conditions make it advisable to travel at a constant speed. RThe use of the cruise control can be dangerous on winding roads or in heavy traffic because conditions do not allow safe driving at a constant - 2009 Mercedes CLS-Class | Owner's Manual - Page 145
control lever in direction of arrow 1 or depress in direction of arrow 2. Remove your foot from the accelerator pedal. X to last set speed X The last stored set speed is canceled when the engine is turned off. The cruise control switches off automatically when you depress the brake pedal or you - 2009 Mercedes CLS-Class | Owner's Manual - Page 146
. Briefly pull the cruise control lever in direction of arrow 4. If no speed is stored, the current speed is set and stored. Remove your foot from the accelerator pedal. X Release the cruise control lever. The new speed is set and the vehicle will accelerate or decelerate. The last stored set - 2009 Mercedes CLS-Class | Owner's Manual - Page 147
control of the vehicle. High-frequency sources such as toll stations, speed measuring systems etc. can cause the Distronic system to malfunction. G Warning with its operational characteristics. We strongly recommend that you review the following information carefully before operating the system. G - 2009 Mercedes CLS-Class | Owner's Manual - Page 148
in heavy traffic because conditions do not allow safe driving at a constant speed. The Distronic will not react to stationary objects in the roadway (e.g. a system only. Removal, tampering, or altering of the device will void any warranties, and is not permitted by the FCC. Do not tamper with, alter, - 2009 Mercedes CLS-Class | Owner's Manual - Page 149
l in the instrument cluster is illuminated if the Distronic system calculates that the distance to the vehicle ahead and your vehicle's current speed indicate that the Distronic will not be capable of slowing the vehicle sufficiently to maintain the preset following distance, which creates a danger - 2009 Mercedes CLS-Class | Owner's Manual - Page 150
maximum deceleration of your vehicle. The Distronic brakes the vehicle in an effort to restore the preset distance or to maintain the set speed. Distronic menu in the control system The information shown in the multifunction display depends on whether the Distronic system and/or the distance warning - 2009 Mercedes CLS-Class | Owner's Manual - Page 151
up in direction of arrow 1 (Y page 148). The new speed is set and the vehicle will accelerate. Keep in mind that it may take a brief moment until the vehicle has reached the set speed. Z Activating Distronic You can activate the Distronic when the vehicle speed is between 20 mph (30 km/h) and 110 - 2009 Mercedes CLS-Class | Owner's Manual - Page 152
Briefly press the cruise control lever down in direction of arrow 2 (Y page 148). The new speed is set and the vehicle will decelerate. Keep in mind that it may take a in direction of arrow 3 (Y page 148). The cruise control speed segments in the multifunction display will go out and the following - 2009 Mercedes CLS-Class | Owner's Manual - Page 153
of 20 mph (30 km/h) by operation of the system. At that time the driver must apply the brakes in order to reduce vehicle speed further or bring it to a stop. Depressing the accelerator pedal does not deactivate the Distronic. After a brief acceleration (e.g. for passing), the Distronic will resume - 2009 Mercedes CLS-Class | Owner's Manual - Page 154
register stationary objects in the road, e.g.: Ra Ra i If the message DISTRONIC Currently Unavailable - See Operator's Manual disappears during driving and the last set speed flashes for approximately 5 seconds, the dirt (e.g. slush) has dissolved; Distronic works again. Turns and bends stopped - 2009 Mercedes CLS-Class | Owner's Manual - Page 155
yet been detected by Distronic. There will be insufficient distance to the preceding vehicles. If these warnings are issued, you must brake manually to maintain a safe distance and avoid a collision with the preceding vehicle. When depressing the brake pedal, the warning sound ceases. The warning - 2009 Mercedes CLS-Class | Owner's Manual - Page 156
Controls in detail Driving systems comes on. A loudspeaker symbol appears in the multifunction display (Y page 148). Airmatic DC (Dual Control) Introduction The Airmatic DC consists of two components. The Adaptive Damping System (ADS) (Y page 154) and the vehicle level control (Y page 154). G - 2009 Mercedes CLS-Class | Owner's Manual - Page 157
or lowered according to the selected level setting and to the vehicle speed. At a speed exceeding approximately 68 mph (110 km/h) with normal level set or Lamp off Lamp on the ride height is reduced automatically. With decreasing speed, the ride height is again raised to the normal level. Select the - 2009 Mercedes CLS-Class | Owner's Manual - Page 158
raised is canceled. The indicator lamp 2 in switch 1 goes out. The vehicle then lowers to normal level. If you do not drive in this speed range, the selected vehicle level setting remains stored G Warning! The Parktronic is a supplemental system. It is not intended to, nor does it replace, the - 2009 Mercedes CLS-Class | Owner's Manual - Page 159
Controls in detail Driving systems ! Special attention must be paid to objects with smooth surfaces or low silhouettes (e.g. trailer couplings, painted posts, elevated crossbars or road curbs). Such objects may not be detected by the system and can damage the vehicle. During parking maneuvers, pay - 2009 Mercedes CLS-Class | Owner's Manual - Page 160
Controls in detail Driving systems Current transmission position D R or N Warning indicator Front area activated Front and rear area activated position D, or park position P, or the parking brake is engaged. Switching the Parktronic system on/off The Parktronic system is automatically switched on - 2009 Mercedes CLS-Class | Owner's Manual - Page 161
off after 20 seconds and the indicator lamp 2 in the Parktronic switch 1 comes on. X Have the Parktronic system checked at an authorized Mercedes-Benz Center as soon as possible. If only the red distance segments illuminate and no acoustic warning sounds, the Parktronic system sensors are dirty - 2009 Mercedes CLS-Class | Owner's Manual - Page 162
Controls in detail Climate control system Climate control system Control panels 4-zone automatic climate control 160 - 2009 Mercedes CLS-Class | Owner's Manual - Page 163
Controls in detail Climate control system Function 1 2 3 4 5 6 Air distribution, driver's side y Front defroster $ Temperature control, driver's side, raising Display $ Temperature control, passenger side, raising ¯ Rear window defroster Recommendation/Notes (Y page 167) i Keep this setting - 2009 Mercedes CLS-Class | Owner's Manual - Page 164
Controls in detail Climate control system Function b 5 Rear air-conditioning remote control (USA only) Ñ Rear air-conditioning remote control (Canada only) c d Q Increasing air volume ´ Climate control on/off · Decreasing air volume MAX COOL on/off (USA only) T Residual heat/ventilation (Canada only - 2009 Mercedes CLS-Class | Owner's Manual - Page 165
can operate the climate control system in either the automatic or manual mode. The system cools or heats the interior depending on the others. Have a clogged filter replaced as soon as possible at an authorized Mercedes-Benz Center. The air conditioning will not engage (no cooling) if the A/C mode - 2009 Mercedes CLS-Class | Owner's Manual - Page 166
Controls in detail Climate control system Deactivating the climate control system G Warning! When the climate control is switched off, the outside air supply and circulation are also switched off. Only choose this setting for a short time. Otherwise the windows could fog up, impairing visibility and - 2009 Mercedes CLS-Class | Owner's Manual - Page 167
Controls in detail Climate control system X Press buttons  or Á to separately adjust the interior air temperature on each side of the passenger compartment. Activating: Press one button U. The indicator lamp in the button comes on. AUTO appears in display 4 (Y page 160). The air volume and air - 2009 Mercedes CLS-Class | Owner's Manual - Page 168
direct the air to air vents in the vehicle interior that are not in the immediate area of unprotected skin. Please comply with the following instructions in order for the climate control to function optimally: X Keep the air intake grille in front of the windshield free of snow, leaves, sticks, and - 2009 Mercedes CLS-Class | Owner's Manual - Page 169
Controls in detail Climate control system temperature of the air is approximately the same as that of the air flowing from the center air vents. Rear center console air vents Adjusting air distribution The air distribution can be adjusted separately on each side of the passenger compartment. The - 2009 Mercedes CLS-Class | Owner's Manual - Page 170
: Press button f again. MAX COOL disappears in display 4. The previous settings are once again in effect. on to dehumidify efficient blower speed and heating power, depending on outside temperature flows onto the windshield and the front side windows air recirculation mode is switched off i To - 2009 Mercedes CLS-Class | Owner's Manual - Page 171
out. i Regardless of the selected air volume, the blower operates at low speed. i How long the system will provide heating depends on the coolant temperature conditioning is activated, or press button y. X i The manually selected air recirculation mode is deactivated automatically: Rafter 5 minutes - 2009 Mercedes CLS-Class | Owner's Manual - Page 172
Controls in detail Power tilt/sliding sunroof Rear window defroster G Warning! Any accumulation of snow and ice should be removed from the rear window before driving. Visibility could otherwise be impaired, endangering you and others. The rear window defroster uses a large amount of power. To keep - 2009 Mercedes CLS-Class | Owner's Manual - Page 173
sunroof when leaving the vehicle. If water enters the vehicle interior, vehicle electronics could be damaged which is not covered by the Mercedes-Benz Limited Warranty. i You can also open or close the tilt/sliding sunroof using the SmartKey or the KEYLESS-GO function, see "Summer opening feature - 2009 Mercedes CLS-Class | Owner's Manual - Page 174
in the passenger compartment. To reduce or eliminate these noises, change the position of the tilt/sliding sunroof or open a window slightly. Closing manually: Pull and hold the sunroof switch to the resistance point in direction of arrow 3. Release the sunroof switch when the desired position is - 2009 Mercedes CLS-Class | Owner's Manual - Page 175
be closed again. X X X X Loading and storing Loading instructions G Warning! Always fasten items being carried as securely as possible using /sliding sunroof cannot be closed or synchronized, contact an authorized Mercedes-Benz Center or call Roadside Assistance. X Vehicles with SmartKey: Switch - 2009 Mercedes CLS-Class | Owner's Manual - Page 176
instructions when loading the vehicle and transporting cargo: RAlways Roof rack For information about further roof rack equipment, contact an authorized Mercedes-Benz for your vehicle model to avoid damage to the vehicle. Follow the manufacturer's installation instructions. Otherwise, an - 2009 Mercedes CLS-Class | Owner's Manual - Page 177
Controls in detail Loading and storing Ski bag (Canada only) G Warning! The ski bag is designed for up to four pairs of skis. Do not load the ski bag with other objects. Always fasten the ski bag securely. In an accident, an unfastened ski bag can cause injury to vehicle occupants. Unfolding and - 2009 Mercedes CLS-Class | Owner's Manual - Page 178
recess of seat backrest. Close ski bag compartment cover. Removing the ski bag For ski bag removal, we recommend that you contact an authorized Mercedes-Benz Center. 1 Strap X Tighten strap 1 by pulling at the loose end (arrow) until the skis in the ski bag are tightly secured. 1 Hook 2 Eye - 2009 Mercedes CLS-Class | Owner's Manual - Page 179
. Carefully secure cargo by applying even load on all hooks with rope of sufficient strength to hold down the cargo. Always follow loading instructions (Y page 173). Retaining hook A retaining hook can be used to attach cargo items such as bags. 1 Tab 2 Retaining hook X Pull tab 1 of retaining - 2009 Mercedes CLS-Class | Owner's Manual - Page 180
information on Audio AUX mode or on media interface, see separate COMAND system operating instructions. 1 Glove box lid release 2 Glove box lid X X $ Unlocking glove box separately, e.g. when the vehicle is in the shop for service. The glove box can only be locked or unlocked with the mechanical key. - 2009 Mercedes CLS-Class | Owner's Manual - Page 181
Controls in detail Loading and storing i The Roadside Assistance button p (Y page 187) and the Information button ¡ (Y page 188) are located in the storage compartment. X Storage compartment in the rear armrest Opening storage compartment: Press button 1 right or left and fold cover 2 sideward. - 2009 Mercedes CLS-Class | Owner's Manual - Page 182
an accident. Liquids spilled on vehicle occupants may cause serious personal injury. Liquids spilled on vehicle equipment may cause damage not covered by the Mercedes-Benz Limited Warranty. The cup holder must be extended when in use with bottles. When not in use, keep the cup holder closed. An open - 2009 Mercedes CLS-Class | Owner's Manual - Page 183
. Cup holder in rear armrest The cup holder can be removed for cleaning purposes. ! Make sure that the cup holder is correctly positioned in the guide while you are reinstalling it. Otherwise the cup holder can be damaged. X Press mark on cup holder and press cup holder downward until it engages - 2009 Mercedes CLS-Class | Owner's Manual - Page 184
To use vanity mirror 5, lift up vanity mirror cover 6. Vanity mirror lamp 1 comes on. 1 Rear window sunshade switch Always extend the sunshade fully for its support against the window frame. X Switch on the ignition. 182 - 2009 Mercedes CLS-Class | Owner's Manual - Page 185
insert: Push the ashtray insert back into frame until it engages. Closing: Push down cover 1. 2 Ashtray X X X X Opening: Briefly press the top of ashtray 2. Removing ashtray insert: Pull ashtray release 1 in direction of arrow. Remove ashtray insert upwards from ashtray frame. Reinstalling ashtray - 2009 Mercedes CLS-Class | Owner's Manual - Page 186
Controls in detail Useful features necting, or using plugs that do not fit properly) can damage the lighter socket. With the socket damaged, the lighter may not function properly any longer. Power outlets ! Make sure no fluids come into contact with the power outlet, as this could cause a short - 2009 Mercedes CLS-Class | Owner's Manual - Page 187
and is operational. Activation requires a subscription for monitoring services, connection and cellular air time. Rvehicle Rthe battery power self-test after you have switched on the ignition. and manual emergency Assistance RInformation The Tele Aid system is operational providing that - 2009 Mercedes CLS-Class | Owner's Manual - Page 188
by other means. Have the system checked at the nearest Mercedes-Benz Center or contact the Response Center at 1-800-756-9018 call manually i The "911" emergency call system is a public service. Using satellite location system), vehicle model, identification number and color are generated. i If no - 2009 Mercedes CLS-Class | Owner's Manual - Page 189
generating the vehicle identification number, model, color and location (subject to availability Mercedes-Benz technician or arrange to tow your vehicle to the nearest authorized MercedesBenz Center. For services such as labor and/ or towing, charges may apply. Refer to the Roadside Assistance manual - 2009 Mercedes CLS-Class | Owner's Manual - Page 190
Aid system will transmit data generating the vehicle identification number, model, color and location (subject to availability of cellular and GPS signals your vehicle, the nearest authorized MercedesBenz Center or Mercedes-Benz USA products and services is available to you. Terminating calls: Press - 2009 Mercedes CLS-Class | Owner's Manual - Page 191
Assistance Center. The transmitted data can contain address details for a Mercedes-Benz Center or POIs. Route guidance A prompt appears for confirmation if of the COMAND system can be found in the separate COMAND operating instructions. Destination Download allows you access to a database of over 10 - 2009 Mercedes CLS-Class | Owner's Manual - Page 192
instructions for programming information. Stolen Vehicle Recovery services In the event your vehicle was stolen: X Report the incident to the police. The police will issue a numbered incident report. X Pass this number on to the Mercedes-Benz any garage door opener model manufactured before April - 2009 Mercedes CLS-Class | Owner's Manual - Page 193
rolling code devices) with the rolling code feature, follow these instructions after completing the "Programming" portion (steps 1 through 6) of on constantly, programming is complete and your device i Exact location and color of the button may vary by garage door opener brand. Depending on - 2009 Mercedes CLS-Class | Owner's Manual - Page 194
in detail Useful features "smart" button. If there is difficulty locating the transmitting button, refer to the garage door opener Operator's Manual. X X Step 12: Confirm the garage door operation by pressing the programmed signal transmitter button (2, 3 or 4). Step 13: To program the remaining - 2009 Mercedes CLS-Class | Owner's Manual - Page 195
faster and more accurate signal to the integrated remote control. RPut a new battery in hand-held remote con- Erasing the integrated remote control memory authorized Mercedes-Benz Center, or call Mercedes-Benz Customer Assistance Center (in the USA) at 1-800-FOR-MERCedes, or Customer Service (in - 2009 Mercedes CLS-Class | Owner's Manual - Page 196
securely in place and adjust them if necessary. A loose floormat could slip and hinder proper functioning of the pedals. Do not place several floormats on top of each other as this may impair pedal movement. i To install or remove the floormat more easily, move the driver's seat or front passenger - 2009 Mercedes CLS-Class | Owner's Manual - Page 197
Operation Vehicle equipment ...The first 1000 miles (1500 km) ...At the gas station ...Engine compartment ...Tires and wheels ...Winter driving ...Driving instructions ...Maintenance ...Vehicle care ...196 196 197 199 204 231 233 238 241 195 - 2009 Mercedes CLS-Class | Owner's Manual - Page 198
might not be equipped with all features described in this manual. The first 1000 miles (1500 km) The more speeds. RDuring ! Additional instructions for AMG vehicles: RDuring the first 1 000 miles (1 500 km), do not exceed a speed of 85 mph (140 km/h). RDuring this period, avoid engine speeds - 2009 Mercedes CLS-Class | Owner's Manual - Page 199
from the use of non-approved fuels or fuel additives or resulting from mixing gasoline with diesel fuel is not covered by the Mercedes-Benz Limited Warranty. contact gas station personnel in case labels on the pump cannot be found. For more information on gasoline, see "Premium unleaded gasoline - 2009 Mercedes CLS-Class | Owner's Manual - Page 200
inside of fuel filler flap. Fully insert filler nozzle unit and refuel. Only fill your tank until the filler nozzle unit cuts out - do not top off or overfill. Closing: Turn fuel filler cap 2 clockwise until it audibly engages. oil level (Y page 200) level (Y page 202) lighting (Y page 94), (Y page - 2009 Mercedes CLS-Class | Owner's Manual - Page 201
socket) of the ignition system Rwith the engine running Rwhile starting the engine Rwhen the ignition is switched on and the engine is turned manually 1 Hood lock release lever X Pull release lever 1. The hood is unlocked. ! To avoid damage to the windshield wipers or hood, never open the hood - 2009 Mercedes CLS-Class | Owner's Manual - Page 202
Increased oil consumption can occur when the vehicle is new or the vehicle is driven frequently at higher engine speeds. Engine oil consumption checks should only be made Using special additives not approved by Mercedes-Benz may cause damage not covered by the Mercedes-Benz Limited Warranty. 200 - 2009 Mercedes CLS-Class | Owner's Manual - Page 203
approximately 2.1 US qt. (2.0 l). i CLS 63 AMG: The filling quantity between the upper and emission control system damage not covered by the Mercedes-Benz Limited Warranty. If necessary, add engine oil. 1 Fully insert oil dipstick 1 into the dipstick guide tube. Pull out oil dipstick 1 again after - 2009 Mercedes CLS-Class | Owner's Manual - Page 204
burn if it comes into contact with hot engine parts. Coolant level CLS 63 AMG 1 Filler cap X X RDo Unscrew filler cap 1 from filler cause damage to the engine and emission control system not covered by the Mercedes-Benz Limited Warranty. X Screw filler cap 1 back on filler neck. For more - 2009 Mercedes CLS-Class | Owner's Manual - Page 205
Operation Engine compartment X Using a rag, turn cap 1 slowly approximately 1/2 counterclockwise to release any excess pressure. Continue turning cap 1 counterclockwise and remove it. The coolant level is correct if the level Rfor Washer system and headlamp cleaning system G Warning! Washer - 2009 Mercedes CLS-Class | Owner's Manual - Page 206
page 350). X Tires and wheels Safety notes Contact an authorized Mercedes-Benz Center for information on tested and recommended rims and tires for summer and winter operation. They can also offer advice concerning tire service and purchase. Closing washer fluid reservoir: Press cap 1 onto filler - 2009 Mercedes CLS-Class | Owner's Manual - Page 207
inflation pressure" (Y page 210). Important guidelines ROnly use sets of tires and rims of the same type and make. in new tires for approximately 60 miles (100 km) at moderate speeds. age. Dented or bent rims can cause tire inflation pressure loss and damage to the tire beads. RTires must be of - 2009 Mercedes CLS-Class | Owner's Manual - Page 208
temporary use only until the regular drive wheel has been repaired or replaced. Always observe and follow applicable temporary use restrictions and speed limitations indicated on the spare wheel. The treadwear indicator appears as a solid band across the tread. Storing tires ! Keep unmounted tires - 2009 Mercedes CLS-Class | Owner's Manual - Page 209
B-pillar. Overloading the tires can overheat them, possibly causing a blowout. Overloading the tires can also result in handling or steering problems, or brake failure. Tire and Loading Information placard i Data shown on Tire and Loading Information placard example are for illustration purposes - 2009 Mercedes CLS-Class | Owner's Manual - Page 210
in step 4. Step 6 (if applicable): If your vehicle will be towing a trailer, load from your trailer will be transferred to your vehicle. Consult this manual to determine how this reduces the available cargo and luggage load capacity of your vehicle (Y page 210). X i Data shown on Tire and Loading - 2009 Mercedes CLS-Class | Owner's Manual - Page 211
Operation Tires and wheels you are using the actual load limit for your vehicle stated on the vehicle's Tire and LoadExample Combined weight limit of occupants and cargo from Tire and Loading Information placard 1 500 lbs ing Information placard (Y page 208). Seating configuration Occupants weight - 2009 Mercedes CLS-Class | Owner's Manual - Page 212
blowout. Overloading the tires can also result in handling or steering problems, or brake failure. Your vehicle is equipped with the Tire and everything loaded in it. Your Mercedes-Benz has been designed primarily to carry passengers and their cargo. Mercedes-Benz does not recommend trailer towing - 2009 Mercedes CLS-Class | Owner's Manual - Page 213
of the fuel filler flap, contact an authorized Mercedes-Benz Center for proper tire inflation pressure. loads less as original equipment. Potential problems associated with underinflated and the tire inflation pressure is adjusted to the value for speeds above 100 mph (160 km/h) as specified on the - 2009 Mercedes CLS-Class | Owner's Manual - Page 214
Overloading the tires can also result in handling or steering problems, or brake failure. Check the tire inflation pressure at pressure. Otherwise, the tire will be underinflated. Checking tire inflation pressure manually Follow the steps below to achieve correct tire inflation pressure: X Remove - 2009 Mercedes CLS-Class | Owner's Manual - Page 215
you are driving in a very sporty manner (involving rapid acceleration or high speeds in curves) you are driving with a loaded roof rack or heavily laden page 197). The tire inflation pressures are not listed in the Operator's Manual. G Warning! The Run Flat Indicator does not provide a warning for - 2009 Mercedes CLS-Class | Owner's Manual - Page 216
Active Menu: R-Button Press the reset button (Y page 120). The following the wheels or tires X Rafter you have installed new wheels or tires X Tire Pressure Monitoring System ( The Run Flat Indicator can only warn you in a reliable manner if you have set the correct tire inflation pressures for - 2009 Mercedes CLS-Class | Owner's Manual - Page 217
Operation Tires and wheels i This device complies with Part 15 of the FCC Rules. Operation is subject to the following two conditions: 1. This device may not cause harmful interference, and 2. this device must accept any interference received, including interference that may cause undesired. Any - 2009 Mercedes CLS-Class | Owner's Manual - Page 218
be restarted when you have adjusted the tire inflation pressure to a new level (e.g. because of different load or driving conditions). The TPMS vehicles may have supplemental tire pressure information for driving at high speeds or for vehicle loads less than the maximum loaded vehicle condition. - 2009 Mercedes CLS-Class | Owner's Manual - Page 219
Operation Tires and wheels X Press the reset button (Y page 120). The following message will appear in the multifunction display: Restart tire pressure monitor? If you wish to confirm: Press button æ. The following - 2009 Mercedes CLS-Class | Owner's Manual - Page 220
Operation Tires and wheels telltale illuminates, you should stop and check your tires as soon as possible. Driving on a significantly underinflated tire causes the tire to overheat and can lead to tire failure. Underinflation also reduces fuel efficiency and tire tread life, and may affect the - 2009 Mercedes CLS-Class | Owner's Manual - Page 221
tire pressure information for driving at high speeds or for vehicle loads less than the only displayed after driving for a few minutes Press the reset button (Y page 120). The following message will appear monitor? or X If you want to set new reference values manually: X X If you wish to confirm: - 2009 Mercedes CLS-Class | Owner's Manual - Page 222
data shown in above illustration. For more information, see "Rims and tires" (Y page 336). Tire size designation, load and speed rating Tire labeling Besides tire name (sales designation) and manufacturer name, a number of markings can be found on a tire. 1 Uniform Tire Quality Grading Standards - 2009 Mercedes CLS-Class | Owner's Manual - Page 223
designation (for example: 245/40 ZR 18). For additional information, see "Tire speed rating" (Y page 222). Rim diameter Rim diameter 4 is the diameter of the or steering problems, or brake failure. Tire load rating 5 is a numerical code associated with the maximum load a tire can support. For example - 2009 Mercedes CLS-Class | Owner's Manual - Page 224
above 186 mph (300 km/h) must include a "ZR" in the size designation AND the service description must be placed in parenthesis. Example: 275/40 ZR 18 (99Y). The "(Y)" speed rating in parenthesis designates the maximum speed capability of the tire as being above 186 mph (300 km/h). Consult the tire - 2009 Mercedes CLS-Class | Owner's Manual - Page 225
tires have the required tire speed rating as specified for your vehicle in the "Technical data" section (Y page 336), for example when purchasing new tires. If you are uncertain about the correct reading of the information given on a tire's sidewall, any authorized Mercedes-Benz Center will be glad - 2009 Mercedes CLS-Class | Owner's Manual - Page 226
mark Manufacturer's identification mark 2 denotes the tire manufacturer. New tires have a mark with two symbols. Retreaded tires have blowout. Overloading the tires can also result in handling or steering problems, or brake failure. Tire size 1 DOT 2 Manufacturer's identification mark - 2009 Mercedes CLS-Class | Owner's Manual - Page 227
each vehicle and may vary from data shown in above illustration. The maximum tire load is the maximum weight the tires are designed to support. For more information on tire load rating, see (Y page 221). For information on calculating total and cargo load capacities, see (Y page 208). sure i For - 2009 Mercedes CLS-Class | Owner's Manual - Page 228
reliable made for sale in North America driving habits, service practices and speed on a wet, snow covered or icy road is always lower than on a dry road. You should pay particular attention to the condition of the road whenever the outside temperature is close to the freezing point. Mercedes-Benz - 2009 Mercedes CLS-Class | Owner's Manual - Page 229
to the drivetrain which is not covered by the Mercedes-Benz Limited Warranty. Temperature G Warning! The temperature grade for this tire is established for a tire that is properly inflated and not overloaded. Excessive speed, underinflation, or excessive loading, either separately or in combination - 2009 Mercedes CLS-Class | Owner's Manual - Page 230
Operation Tires and wheels Bar Another metric unit for air pressure. There are 14.5038 pounds per square inch (psi) to 1 bar; there are 100 kilopascals (kPa) to 1 bar. GAWR (Gross Axle Weight Rating) The GAWR is the maximum permissible axle weight. The gross vehicle weight on each axle must never - 2009 Mercedes CLS-Class | Owner's Manual - Page 231
a tire between the tread and the bead. Tire speed rating Part of tire designation; indicates the speed range for which a tire is approved. PSI ( . Tire load rating Numerical code associated with the maximum load a tire can support. Tread The portion of a tire that comes into contact with the road - 2009 Mercedes CLS-Class | Owner's Manual - Page 232
with a torque of 96 lb-ft (130 Nm). Only use genuine Mercedes-Benz wheel bolts specified for your vehicle's rims. Tire rotation can be performed on the tire manufacturer's recommended intervals in the tire manufacturer's warranty pamphlet located in your vehicle literature portfolio. If none is - 2009 Mercedes CLS-Class | Owner's Manual - Page 233
speed rating of your vehicle, you must place a notice to this effect where it will be seen by the driver. Such notices are available at your tire dealer or any authorized Mercedes-Benz Manual. Snow chains should only be driven on snowcovered roads at speeds manufacturer's mounting instructions. ! If - 2009 Mercedes CLS-Class | Owner's Manual - Page 234
. Mercedes-Benz. Any authorized MercedesBenz Center will be glad to advise you on this subject. RUse of snow chains may be prohibited depending on location. Always check local and state laws before installing snow chains. RDo not use snow chains on the spare wheel. i All models except CLS 63 AMG - 2009 Mercedes CLS-Class | Owner's Manual - Page 235
any other road users when carrying out these braking maneuvers. Driving instructions Drive sensibly - save fuel To save fuel you should: RKeep Booklet and as required by the Maintenance system. Contact an authorized Mercedes-Benz Center. Fuel consumption is also increased by driving in cold weather - 2009 Mercedes CLS-Class | Owner's Manual - Page 236
Driving instructions or ! There is no power assistance for the steering and the service brake when the engine is not running. Steering and braking requires damage to the drivetrain which is not covered by the Mercedes-Benz Limited Warranty. Continuous or hard braking G Warning! Resting your foot on - 2009 Mercedes CLS-Class | Owner's Manual - Page 237
instructions immediately after commencing a new trip, so that salt residues are removed from the brake disc Brake service ! The brake fluid which is not covered by the Mercedes-Benz Limited Warranty. If your brake system is available on CLS 63 AMG. G Warning! New vehicle brake pads and discs, and - 2009 Mercedes CLS-Class | Owner's Manual - Page 238
low speeds and with new tires. X Reduce vehicle speed, Mercedes-Benz Limited Warranty. ! Simultaneously depressing the accelerator pedal and applying the brakes reduces engine performance and causes premature brake and drivetrain wear which is not covered by the Mercedes-Benz Limited Warranty. speed - 2009 Mercedes CLS-Class | Owner's Manual - Page 239
instructions Driving abroad If you plan to drive the vehicle outside the U.S. or Canada, you should request dealer network information for your destination from any authorized Mercedes-Benz traffic conditions permit. Bear in mind that at a speed of just 30 mph (approximately 50 km/h), your vehicle - 2009 Mercedes CLS-Class | Owner's Manual - Page 240
while driving, have the cause determined and cor- i Failure to have the vehicle maintained in accordance with the Maintenance Booklet and maintenance service indicator at the designated times/mileage (kilometers) will result in vehicle damage not covered by the Mercedes-Benz Limited Warranty. 238 - 2009 Mercedes CLS-Class | Owner's Manual - Page 241
and intervals they need to be performed at. Clearing the maintenance service indicator message The maintenance service indicator message is automatically cleared Rafter Rafter Rafter 1 Reset button X approximately 10 seconds when you switch on the ignition approximately 10 seconds when reaching - 2009 Mercedes CLS-Class | Owner's Manual - Page 242
damage and/or other vehicle damage not covered by the Mercedes-Benz Limited Warranty. Calling up the maintenance service indicator display i The menu overview can be found on (Y page 125). You can call up the maintenance service indicator display at any time to check when the next maintenance - 2009 Mercedes CLS-Class | Owner's Manual - Page 243
cleaning products can be hazardous. Some are poisonous, others are flammable. Always follow the instructions on the particular container. Always open your vehicle's doors or windows when cleaning the always reflect the latest technology. You can obtain Mercedes-Benz approved vehicle-care Z 241 - 2009 Mercedes CLS-Class | Owner's Manual - Page 244
used. Mercedes-Benz approved Paint Cleaner should be applied if the paint surface shows signs of embedded dirt (i.e. loss of gloss). Do not apply any of these products or wax if your vehicle is parked in the sun or if the hood is still hot. Power washer ! Follow the instructions provided by - 2009 Mercedes CLS-Class | Owner's Manual - Page 245
. Ornamental moldings X For regular cleaning and care of ornamental moldings, use a damp cloth. Only use a mild vehicle wash detergent, such as Mercedes-Benz approved Car Shampoo. Thoroughly spray the vehicle with a diffused jet of water. Do not spray directly towards the ventilation intake. Use - 2009 Mercedes CLS-Class | Owner's Manual - Page 246
. Only clean sensor cover 1 by hand. Use a mild vehicle wash detergent, such as Mercedes-Benz approved Car Shampoo, Only clean sensors 1 by hand. Use a mild vehicle wash detergent, such as Mercedes-Benz approved Car Shampoo, with plenty of water and a soft, nonscratching cloth to clean sensors - 2009 Mercedes CLS-Class | Owner's Manual - Page 247
with a cloth moistened in a lukewarm solution. The surface may temporarily change color. If this is the case, wait for it to dry. ! Only your vehicle for several minutes to allow the brakes to dry. When applying Mercedes-Benz approved Tire Care and Mer- X ! Fold the windshield wiper arms back - 2009 Mercedes CLS-Class | Owner's Manual - Page 248
cover, contact-discoloration will be prevented. G Warning! Only use seat or head restraint covers which have been tested and approved by Mercedes-Benz for your vehicle model. Using other seat or head restraint covers may interfere with or prevent the activation of the active head restraints and/or - 2009 Mercedes CLS-Class | Owner's Manual - Page 249
-plated exhaust tip Regular cleaning and care of chrome-plated exhaust tips will help to maintain their shine and the classy appearance. X Use Mercedes-Benz approved Chrome Polishing Paste each time the vehicle has been washed, especially during the winter. ! Do not use alkaline cleaners such as - 2009 Mercedes CLS-Class | Owner's Manual - Page 250
248 - 2009 Mercedes CLS-Class | Owner's Manual - Page 251
...Where will I find ...? ...Vehicle status messages in the multifunction display ...What to do if ... ...Unlocking/locking manually ...Resetting activated head restraints Replacing SmartKey batteries ...Replacing bulbs ...Replacing wiper blades ...Flat tire ...Battery ...Jump starting ...Towing the - 2009 Mercedes CLS-Class | Owner's Manual - Page 252
for your vehicle at the time of purchase. Please be aware that your vehicle might not be equipped with all features described in this manual. Where will I find ...? First aid kit i Check expiration dates and contents for completeness at least once a year and replace missing/expired items. The first - 2009 Mercedes CLS-Class | Owner's Manual - Page 253
a wheel. X Take the collapsible wheel chock from the vehicle tool kit (Y page 250). Setting up: Tilt both plates upward 1. Fold the lower plate outward 2. Guide the tabs of the lower plate all the way into the openings of base plate 3. Storage position X For information on where to place wheel - 2009 Mercedes CLS-Class | Owner's Manual - Page 254
Practical hints Where will I find ...? Spare wheel G Observe Safety notes, see page 314. The spare wheel is located in the space underneath the trunk floor. X Open the trunk (Y page 78). X Lift the trunk floor using the floor handle. X Engage the floor handle on the upper trunk lip. X Remove the - 2009 Mercedes CLS-Class | Owner's Manual - Page 255
Practical hints Where will I find ...? Vehicles with spare wheel with collapsible tire X Removing: Remove the storage well casing (Y page 251). Storing the spare wheel after use If you wish to store the spare wheel after use, carry out the following steps. Otherwise, the spare wheel may not fit - 2009 Mercedes CLS-Class | Owner's Manual - Page 256
Practical hints Where will I find ...? X X Extend the tensioning strap by pulling the slider. Place tensioning strap around the spare wheel rim and collapsible tire with the buckle facing the inside of the rim. Close the buckle. Pull the loose end of the tensioning strap. The tensioning strap must - 2009 Mercedes CLS-Class | Owner's Manual - Page 257
Mercedes-Benz Limited Warranty, or result in property damage or personal injury. G Warning! No messages will be displayed if either the instrument cluster or the multifunction display is inoperative. As a result, you will not be able to see information about your driving conditions, such as speed - 2009 Mercedes CLS-Class | Owner's Manual - Page 258
capability. Have the system checked at an authorized Mercedes-Benz Center as soon as possible. X Failure to follow these instructions increases the risk of an accident. ABS ABS, ESP Unavailable See Operator's Man. Inoperative See Operator's Manual The brake system still functions normally but due - 2009 Mercedes CLS-Class | Owner's Manual - Page 259
Display messages PRE-SAFE Inoperative See Operator's Manual Possible cause/consequence The PRE-SAFE® system itself has failed. All other occupant safety systems, such as the air bags, are still available. Possible solution X Contact an authorized Mercedes-Benz Center as soon as possible. Z 257 - 2009 Mercedes CLS-Class | Owner's Manual - Page 260
Practical hints Vehicle status messages in the multifunction display Display messages Front Passenger Airbag Enabled See Operator's Manual Possible cause/consequence Front passenger front air bag is activated while driving even though a child, small individual, or object below the system's weight - 2009 Mercedes CLS-Class | Owner's Manual - Page 261
that the OCS (Y page 48) has deactivated the front passenger front air bag. Passenger Airbag Enabled See Operator's Manual or the message Front Passenger Airbag Disabled See Operator's Manual should not appear in the multifunction display at any time the seat is unoccupied. Wait at least 60 seconds - 2009 Mercedes CLS-Class | Owner's Manual - Page 262
solution If above conditions are not met, the system is not working properly. Have the system checked as soon as possible at an authorized Mercedes-Benz Center. G Warning! If the 75 indicator lamp remains out even after performing the above corrective steps, do not have any children 12 years old - 2009 Mercedes CLS-Class | Owner's Manual - Page 263
Practical hints Vehicle status messages in the multifunction display Display messages Front Passenger Airbag Disabled See Operator's Manual Possible cause/consequence Front passenger front air bag is deactivated while driving even though an adult or someone larger than a small individual is - 2009 Mercedes CLS-Class | Owner's Manual - Page 264
the front passenger front air bag. Passenger Airbag Enabled See Operator's Manual or the message Front Passenger Airbag Disabled See Operator's Manual should not appear in the multifunction display at any time the the system checked as soon as possible at an authorized Mercedes-Benz Center. 262 - 2009 Mercedes CLS-Class | Owner's Manual - Page 265
. The Distronic has switched off. Possible solution X Have cruise control checked at an authorized Mercedes-Benz Center. Drive faster than 20 mph (30 km/h), if the situation allows, and set the speed. Check the activation conditions for cruise control (Y page 143). Drive faster than 20 mph - 2009 Mercedes CLS-Class | Owner's Manual - Page 266
display Display messages DISTRONIC Currently Unavailable See Operator's Manual Possible cause/consequence Distronic is deactivated because: RThe rain or the road surface drying) message in the multifunction display disappears speed last stored flashes in the display for 5 seconds. Rthe Rthe You - 2009 Mercedes CLS-Class | Owner's Manual - Page 267
display Display messages DISTRONIC Currently Unavailable See Operator's Manual Possible cause/consequence Distronic is deactivated because the external interferences, e.g. high-frequency sources such as toll stations, speed measuring systems etc. Distronic is deactivated because the Distronic sensor - 2009 Mercedes CLS-Class | Owner's Manual - Page 268
Practical hints Vehicle status messages in the multifunction display Vehicle Display messages P Possible cause/consequence You have opened the driver's door while Gear Selector Lever In P Position the engine was not running and the automatic transmission was not in park position P. You have - 2009 Mercedes CLS-Class | Owner's Manual - Page 269
is set for each tire. Then restart the Run Flat Indicator (Y page 213). Have the Run Flat Indicator checked at an authorized Mercedes-Benz Center. Carefully bring the vehicle to a halt, avoiding abrupt steering and braking maneuvers. Observe the traffic situation around you. Check and adjust - 2009 Mercedes CLS-Class | Owner's Manual - Page 270
Center. Have the appropriate wheel sensors installed at an authorized Mercedes-Benz Center. Have the Advanced TPMS checked at an authorized Mercedes-Benz Center. Have the wheel sensors installed at an authorized Mercedes-Benz Center. X X Tire Pres. Mon- Wheel Sensor Missitor ing Vehicles with - 2009 Mercedes CLS-Class | Owner's Manual - Page 271
Practical hints Vehicle status messages in the multifunction display Display messages Tire Pressure Monitor Currently Unavailable Possible cause/consequence The TPMS (USA only) or Advanced TPMS (Canada only) is unable to monitor the tire pressure due to a nearby radio interference source or - 2009 Mercedes CLS-Class | Owner's Manual - Page 272
Practical hints Vehicle status messages in the multifunction display Display messages Check Tires Possible cause/consequence Vehicles with Advanced TPMS (Canada only): The tire pressure in one or more tires is already below the minimum value. The respective tire is indicated in the multifunction - 2009 Mercedes CLS-Class | Owner's Manual - Page 273
hard braking, reducing steering capability. Adjust driving to be consistent with reduced braking responsiveness. Have the system checked at an authorized Mercedes-Benz Center as soon as possible. Release the parking brake. X X ; (USA only) Release Parking Brake You are driving with the parking - 2009 Mercedes CLS-Class | Owner's Manual - Page 274
as soon as it is safe to do so. X X Do not drive any further. Contact an authorized Mercedes-Benz Center or call Roadside Assistance. Do not add brake fluid! This will not solve the problem. G Warning! Driving with the message Check Brake Fluid Level displayed can result in an accident. Have your - 2009 Mercedes CLS-Class | Owner's Manual - Page 275
Tele Aid Inoperative Restraint System Malfunction Service Required One or more main functions of the Tele Aid system are malfunctioning. The system is malfunctioning. Possible solution X L 1 Have the Tele Aid system checked at an authorized Mercedes-Benz Center. Drive with added caution to - 2009 Mercedes CLS-Class | Owner's Manual - Page 276
Center as soon as possible. Do not drive faster than 50 mph (80 km/h). Have the vehicle checked at an authorized Mercedes-Benz Center. X There is otherwise danger of an accident. @ Malfunction The system is functional only to a limited extent. The system display or the system is malfunctioning - 2009 Mercedes CLS-Class | Owner's Manual - Page 277
the SmartKey out of the vehicle. X X Take the SmartKey with you when leaving the vehicle. I I I Remove Key Please get a new key. Change Key Batteries X Remove the SmartKey from the starter switch. Contact an authorized Mercedes-Benz Center. Replace the batteries (Y page 306). X X Z 275 - 2009 Mercedes CLS-Class | Owner's Manual - Page 278
with KEYLESS-GO is momentarily not detected. X X X I Key Not Detected X X t W Bluetooth Ready The telephone has not yet been connected to the COMAND system via Bluetooth®. X Top Up Washer Fluid The fluid level has dropped to approximately 1/3 of total reservoir capacity. X 276 - 2009 Mercedes CLS-Class | Owner's Manual - Page 279
soon as possible at an authorized Mercedes-Benz Center. ± (Canada only) ± B Display Malfunction Service Required Top Up Coolant See Operator's Man. displayed may cause serious engine damage not covered by the Mercedes-Benz Limited Warranty. Do not drive without sufficient amount of coolant in the - 2009 Mercedes CLS-Class | Owner's Manual - Page 280
the parking brake. Observe the coolant temperature indicator in the instrument cluster. If the temperature rises again: Contact an authorized Mercedes-Benz Center immediately. X X X During severe operation conditions and stopand-go city traffic, the coolant temperature may rise close to 248‡ (120 - 2009 Mercedes CLS-Class | Owner's Manual - Page 281
Practical hints Vehicle status messages in the multifunction display ! The engine should not be operated with the coolant temperature above 248‡ (120†). Doing so may cause serious damage which is not covered by the Mercedes-Benz Limited Warranty. Z 279 - 2009 Mercedes CLS-Class | Owner's Manual - Page 282
: Do not continue to drive the vehicle with this message displayed. Doing so could result in serious engine damage that is not covered by the Mercedes-Benz Limited Warranty. Observe the coolant temperature indicator in the instrument cluster. Drive to the nearest authorized - 2009 Mercedes CLS-Class | Owner's Manual - Page 283
the coolant temperature indicator in the instrument cluster. If the coolant temperature is under 248‡ (120†), you may continue driving to an authorized Mercedes-Benz Center. Avoid placing heavy loads on the engine (e.g. by driving uphill) as well as stop-and-go traffic. Have the fan replaced as - 2009 Mercedes CLS-Class | Owner's Manual - Page 284
nearest service station to refill your engine oil to the required level. For information on approved engine oils contact an authorized Mercedes-Benz Center result in serious engine damage that is not covered by the Mercedes-Benz Limited Warranty. Possible solution X ¿ W Reserve Fuel Refuel at the - 2009 Mercedes CLS-Class | Owner's Manual - Page 285
: Close the fuel cap. If it is closed properly: Have the fuel system checked at an authorized Mercedes-Benz Center. Have the air filter checked at an authorized Mercedes-Benz Center. ò Lamps Display messages Replace Air Filter The air filter is clogged. X Possible cause/consequence Active - 2009 Mercedes CLS-Class | Owner's Manual - Page 286
right brake/tail lamp is malfunctioning. This message will only appear if all LEDs have stopped working. Possible solution X . Contact an authorized Mercedes-Benz Center as soon as possible. ... The high-mounted brake lamp is malfunctioning. This message will only appear if all LEDs have stopped - 2009 Mercedes CLS-Class | Owner's Manual - Page 287
X . The light sensor is malfunctioning. The headlamps come on automatically. X Contact an authorized Mercedes-Benz Center as soon as possible. In the control system, set daytime running lamp mode to manual (Y page 135). Switch off the headlamps using the exterior lamp switch (Y page 95). Z To - 2009 Mercedes CLS-Class | Owner's Manual - Page 288
is malfunctioning. A substitute bulb is being used. X . Tail Lamp Auxiliary or Tail Lamp Auxiliary Left Bulb On Right Bulb On Contact an authorized Mercedes-Benz Center as soon as possible. . Cornering Lamp Left or Cornering Lamp Right The left or right corner-illuminating front fog lamp is - 2009 Mercedes CLS-Class | Owner's Manual - Page 289
Left Mirror Turn Signal or Right Mirror Turn Signal The left or right front turn signal lamp is malfunctioning. Possible solution X . Contact an authorized Mercedes-Benz Center as soon as possible. . X Replace the bulb as soon as possible (Y page 310). . The turn signal in the left or right - 2009 Mercedes CLS-Class | Owner's Manual - Page 290
Practical hints Vehicle status messages in the multifunction display Tires Display messages Possible cause/consequence Please correct the tire pressure. The tire pressure is too low in one or more tires. or The tire pressure of the individual tires differ from each other significantly. One or more - 2009 Mercedes CLS-Class | Owner's Manual - Page 291
Practical hints Vehicle status messages in the multifunction display Do not overinflate tires. Overinflated tires can adversely affect handling and ride comfort, wear unevenly, increase stopping distance, and result in sudden deflation (blowout) because they are more likely to become punctured or - 2009 Mercedes CLS-Class | Owner's Manual - Page 292
Practical hints What to do if ... What to do if ... Lamps in instrument cluster Notes If any of the following lamps in the instrument cluster fails to come on during the bulb selfcheck when switching on the ignition, have the respective bulb checked and replaced if necessary. When you switch on the - 2009 Mercedes CLS-Class | Owner's Manual - Page 293
Practical hints What to do if ... Brake Problem - The yellow ABS indicator lamp comes on while the authorized Mercedes-Benz Center The brake system is still functionas soon as possible. ing normally but without the systems specified above available. Failure to follow these instructions increases the - 2009 Mercedes CLS-Class | Owner's Manual - Page 294
brake. Read and observe messages that may appear in the multifunction display (Y page 255). Contact an authorized Mercedes-Benz Center. Do not add brake fluid! This will not solve the problem. G Warning! Driving with the brake warning lamp illuminated can result in an accident. Have your brake - 2009 Mercedes CLS-Class | Owner's Manual - Page 295
Practical hints What to do if ... Safety systems Problem Possible cause/consequence Suggested solutions < The red seat belt telltale The seat belt telltale reminds you X Fasten your seat belts. comes on for a maximum and - 2009 Mercedes CLS-Class | Owner's Manual - Page 296
if ... Problem < During driving the red seat belt telltale flashes and you additionally hear an intermittent warning chime with increasing intensity. Possible cause/consequence The vehicle's speed once exceeded accident. Drive with added caution to the nearest authorized Mercedes-Benz Center. 294 - 2009 Mercedes CLS-Class | Owner's Manual - Page 297
that may appear in the multifunction display. Continue driving with added caution. Adapt your speed and driving to the prevailing road and weather conditions. Have the system checked at an authorized Mercedes-Benz Center as soon as possible. v The yellow ESP® warning lamp comes on while the - 2009 Mercedes CLS-Class | Owner's Manual - Page 298
on the accelerator pedal. Adapt your speed and driving to the prevailing road and weather conditions. Do not deactivate the ESP®. Exceptions: (Y page 67). Failure to follow these instructions increases the risk of an accident. Driving systems Problem Possible cause/consequence Suggested solutions - 2009 Mercedes CLS-Class | Owner's Manual - Page 299
Practical hints What to do if ... Vehicle Problem Possible cause/consequence Suggested solutions X A The yellow fuel tank The fuel level has gone below the reserve warning lamp reserve mark. comes on when the engine is running. Refuel at the next gas station. Z 297 - 2009 Mercedes CLS-Class | Owner's Manual - Page 300
Practical hints What to do if ... Engine Problem ú (USA only) ± (Canada only) The yellow engine malfunction indicator system which affect emis- Have the vehicle checked as soon as possible at an authorized Mercedes-Benz Center. RSystems i Some states may by law require you to visit a workshop as - 2009 Mercedes CLS-Class | Owner's Manual - Page 301
Practical hints What to do if ... Problem Ì The red coolant temperature warning lamp comes on when If the coolant temperature is below 248‡ (120†), you can continue driving to the nearest authorized Mercedes-Benz Center. Avoid high engine loads (e.g. driving uphill) and stop-and-go driving. Stop in a - 2009 Mercedes CLS-Class | Owner's Manual - Page 302
Practical hints What to do if ... Tires Problem H USA only: Combination low tire pressure telltale/TPMS in the multifunction display (Y page 255). Have the TPMS checked by an authorized Mercedes-Benz Center. After the malfunction has been remedied, the combination low tire pressure/TPMS malfunction - 2009 Mercedes CLS-Class | Owner's Manual - Page 303
the TPMS to continue to function properly. Lamp in center console Problem Possible cause/consequence Suggested solutions X X 75 The system is Have the system checked as soon as possible at an authorized Mercedes-Benz Center. Read and observe messages in the multifunction display and follow corrective steps - 2009 Mercedes CLS-Class | Owner's Manual - Page 304
passenger use the front passenger seat until the system has been repaired. Problem Possible cause/consequence Suggested solutions X X X 75 The system is out, have the system checked as soon as possible at an authorized Mercedes-Benz Center. Do not transport a child on the front passenger seat until - 2009 Mercedes CLS-Class | Owner's Manual - Page 305
Practical hints Unlocking/locking manually Unlocking/locking manually Unlocking the vehicle If you cannot unlock the vehicle with the SmartKey or with KEYLESS-GO, unlock the driver's door and the trunk using the - 2009 Mercedes CLS-Class | Owner's Manual - Page 306
. Press the central locking switch (Y page 77). Check to see whether the locking knobs on the doors have moved down. If necessary, push them down manually. Remove the mechanical key from the SmartKey (Y page 303). Check whether the trunk is locked. If it is not locked, lock it with the mechanical - 2009 Mercedes CLS-Class | Owner's Manual - Page 307
now. X X Open the trunk. Remove right side trim panel. Resetting activated head restraints If the active head restraints have been triggered in a open it manually. 1 Release knob X X G Warning! For safety reasons, have the active head restraints checked at an authorized Mercedes-Benz Center - 2009 Mercedes CLS-Class | Owner's Manual - Page 308
second front seat. After resetting the active head restraints store reset tool 1 in the Mercedes-Benz literature pouch. Replacing SmartKey batteries accept old batteries for recycling. Take reset tool 1 out of the MercedesBenz literature pouch. Guide reset tool 1 into rectangular opening 3 between - 2009 Mercedes CLS-Class | Owner's Manual - Page 309
batteries are available at any authorized Mercedes-Benz Center. Replacement batteries: Lithium, type CR 2025 or equivalent. X Remove the mechanical key from the SmartKey (Y page 303). X 3 Batteries 4 Contact springs X Pull out batteries 3. Insert new - 2009 Mercedes CLS-Class | Owner's Manual - Page 310
adjustment is extremely important. Have headlamps checked and readjusted at regular intervals and when a bulb has been replaced. Contact an authorized Mercedes-Benz Center for headlamp adjustment. the lamp and its components. We recommend that you have such work done by a qualified technician - 2009 Mercedes CLS-Class | Owner's Manual - Page 311
bulbs. RYour hands should be dry and free of oil and grease. RIf the newly installed bulb does not come on, contact an authorized Mercedes-Benz Center. Have the LEDs and bulbs for the following lamps replaced at an authorized MercedesBenz Center: RAdditional RBi-Xenon turn signal lamps in the - 2009 Mercedes CLS-Class | Owner's Manual - Page 312
could otherwise damage the LEDs or parts of the vehicle. Only have the LEDs replaced at an authorized Mercedes-Benz Center. Replacing bulbs for front lamps Before you start to replace a bulb for a front lamp, it. Pull the bulb out of bulb socket 6. Press the new bulb gently into bulb socket 6. 310 - 2009 Mercedes CLS-Class | Owner's Manual - Page 313
equipped with HiP bulbs and LEDs. Have them replaced at an authorized Mercedes-Benz Center. High-beam and high-beam flasher bulb (halogen headlamps)/high socket 5 with the bulb. Pull the bulb out of bulb socket 5. Press the new bulb gently into bulb socket 5. Press bulb socket 5 back into the lamp. - 2009 Mercedes CLS-Class | Owner's Manual - Page 314
arm to contact the windshield glass without a wiper blade inserted. For your convenience, we recommend that you have this work carried out at an authorized Mercedes-Benz Center. Placing wiper arms in vertical position Wiper arms in vertical position X Make sure the hood is fully closed. 312 - 2009 Mercedes CLS-Class | Owner's Manual - Page 315
Practical hints Replacing wiper blades Vehicles with SmartKey X X X Removing wiper blades ! Do not pull on the wiper blade inserts. They could tear. X Installing wiper blades X X X Turn the SmartKey in the starter switch to position 1. Turn combination switch to wiper setting u. With wiper arms - 2009 Mercedes CLS-Class | Owner's Manual - Page 316
. The spare wheel is for temporary use only. When driving with spare wheel mounted, ensure proper tire inflation pressure and do not exceed a vehicle speed of 50 mph (80 km/h). Contact the nearest authorized MercedesBenz Center as soon as possible to have the spare wheel replaced with a regular road - 2009 Mercedes CLS-Class | Owner's Manual - Page 317
your vehicle may be of a different color. The jack is designed exclusively for jacking example a rubber mat. Do not use wooden blocks or similar objects to support the jack. Otherwise the jack may not be able to achieve its loadbearing specifically approved by Mercedes-Benz for your vehicle. Z 315 - 2009 Mercedes CLS-Class | Owner's Manual - Page 318
Practical hints Flat tire Always try lifting the vehicle using the jack on a level surface. However, should circumstances require you to do so on a hill, place the wheel chock and another sizeable object as follows: X X On wheel to be changed, loosen but do not yet remove the wheel bolts ( - 2009 Mercedes CLS-Class | Owner's Manual - Page 319
bolts can cause the wheel to come off. This could cause an accident. Be sure to use the correct wheel bolts. G Warning! Only use genuine Mercedes-Benz wheel bolts. Other wheel bolts may come loose. Do not tighten the wheel bolts when the vehicle is raised. Otherwise the vehicle could fall off - 2009 Mercedes CLS-Class | Owner's Manual - Page 320
320). Vehicles with Minispare wheel: Continue the procedure by following the instructions under "Lowering the vehicle" (Y page 320). Your vehicle may be description applies to both versions. Differences in usage are expressly declared. Guide the spare wheel onto the alignment bolt and push it on. - 2009 Mercedes CLS-Class | Owner's Manual - Page 321
wheel rim. If the tire inflation pressure on the yellow label on the spare wheel rim differs from the values given in this Operator's Manual, inflate the tire to the recommended tire inflation pressure given on the yellow label on the spare wheel rim. X Version 2 2 Air pump switch 3 Electrical - 2009 Mercedes CLS-Class | Owner's Manual - Page 322
Practical hints Flat tire X X Press 0 on electric air pump switch 2. Turn the SmartKey in the starter switch to position 0. Vehicles with KEYLESS-GO: Press the KEYLESS-GO start/stop button on the gear selector lever twice. Do not depress the brake pedal. Version 1 only: If the tire inflation - 2009 Mercedes CLS-Class | Owner's Manual - Page 323
of tire inflation pressure. X Do not exceed the maximum speed of 50 mph (80 km/h). For information on storing the functioning sensor has been placed back into service on the vehicle. notice knocking sounds have the rims inspected by an authorized Mercedes-Benz Center to check if they are suitable - 2009 Mercedes CLS-Class | Owner's Manual - Page 324
achieve its rated service life. Refer to Maintenance Booklet for battery maintenance intervals. If you use your vehicle mostly for short-distance trips, you will need to have the battery charge checked more frequently. When replacing a battery, always use a battery approved by Mercedes-Benz. If you - 2009 Mercedes CLS-Class | Owner's Manual - Page 325
Failure to follow these instructions can result in severe will be damaged. Even though VRLA batteries do not require topping-up of the electrolyte level and cannot be opened to check by Mercedes-Benz for your vehicle model to maintain the battery charge. Contact an authorized Mercedes- Benz Center - 2009 Mercedes CLS-Class | Owner's Manual - Page 326
in its installed position. Contact an authorized Mercedes-Benz Center for information and availability. Charge battery in accordance with the separate instructions for the accessory battery charger. Have batteries charged at an authorized Mercedes-Benz Center. If you charge the batteries yourself - 2009 Mercedes CLS-Class | Owner's Manual - Page 327
not be covered by the Mercedes-Benz Limited Warranty. use jumper cables with sufficient Do not smoke. Observe all safety instructions and precautions when handling automotive batteries. the vehicle with the charged battery and run at idle speed. Connect negative terminals 2 and 4 of the batteries - 2009 Mercedes CLS-Class | Owner's Manual - Page 328
at idle speed. You manually unlocking the gear selector lever, see (Y page 304) ! Before towing the vehicle observe the following instructions: RDo not tow-start the vehicle. You could otherwise seriously damage the automatic transmission which is not covered by the Mercedes-Benz Limited Warranty - 2009 Mercedes CLS-Class | Owner's Manual - Page 329
Practical hints Towing the vehicle Installing towing eye bolt Depending on whether you are towing a vehicle or you are being towed, the towing eye bolt can be screwed into threaded holes which are located behind covers on each bumper. The towing eye bolt is supplied with the vehicle tool kit, - 2009 Mercedes CLS-Class | Owner's Manual - Page 330
the ESP® may otherwise seriously damage the brake system. ! The vehicle may be towed only for distances up to 30 miles (50 km) and at a speed not to exceed 30 mph (50 km/h). Towing with all wheels on the ground G Warning! If circumstances require towing the vehicle with all wheels on - 2009 Mercedes CLS-Class | Owner's Manual - Page 331
may be towed only for distances up to 30 miles (50 km) and at a speed not to exceed 30 mph (50 km/h). i To signal turns while being towed with and remedied by an authorized Mercedes-Benz Center. A blown fuse must be replaced by an appropriate spare fuse (recognizable by its color or the fuse rating - 2009 Mercedes CLS-Class | Owner's Manual - Page 332
Practical hints Fuses Fuse box in passenger compartment ! Do not use sharp objects such as a screwdriver to open the fuse box cover in the dashboard, as this could damage the fuse box cover or the dashboard. X X Closing: Hook cover 1 into the opening at the front. Press cover 1 back on until it - 2009 Mercedes CLS-Class | Owner's Manual - Page 333
Technical data Vehicle equipment ...Parts service ...Warranty coverage ...Identification labels ...Engine ...Rims and tires ...Electrical system ...Main dimensions ...Weights ...Fuels, coolants, lubricants etc...332 332 332 333 335 336 341 342 343 343 331 - 2009 Mercedes CLS-Class | Owner's Manual - Page 334
repair work. In addition, strategically located parts distribution centers provide quick and reliable parts service. More than 300 000 different parts for Mercedes-Benz models are available. Genuine Mercedes-Benz Parts are subjected to stringent quality inspections. Each part has been specifically - 2009 Mercedes CLS-Class | Owner's Manual - Page 335
Technical data Identification labels Loss of Service and Warranty Information booklet Should you lose your Service and Warranty Information booklet, have an authorized Mercedes-Benz Center arrange for a replacement. It will be mailed to you. Identification labels Example certification label (U.S. - 2009 Mercedes CLS-Class | Owner's Manual - Page 336
Technical data Identification labels i Data shown on certification label are for illustration purposes only. These data are specific to each vehicle and may vary from data shown in the illustration. Refer to certification label on vehicle for actual data specific to your vehicle. 6 Emission control - 2009 Mercedes CLS-Class | Owner's Manual - Page 337
Model Engine type Mode of operation No. of cylinders Bore Stroke Total piston displacement Compression ratio Output acc. to SAE J 1349 Maximum torque acc. to SAE J 1349 Maximum engine speed Firing order Poly-V-belt CLS 500 rpm 1-5-4-2-6-3-7-8 2 404 mm CLS 63 AMG (219.377)14 156 4-stroke Mercedes-Benz - 2009 Mercedes CLS-Class | Owner's Manual - Page 338
than those approved by Mercedes-Benz may result in damage that is not covered by the Mercedes-Benz Limited Warranty. For information on driving be purchased from an authorized Mercedes-Benz Center. Equipping your vehicle with winter tires approved for your vehicle model may require the purchase of - 2009 Mercedes CLS-Class | Owner's Manual - Page 339
tires on rims with different wheel offset front vs. rear cannot be rotated. Model Rims (light alloy) CLS 550 8.5 J x 18 H2 CLS 550 (AMG Sport Package) CLS 63 AMG 8.5 J x 18 H2 0.98 in (25 mm) 0.98 in (25 (Canada vehicles) only. 19 Maximum permissible vehicle speed of 137 mph (220 km/h). Z 337 - 2009 Mercedes CLS-Class | Owner's Manual - Page 340
Model Front axle Rims (light alloy) Wheel offset Summer tires20 Summer tires20,21 All-season tires20 Rear axle Rims (light alloy) Wheel offset Summer tires20,22 Summer tires20,21,22 All-season tires20,22 CLS 275/35 R18 95Y MOExtended 275/35 R18 95V M+S CLS 550 (AMG Sport Package) 8.5 J x 18 H2 0.98 - 2009 Mercedes CLS-Class | Owner's Manual - Page 341
Technical data Rims and tires Model Front axle Rims (light alloy) Wheel offset Summer tires23 Winter tires23,24 Rear axle Rims (light alloy) Wheel offset Summer tires23,25 Winter tires23,24,25 CLS 63 AMG 8.5 J x 19 H2 0.98 in (25 mm) 255/35 ZR19 96Y XL (Extra Load) - 9.5 J x 19 H2 1.10 in (28 mm) - 2009 Mercedes CLS-Class | Owner's Manual - Page 342
in this Operator's Manual, inflate the tire Model Rim (light alloy) Wheel offset Minispare tire26 Collapsible tire26 Recommended tire inflation pressure CLS 550 CLS 550 (AMG psi (4.2 bar) CLS 63 AMG 6.0 B x 18 H2 0.98 in (25 mm) - 175/55-18 95P 51 psi (3.5 bar) CLS 63 AMG (Performance Package) 6.5 - 2009 Mercedes CLS-Class | Owner's Manual - Page 343
Electrical system Electrical system Model Alternator Starter motor Battery Spark plugs Type Electrode gap Tightening torque CLS 550 14 V / 180 A 12 V / 1.7 kW 12 V / 100 Ah Bosch F8 DPP 332U NGK PFR 5R-11 0.039 in (1.0 mm) 18 lb-ft - 22 lb-ft (25 Nm - 30 Nm) CLS 63 AMG 14 V / 180 A 12 V / 2.1 kW - 2009 Mercedes CLS-Class | Owner's Manual - Page 344
Technical data Main dimensions Main dimensions Model Overall vehicle length CLS 550 193.4 in (4 913 mm) CLS 63 AMG 193.5 in (4 915 mm) 83.0 in (2 107 mm) 54.7 in (1 389 mm) 112.4 in (2 854 mm) 63.0 in (1 599 mm) 62.3 in (1 583 mm) 37.7 ft (11.50 m) Overall vehicle width, exterior rear view mirrors - 2009 Mercedes CLS-Class | Owner's Manual - Page 345
your skin or clothing. If a service fluid is swallowed, contact a physician immediately. Fuels, coolants, lubricants, etc. Approved engine oils Model Engine with oil filter CLS 550 CLS 63 AMG27 Automatic transmission CLS 550 CLS 63 AMG Rear axle CLS 550 CLS 63 AMG Capacity 9.0 US qt (8.5 l) 9.3 US - 2009 Mercedes CLS-Class | Owner's Manual - Page 346
Technical data Fuels, coolants, lubricants etc. Model CLS 63 AMG28 Power steering CLS 550 CLS 63 AMG Brake system Cooling system All models CLS 550 CLS 63 AMG Fuel tank All models Capacity 1.3 US qt (1.2 l) 1.0 US qt (0.9 l) 1.3 US qt (1.2 l) 0.63 US qt (0.6 l) approx. 11.9 US qt (11.3 l) approx. 12 - 2009 Mercedes CLS-Class | Owner's Manual - Page 347
covered by the Mercedes-Benz Limited Warranty. Mercedes-Benz recommends MOBIL OIL. Use the table below to determine the MB sheet number. Model CLS 550 Engine type Maintenance System will result in engine or emission 29 Use CLS 63 AMG 156 MB Windshield Washer Concentrate "MB SummerFit" and water - 2009 Mercedes CLS-Class | Owner's Manual - Page 348
from blending oil additives are not covered by the MercedesBenz Limited Warranty. Air conditioning refrigerant R-134a (HFC) refrigerant and special PAG for replacement interval. Only brake fluid approved by Mercedes-Benz is recommended. Any authorized MercedesBenz Center will provide you - 2009 Mercedes CLS-Class | Owner's Manual - Page 349
RDo not exceed an engine speed of 3 000 rpm if leading to engine performance problems such as: RWarm-up RUnstable Contact an authorized Mercedes-Benz Center or visit www. Mercedes-Benz vehicles are not covered by the MercedesBenz Limited Warranty or by any pre-owned or Extended Limited warranties - 2009 Mercedes CLS-Class | Owner's Manual - Page 350
covered by the Mercedes-Benz Limited Warranty. If the instructions. The water in the cooling system must meet minimum requirements, which are usually satisfied by normal drinking water. If you are not sure about the water quality, contact an authorized Mercedes-Benz shortened service life. - 2009 Mercedes CLS-Class | Owner's Manual - Page 351
Technical data Fuels, coolants, lubricants etc. Model -35‡ (-37†) Cooling system CLS 550 CLS 63 AMG 6.0 US qt (5.65 l) 6.2 US qt (5.9 l) Approximate freeze protection -49‡ (-45†) 6.6 US qt (6.2 l) 6.9 US qt (6.5 l) Z 349 - 2009 Mercedes CLS-Class | Owner's Manual - Page 352
Technical data Fuels, coolants, lubricants etc. Washer system and headlamp cleaning system G Warning! Washer solvent/antifreeze is highly flammable. Do not spill washer solvent/antifreeze on hot engine parts, because it may ignite and burn. You could be seriously burned. Washer fluid mixing ratio - 2009 Mercedes CLS-Class | Owner's Manual - Page 353
351 - 2009 Mercedes CLS-Class | Owner's Manual - Page 354
352 - 2009 Mercedes CLS-Class | Owner's Manual - Page 355
your vehicle properly. For expert advice and quality service, contact an authorized Mercedes-Benz Center. If you are interested in obtaining service literature for your vehicle, please contact an authorized Mercedes-Benz Center. We consider this the best way for you to obtain accurate information - 2009 Mercedes CLS-Class | Owner's Manual - Page 356
É2195842883KËÍ 2195842883 Order no. 6515 1441 13 Part no. 219 584 28 83 Edition A 2009 USA
-
 1
1 -
 2
2 -
 3
3 -
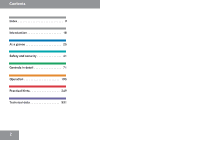 4
4 -
 5
5 -
 6
6 -
 7
7 -
8
-
9
-
10
-
11
-
12
-
13
-
14
-
15
-
16
-
17
-
18
-
19
-
20
-
21
-
22
-
23
-
24
-
25
-
26
-
27
-
28
-
29
-
30
-
31
-
32
-
33
-
34
-
35
-
36
-
37
-
38
-
39
-
40
-
41
-
42
-
43
-
44
-
45
-
46
-
47
-
48
-
49
-
50
-
51
-
52
-
53
-
54
-
55
-
56
-
57
-
58
-
59
-
60
-
61
-
62
-
63
-
64
-
65
-
66
-
67
-
68
-
69
-
70
-
71
-
72
-
73
-
74
-
75
-
76
-
77
-
78
-
79
-
80
-
81
-
82
-
83
-
84
-
85
-
86
-
87
-
88
-
89
-
90
-
91
-
92
-
93
-
94
-
95
-
96
-
97
-
98
-
99
-
100
-
101
-
102
-
103
-
104
-
105
-
106
-
107
-
108
-
109
-
110
-
111
-
112
-
113
-
114
-
115
-
116
-
117
-
118
-
119
-
120
-
121
-
122
-
123
-
124
-
125
-
126
-
127
-
128
-
129
-
130
-
131
-
132
-
133
-
134
-
135
-
136
-
137
-
138
-
139
-
140
-
141
-
142
-
143
-
144
-
145
-
146
-
147
-
148
-
149
-
150
-
151
-
152
-
153
-
154
-
155
-
156
-
157
-
158
-
159
-
160
-
161
-
162
-
163
-
164
-
165
-
166
-
167
-
168
-
169
-
170
-
171
-
172
-
173
-
174
-
175
-
176
-
177
-
178
-
179
-
180
-
181
-
182
-
183
-
184
-
185
-
186
-
187
-
188
-
189
-
190
-
191
-
192
-
193
-
194
-
195
-
196
-
197
-
198
-
199
-
200
-
201
-
202
-
203
-
204
-
205
-
206
-
207
-
208
-
209
-
210
-
211
-
212
-
213
-
214
-
215
-
216
-
217
-
218
-
219
-
220
-
221
-
222
-
223
-
224
-
225
-
226
-
227
-
228
-
229
-
230
-
231
-
232
-
233
-
234
-
235
-
236
-
237
-
238
-
239
-
240
-
241
-
242
-
243
-
244
-
245
-
246
-
247
-
248
-
249
-
250
-
251
-
252
-
253
-
254
-
255
-
256
-
257
-
258
-
259
-
260
-
261
-
262
-
263
-
264
-
265
-
266
-
267
-
268
-
269
-
270
-
271
-
272
-
273
-
274
-
275
-
276
-
277
-
278
-
279
-
280
-
281
-
282
-
283
-
284
-
285
-
286
-
287
-
288
-
289
-
290
-
291
-
292
-
293
-
294
-
295
-
296
-
297
-
298
-
299
-
300
-
301
-
302
-
303
-
304
-
305
-
306
-
307
-
308
-
309
-
310
-
311
-
312
-
313
-
314
-
315
-
316
-
317
-
318
-
319
-
320
-
321
-
322
-
323
-
324
-
325
-
326
-
327
-
328
-
329
-
330
-
331
-
332
-
333
-
334
-
335
-
336
-
337
-
338
-
339
-
340
-
341
-
342
-
343
-
344
-
345
-
346
-
347
-
348
-
349
-
350
-
351
-
352
-
353
-
354
-
355
-
356
 |
 |

Operator’s Manual
CLS