Viper 320HV Owner Manual
Viper 320HV Manual
 |
View all Viper 320HV manuals
Add to My Manuals
Save this manual to your list of manuals |
Viper 320HV manual content summary:
- Viper 320HV | Owner Manual - Page 1
Viper 320HV Owner's Guide - Viper 320HV | Owner Manual - Page 2
WAS SOLD, INSTALLED, AND SERVICED BY A PROFESSIONAL AUTO INSTALLER, AND REMAINS IN THE CAR IN WHICH THE SYSTEM WAS ORIGINALLY INSTALLED. If warranty service is necessary labor costs for the removal, diagnosis, troubleshooting or reinstallation of the unit. For service on an out-of-warranty product a - Viper 320HV | Owner Manual - Page 3
of the sales receipt, showing the following: ➤ Date of purchase ➤ Your full name and address ➤ Authorized dealer's company name and address ➤ Type of alarm installed ➤ Year, make, model and color of the automobile ➤ Automobile license number ➤ Vehicle identification number ➤ All security options - Viper 320HV | Owner Manual - Page 4
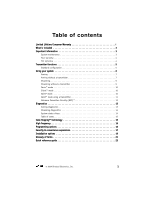
Disarming diagnostics 14 System status chirps 14 Table of zones 15 Code HoppingTM Technology 15 High frequency 16 Programming options 16 Security & convenience expansions 17 Installation options 19 Glossary of terms 21 Quick reference guide 23 © 2004 Directed Electronics, Inc. 1 - Viper 320HV | Owner Manual - Page 5
2 © 2004 Directed Electronics, Inc. - Viper 320HV | Owner Manual - Page 6
This system has been designed to provide years of trouble-free operation. By carefully reading this guide prior to using your system, you will maximize the , the LED on the remote transmitter will dim and you will notice reduced operating range when using the remote transmitter. To access the - Viper 320HV | Owner Manual - Page 7
returned, no warranty will be honored on your unit. It is also necessary to keep your proof of purchase, which reflects that the product was installed by an authorized dealer. Make sure you receive the warranty card from your dealer. ➜ FCC id/notice This device complies with Part 15 of FCC - Viper 320HV | Owner Manual - Page 8
function. The remote initially comes programmed with Standard Configuration, but may also be customized by an authorized dealer. ➜ Standard configuration Button Pressing arms the security system and locks the vehicle doors (if connected). Press and hold for Panic alarm. Button Pressing - Viper 320HV | Owner Manual - Page 9
to your system can be activated by pressing these buttons simultaneously. The auxiliary output controls Using your system The buttons described in all instructions in this manual correspond to a standard configuration transmitter, unless otherwise specified. 6 © 2004 Directed Electronics, Inc. - Viper 320HV | Owner Manual - Page 10
Notification is described in detail in the Diagnostics section of this manual. If the vehicle is equipped with Comfort Closing of the windows ON the windows/sunroof will close immediately after the doors lock. The alarm system will not monitor the zone inputs for Bypass Notification, Warn away - Viper 320HV | Owner Manual - Page 11
seconds later, the siren output changes to a continuous blast. This two-stage progressive response allows you time to disarm the security system with your remote transmitter, in case the door is inadvertently opened while the system is armed. ➤ Turning on the ignition key triggers the same two-stage - Viper 320HV | Owner Manual - Page 12
If your remote transmitter is lost or damaged, you can manually disarm the security system. To disarm the system without a transmitter, you must have the vehicle's ignition key and know where the Valet switch is located. Be sure to check with your installer at the time of installation for the - Viper 320HV | Owner Manual - Page 13
the Panic Mode. ➜ Silent™ mode Use the remote-controlled silent arm/disarm to temporarily turn off the the arm and disarm chirps, contact your installation dealer. NOTE: The warn away response to and triggering either automatically or with the remote transmitter. In Valet® Mode, the system - Viper 320HV | Owner Manual - Page 14
You can access Valet® Mode either manually or from the remote. To enter or exit Valet® Mode with the Valet® . ➜ Valet™ mode using a transmitter You can also enter or exit Valet® Mode by using the remote transmitter: 1. Open any vehicle door. 2. Press . 3. Press . 4. Press again. The status - Viper 320HV | Owner Manual - Page 15
trigger sequences due to faulty door pinswitches or environmental conditions such as thunder, jackhammers, airport noise, etc. Here's how it works: If the alarm is triggered by the same sensor or switch three times within a 60 minute period, your system interprets this pattern of triggers as false - Viper 320HV | Owner Manual - Page 16
Diagnostics The microprocessor at the heart of your system has the ability to constantly monitor all of the switches and sensors connected to it. It can detect any faulty switches or sensors and prevent them from disabling the entire system. It can also record and report any triggers that occur when - Viper 320HV | Owner Manual - Page 17
➜ Disarming diagnostics Your system has a Tamper Alert feature that notifies you of system triggers that occur while you are away from your vehicle. If you hear four chirps when you disarm, this indicates that the system was triggered in your absence. If you hear five chirps when you disarm, this - Viper 320HV | Owner Manual - Page 18
in the following table, along with spaces to write in any optional sensors or switches that you have had installed. ZONE (Number of LED Flashes) DESCRIPTION DEALER-INSTALLED OPTIONS 1 Instant trigger for optional hood or trunk pins 2 A heavier impact detected by the on-board shock sensor - Viper 320HV | Owner Manual - Page 19
options Programming options control your system's normal, operational set-up. Most options do not require additional parts, but some may require installation labor. This system's programming options are listed below, with the factory default settings in bold: ➤ Active arming (only with the - Viper 320HV | Owner Manual - Page 20
if the glass has been tampered with or broken. Backup Battery: The 520T Backup Battery ensures that the system stays armed, triggers the alarm and keeps the optional starter interrupt active if main battery power is disconnected. Comfort Closure: This feature is designed to integrate with vehicles - Viper 320HV | Owner Manual - Page 21
timer is active and closing the windows the user disarms the unit, the Comfort Close output will immediately cease before the doors unlock. The alarm system will not monitor the zone inputs for Bypass Notification, Warn away or Full trigger inputs until after the 20 second timer has completed to - Viper 320HV | Owner Manual - Page 22
available only for fuel-injected, automatictransmission vehicles.) Installation options Installation options may require additional parts or labor. remaining doors. Horn Honk: If connected, the horn will sound if the alarm is either triggered by an intrusion or activated by Panic Mode. (In most vehicles - Viper 320HV | Owner Manual - Page 23
Light Illumination: The interior domelight can be configured to illuminate for 30 seconds after the alarm is disarmed. If the system is rearmed during that 30-second period, the interior light illumination will terminate until the alarm is disarmed once again. 20 © 2004 Directed Electronics, Inc. - Viper 320HV | Owner Manual - Page 24
by existing systems in the vehicle, such as ignition or courtesy lights. LED: A red light mounted inside the vehicle, at a location determined by the installer. The LED indicates the status of your system and also reports triggers and faults in the system or sensors. Shock Sensor: A dual-stage shock - Viper 320HV | Owner Manual - Page 25
remote control that operates the various functions of the security system. Trigger or Triggered Sequence: The "setting off" or "tripping" of the alarm inside the vehicle, at a location determined by the installer. This switch is used to override the alarm when a transmitter is lost or damaged, or can - Viper 320HV | Owner Manual - Page 26
✂ Cut along dotted line and fold for a quick and easy reference to keep in your purse or wallet. ✂ QUICK REFERENCE GUIDE To arm using your remote: ■ Press of your transmitter for one second. When the system arms, you will hear a short siren sound, or chirp, and see the parking lights flash - Viper 320HV | Owner Manual - Page 27
patents and Innovations Awards in the field of advanced electronic technology, Directed Electronics, Inc. is ISO 9001 registered. Quality Directed Electronics products are sold and serviced throughout North America and around the world. Call (800) 361-7271 for more information about our products and
-
 1
1 -
 2
2 -
 3
3 -
 4
4 -
 5
5 -
 6
6 -
 7
7 -
8
-
9
-
10
-
11
-
12
-
13
-
14
-
15
-
16
-
17
-
18
-
19
-
20
-
21
-
22
-
23
-
24
-
25
-
26
-
27
 |
 |

Viper 320HV
Owner's Guide