Panasonic PT-EX620 Operating Instructions - Page 142
Remove the lamp cover. Fig. 1
 |
View all Panasonic PT-EX620 manuals
Add to My Manuals
Save this manual to your list of manuals |
Page 142 highlights
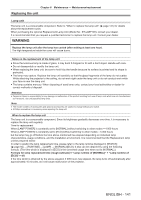
Chapter 6 Maintenance - Maintenance/replacement On-screen display REPLACE LAMP Lamp indicator Over 3 800 hours Over 4 000 hours The message is displayed for 30 seconds. Pressing any button on the control panel or the remote control within 30 seconds will clear the message. The indicator lights in red even during the standby mode. The message remains displayed until you press any button. Note ff The time which is obtained by the formula for lamp replacement time "4 000 hours" is a rough guideline, but is not a guarantee. The lamp runtime differs depending on the setting of "LAMP POWER" menu. How to replace the lamp unit Attention ff While attaching the projector to the ceiling, do not work right under the lamp unit or do not conduct work while your face is near the lamp unit. ff Do not remove or loosen the screws other than specified ones when replacing the lamp unit. ff Make sure to attach the lamp unit and the lamp cover securely. Lamp cover Lamp unit fixing screws ii) i) Fig. 1 Lamp cover fixing screw Fig. 2 Handles Lamp unit 1) Turn off the power of the projector and set the switch to and disconnect the power plug from the power outlet. ffWait at least one hour and check if the lamp unit has cooled down. 2) Remove the lamp cover. (Fig. 1) ffUse a Phillips screwdriver to turn the lamp cover fixing screw (x1) counterclockwise until it turns freely, and slide and pull up the lamp cover slowly in the direction of the arrow to remove it. ffOpening the lamp cover quickly may result in falling. 3) Remove the lamp unit. (Fig. 2) ffUse a Phillips screwdriver to turn the lamp unit fixing screws (x3) counterclockwise until they turn freely, and remove the lamp unit. ffHold the handles of the lamp unit and remove it straight. 4) Push in the new lamp unit while paying attention to the insertion position. ffIf the lamp unit is not installed properly, remove it and then push it in slowly. Pushing it in quickly or forcibly may break the connector. 5) Use a Phillips screwdriver to firmly tighten the lamp unit fixing screws (x3). ffMake sure to attach the lamp unit securely. 6) Attach the lamp cover. i) Perform Step 2) in the reverse order to attach the lamp cover. ii) Use a Phillips screwdriver to firmly tighten the lamp cover fixing screw (x1). ffMake sure to attach the lamp cover slowly and securely. 142 - ENGLISH
-
 1
1 -
2
-
3
-
4
-
5
-
6
-
7
-
8
-
9
-
10
-
11
-
12
-
13
-
14
-
15
-
16
-
17
-
18
-
19
-
20
-
21
-
22
-
23
-
24
-
25
-
26
-
27
-
28
-
29
-
30
-
31
-
32
-
33
-
34
-
35
-
36
-
37
-
38
-
39
-
40
-
41
-
42
-
43
-
44
-
45
-
46
-
47
-
48
-
49
-
50
-
51
-
52
-
53
-
54
-
55
-
56
-
57
-
58
-
59
-
60
-
61
-
62
-
63
-
64
-
65
-
66
-
67
-
68
-
69
-
70
-
71
-
72
-
73
-
74
-
75
-
76
-
77
-
78
-
79
-
80
-
81
-
82
-
83
-
84
-
85
-
86
-
87
-
88
-
89
-
90
-
91
-
92
-
93
-
94
-
95
-
96
-
97
-
98
-
99
-
100
-
101
-
102
-
103
-
104
-
105
-
106
-
107
-
108
-
109
-
110
-
111
-
112
-
113
-
114
-
115
-
116
-
117
-
118
-
119
-
120
-
121
-
122
-
123
-
124
-
125
-
126
-
127
-
128
-
129
-
130
-
131
-
132
-
133
-
134
-
135
-
136
-
 137
137 -
 138
138 -
 139
139 -
 140
140 -
 141
141 -
 142
142 -
 143
143 -
 144
144 -
 145
145 -
 146
146 -
 147
147 -
148
-
149
-
150
-
151
-
152
-
153
-
154
-
155
-
156
-
157
-
158
-
159
-
160
-
161
-
162
-
163
-
164
 |
 |
