Metabo AS 18 L PC Operating Instructions - Page 14
The device, Cleaning
 |
View all Metabo AS 18 L PC manuals
Add to My Manuals
Save this manual to your list of manuals |
Page 14 highlights
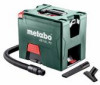
en ENGLISH 6.1 Use a fleece filter bag (43) (see fig. A, page 2) Switch off the device, remove the mains plug and open the snap locks (27). Remove the upper part (32) of the device from the dust container (26). We recommend using fleece filter bags for: - Applications, where small amounts of fine dust are created (e.g. spot-grinding and grinding of paint and lacquer coatings, extraction of drilling applications with small diameters < 10 mm of short duration, etc.). - Use of machines, such as: cordless grinders, cordless mitre saws, cordless jigsaws, etc. When using a fleece filter bag the filter cleaning is non-functional. Insert a fleece filter bag (43) in the dust container (26) as shown in fig. A, page 2. Fold the carry handle of the dust container (44) in direction of latches (45) and engage. Replace the upper part (32) and close the snap locks (27) . 6.2 Battery pack Charge the battery pack (33) before use. Recharge the battery pack if performance diminishes. The ideal storage temperature is between 10°C and 30°C. Capacity and signal indicator (37): - Press the button (38); the LEDs indicate the charge level. - The battery pack is almost flat and must be recharged if one LED is flashing. 6.3 Removing and inserting the battery pack Remove: Press the battery pack release button (34) and remove the battery pack (33) . To insert: Slide the battery pack (33) in until it engages. 6.4 Carrying strap If required, hook the Metabo carry strap into both eyelets (29) left and right of the device. Set the carry strap to the desired length. Carrying: Carry only without connected suction hose (47) . Carry the device only when switched off. The tool must be carried only with the Metabo carry strap. The machine must NOT be carried with the carrying strap around your neck. 7. The device 7.1 Switching on/off Prior to switching on the vacuum cleaner, the suction hose must be removed from the housing to avoid overheating. Prior to switching on the device set the respective 14 suction power via the rotary switch (39): "BOOST": high suction power - working with a drill vacuum cleaner adapter (DDE 14, 6.30829), recommended for profiled surface such as e.g. carpets. "ECO": medium suction power - recommended for smooth surfaces, cordless tools with low dust generation (cordless grinders, cordless mitre saws, cordless jigsaws, etc.),. "OFF": Off (transport lock) - deactivates the corner switch (28) Use the corner switch (28) to turn the machine On/ Off. The suction power can also be changed with the machine in operation. 7.2 PressClean To clean the pleated filter (41) using a strong air flow: Put the rotary switch (39) in BOOST position, cover connecting sleeve (46) or suction opening (35) with the hand and press the button (36) several times (at least 3 times). 8. Use 8.1 Dry Vacuuming WARNING - This device is only intended for dry use. Vacuum only with dry pleated filter (41), device and accessories. If the cartridge is damp, dust may stick and form a crust. The device must not be switched on without pleated filter in place (41). 8.2 Transport Remove suction hose (47) fromt he suction opening (35) and store in housing according to fig. C on page 2. In start position 1 Insert hose end and wind the hose in the housing around the vacuum cleaner in clockwise direction. The upper part (32) must be securely sealed to the dust container (26) - check that the snap locks (27) are closed. Put rotary switch (39) in "OFF" position (transport lock). Store spare battery pack (49) according to figure B on page 2. Push open downwards along the ridges (direction of arrow). Store charger (48) according to figure B on page 2. Push into the charger storage along the ridges (direction of arrow). 9. Cleaning 9.1 General Cleaning Instructions Clean the dust container (26) and accessories with water. Wipe the upper part (32) with a damp cloth. Caution! This device contains dust that is harmful to health. Discharge and maintenance operations (including disposal of the dust collection containers) must only be carried out by qualified specialists
-
 1
1 -
2
-
3
-
4
-
5
-
6
-
7
-
8
-
 9
9 -
 10
10 -
 11
11 -
 12
12 -
 13
13 -
 14
14 -
 15
15 -
 16
16 -
 17
17 -
 18
18 -
 19
19 -
20
-
21
-
22
-
23
-
24
-
25
-
26
-
27
-
28
-
29
-
30
-
31
-
32
-
33
-
34
-
35
-
36
-
37
-
38
-
39
-
40
-
41
-
42
-
43
-
44
-
45
-
46
-
47
-
48
-
49
-
50
-
51
-
52
-
53
-
54
-
55
-
56
-
57
-
58
-
59
-
60
-
61
-
62
-
63
-
64
-
65
-
66
-
67
-
68
-
69
-
70
-
71
-
72
-
73
-
74
-
75
-
76
-
77
-
78
-
79
-
80
-
81
-
82
-
83
-
84
-
85
-
86
-
87
-
88
-
89
-
90
-
91
-
92
-
93
-
94
-
95
-
96
-
97
-
98
-
99
-
100
-
101
-
102
-
103
-
104
 |
 |
