Lantronix EDS3000PR User Guide
Lantronix EDS3000PR Manual
 |
View all Lantronix EDS3000PR manuals
Add to My Manuals
Save this manual to your list of manuals |
Lantronix EDS3000PR manual content summary:
- Lantronix EDS3000PR | User Guide - Page 1
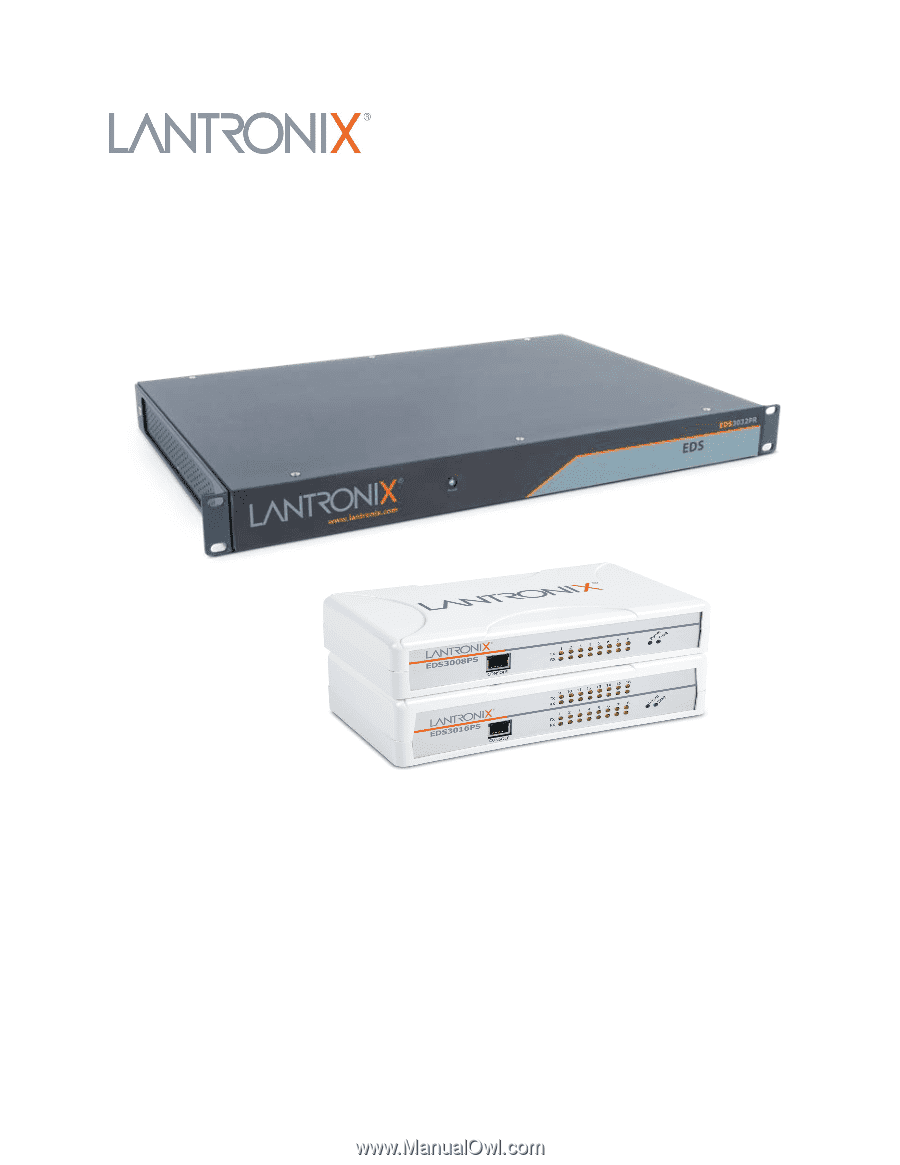
EDS3000 Device Server User Guide EDS3008/16/32PR EDS3008/16PS Part Number PMD-00010 Revision B February 2021 - Lantronix EDS3000PR | User Guide - Page 2
For details on the Lantronix warranty policy, please go to our website at www.lantronix.com/support/warranty. Contacts Lantronix, Inc. Corporate Headquarters 7535 Irvine Center Drive Suite 100 Irvine, CA 92618 /releases/2.7/license/ Linux kernel version 3.6.5. EDS3000 Device Server User Guide 2 - Lantronix EDS3000PR | User Guide - Page 3
energy and, if not installed and used in accordance with this user guide, may cause interference to radio communications. Operation of this equipment in a Updated installation and compliance information. Added TLS1.3 support. Renamed "MACH10" to "ConsoleFlow". EDS3000 Device Server User - Lantronix EDS3000PR | User Guide - Page 4
and EDS3032PR Overview 14 EDS3008PS and EDS3016PS Overview 15 Key Features 16 Applications 16 Protocol Support 17 Additional Features 18 Modem Emulation 18 Web-Based Configuration and Troubleshooting 18 Command-Line Interface (CLI 18 SNMP Management 18 XML-Based Architecture and - Lantronix EDS3000PR | User Guide - Page 5
44 IP Sockets 44 To View the List of IP Sockets 44 Log 44 To Configure the Diagnostic Log Output 45 EDS3000 Device Server User Guide 5 - Lantronix EDS3000PR | User Guide - Page 6
SMTP 61 To Configure SMTP Settings 61 SNMP 62 To Configure SNMP Settings 63 SSH 63 SSH Server: Host Keys 63 EDS3000 Device Server User Guide 6 - Lantronix EDS3000PR | User Guide - Page 7
To Configure Tunnel Modem Emulation Settings 85 User Management 86 To Configure User Management 87 XML 88 To Export Configuration 88 EDS3000 Device Server User Guide 7 - Lantronix EDS3000PR | User Guide - Page 8
Status 89 To Import Configuration 90 Appendix A: Technical Support 93 Appendix B: Binary to Hexadecimal Conversions 94 Converting Installationsanweisungen 98 Rackmontage 98 Energiezufuhr 98 Erdung 98 Installation Instructions 98 Rack Mounting 98 Input Supply 98 Grounding 98 - Lantronix EDS3000PR | User Guide - Page 9
Configuration 37 Figure 6-4 Wired Network (eth0) Ethernet Link Status 39 Figure 6-5 Wired Network (eth0) Link Configuration 39 Figure 7-1 Filesystem Statistics 42 EDS3000 Device Server User Guide 9 - Lantronix EDS3000PR | User Guide - Page 10
64 Table 9-29 SSH Server Authorized Users 65 Table 9-30 SSH Client Known Hosts 66 Table 9-31 SSH Client Users 66 EDS3000 Device Server User Guide 10 - Lantronix EDS3000PR | User Guide - Page 11
New Role Settings 88 Table 9-52 Configuration from Filesystem 91 Table 9-53 Line(s) from single line Settings on the Filesystem 92 EDS3000 Device Server User Guide 11 - Lantronix EDS3000PR | User Guide - Page 12
for contacting Lantronix Technical Support. Instructions for converting binary values to hexadecimals. Lantronix compliance information. Lantronix cables and adapters for use with the EDS3000 devices are listed here according to part number and application. EDS3000 Device Server User Guide 12 - Lantronix EDS3000PR | User Guide - Page 13
1: About This Guide Additional Documentation Visit the Lantronix web site at www.lantronix.com/support/documentation for the latest documentation and the following additional documentation. Document Description EDS3000 Device Server Command Reference Instructions for accessing Command Mode ( - Lantronix EDS3000PR | User Guide - Page 14
EDS3032PR Overview EDS3008PS and EDS3016PS Overview Key Features Applications Protocol Support Additional Features Configuration Methods Addresses and Port Numbers Product Information Label software or hardware components in your application. EDS3000 Device Server User Guide 14 - Lantronix EDS3000PR | User Guide - Page 15
. They provide fully transparent RS-232 point-to-point connections without requiring modifications to existing software or hardware in your application. EDS3000 Device Server User Guide 15 - Lantronix EDS3000PR | User Guide - Page 16
design 8 (EDS3008PR/PS), 16 (EDS3016PR/PS) or 32 (EDS3032PR) serial ports with hardware handshaking signals RS-232 support One RJ45 Ethernet port 4 Gbit (512 Mbyte) NAND flash memory 4 Gbit (512 Mbyte) DRAM A the IP protocol family. ATM machines EDS3000 Device Server User Guide 16 - Lantronix EDS3000PR | User Guide - Page 17
Building Automation equipment Point of Sale Systems 2: Introduction Protocol Support The EDS3000 device servers contain a full-featured TCP/IP stack. Supported protocols include: ARP, IP, UDP, TCP, ICMP , and HTTPS for firmware upgrades and uploading files. EDS3000 Device Server User Guide 17 - Lantronix EDS3000PR | User Guide - Page 18
access. As a result, you decrease downtime (using the troubleshooting tools) and implement configuration changes (using the configuration tools). XML editor. Really Simple Syndication (RSS) The EDS3000 devices support Really Simple Syndication (RSS) for streaming and managing online content Guide 18 - Lantronix EDS3000PR | User Guide - Page 19
have robust defenses to hostile Internet attacks such as a denial of service (DoS), which can be used to take down the network. Moreover, Troubleshooting Capabilities The EDS3000 devices offers a comprehensive diagnostic tool set that lets you troubleshoot problems Device Server User Guide 19 - Lantronix EDS3000PR | User Guide - Page 20
editor. (See the EDS3000 Device Server Command Reference for instructions and available commands. Lantronix documentation is available at www.lantronix.com/support/documentation.) Web API: The Web APIs are restful : FTP UDP Port 69: TFTP UDP Port 514: Syslog EDS3000 Device Server User Guide 20 - Lantronix EDS3000PR | User Guide - Page 21
Tunnel 2 TCP/UDP Port 10003: Tunnel 3 Note: Multi-port products include one or more additional supported ports and tunnels with default sequential numbering, such as TCP/UDP Port 10004: Tunnel 4, TCP/UDP number) Device ID Figure 2-7 EDS3008PR Product Label EDS3000 Device Server User Guide 21 - Lantronix EDS3000PR | User Guide - Page 22
EDS3016PS). One RJ45-to-DB9F serial cable. A printed Quick Start guide. Your package may also include a power supply. User-Supplied Items To -232 serial devices that require network connectivity. Each EDS3000 serial port supports a directly connected RS-232 serial device. A serial cable for - Lantronix EDS3000PR | User Guide - Page 23
Port Power LED Figure 3-4 Back View of the EDS3016PS RJ45 Serial Port Ethernet LEDs Power Connector RJ45 Ethernet Port Reset switch EDS3000 Device Server User Guide 23 - Lantronix EDS3000PR | User Guide - Page 24
ports. Console Port The EDS3000PR/EDS3000PS has an RJ45 Console port configured as DTE and supports up to 230,400 baud. Figure 3-5 RJ45 Serial Port Ethernet Port The EDS3000 devices have an RJ45 Ethernet Blinking = EDS3000PR is receiving data on the serial port. EDS3000 Device Server User Guide 24 - Lantronix EDS3000PR | User Guide - Page 25
this button for 2 to 3 seconds reboots the EDS3000PR device and terminates all data activity occurring on the serial and Ethernet ports. EDS3000 Device Server User Guide 25 - Lantronix EDS3000PR | User Guide - Page 26
. Plug the other end into an AC wall outlet. After power-up, the self-test begins. 5. Power up the serial devices. EDS3000 Device Server User Guide 26 - Lantronix EDS3000PR | User Guide - Page 27
. Plug the other end into an AC wall outlet. After power-up, the self-test begins. 5. Power up the serial devices. EDS3000 Device Server User Guide 27 - Lantronix EDS3000PR | User Guide - Page 28
3: Installation of EDS3000PR/EDS3000PS Figure 3-10 Example of EDS3016PS Connections Serial Device Power 10/100/1000 Base-T Ethernet EDS3000 Device Server User Guide 28 - Lantronix EDS3000PR | User Guide - Page 29
from the Lantronix website at https://www.lantronix.com/products/lantronix-provisioning-manager/. For instructions on using the application, see the Lantronix Provisioning Manager online help. Installing Lantronix menu button at the top, and select an operation. EDS3000 Device Server User Guide 29 - Lantronix EDS3000PR | User Guide - Page 30
Web Manager To access Web Manager, perform the following steps: 1. Open a standard web browser. Lantronix supports the latest version of Internet Explorer, Mozilla Suite, Mozilla Firefox, Safari, Chrome or Opera. 2. click Status in the menu bar (Figure 5-2). EDS3000 Device Server User Guide 30 - Lantronix EDS3000PR | User Guide - Page 31
5: Configuration Using Web Manager Figure 5-2 Web Manager Home Page EDS3000 Device Server User Guide 31 - Lantronix EDS3000PR | User Guide - Page 32
Manager page of the same name. All the functionality is accessible through Web Manager and is divided between these tab/pages. EDS3000 Device Server User Guide 32 - Lantronix EDS3000PR | User Guide - Page 33
the 49 current CLI configuration settings. Allows you to view and configure date and time for the device by either 50 SNTP or manual settings. Shows the configuration and status for the consoleflow client. 51 Diagnostics Lets you perform various diagnostic procedures. 44 EDS3000 Device Server - Lantronix EDS3000PR | User Guide - Page 34
for a terminal. 75 Shows thread ID numbers, names and CPU usage. 48 Shows how to perform a traceroute to a network host. 48 EDS3000 Device Server User Guide 34 - Lantronix EDS3000PR | User Guide - Page 35
configuration of users. Lets you export XML configuration and status records, and import XML configuration records. See Page 76 87 89 EDS3000 Device Server User Guide 35 - Lantronix EDS3000PR | User Guide - Page 36
) Interface Configuration page, shown in Figure 6-2 Wired Network (eth0) Interface Configuration. Table 6-3 Wired Network (eth0) Interface Configuration describes the configuration information. EDS3000 Device Server User Guide 36 - Lantronix EDS3000PR | User Guide - Page 37
6: Network Settings Figure 6-1 Wired Network (eth0) Interface Status Figure 6-2 Wired Network (eth0) Interface Configuration EDS3000 Device Server User Guide 37 - Lantronix EDS3000PR | User Guide - Page 38
is attempted every 5 minutes to obtain a new IP address. When the DHCP is enabled, any configured static IP address is ignored. EDS3000 Device Server User Guide 38 - Lantronix EDS3000PR | User Guide - Page 39
: When speed is Auto, duplex must be Auto or Half. When speed is not Auto, duplex must be Half or Full. EDS3000 Device Server User Guide 39 - Lantronix EDS3000PR | User Guide - Page 40
> IP. Using the CLI To enter the command level: enable > config > ip Using XML Include in your file: EDS3000 Device Server User Guide 40 - Lantronix EDS3000PR | User Guide - Page 41
Resolution Protocol (ARP) network stack specific configuration items.The ARP cache can be manipulated manually by adding new entries and deleting existing ones. Added entries are static and for test arp Using XML Include in your file: EDS3000 Device Server User Guide 41 - Lantronix EDS3000PR | User Guide - Page 42
a directory on the file system. rmdir Removes a directory from the file system. format Format the file system and remove all data. EDS3000 Device Server User Guide 42 - Lantronix EDS3000PR | User Guide - Page 43
, on the Filesystem page, click Browse. Using the CLI To enter the Filesystem command level: enable > filesystem Using XML Not applicable. EDS3000 Device Server User Guide 43 - Lantronix EDS3000PR | User Guide - Page 44
the name of a DNS host and click Lookup. Note: If DNS information is not supplied by DHCP, configure Wired Network (eth0) internet settings according to instructions at Wired Network (eth0) (on page 36). EDS3000 Device Server User - Lantronix EDS3000PR | User Guide - Page 45
Include in your file: Log Configure a line or disable the diagnostic log on this Web Manager page. EDS3000 Device Server User Guide 45 - Lantronix EDS3000PR | User Guide - Page 46
ping. Enter the number of ping packets that the attempts to send to the Host. The default number of packets is 3. EDS3000 Device Server User Guide 46 - Lantronix EDS3000PR | User Guide - Page 47
routes, on the Diagnostics page, click Routes. Using CLI To enter the command level: enable, show routes Using XML Not applicable. EDS3000 Device Server User Guide 47 - Lantronix EDS3000PR | User Guide - Page 48
, on the Diagnostics page, click Traceroute. Using the CLI To enter the command level: enable > trace route Using XML Not applicable. EDS3000 Device Server User Guide 48 - Lantronix EDS3000PR | User Guide - Page 49
status information on the CLI Statistics page displays the current Telnet and SSH server status, uptime, and current connections (if any.) EDS3000 Device Server User Guide 49 - Lantronix EDS3000PR | User Guide - Page 50
current clock settings at the bottom of the Clock page and can also either manually update or synchronize the clock with an SNTP server. If you select SNTP Date Table 9-12 Clock Settings Description Select Manual or SNTP from the drop-down window. If Manual is selected, enter the date using the - Lantronix EDS3000PR | User Guide - Page 51
9: Administration Clock Settings Time NTP Server Time Zone Description If Manual is selected, enter the time using the Hour, Minute (Min) and Second (Sec) drop-down menus Manager. Enter the ConsoleFlow Device Name. Enter the ConsoleFlow Device Description. EDS3000 Device Server User Guide 51 - Lantronix EDS3000PR | User Guide - Page 52
disable the use of a proxy for this connection. Disabled by default. Proxy Type Proxy server type. The supported type is SOCKS5. Proxy Host Hostname or IP address of the proxy server to be used. Proxy Port Submit button appears when new settings are entered. EDS3000 Device Server User Guide 52 - Lantronix EDS3000PR | User Guide - Page 53
other computers to see your computer. The current statistics and configuration options for device discovery are available for the EDS3000 devices. EDS3000 Device Server User Guide 53 - Lantronix EDS3000PR | User Guide - Page 54
of the email, not as an attachment. Select the priority level for the email alert: Urgent High Normal Low Very Low EDS3000 Device Server User Guide 54 - Lantronix EDS3000PR | User Guide - Page 55
when a new state is selected. To Configure FTP Settings Using Web Manager To configure FTP, on the Administration page, click FTP. EDS3000 Device Server User Guide 55 - Lantronix EDS3000PR | User Guide - Page 56
in response to different commands. HTTP Authentication enables the requirement of user names and passwords for access to the EDS3000 devices. EDS3000 Device Server User Guide 56 - Lantronix EDS3000PR | User Guide - Page 57
. Enter the maximum time for the HTTP server to wait when receiving a request. This prevents Denial-of-Service (DoS) attacks. The default is 10 seconds. Enter the maximum number of bytes the HTTP server accepts when Max Log Entries are cached and viewable. EDS3000 Device Server User Guide 57 - Lantronix EDS3000PR | User Guide - Page 58
other Authentication Type. Click Submit when URI and Authentication Type is entered to submit it. Click to delete the existing configuration. EDS3000 Device Server User Guide 58 - Lantronix EDS3000PR | User Guide - Page 59
600, 1200, 2400, 4800, 9600, 19200, 38400, 57600, 115200, 230400. When selecting a Custom baud rate, you may manually enter any value between 300 and 230400. Note: Custom baud rates are not supported when a line is configured for Command Mode. Set the Parity of the Line. The default is None. Set the - Lantronix EDS3000PR | User Guide - Page 60
enable Command Mode on the Line, Tunneling on the Line must be Disabled. Custom baud rates are not supported in Command Mode. Enter the amount of time to wait during boot time for the Serial String. This available when Use Serial String is selected for Mode. EDS3000 Device Server User Guide 60 - Lantronix EDS3000PR | User Guide - Page 61
the RSS Feed On or Off. Click to select whether to turn Persistent mode for the RSS Feed On or Off. EDS3000 Device Server User Guide 61 - Lantronix EDS3000PR | User Guide - Page 62
settings, on the Administration page, click SMTP in the menu. Using the CLI To enter the command level: enable > config > smtp EDS3000 Device Server User Guide 62 - Lantronix EDS3000PR | User Guide - Page 63
Agent State is enabled. Enter the Secondary Destination port. Note: SNMP Traps fields become available when SNMP Agent State is enabled. EDS3000 Device Server User Guide 63 - Lantronix EDS3000PR | User Guide - Page 64
existing public key you want to upload. Click the Submit button after changes are made in the above Upload Keys fields. EDS3000 Device Server User Guide 64 - Lantronix EDS3000PR | User Guide - Page 65
are optional, but if they exist another layer of security is offered which helps prevent Man-in-the-Middle (MITM) attacks. EDS3000 Device Server User Guide 65 - Lantronix EDS3000PR | User Guide - Page 66
kind of secure private network. Click the Choose File button to browse to the existing public key you want to upload. EDS3000 Device Server User Guide 66 - Lantronix EDS3000PR | User Guide - Page 67
your file: Include in your file: Include in your file: EDS3000 Device Server User Guide 67 - Lantronix EDS3000PR | User Guide - Page 68
a protocol that creates an encrypted connection between devices. It also provides authentication and message integrity services. SSL is used widely for secure communication to a Web server, and also for wireless CLI To enter the SSL command level: enable > ssl EDS3000 Device Server User Guide 68 - Lantronix EDS3000PR | User Guide - Page 69
mm/dd/yyyy format. Type Select RSA, DSA, or ECDSA. Key length Select the key length: 512 768 1024 2048 4096 EDS3000 Device Server User Guide 69 - Lantronix EDS3000PR | User Guide - Page 70
verify the identity of a peer. Authority certificates are used with some wireless authentication methods. These certificates do not require a private key. EDS3000 Device Server User Guide 70 - Lantronix EDS3000PR | User Guide - Page 71
open and close tag. If the New Certificate field is set to None, the certificate is not supported. 6. Click Submit. CSR (Certificate Signing Request) The EDS3000 devices uses the Secure Socket Layer (SSL) protocol is vulnerable to man-in-the-middle attacks. EDS3000 Device Server User Guide 71 - Lantronix EDS3000PR | User Guide - Page 72
to the file system is enabled. To allow the administrator to save the complete system log, save the system log to a server that supports remote logging services. For details, refer to RFC 3164. The default port is 514. Field State Host Table 9-35 Syslog Description Enable or disable the Syslog - Lantronix EDS3000PR | User Guide - Page 73
Level Common Name Submit (button) Description Enter the port number for the remote host that supports logging services. The default port is 514. Enter the local port to use for Syslog. Enter the configuration option appears when the Daily schedule is selected. EDS3000 Device Server User Guide 73 - Lantronix EDS3000PR | User Guide - Page 74
: enable > device Using XML Include in your file: Include in your file: EDS3000 Device Server User Guide 74 - Lantronix EDS3000PR | User Guide - Page 75
It is a way to send commands over the network such as send break or start echoing. IAC is only supported in Telnet. Select the interface to display when the user logs in. Choices are: Enabled = shows the Login Connect : enable > config > terminal network Using XML EDS3000 Device Server User Guide 75 - Lantronix EDS3000PR | User Guide - Page 76
Serial Line interface. The Line Settings and Protocol are displayed for informational purposes and must be configured from the Line settings. EDS3000 Device Server User Guide 76 - Lantronix EDS3000PR | User Guide - Page 77
100 to 1450 bytes. Default is 512. Note: This configuration option appears when Timeout mode or Send Character mode is selected. EDS3000 Device Server User Guide 77 - Lantronix EDS3000PR | User Guide - Page 78
to for this connection.There is no remote port or address. Supported serial lines and associated local port numbers progress sequentially in matching value 2 is 10002, and so on for the number of serial lines supported. Serial data can still be received while waiting for a network connection, keeping - Lantronix EDS3000PR | User Guide - Page 79
. Set the port number for use as the network local port. The default local port number for each supported serial line number progresses sequentially in equal value so that Tunnel X: 1000+X. For example: Tunnel 1: . Blank the field to restore the default. EDS3000 Device Server User Guide 79 - Lantronix EDS3000PR | User Guide - Page 80
. Select an email profile number to which an email notification will be sent upon the disconnection of an accept mode tunnel. EDS3000 Device Server User Guide 80 - Lantronix EDS3000PR | User Guide - Page 81
Port. The Local Port is set to by default but can be overridden. Blank the field to restore the default. EDS3000 Device Server User Guide 81 - Lantronix EDS3000PR | User Guide - Page 82
at the SSL > Credentials page. Select to enable or disable. This configuration field becomes available when the SSL protocol is selected. EDS3000 Device Server User Guide 82 - Lantronix EDS3000PR | User Guide - Page 83
with keep alive timeout. It is up to the application (e.g., tunneling) to close the connection (this happens almost immediately with tunneling). EDS3000 Device Server User Guide 83 - Lantronix EDS3000PR | User Guide - Page 84
be accessed. For the EDS3000 device, the Connect Mode supports up to 16 hosts. Hosts may be accessed sequentially or to all listed hosts. The EDS3000 devices can support a maximum of 64 total aggregate connections. Host List can support a maximum of 64 total aggregate connections. EDS3000 - Lantronix EDS3000PR | User Guide - Page 85
commands to control the connection. For compatibility with these older devices on modern networks, the EDS3000 devices mimic the modem's behavior. EDS3000 Device Server User Guide 85 - Lantronix EDS3000PR | User Guide - Page 86
answered after an incoming RING (ATS0=2). Choices are: Disabled (default) Automatic Manual Connect String Enter the customized Connect String sent to the Serial Line with the Connect Modem your file: EDS3000 Device Server User Guide 86 - Lantronix EDS3000PR | User Guide - Page 87
Technician User Click Add to submit the new user. Click OK in the confirmation window which appears to add the user. EDS3000 Device Server User Guide 87 - Lantronix EDS3000PR | User Guide - Page 88
, on the Administration page, click User Management. Using the CLI To enter the User Management command level: enable > config > user management EDS3000 Device Server User Guide 88 - Lantronix EDS3000PR | User Guide - Page 89
Caution: The 'User Management', 'HTTP Authentication', and SSL groups must be imported with secrets manually filled in (e.g., passwords and private key) before import. The exported file can be modified and the Clear All button will uncheck all checkboxes. EDS3000 Device Server User Guide 89 - Lantronix EDS3000PR | User Guide - Page 90
of available groups, use the xcr list command. 7. Click Export. Using the CLI To enter the XML command level: enable > xml EDS3000 Device Server User Guide 90 - Lantronix EDS3000PR | User Guide - Page 91
then only the group name should be specified. Click the Import button when the Configuration from Filesystem fields are completed above. EDS3000 Device Server User Guide 91 - Lantronix EDS3000PR | User Guide - Page 92
marks except Networking. Click the Import button when the Line(s) from single line Settings on the Filesystem fields are completed above. EDS3000 Device Server User Guide 92 - Lantronix EDS3000PR | User Guide - Page 93
support services and product documentation. To contact technical support or sales, look up your local office at http://www.lantronix.com/about/contact.html. When you report a problem the problem Status of the unit when the problem - Lantronix EDS3000PR | User Guide - Page 94
0 1 0001 1 2 0010 2 3 0011 3 4 0100 4 5 0101 5 6 0110 6 7 0111 7 8 1000 8 9 1001 9 10 1010 A 11 1011 B 12 1100 C 13 1101 D 14 1110 E 15 1111 F EDS3000 Device Server User Guide 94 - Lantronix EDS3000PR | User Guide - Page 95
button and select Programmer. 3. Click Bin (Binary), and type the number you want to convert. 4. Click Hex. The hexadecimal value appears. EDS3000 Device Server User Guide 95 - Lantronix EDS3000PR | User Guide - Page 96
Appendix C: Compliance EU Declaration of Conformity for EDS3008PR, 3016PR, 3032PR EDS3000 Device Server User Guide 96 - Lantronix EDS3000PR | User Guide - Page 97
Appendix C: Compliance EU Declaration of Conformity for EDS3008PS, 3016PS Planned compliance. This section will be updated when compliance is complete. EDS3000 Device Server User Guide 97 - Lantronix EDS3000PR | User Guide - Page 98
TYPE RECOMMENDED BY THE MANUFACTURER. DISCARD USED BATTERIES ACCORDING TO THE MANUFACTURER'S INSTRUCTIONS. ACHTUNG: WIRD BEIM BATTERIEWECHSEL EINE FALSCHE BATTERIE EINGESETZT, BESTEHT EXPLOSIONSGEFAHR. SETZEN BATTERIEN GEMÄSS DEN ANWEISUNGEN DES HERSTELLERS. EDS3000 Device Server User Guide 98 - Lantronix EDS3000PR | User Guide - Page 99
dieser Ausrüstung muss gewährleistet sein. Dies gilt besonders bei Anschluss an Mehrfachsteckdosen. Installation Instructions Rack Mounting for EDS3000PR only If rack mounted units are installed in a closed or direct connections to the branch circuit strips. EDS3000 Device Server User Guide 99 - Lantronix EDS3000PR | User Guide - Page 100
cable to connect the EDS3008/ 3016/3032PR/EDS3008/16PS to an RJ45 console port on products from Cisco and other manufacturers. EDS3000 Device Server User Guide 100
-
 1
1 -
 2
2 -
 3
3 -
 4
4 -
 5
5 -
 6
6 -
 7
7 -
8
-
9
-
10
-
11
-
12
-
13
-
14
-
15
-
16
-
17
-
18
-
19
-
20
-
21
-
22
-
23
-
24
-
25
-
26
-
27
-
28
-
29
-
30
-
31
-
32
-
33
-
34
-
35
-
36
-
37
-
38
-
39
-
40
-
41
-
42
-
43
-
44
-
45
-
46
-
47
-
48
-
49
-
50
-
51
-
52
-
53
-
54
-
55
-
56
-
57
-
58
-
59
-
60
-
61
-
62
-
63
-
64
-
65
-
66
-
67
-
68
-
69
-
70
-
71
-
72
-
73
-
74
-
75
-
76
-
77
-
78
-
79
-
80
-
81
-
82
-
83
-
84
-
85
-
86
-
87
-
88
-
89
-
90
-
91
-
92
-
93
-
94
-
95
-
96
-
97
-
98
-
99
-
100
 |
 |
Part Number PMD-00010
Revision B February 2021
EDS3000 Device Server
User Guide
EDS3008/16/32PR
EDS3008/16PS