Epson LightScene EV-100 Users Guide
Epson LightScene EV-100 Manual
 |
View all Epson LightScene EV-100 manuals
Add to My Manuals
Save this manual to your list of manuals |
Epson LightScene EV-100 manual content summary:
- Epson LightScene EV-100 | Users Guide - Page 1
LightScene EV-100/105 User's Guide - Epson LightScene EV-100 | Users Guide - Page 2
- Epson LightScene EV-100 | Users Guide - Page 3
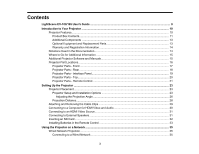
LightScene EV-100/105 User's Guide ...9 Introduction to Your Projector ...10 Projector Features Projector Software and Manuals 15 Projector Part Locations ...16 Projector Parts - Front ...17 Projector Parts - Rear ...18 Projector Parts - Interface Panel...19 Projector Parts - Top...20 Projector - Epson LightScene EV-100 | Users Guide - Page 4
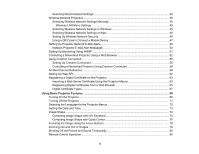
Wireless Network Settings Manually 40 Wireless LAN Menu Settings ...43 Selecting Wireless Network Settings in Windows 45 Selecting Wireless Network Settings on Mac 46 Setting Up Wireless Network Security 46 Using a QR Code to Connect a Mobile Device 47 Setting Up Projector Network E-Mail Alerts - Epson LightScene EV-100 | Users Guide - Page 5
with the Volume Buttons 97 Adjusting Projector Features ...98 Using Multiple Projectors ...98 Projector Identification System for Multiple Projector Control 98 Setting the Projector ID ...99 Setting the Remote Control ID 100 Adjusting the Projector's Brightness Level 100 Blending the Image Edges - Epson LightScene EV-100 | Users Guide - Page 6
Maintenance ...145 Cleaning the Lens...145 Cleaning the Projector Case...146 Cleaning the Air Vents ...146 Replacing the Remote Control Batteries 147 Transporting the Projector...149 Solving Problems ...150 Projection Problem Tips ...150 Projector Light Status ...151 Solving Image or Sound - Epson LightScene EV-100 | Users Guide - Page 7
Laptop 156 Displaying From a Mac Laptop 156 Solutions When "Not Supported" Message Appears 156 Solutions When Only a Partial Image Appears 157 Problems ...160 Solving Projector or Remote Control Operation Problems 160 Solutions to Projector Power or Shut-Off Problems 161 Solutions to Problems - Epson LightScene EV-100 | Users Guide - Page 8
Important Safety Information ...173 Laser Safety Information ...173 Important Safety Instructions...176 Restriction of Use ...179 List of Safety Symbols ...179 FCC Compliance Statement...183 Binding Arbitration and Class Waiver 184 Trademarks ...187 Copyright Notice...188 A - Epson LightScene EV-100 | Users Guide - Page 9
LightScene EV-100/105 User's Guide Welcome to the LightScene EV-100/105 User's Guide. For a printable PDF copy of this guide, click here. 9 - Epson LightScene EV-100 | Users Guide - Page 10
Information Additional Projector Software and Manuals Projector Part Locations Projector Features The LightScene EV-100/105 projector includes these • Wired and wireless network support for projection, monitoring, and control via remote network computer • Use Epson iProjection (Windows/Mac) to - Epson LightScene EV-100 | Users Guide - Page 11
for sharp, detailed images • Epson's Direct Power On and Auto Power On features for quick and easy setup • Support for Crestron Connected network monitoring systems • Network message broadcast system to project timely messages to all networked projectors Product Box Contents Additional Components - Epson LightScene EV-100 | Users Guide - Page 12
Make sure your projector box included all of these parts: 1 Projector 2 Remote control 3 Remote control batteries (2 AA alkaline) 4 Power cord 5 Cable cover 6 Direct mount 12 - Epson LightScene EV-100 | Users Guide - Page 13
or an authorized Epson reseller. Audio out USB Note: Older Mac computers (2009 and earlier) may not support HDMI audio. Commercially available 3.5 mm mini jack stereo cable Compatible USB cable (for 1200 mA power supply connection only) Parent topic: Projector Features Optional Equipment and - Epson LightScene EV-100 | Users Guide - Page 14
comes with a basic warranty that lets you project with confidence. For details, see the warranty that came with your projector. In addition, Epson offers free Extra Care Road Service. In the unlikely event of an equipment failure, you won't have to wait for your unit to be repaired. Instead - Epson LightScene EV-100 | Users Guide - Page 15
, you can use the Epson PrivateLine Support service to get help fast. For details, see "Where to Get Help." Projector software Epson Projector Management (Windows only) Epson iProjection (Windows/Mac) Manual Epson Projector Management Operation Guide Epson iProjection Operation Guide (Windows/Mac - Epson LightScene EV-100 | Users Guide - Page 16
firmware for a projector over a (Windows only) Operation Guide wired LAN. You can download the latest software and documentation from the Epson web site. Go to epson.com/support (U.S.) or epson.ca/support (Canada) and select your projector. Epson iProjection app Instructions are included with - Epson LightScene EV-100 | Users Guide - Page 17
: Introduction to Your Projector Projector Parts - Front 1 Projection lens 2 Remote control receiver 3 Status lights 4 Ball joint adjustment screw 5 Ball joint 6 Air intake vent 7 Power supply unit 8 Projection unit Parent topic: Projector Part Locations Related references Projector Light Status 17 - Epson LightScene EV-100 | Users Guide - Page 18
Projector Parts - Rear 1 Air exhaust vent 2 Interface panel 3 Power button 4 Cable clip attachment point 5 Power inlet 6 Cable cover Parent topic: Projector Part Locations 18 - Epson LightScene EV-100 | Users Guide - Page 19
2 HDMI port 3 SD card slot 4 Audio Out port 5 USB-A port (for 1200 mA power supply connection only) 6 Cable clip attachment point Parent topic: Projector Part Locations Related tasks Connecting to a Computer for HDMI Video and Audio Connecting to an HDMI Video Source Connecting to External Speakers - Epson LightScene EV-100 | Users Guide - Page 20
Projector Parts - Top 1 Direct mount holes (4) 2 Optional lighting track mount holes (7) 3 Optional floor stand holes (6) Parent topic: Projector Part Locations Related references Optional Equipment and Replacement Parts 20 - Epson LightScene EV-100 | Users Guide - Page 21
Projector Parts - Remote Control 1 Power button 2 HDMI button (selects HDMI video source) 21 - Epson LightScene EV-100 | Users Guide - Page 22
buttons (move through on-screen options) 8 Enter button (selects options) 9 User button (customizable for different functions) 10 Focus button (adjusts projector focus) 11 Zoom button (zoom into and out of the image) 12 Pattern button (displays a test pattern) 13 Keystone button (corrects - Epson LightScene EV-100 | Users Guide - Page 23
lighting track (with the optional lighting track mount). Keep these considerations in mind as you select a projector location: • Follow the instructions in the Installation Guide to install the projector on a wall or ceiling. • If installing on a lighting track, use only the optional lighting track - Epson LightScene EV-100 | Users Guide - Page 24
Mounted on a ceiling or lighting track Mounted on a wall Placed on the floor or on a table or portable cart 24 - Epson LightScene EV-100 | Users Guide - Page 25
exhaust and intake vents. 1 11.8 inches (30 cm) 2 7.8 inches (20 cm) If you are installing multiple projectors next to each other, be sure to leave at least 20 inches (50 cm) of space between the projectors. Also make sure heated air from an exhaust vent does not go into the air intake - Epson LightScene EV-100 | Users Guide - Page 26
image 90 degrees in either direction. Make sure to select the correct Projection setting in the Extended menu. Adjusting the Projection Angle Parent topic: Projector Placement Adjusting the Projection Angle You can adjust the projection angle using the ball joint on the projection unit. 1. Turn the - Epson LightScene EV-100 | Users Guide - Page 27
2. Loosen the ball joint screw using the supplied hexagonal wrench. Make sure to support the projection unit while loosening the screw so that it does not move suddenly. Warning: Do not grip the ball joint with your fingers while loosening the screw or your fingers could get pinched. 27 - Epson LightScene EV-100 | Users Guide - Page 28
you may damage the projector. 4. When you finish, tighten the ball joint screw using the supplied hexagonal wrench. Make sure to support the projection unit . Refer to the tables in the Installation Guide to determine approximately how far to place the projector from the screen based on the size of - Epson LightScene EV-100 | Users Guide - Page 29
and Removing the Cable Clips You can install the cable clips that came with your projector to provide additional support to the power cord and HDMI cable. 1. Connect the power cord and HDMI cable to the projector. 2. Insert the end of each cable clip anchor into the cable clip slot above the - Epson LightScene EV-100 | Users Guide - Page 30
HDMI port. Note: The projector converts the digital audio signal sent from your computer into a stereo analog signal if you are connecting to external speakers. (Make sure the HDMI audio playback device on your computer's audio settings is set to EPSON PJ.) Parent topic: Setting Up the Projector 30 - Epson LightScene EV-100 | Users Guide - Page 31
the best image quality. 1. Connect the HDMI cable to your video source's HDMI output port. 2. Connect the other end to the projector's HDMI port. Note: The projector converts the digital audio signal sent from your video source into a stereo analog signal if you are connecting to external speakers - Epson LightScene EV-100 | Users Guide - Page 32
Setup Settings - Extended Menu Inserting an SD Card Insert a commercially available SD card into the projector's SD card slot. Note: An SD card is required to project from a playlist created using the Epson Projector Content Manager software. Make sure you use an SDHC card of Class 10 or higher with - Epson LightScene EV-100 | Users Guide - Page 33
Installing Batteries in the Remote Control The remote control uses the two AA batteries that came with the projector. Caution: Use only the type of batteries specified in this manual. Do not install batteries of different types, or mix new and old batteries. 1. Remove the battery cover. 2. Insert - Epson LightScene EV-100 | Users Guide - Page 34
or flame. Keep batteries out of the reach of children; they are choking hazards and are very dangerous if swallowed. Parent topic: Setting Up the Projector 34 - Epson LightScene EV-100 | Users Guide - Page 35
can connect to the projector wirelessly through the access point using the Epson network software. Connecting to a Wired Network Selecting Wired Network Settings Parent topic: Using the Projector on a Network Related references Additional Projector Software and Manuals Connecting to a Wired Network - Epson LightScene EV-100 | Users Guide - Page 36
Wired Network Projection Selecting Wired Network Settings Before you can project from computers on your network, you must select the network settings for the projector using its menu system. Note: Make sure you already connected the projector to your wired network using the LAN port. 1. Turn on the - Epson LightScene EV-100 | Users Guide - Page 37
Network menu and press Enter ( ). 4. Select Network Configuration and press Enter ( ). 5. Select the Basic menu and press Enter ( ). 6. Select the following basic options as necessary: • Projector Name lets you enter a name up to 16 alphanumeric characters long to identify the - Epson LightScene EV-100 | Users Guide - Page 38
.) • Moderator Password lets you enter a password up to 4 numbers long for accessing the projector as a moderator with the Epson iProjection (Windows/Mac) software or the Epson iProjection app. (No default password.) • Projector Keyword lets you turn on a security password to prevent access to the - Epson LightScene EV-100 | Users Guide - Page 39
turn on the DHCP setting. • If you must set addresses manually, turn off DHCP and enter the projector's IP Address, Subnet Mask, and Gateway Address as needed. you finish selecting settings, select Complete and follow the on-screen instructions to save your settings and exit the menus. Parent topic: - Epson LightScene EV-100 | Users Guide - Page 40
tasks Setting the Date and Time Selecting Wireless Network Settings Manually Before you can project from your wireless network, you must select the network settings for the projector using its menu system. 1. Turn on the projector. 2. Press the Menu button. 3. Select the Network menu and press - Epson LightScene EV-100 | Users Guide - Page 41
.) • Moderator Password lets you enter a password up to 4 numbers long for accessing the projector as a moderator with the Epson iProjection (Windows/Mac) software or the Epson iProjection app. (No default password.) • Projector Keyword lets you turn on a security password to prevent access to the - Epson LightScene EV-100 | Users Guide - Page 42
projector displays network information. You can select an option to display a QR code that lets you quickly connect your iOS or Android devices using the Epson the on-screen instructions to save your settings and exit the menus. After you complete the wireless settings for your projector, you need to - Epson LightScene EV-100 | Users Guide - Page 43
: lets you directly connect to multiple devices and computers using the projector's built-in wireless network. Advanced: lets you connect to multiple network access points in Advanced connection mode Manually set the SSID (network name) of the wireless LAN system the projector is connecting to 43 - Epson LightScene EV-100 | Users Guide - Page 44
Setting Security Passphrase EAP Method Options Open WPA2-PSK WPA/WPA2-PSK WPA2-EAP WPA/WPA2-EAP Various passphrases from 8 to 32 characters (from a web browser, the maximum is 63 characters) EAP Type User name Password Client Certificate Verify Server Cert. CA Certificate RADIUS Server Name - Epson LightScene EV-100 | Users Guide - Page 45
Home screen Selects the IPv6 settings when you connect the projector to the network using IPv6 Parent topic: Selecting Wireless Network Settings Manually Selecting Wireless Network Settings in Windows Before connecting to the projector, select the correct wireless network on your computer. 1. To - Epson LightScene EV-100 | Users Guide - Page 46
's SSID. Parent topic: Wireless Network Projection Setting Up Wireless Network Security You can set up security for your projector to use on a wireless network. Set up one of the following security options to match the settings used on your network: • WPA2-PSK • WPA2-EAP* • - Epson LightScene EV-100 | Users Guide - Page 47
the on-screen instructions to save your projector, you can display a QR code on the screen and use it to connect a mobile device using the Epson iProjection app. Note: Make sure you have installed the latest version of Epson iProjection on your device. Visit epson.com/iprojection (U.S.) or epson - Epson LightScene EV-100 | Users Guide - Page 48
Enter ( ). 4. Select the Basic menu and press Enter ( ). 5. Set the Display LAN Info setting to Text & QR Code. 6. Select Complete and follow the on-screen instructions to save your settings and exit the menus. 48 - Epson LightScene EV-100 | Users Guide - Page 49
device to the projector. Visit epson.com/iprojection (U.S.) or epson.ca/iprojection (Canada) for instructions. Parent topic: Wireless Network Projection Setting Up Projector Network E-Mail Alerts You can set up the projector to send you an e-mail alert over the network if there is a problem with the - Epson LightScene EV-100 | Users Guide - Page 50
PJLink notifications as the Notified IP Address setting. 11. When you finish selecting settings, select Complete and follow the on-screen instructions to save your settings and exit the menus. Note: If a critical problem causes a projector to shut down, you may not receive an e-mail alert. Network - Epson LightScene EV-100 | Users Guide - Page 51
administrators can install SNMP (Simple Network Management Protocol) software on network computers so they can monitor projectors. If your network uses this software, you can set up the projector for SNMP monitoring. 1. Press the Menu button. 2. Select the Network menu and press Enter ( ). 3. Select - Epson LightScene EV-100 | Users Guide - Page 52
on the Message Broadcasting setting. Administrators can broadcast messages over the network using the Epson Projector Management software. 13. When you finish selecting settings, select Complete and follow the on-screen instructions to save your settings and exit the menus. Parent topic: Using the - Epson LightScene EV-100 | Users Guide - Page 53
2. Start your web browser on a computer or device connected to the network. 3. Type the projector's IP address into the browser's address box and press the computer's Enter key. Note: If you attempt to connect to the Epson Web Control screen via a proxy server, the screen will not be displayed. Make - Epson LightScene EV-100 | Users Guide - Page 54
Advanced on the Epson Web Control screen. Note: If you see a log in window, enter your user name and password. (The default user name is EPSONWEB and the default password is admin.) 7. Select the name of the menu and follow the on-screen instructions. Parent topic: Using the Projector on a Network - Epson LightScene EV-100 | Users Guide - Page 55
for use on the system. Crestron Connected lets you control and monitor your projector using a web browser. Note: You cannot use the Message Broadcasting tool for Epson Projector Management when you use Crestron Connected. For additional information on Crestron Connected, contact Crestron. Setting - Epson LightScene EV-100 | Users Guide - Page 56
( ). 5. Set the Crestron Connected setting to On to allow the projector to be detected. Note: Enabling Crestron Connected disables the Epson Message Broadcasting feature in the Epson Projector Management software. 6. Turn off the projector, then turn it on again to enable the setting. Parent topic - Epson LightScene EV-100 | Users Guide - Page 57
You see the Epson Web Control screen: 3. Select Crestron Connected. You see this screen: 57 - Epson LightScene EV-100 | Users Guide - Page 58
or an application system. The following table lists the channel definitions used to control the projector in Art-Net. Channel/Function 1 Adjusting light (dimming) 2 Shutter control Operation 0% to 100% Shutter open Non-operational Shutter closed Parameters 0 to 255 (default is 0) 0 to 63 (default - Epson LightScene EV-100 | Users Guide - Page 59
Channel/Function 3 Switch source 7 Zoom 8 Electronic focus Operation Parameters Non-operational 0 to 7 (default is 0) HDMI 8 to 15 LAN 16 to 23 SD Player 24 to 31 Spotlight 32 to 39 Non-operational 40 to 255 (+) lens adjustment (large) 0 to 31 (default is 128) (+) lens adjustment ( - Epson LightScene EV-100 | Users Guide - Page 60
Channel/Function Operation 10 Content playback Non-operational Playlist 1 Playlist 2 Playlist 3 Playlist 4 Playlist 5 Playlist 6 Playlist 7 Playlist 8 Playlist 9 Playlist 10 Playlist 11 Playlist 12 Playlist 13 Playlist 14 Playlist 15 Parameters 0 to 3 (default is 0) 4 to 7 8 to 11 12 to 15 16 to 19 - Epson LightScene EV-100 | Users Guide - Page 61
67 68 to 71 72 to 75 76 to 79 80 to 83 84 to 87 88 to 91 92 to 95 96 to 99 100 to 103 104 to 107 108 to 111 112 to 115 116 to 119 120 to 123 124 to 127 128 to 131 132 to - Epson LightScene EV-100 | Users Guide - Page 62
Cannot control, then set it back to Can control. Parent topic: Using the Projector on a Network Setting Up Web API You can setup Web API from a Web browser and operate the projector using Web API. 1. Open the Epson Web Control from your Web browser. 2. Select Developer's Menu. 3. Set the Enable API - Epson LightScene EV-100 | Users Guide - Page 63
following Web APIs to operate the projector: URL Supported methods http:///api/v01/contentmgr 128) Note: In the above URLs, enter the IP address for the projector in the field. For example, a URL instructing a projector with the IP address 192.168.0.2 to playback playlist ID 3 would - Epson LightScene EV-100 | Users Guide - Page 64
register once, or the certificate may not install correctly. 1. Insert an SD card into the projector's SD card slot, if necessary. (Make sure your digital certificate file is compatible with projector registration and saved in the root directory of the SD card.) 2. Press the Menu button. 3. Select - Epson LightScene EV-100 | Users Guide - Page 65
Certificates from a Web Browser You can register the digital certificates on the projector for wireless LAN authentication. 1. Make sure your digital certificate file is compatible with projector registration. 2. Make sure the projector is turned on. 3. Start your web browser on a computer or mobile - Epson LightScene EV-100 | Users Guide - Page 66
change the user ID.) • For the password, enter the default password admin. (You can change the Web Control password using the projector's Network menu.) 6. Select Advanced. 7. Under Network, select Certificate. You see a screen like this: 8. Click the Choose File button, select the certificate - Epson LightScene EV-100 | Users Guide - Page 67
the certificate, click Apply to finalize your changes and complete the registration. Parent topic: Registering a Digital Certificate on the Projector Digital Certificate Types You can register these types of digital certificates. Client Certificate (PEAP-TLS/EAP-TLS) Specification Format Extension - Epson LightScene EV-100 | Users Guide - Page 68
Specification Encryption Hashes Key length Common name Organization Password Description RSA SHA-256 2048 bit Network host name Optional Up to 32 alphanumeric characters; required Parent topic: Registering a Digital Certificate on the Projector 68 - Epson LightScene EV-100 | Users Guide - Page 69
Using Basic Projector Features Follow the instructions in these sections to use your projector's basic features. Turning On the Projector Turning Off the Projector Selecting the Language for the Projector Menus Setting the Date and Time Image Shape Focusing the Image Using the Focus Buttons Zooming - Epson LightScene EV-100 | Users Guide - Page 70
can melt and light that is reflected back into the lens can cause the projector to malfunction. If you do not see a projected image right away, try Power On setting in the Extended menu is set to HDMI, the projector automatically turns on when an HDMI signal is detected. • Change the screen output - Epson LightScene EV-100 | Users Guide - Page 71
the power button again. (To leave it on, press any other button.) The laser turns off and the Status light turns off. Note: With Epson's Instant Off technology, there is no cool-down period so you can pack up the projector for transport right away (if necessary). Caution: Do not turn the - Epson LightScene EV-100 | Users Guide - Page 72
is off, then unplug the power cord. Parent topic: Using Basic Projector Features Related references Projector Setup Settings - Extended Menu Selecting the Language for the Projector Menus If you want to view the projector's menus and messages in another language, you can change the Language setting - Epson LightScene EV-100 | Users Guide - Page 73
to use and press Enter ( ). 6. Press Menu or Esc to exit the menus. Parent topic: Using Basic Projector Features Setting the Date and Time You can set the date and time for the projector. Note: If the Schedule Protection setting in the Password Protection screen is enabled, you cannot change the - Epson LightScene EV-100 | Users Guide - Page 74
of an image that is unevenly rectangular on the sides. Note: You cannot combine Keystone correction with other image shape correction methods. 1. Turn on the projector and display an image. Note: You can display a pattern to aid in adjusting the projected image using the Settings menu. Note: You can - Epson LightScene EV-100 | Users Guide - Page 75
3. Select the Settings menu and press Enter ( ). Note: You can also press the Keystone button on the remote control to display the Keystone adjustment screen. 4. Select the Keystone setting and press Enter ( ). 5. Select H/V Keystone and press Enter ( ). Then press Enter ( ) again. 6. Use the arrow - Epson LightScene EV-100 | Users Guide - Page 76
correct the shape and size of an image that is unevenly rectangular on all sides. Note: To provide the best possible image quality, adjust the projector's position to correct the image shape. If this isn't possible, use the Quick Corner setting to correct the image shape. Note: You cannot combine - Epson LightScene EV-100 | Users Guide - Page 77
1. Turn on the projector and display an image. Note: You can display a pattern to aid in adjusting the projected image using the Settings menu. Note: You can also display - Epson LightScene EV-100 | Users Guide - Page 78
as necessary. Press Enter ( ) to return to the area selection screen. 8. When you are finished, press Esc. Parent topic: Image Shape Related references Projector Feature Settings - Settings Menu Focusing the Image Using the Focus Buttons You can adjust the sharpness of the projected image using the - Epson LightScene EV-100 | Users Guide - Page 79
to adjust the focus. 3. Press the Esc button when finished. Parent topic: Using Basic Projector Features Zooming Into and Out of Images You can draw attention to parts of an image by as necessary. • To return to the original image size, press Esc. Parent topic: Using Basic Projector Features 79 - Epson LightScene EV-100 | Users Guide - Page 80
you want to display an image such as a company logo or picture when the presentation is stopped, you can set up this feature using the projector's menus. 1. Press the A/V Mute button on the remote control to temporarily stop projection and mute any sound. 2. To turn the picture and sound back on - Epson LightScene EV-100 | Users Guide - Page 81
listed here. 1 ±60° 2 ±15° 3 23 feet (7 m) Note: Avoid using the remote control in conditions with bright fluorescent lights or in direct sunlight, or the projector may not respond to commands. If you will not use the remote control for a long time, remove the batteries. Parent topic: Using Basic - Epson LightScene EV-100 | Users Guide - Page 82
over a network) 3 SD card source (switches to images on an inserted SD card) 4 Spotlight (switches to spotlight mode) Parent topic: Using Basic Projector Features Using Spotlight Mode You can use spotlight mode to project a virtual spotlight and customize the position, size, shape and width of the - Epson LightScene EV-100 | Users Guide - Page 83
movies and save them to an SD card. You can then insert the SD card into the projector and select the playlist you want to project. Note: See the Epson Projector Content Manager Operation Guide for information about creating playlists and exporting them to an SD card. 1. Insert an SD card containing - Epson LightScene EV-100 | Users Guide - Page 84
2. To select a playlist, do one of the following: • Press the SD button on the projector's remote control to project the playlist on the SD card that was played last. If there is a timetable assigned, the playlist will play back according to the schedule in the timetable. 84 - Epson LightScene EV-100 | Users Guide - Page 85
• Press the SD Viewer button on the projector's remote control and use the arrow buttons to select a playlist from the displayed list. 85 - Epson LightScene EV-100 | Users Guide - Page 86
(1 to 9) on the projector's remote control using the Epson Projector Content Manager software. See the Epson Projector Content Manager Operation Guide for details. Parent topic: Using Basic Projector Features Related references Additional Projector Software and Manuals Overlay Effects and Shape - Epson LightScene EV-100 | Users Guide - Page 87
Effect You can select a standard or customized shape effect filter and apply it to the spotlight or playlist. 1. Press the Effect button on the projector's remote control. You see this screen: 2. Set the Overlay Effect setting to On. 3. Select Shape Filter and press Enter ( ). You see this screen - Epson LightScene EV-100 | Users Guide - Page 88
: The standard shape effect filters are Circle 1 to Circle 3 and Rectangle 1 to Rectangle 3. You can also create custom shapes using the Epson Projector Content Manager software. 5. To apply a filter to the effect, select Filter Effect, press Enter( ), select a filter effect option, and press Menu - Epson LightScene EV-100 | Users Guide - Page 89
of the Effect You can lighten or darken the overlay effect and apply it to the spotlight or playlist. 1. Press the Effect button on the projector's remote control. 89 - Epson LightScene EV-100 | Users Guide - Page 90
or darken the effect. 5. Press Menu to exit. Parent topic: Overlay Effects and Shape Filters Projection Modes Depending on how you positioned the projector, you may need to change the projection mode so your images project correctly. • Front (default setting) lets you project from a table in front - Epson LightScene EV-100 | Users Guide - Page 91
Mode Using the Menus You can change the projection mode to flip the image over top-to-bottom and/or left-to-right using the projector menus. 1. Turn on the projector and display an image. 2. Press the Menu button on the remote control. 3. Select the Extended menu and press Enter ( ). 91 - Epson LightScene EV-100 | Users Guide - Page 92
setting to automatically optimize the image luminance. This improves the image contrast based on the brightness of the content you project. 1. Turn on the projector and switch to the image source you want to use. 2. Press the Menu button. 3. Select the Image menu and press Enter ( ). 4. Select the - Epson LightScene EV-100 | Users Guide - Page 93
use a particular aspect ratio for a certain video input source, you can select it using the projector's menus. Changing the Image Aspect Ratio Available Image Aspect Ratios Parent topic: Using Basic Projector Features Changing the Image Aspect Ratio You can change the aspect ratio of the displayed - Epson LightScene EV-100 | Users Guide - Page 94
3. Select the Signal menu and press Enter ( ). 4. Select Aspect and press Enter ( ). 5. Select the aspect ratio you want to use for your input signal and press Enter ( ). 6. Press Menu or Esc to exit the menus. Parent topic: Image Aspect Ratio Related references Input Signal Settings - Signal Menu - Epson LightScene EV-100 | Users Guide - Page 95
screen are not projected). Displays images as is (aspect ratio and resolution are maintained). Parent topic: Image Aspect Ratio Color Mode The projector offers different Color Modes to provide optimum brightness, contrast, and color for a variety of viewing environments and image types. You can - Epson LightScene EV-100 | Users Guide - Page 96
you are finished, press Esc. Parent topic: Color Mode Related references Image Quality Settings - Image Menu Available Color Modes You can set the projector to use these Color Modes, depending on the input source you are using: Color Mode Dynamic Normal Description Best for images projected in - Epson LightScene EV-100 | Users Guide - Page 97
with the Volume Buttons The volume buttons control any external speakers you connected to the projector. You must adjust the volume separately for each connected input source. 1. Turn on the projector and start a presentation that includes audio. 2. To lower or raise the volume, press the Volume - Epson LightScene EV-100 | Users Guide - Page 98
the projected images from two or more projectors to create one large image. Follow the instructions in these sections to set up and project from multiple projectors. Projector Identification System for Multiple Projector Control Adjusting the Projector's Brightness Level Blending the Image Edges - Epson LightScene EV-100 | Users Guide - Page 99
a unique ID. 1. Press the Menu button. 2. Select the Extended menu and press Enter ( ). 3. Select the Multi-Projection setting and press Enter ( ). 4. Select Projector ID and press Enter ( ). 5. Press the arrow buttons on the remote control to select the identification number you want to use for the - Epson LightScene EV-100 | Users Guide - Page 100
Settings - Extended Menu Adjusting the Projector's Brightness Level When projecting with multiple projectors, you must adjust the brightness setting so that all projectors are equally bright. (Even after adjusting the brightness levels, the brightness of each projector may not match exactly.) 100 - Epson LightScene EV-100 | Users Guide - Page 101
> Multi-Projection > On) before you adjust the projector's brightness level. 1. Turn on all the projectors and display the same image. 2. Press the Menu 000 hours) • Custom: Select a custom brightness level between 50% and 100% 6. If you select Custom, select the Brightness Level setting from the - Epson LightScene EV-100 | Users Guide - Page 102
the Multi-Projection setting and press Enter ( ). 4. Select the Edge Blending setting and press Enter ( ). You see this screen: 5. Turn on the Edge Blending, Line Guide, and Pattern Guide settings. 6. Select the edge you want to blend on each projector and press Enter ( ). 102 - Epson LightScene EV-100 | Users Guide - Page 103
screen. 10. Select the Blend Curve setting and select a gradient for the shaded area on the projectors. 11. When the edges are blended, turn off the Line Guide and Pattern Guide settings on each projector to check the final settings. 12. When you are finished, press the Menu button. Parent topic - Epson LightScene EV-100 | Users Guide - Page 104
Scaling an Image You can project the same image from multiple projectors and use the Scale feature to crop and combine them into one large image. 1. Press the Menu button. 2. Select the Extended menu and press Enter ( ). 3. - Epson LightScene EV-100 | Users Guide - Page 105
Zoom Display to maintain the image aspect ratio as you scale the image • Full Display to adjust the image to the projector's screen size as you scale the image 7. Use the arrow buttons to adjust each of the following scale options as the coordinates and size of each image as you view the screen. 105 - Epson LightScene EV-100 | Users Guide - Page 106
Adjusting Color Uniformity If the color tone is uneven on each screen, adjust the color tone balance in the Extended menu of each projector. (The color tone may not be uniform even after performing color uniformity.) Note: If you cannot adjust color uniformity, make sure the Color Mode setting - Epson LightScene EV-100 | Users Guide - Page 107
2. Select the Multi-Projection setting and press Enter ( ). 3. Select the Color Uniformity setting and press Enter ( ). 4. Select On as the Color Uniformity setting and press Enter ( ), then press Esc. 5. Select Adjustment Level and press Enter ( ). 6. Select an adjustment level and press Esc. 7. - Epson LightScene EV-100 | Users Guide - Page 108
select All to adjust the entire screen. 12. Press Esc to exit the menus. Parent topic: Using Multiple Projectors Matching the Image Colors You can match the display color of multiple projectors that will project next to one another. 1. Press the Menu button. 2. Select the Extended menu and press - Epson LightScene EV-100 | Users Guide - Page 109
or right arrow buttons to adjust the Brightness setting. 8. Repeat the previous three steps as necessary to adjust each adjustment level. Parent topic: Using Multiple Projectors 109 - Epson LightScene EV-100 | Users Guide - Page 110
simultaneously project a synchronized playlist across multiple (up to 16) projectors. Note: You can create playlists and set timetables for them using the Epson Projector Content Manager software. See the Epson Projector Content Manager Operation Guide for details. Make sure the name, date, and time - Epson LightScene EV-100 | Users Guide - Page 111
Synchronized playback starts at the time specified in the playlist timetables. Parent topic: Using Multiple Projectors Related tasks Setting the Date and Time Setting the Projector ID Selecting a Test Pattern Using the Remote Control You can display a test pattern to aid in adjusting the projection - Epson LightScene EV-100 | Users Guide - Page 112
a Test Pattern Using the Menus You can display a test pattern to aid in adjusting the projection status without connecting video equipment. 1. Turn on the projector and display an image. 2. Press the Menu button on the remote control, select the Settings menu, and press Enter ( ). 3. Select the Test - Epson LightScene EV-100 | Users Guide - Page 113
more events, repeat the previous steps as necessary. 10. Select Setup complete and select Yes to save your changes. Parent topic: Scheduling Projector Events Viewing Scheduled Events You can view your scheduled events on the calendar displayed on the Schedule Settings screen. 1. Press the Menu - Epson LightScene EV-100 | Users Guide - Page 114
. A blue icon indicates an enabled event, a gray icon indicates a disabled event, and the icon indicates a repeating event. Parent topic: Scheduling Projector Events Editing a Scheduled Event You can edit any currently scheduled event. 1. Press the Menu button. 2. Select the Extended menu and press - Epson LightScene EV-100 | Users Guide - Page 115
Setup complete and select Yes to save your changes. Note: To delete all scheduled events, select Schedule Reset and select Yes. Parent topic: Scheduling Projector Events Projector Security You can secure your projector to deter theft or prevent unintended use. You can set up passwords to prevent the - Epson LightScene EV-100 | Users Guide - Page 116
Password Security Types You can set up these types of password security using one shared password: • Power On Protection password prevents anyone from using the projector without first entering a password. • User's Logo Protection password prevents anyone from changing the custom screen the - Epson LightScene EV-100 | Users Guide - Page 117
to return to the menu. 7. Make a note of the password and keep it in a safe place in case you forget it. Parent topic: Adjusting Projector Features Selecting Password Security Types After setting a password, you see this menu, allowing you to select the password security types you want to use. If - Epson LightScene EV-100 | Users Guide - Page 118
in a safe place; if you lose it, you will not be able to enter the password required to use the projector. Parent topic: Adjusting Projector Features Entering a Password to Use the Projector If a password is set up and a Power On Protection password is enabled, you see a prompt to enter a password - Epson LightScene EV-100 | Users Guide - Page 119
If you continue to enter an incorrect password 30 times in succession, the projector displays a request code and a message to contact Epson Support. Do not attempt to enter the password again. When you contact Epson Support, provide the displayed request code and proof of ownership for assistance in - Epson LightScene EV-100 | Users Guide - Page 120
feature, the user logo is also copied. Do not include any information in the user logo that you do not want to share between multiple projectors. 1. Display the image you want to project as the User's Logo. 2. Press the Menu button, select the Extended menu, and press Enter ( ). 3. Select the User - Epson LightScene EV-100 | Users Guide - Page 121
screen: • To display it whenever there is no input signal, select Display Background and set it to Logo. • To display it whenever you turn the projector on, select Startup Screen and set it to On. • To display it whenever you press the A/V Mute button, select A/V Mute and set it to Logo - Epson LightScene EV-100 | Users Guide - Page 122
Updater Operation Guide for instructions. You can download the latest software and documentation from the Epson website. Saving Settings to an SD Card Transferring Settings from an SD Card Parent topic: Adjusting Projector Features Related references Additional Projector Software and Manuals Saving - Epson LightScene EV-100 | Users Guide - Page 123
the Esc button on the remote control as you connect the power cord to the projector's power inlet. 4. When the On/Standby and Status lights are blue, and the lights stop flashing, the On/Standby light turns blue and the projector enters standby mode. Caution: Do not unplug the power cord or remove - Epson LightScene EV-100 | Users Guide - Page 124
Make sure the SD card contains only one settings transfer file from another projector of the same model. The settings are contained in a file called may not complete correctly. Do not adjust image settings on a projector until after you transfer settings to it. Otherwise, you may have to repeat your adjustments - Epson LightScene EV-100 | Users Guide - Page 125
Menu button. The lights flash as settings transfer to the SD card. When the lights stop flashing, the On/Standby light turns blue and the projector enters standby mode. Caution: Do not unplug the power cord or remove the SD card while the lights are flashing. This could damage the - Epson LightScene EV-100 | Users Guide - Page 126
Settings Follow the instructions in these sections to access the projector menu system and change projector settings. Using the Projector's Menus Image Quality Settings - Image Menu Input Signal Settings - Signal Menu Projector Feature Settings - Settings Menu Projector Setup Settings - Extended - Epson LightScene EV-100 | Users Guide - Page 127
You see the menu screen displaying the Image menu settings. 2. Press the up or down arrow button to move through the menus listed on the left. The settings for each menu are displayed on the right. Note: The available settings depend on the current input source. 3. To change settings in the - Epson LightScene EV-100 | Users Guide - Page 128
Image Quality Settings - Image Menu Settings on the Image menu let you adjust the quality of your image for the input source you are currently using. The available settings depend on the currently selected input source. To change settings for an input source, make sure the source is connected and - Epson LightScene EV-100 | Users Guide - Page 129
Setting White Balance Options Color Temp. Customized Advanced Dynamic Contrast Gamma Off Normal High Speed Description Sets the overall color tone of the image Color Temp.: sets the color temperature according to the selected color mode; lower values tint the image red, and higher values tint - Epson LightScene EV-100 | Users Guide - Page 130
Input Signal Settings - Signal Menu Normally the projector detects and optimizes the input signal settings automatically. If you need to customize the settings, you can use the Signal menu. The available settings depend - Epson LightScene EV-100 | Users Guide - Page 131
; select if the image is too dark Adjusts the size and position of the image displayed by each projector when using multiple projectors to project one image Parent topic: Adjusting the Menu Settings Projector Feature Settings - Settings Menu Options on the Settings menu let you customize various - Epson LightScene EV-100 | Users Guide - Page 132
rectangular (horizontally and vertically) H/V Keystone: lets you manually correct horizontal and vertical sides Quick Corner: select to Adjusts the volume of external speakers connected to the projector Selects the brightness mode of the projector laser Light Source Mode: sets the brightness for - Epson LightScene EV-100 | Users Guide - Page 133
Setting User Button Test Pattern Content Playback Options Light Source Mode Multi-Projection Info Display the QR Code Messages Brightness Level - Overlay Effect SD Viewer Parent topic: Adjusting the Menu Settings Description Assigns a menu option to the User button on the remote control for one- - Epson LightScene EV-100 | Users Guide - Page 134
are displayed on the screen Startup Screen: controls whether a special screen appears when the projector starts up Standby Confirmation: controls whether a confirmation screen appears when the projector is powered off Color Uniformity: adjusts the color tone balance Creates a screen that the - Epson LightScene EV-100 | Users Guide - Page 135
reception level of the video source connected to the HDMI port if there is no image or noise in the image Date & Time: adjusts the projector's date and time settings • Daylight Savings Time: enables daylight savings time • Internet Time: updates the time automatically via an online time server 135 - Epson LightScene EV-100 | Users Guide - Page 136
(turned off): Standby Mode: Communication On indicates that the projector can be monitored and controlled over a network when the projector is in standby mode; enable this setting to monitor and control the projector over a network when the projector is in standby mode Port: selects the Wired LAN or - Epson LightScene EV-100 | Users Guide - Page 137
to create a seamless screen Scale: adjusts and crops the size and position of the image displayed by each projector Brightness Settings: selects the brightness mode of the projector Color Matching: corrects the difference in tint and brightness for each projected image Reset: resets all of the - Epson LightScene EV-100 | Users Guide - Page 138
Logo • Projection • High Altitude Mode • HDMI EQ Setting • Standby Mode • Port • Multi-Projection • Projector ID • Color Mode • Color Matching • Language Parent topic: Adjusting the Menu Settings Projector Network Settings - Network Menu Settings on the Network menu let you view network information - Epson LightScene EV-100 | Users Guide - Page 139
Network Configuration Options On Off Connection mode Wireless LAN Sys. Antenna level Projector Name SSID DHCP IP Address Subnet Mask Gateway Address MAC Address Region Code IPv6 Address (Manual) IPv6 Address (Auto) Projector Name DHCP IP Address Subnet Mask Gateway Address MAC Address IPv6 Address - Epson LightScene EV-100 | Users Guide - Page 140
the resolution of the current input source Displays the refresh rate of the current input source Displays information that may be needed by a service technician Displays information about projector problems that may be needed by a service technician Displays the projector's serial number 140 - Epson LightScene EV-100 | Users Guide - Page 141
Description Displays the Event ID number corresponding to a specific projector problem; see the list of Event ID codes Event ID a code number, check this list of Event ID codes for the solution to the projector problem associated with the code. Event ID code 0432 0435 0433 0434 0481 0482 0485 0484 - Epson LightScene EV-100 | Users Guide - Page 142
DHCP setting in the Network menus. A communication error has occurred. Try restarting the network software and restarting your projector. If that does not solve the problem, contact Epson for help. The EAP authentication type does not match the network. Check the wireless LAN security settings and - Epson LightScene EV-100 | Users Guide - Page 143
the Reset menu. Setting Refresh Mode Options - Description Projects a black image for a selected amount of time to maintain projector image quality; Refresh Mode ends and the projector turns off automatically during message broadcasting or if an error message occurs Note: Refresh Mode should be - Epson LightScene EV-100 | Users Guide - Page 144
so you can schedule Light Source Calibration to run periodically Note: Light Source Calibration runs automatically after every 100 hours of use only if the projector is turned off. If the projector is on continuously for more than 24 hours, or when direct shutdown is used regularly, select Run Now - Epson LightScene EV-100 | Users Guide - Page 145
Epson servicer. This projector uses a sealed laser light source which does not need servicing and cannot be replaced. Warning: Before cleaning any part of the projector, turn it off and unplug the power cord. Never open any cover on the projector, except as specifically explained in this manual - Epson LightScene EV-100 | Users Guide - Page 146
. Do not spray any liquid directly on the lens. Warning: Do not use a lens cleaner that contains flammable gas. The high heat generated by the projector may cause a fire. Caution: Do not use glass cleaner or any harsh materials to clean the lens and do not subject the lens to any - Epson LightScene EV-100 | Users Guide - Page 147
Maintenance Related tasks Turning Off the Projector Replacing the Remote Control Batteries The remote control uses two AA manganese or alkaline batteries. Replace the batteries as soon as they run out. Caution: Use only the type of batteries specified in this manual. Do not install batteries of - Epson LightScene EV-100 | Users Guide - Page 148
1. Remove the battery cover as shown. 2. Remove the old batteries. Warning: If the battery fluid has leaked, wipe it away with a soft cloth and avoid getting the fluid on your hands. If it gets on your hands, wash them immediately to avoid injury. 3. Insert the batteries with the + and - ends facing - Epson LightScene EV-100 | Users Guide - Page 149
it and mark the box "Fragile." • When shipping the projector for repairs, place it in its original packing materials, if possible, or use equivalent materials with cushioning around the projector. Mark the box "Fragile." Note: Epson shall not be liable for any damages incurred during transportation - Epson LightScene EV-100 | Users Guide - Page 150
The lights on the projector may indicate what the problem is. • The solutions in this manual can help you solve many problems. If none of these solutions help, you can contact Epson for technical support. Parent topic: Solving Problems Related references Projector Light Status Related tasks Turning - Epson LightScene EV-100 | Users Guide - Page 151
Light Status The lights on the projector indicate the projector status and let you know when a problem occurs. Check the status and color of the lights and look for a solution in the tables here. 1 On/Standby light 2 Status light 3 Laser light 4 Temp ( - Epson LightScene EV-100 | Users Guide - Page 152
on. Press any button to turn Refresh Mode off. Internal projector error. Turn the projector off, unplug it, and contact Epson for help. A fan or sensor has a problem. Turn the projector off, unplug it, and contact Epson for help. Projector has overheated and turned off. Leave it turned off to cool - Epson LightScene EV-100 | Users Guide - Page 153
nearby objects. • Make sure the environmental temperature is not too hot. • If the problem persists, unplug the projector and contact Epson for help. Laser warning. Turn the projector off, unplug it, and contact Epson for help. Wireless LAN light Blue Flashing blue quickly Flashing blue slowly Off - Epson LightScene EV-100 | Users Guide - Page 154
problems with projected images or sound. Solutions When No Image Appears Solutions When "No Signal" Message Appears Solutions When "Not Supported saver. • Press the Menu button. If the projector menu is able to display, there may be a problem with the connected video source, cable connection, or - Epson LightScene EV-100 | Users Guide - Page 155
. For details, see the manual supplied with your computer. • If you are projecting from the SD card, press one of the favorite playlist numbers on the remote control to display the image. • If the other solutions do not solve the problem, reset all of the projector settings using the options on - Epson LightScene EV-100 | Users Guide - Page 156
the same image is not displayed by the laptop and projector, check the Windows Display utility to make sure the external monitor port is enabled and extended desktop mode is disabled. (See your computer or Windows manual for instructions.) 3. If necessary, check your video card settings and set the - Epson LightScene EV-100 | Users Guide - Page 157
video source to the projector. Try connecting different cables. projector's limits. (See your computer manual projector. • Make sure the Light Source Calibration options in the Reset menu are set correctly. Parent topic: Solving Image or Sound Problems into the projector. • Make sure the SD card is - Epson LightScene EV-100 | Users Guide - Page 158
format. Note: See the Epson Projector Content Manager Operation Guide for details. Parent topic: Solving Image or Sound Problems Related tasks Inserting an SD Card the projector. Parent topic: Solving Image or Sound Problems Related references Input Signal Settings - Signal Menu Supported Video - Epson LightScene EV-100 | Users Guide - Page 159
meets the specifications in the Installation Guide included with your mount. • If you are projecting from a computer, adjust the computer's resolution to match the projector's native resolution, if possible. Parent topic: Solving Image or Sound Problems Related references Image Quality Settings - Epson LightScene EV-100 | Users Guide - Page 160
, you need to connect an audio cable directly to your speaker system. • HDMI audio is only supported using PCM. Make sure your audio source is set to the PCM setting. • If you turn the projector on immediately after turning it off, the cooling fans may run at high speed momentarily and cause - Epson LightScene EV-100 | Users Guide - Page 161
't work, disconnect the cord and contact Epson. Parent topic: Solving Projector or Remote Control Operation Problems Related references Projector Feature Settings - Settings Menu Projector Light Status Solutions to Problems with the Remote Control If the projector does not respond to remote control - Epson LightScene EV-100 | Users Guide - Page 162
a message telling you that the battery that saves your clock settings is running low, contact Epson for help. Parent topic: Solving Projector or Remote Control Operation Problems Solutions to Password Problems If you cannot enter or remember a password, try the following solutions: • You may have - Epson LightScene EV-100 | Users Guide - Page 163
in the Network Configuration menu. • Check the Event ID number displayed in the Info menu and check the link below to identify the problem. Parent topic: Solving Network Problems Related references Projector Network Settings - Network Menu Event ID Code List Solutions When You Cannot Access the - Epson LightScene EV-100 | Users Guide - Page 164
's IP address in the web browser address bar. Note: The user ID and password are case sensitive. Parent topic: Solving Network Problems Related references Projector Network Settings - Network Menu Solutions When You Cannot Access the SD Card Through the Web If you are unable to access the SD - Epson LightScene EV-100 | Users Guide - Page 165
select your product for solutions to common problems with your projector. You can download utilities and documentation, get FAQs and troubleshooting advice, or e-mail Epson with your questions. Speak to a Support Representative To use the Epson PrivateLine Support service, call (800) 637-7661. This - Epson LightScene EV-100 | Users Guide - Page 166
projector, or in the menu system) • Proof of purchase (such as a store receipt) and date of purchase • Computer or video configuration • Description of the problem , and replacement parts from an Epson authorized reseller. To find the nearest reseller, call 800-GO-EPSON (800-463-7766) in the - Epson LightScene EV-100 | Users Guide - Page 167
of your projector. General Projector Specifications Projector Light Source Specifications Remote Control Specifications Projector Dimension Specifications Projector Electrical Specifications Projector Environmental Specifications Projector Safety and Approvals Specifications Supported Video Display - Epson LightScene EV-100 | Users Guide - Page 168
1 USB 2.0 compliant port for 1200 mA power supply (no USB connectivity function) Parent topic: Technical Specifications Projector Light Source Specifications Type Power consumption (100 to 120 V) Power consumption (220 to 240 V) Light source output power Laser Diode Normal Light Source mode - Epson LightScene EV-100 | Users Guide - Page 169
Light Source mode: Up to about 30000 hours Note: Turn off this product when not in use to prolong the life of the projector. Laser life will vary depending upon mode selected, environmental conditions, and usage. Brightness decreases over time. Parent topic: Technical Specifications Remote Control - Epson LightScene EV-100 | Users Guide - Page 170
: 4.3 inches (110 mm) 11.0 lb (4.9 kg) Parent topic: Technical Specifications Projector Electrical Specifications Rated frequency Power supply Power consumption (100 to 120 V) Power consumption (220 to 240 V) 50/60 Hz 100 to 240 VAC ±10% 1.8 to 0.8 A Operating: Normal Power Consumption mode: 173 - Epson LightScene EV-100 | Users Guide - Page 171
projector includes Epson's SizeWise chip that supports other computer display resolutions, so your image will be resized to fit automatically. Your computer's monitor port or video card refresh rate (vertical frequency) must be compatible with the projector. (See your computer or video card manual - Epson LightScene EV-100 | Users Guide - Page 172
Display format Refresh rate (in Hz) Computer signals (analog RGB) VGA 60 SVGA 60 XGA 60 WXGA 60 60 WXGA+ 60 WXGA++ 60 SXGA 60 60 SXGA+ 60 WSXGA+ 60 UXGA 60 WUXGA (Reduced Blanking) 60 HDMI input signals SDTV (480i/480p) 60 SDTV (576i/576p) 50 HDTV (720p) 50/60 HDTV ( - Epson LightScene EV-100 | Users Guide - Page 173
can severely injure you. Except as specifically explained in this User's Guide, do not attempt to service this product yourself. Refer all servicing to qualified service personnel. Warning: The projector and its accessories come packaged in plastic bags. Keep plastic bags away from small children - Epson LightScene EV-100 | Users Guide - Page 174
could result in an electric shock, fire, or visual impairment. Contact Epson support. • Do not open the projector case or attempt to disassemble or modify the projector. The projector contains a high-power laser component. Serious injury could result. • Do not look into the lens during projection - Epson LightScene EV-100 | Users Guide - Page 175
Labels are attached to the projector to indicate it is a Class 2 laser product and complies with FDA performance standards for laser products except for deviations pursuant to Laser Notice No. 50, dated June 24, 2007: • Inside 175 - Epson LightScene EV-100 | Users Guide - Page 176
• Side Parent topic: Notices Important Safety Instructions Follow these safety instructions when setting up and using the projector: • Do not look into the lens when the projector is on. The bright light can damage your eyes. Avoid standing in front of the projector so the bright light does not - Epson LightScene EV-100 | Users Guide - Page 177
. This could cause fire or electric shock. • Unplug the projector from the wall outlet and refer servicing to qualified service personnel under the following conditions: if it does not operate normally when you follow the operating instructions, or exhibits a distinct change in performance; if smoke - Epson LightScene EV-100 | Users Guide - Page 178
book or any other object, especially flammable objects. This could damage the projector or cause a fire. • Do not touch the lens with your fingers on the lens and cause projection quality to deteriorate. • Do not store the projector outside of the required temperature range of 14 to 140 °F (-10 to - Epson LightScene EV-100 | Users Guide - Page 179
this manual, do not attempt to service this product yourself. Refer all servicing to qualified personnel. Opening or removing the projector case product's suitability after a full evaluation. Parent topic: Important Safety Instructions List of Safety Symbols The following table lists the meaning of - Epson LightScene EV-100 | Users Guide - Page 180
No. Symbol 1 2 3 4 5 6 7 Approved Standards IEC60417 No.5007 Description "ON" (power) To indicate connection to the mains. IEC60417 No.5008 IEC60417 No.5009 ISO7000 No.0434B, IEC3864-B3.1 IEC60417 No.5041 IEC60417 No.6042 ISO3864-B3.6 IEC60417 No.5957 "OFF" (power) To indicate disconnection from - Epson LightScene EV-100 | Users Guide - Page 181
No. Symbol 8 9 10 11 12 13 14 Approved Standards IEC60417 No.5926 - IEC60417 No.5001B IEC60417 No.5002 - IEC60417 No.5019 IEC60417 No.5017 Description Polarity of DC power connector To identify the positive and negative connections (the polarity) on a piece of equipment to which a DC power supply - Epson LightScene EV-100 | Users Guide - Page 182
could occur due to touching a specific part of the equipment. Never look into the optical lens while the projector is on. - ISO3864 IEC60825-1 To indicate that the marked item don't place anything on projector. Caution, laser radiation To indicate the equipment has a laser radiation part. 182 - Epson LightScene EV-100 | Users Guide - Page 183
harmful interference in a residential installation. This equipment generates, uses, and can radiate radio frequency energy and, if not installed and used in accordance with the instructions, may cause harmful 183 - Epson LightScene EV-100 | Users Guide - Page 184
, AND WAIVER OF CLASS ACTIONS AND CLASS ARBITRATIONS 1.1 Disputes. The terms of this Section 1 shall apply to all Disputes between you and Epson. The term "Dispute" is meant to have the broadest meaning permissible under law and includes any dispute, claim, controversy or action between you - Epson LightScene EV-100 | Users Guide - Page 185
if your address changes by emailing us at [email protected] or writing us at the Epson Address above. Notice of the Dispute shall include the that court. 1.5 WAIVER OF CLASS ACTIONS AND CLASS ARBITRATIONS. YOU AND EPSON AGREE THAT EACH PARTY MAY BRING DISPUTES AGAINST THE OTHER PARTY ONLY IN - Epson LightScene EV-100 | Users Guide - Page 186
any settlement offer made shall not be disclosed to the arbitrator until after the arbitrator determines the amount, if any, to which you or Epson is entitled. The discovery or exchange of non-privileged information relevant to the Dispute may be allowed during the arbitration. c) Arbitration Fees - Epson LightScene EV-100 | Users Guide - Page 187
of your assent to this Agreement (including without limitation the purchase, download, installation of the Software or other applicable use of Epson Hardware, products and services) that specifies (i) your name, (ii) your mailing address, and (iii) your request to be excluded from the final, binding - Epson LightScene EV-100 | Users Guide - Page 188
registered trademark; SizeWiseTM is a trademark; and Epson StoreSM and Extra CareSM are service marks of Epson America, Inc. Mac, OS X, and macOS with Seiko Epson Corporation's operating and maintenance instructions. Seiko Epson Corporation shall not be liable for any damages or problems arising from - Epson LightScene EV-100 | Users Guide - Page 189
encourages each user to be responsible and respectful of the copyright laws when using any Epson product. While some countries' laws permit limited copying or reuse of copyrighted material in certain circumstances, those circumstances may not be as broad as some
-
 1
1 -
 2
2 -
 3
3 -
 4
4 -
 5
5 -
 6
6 -
 7
7 -
8
-
9
-
10
-
11
-
12
-
13
-
14
-
15
-
16
-
17
-
18
-
19
-
20
-
21
-
22
-
23
-
24
-
25
-
26
-
27
-
28
-
29
-
30
-
31
-
32
-
33
-
34
-
35
-
36
-
37
-
38
-
39
-
40
-
41
-
42
-
43
-
44
-
45
-
46
-
47
-
48
-
49
-
50
-
51
-
52
-
53
-
54
-
55
-
56
-
57
-
58
-
59
-
60
-
61
-
62
-
63
-
64
-
65
-
66
-
67
-
68
-
69
-
70
-
71
-
72
-
73
-
74
-
75
-
76
-
77
-
78
-
79
-
80
-
81
-
82
-
83
-
84
-
85
-
86
-
87
-
88
-
89
-
90
-
91
-
92
-
93
-
94
-
95
-
96
-
97
-
98
-
99
-
100
-
101
-
102
-
103
-
104
-
105
-
106
-
107
-
108
-
109
-
110
-
111
-
112
-
113
-
114
-
115
-
116
-
117
-
118
-
119
-
120
-
121
-
122
-
123
-
124
-
125
-
126
-
127
-
128
-
129
-
130
-
131
-
132
-
133
-
134
-
135
-
136
-
137
-
138
-
139
-
140
-
141
-
142
-
143
-
144
-
145
-
146
-
147
-
148
-
149
-
150
-
151
-
152
-
153
-
154
-
155
-
156
-
157
-
158
-
159
-
160
-
161
-
162
-
163
-
164
-
165
-
166
-
167
-
168
-
169
-
170
-
171
-
172
-
173
-
174
-
175
-
176
-
177
-
178
-
179
-
180
-
181
-
182
-
183
-
184
-
185
-
186
-
187
-
188
-
189
 |
 |

LightScene EV-100/105 User's Guide