Epson FastFoto FF-640 Users Guide
Epson FastFoto FF-640 Manual
 |
View all Epson FastFoto FF-640 manuals
Add to My Manuals
Save this manual to your list of manuals |
Epson FastFoto FF-640 manual content summary:
- Epson FastFoto FF-640 | Users Guide - Page 1
FF-640 User's Guide - Epson FastFoto FF-640 | Users Guide - Page 2
- Epson FastFoto FF-640 | Users Guide - Page 3
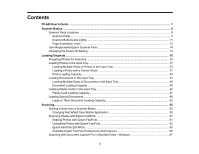
Contents FF-640 User's Guide ...7 Scanner Basics...8 Scanner Parts Locations ...8 Scanner Parts...9 Scanner Buttons and Lights...11 Page Separation Lever...13 User Replaceable Epson Scanner Parts 14 Changing the Power Off Setting ...14 Loading Originals...16 Preparing Photos for Scanning ...16 - Epson FastFoto FF-640 | Users Guide - Page 4
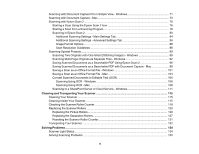
as a Searchable PDF Using Epson Scan 2 96 Saving Using OCR - Windows 106 Scanning Using OCR - Mac ...108 Scanning to a SharePoint Server or Cloud Service - Windows 111 Cleaning and Transporting Your Scanner 115 Cleaning Your Scanner ...115 Cleaning Inside Your Scanner...115 Checking the Scanner - Epson FastFoto FF-640 | Users Guide - Page 5
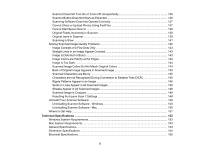
136 Scanning Software Does Not Operate Correctly 137 Cannot Share or Upload Photos Using FastFoto 137 Cannot Start Epson Scan 2 ...138 Original Feeds Incorrectly in Scanner 138 Original Jams in Scanner...139 Scanning is Slow ...141 Solving Scanned Image Quality Problems 142 Image Consists - Epson FastFoto FF-640 | Users Guide - Page 6
...158 Important Safety Instructions...158 Restrictions on Copying ...160 Default Delay Times for Power Management for Epson Products 161 Binding Arbitration and Class Waiver 161 Trademarks ...164 FCC Compliance Statement...164 Copyright Notice...165 libTIFF Software Acknowledgment 166 libjpeg - Epson FastFoto FF-640 | Users Guide - Page 7
the FF-640 User's Guide. For a printable PDF copy of this guide, click here. Note: This guide contains instructions for the 2.0 version of the FastFoto software. If you have an earlier version, you can download and install the latest software from the Epson support site or using the Epson Software - Epson FastFoto FF-640 | Users Guide - Page 8
to learn about the basic features of your scanner. Scanner Parts Locations User Replaceable Epson Scanner Parts Changing the Power Off Setting Scanner Parts Locations See these sections to identify the parts on your scanner. Scanner Parts Scanner Buttons and Lights Page Separation Lever Parent topic - Epson FastFoto FF-640 | Users Guide - Page 9
Scanner Parts 1 Scanner cover 2 Page separation lever 3 Edge guides 4 Input tray extension 5 Input tray 6 Cover open lever 7 Output tray 8 Output tray extension 9 - Epson FastFoto FF-640 | Users Guide - Page 10
9 Stopper 1 Kensington security slot 2 USB port 3 Power inlet 1 AC adapter 2 Power cord 3 USB cable 4 Microfiber cleaning cloths (2) 10 - Epson FastFoto FF-640 | Users Guide - Page 11
5 Carrier sheet Parent topic: Scanner Parts Locations Scanner Buttons and Lights Buttons 1 power button 2 stop button 3 scan button 11 - Epson FastFoto FF-640 | Users Guide - Page 12
Lights 1 Ready light 2 ! error light Parent topic: Scanner Parts Locations Related references Scanner Light Status 12 - Epson FastFoto FF-640 | Users Guide - Page 13
or any document or photo that requires a carrier sheet. Note: Use a carrier sheet to load small, fragile or irreplaceable photos, valuable photos or standard single- or multiple-page documents. Parent topic: Scanner Parts Locations Related tasks Loading Photos in the Input Tray Loading Documents - Epson FastFoto FF-640 | Users Guide - Page 14
) in the U.S. or 800-807-7766 in Canada. Part Carrier sheet Roller assembly kit Part number B12B813431 B12B819231 Parent topic: Scanner Basics Changing the Power Off Setting You can use the Epson Scan 2 Utility to change the time period before the scanner turns off automatically. 1. Do one of the - Epson FastFoto FF-640 | Users Guide - Page 15
2. Click the Power Save tab. 3. Select the length of time after which you want the scanner to automatically turn off when not in use as the Power Off Timer setting. 4. Close the Epson Scan 2 Utility. Parent topic: Scanner Basics 15 - Epson FastFoto FF-640 | Users Guide - Page 16
subject, date, or location before scanning lets FastFoto add a descriptive file name to every photo in a batch, if desired. Before scanning multiple photos, organize and clean your photos as described here. For more information, view this Epson support video. 1. Organize your photos by subject, date - Epson FastFoto FF-640 | Users Guide - Page 17
scanning and use the included microfiber cloth to clean the scanner rollers after every 300 scans, or even before each scanning session. See the link below for instructions on cleaning the rollers. Parent topic: Loading Originals Related tasks Cleaning Inside Your Scanner Loading Photos in the Input - Epson FastFoto FF-640 | Users Guide - Page 18
1. Pull up the input tray extension, extend the output tray, and flip up the stopper. Note: If you are scanning large photos, do not flip up the stopper. 18 - Epson FastFoto FF-640 | Users Guide - Page 19
2. Slide the input tray edge guides all the way out. 19 - Epson FastFoto FF-640 | Users Guide - Page 20
3. Check to make sure that the page separation lever is in the position shown here. Note: To prevent paper jams, keep the lever in this position for most types of photos. If you are scanning a photo using a carrier sheet, slide it to the upper position. 20 - Epson FastFoto FF-640 | Users Guide - Page 21
4. Flip your photos so they are facedown. 5. Fan your stack of photos and tap them gently on a flat surface to even the edges. 21 - Epson FastFoto FF-640 | Users Guide - Page 22
you have both portrait- and landscape-oriented photos in the same stack, you can rotate the portrait images after scanning. 7. Slide the edge guides against the edges of the photos. Loading Multiple Sizes of Photos in the Input Tray Loading a Photo with a Carrier Sheet Photo Loading Capacity Parent - Epson FastFoto FF-640 | Users Guide - Page 23
fragile or irreplaceable photos, or valuable original documents or artwork, directly into the input tray. This may wrinkle or damage the original. Load these originals using the included carrier sheet. 1. Pull up the input tray extension, extend the output tray, and flip up the stopper. 23 - Epson FastFoto FF-640 | Users Guide - Page 24
2. Slide the input tray edge guides all the way out. 24 - Epson FastFoto FF-640 | Users Guide - Page 25
3. Check to make sure that the page separation lever is in the position shown here. Note: To prevent jams, keep the lever in this position for most types of photos. If you are scanning a photo using a carrier sheet, slide it to the upper position. 25 - Epson FastFoto FF-640 | Users Guide - Page 26
. Note: If you have both portrait- and landscape-oriented photos in the same stack, you can rotate the portrait images after scanning. 5. Slide the edge guides against the edges of the widest photo. 26 - Epson FastFoto FF-640 | Users Guide - Page 27
a large, thick, folded, fragile, or irregularly shaped photo in the input tray using a carrier sheet. Make sure the photo meets the photo loading specifications before loading it. For more information, view this Epson support video. 1. Pull up the input tray extension, extend the output tray, and - Epson FastFoto FF-640 | Users Guide - Page 28
input tray edge guides all the way outward. 3. Insert your photo in the center of the carrier sheet with the printed side facedown and the top edge facing the arrow on the sheet. 4. Load the carrier sheet in the input tray facedown with the arrow leading into the scanner. 5. Slide the carrier - Epson FastFoto FF-640 | Users Guide - Page 29
6. Slide the edge guides against the edges of the carrier sheet. 29 - Epson FastFoto FF-640 | Users Guide - Page 30
Input Tray Related references Photo Loading Capacity Photo Loading Capacity You can load photos that meet these specifications in your scanner. Note: Use a carrier sheet to load large or thick photos, fragile or irreplaceable photos, valuable original documents, or artwork. Photo size 3 × 5 inches - Epson FastFoto FF-640 | Users Guide - Page 31
178 mm). Caution: Do not load the following types of originals in the scanner, or they may be damaged or may damage the scanner: • Polaroid or self-processed photos • Sticky photos • Photos thicker than . one at a time using a carrier sheet. For more information, view this Epson support video. 31 - Epson FastFoto FF-640 | Users Guide - Page 32
1. Pull up the input tray extension, extend the output tray, and flip up the stopper. Note: If you are scanning originals longer than this, do not flip up the stopper: Letter (8.5 × 11 inches [216 × 279 mm]). 32 - Epson FastFoto FF-640 | Users Guide - Page 33
2. Slide the input tray edge guides all the way out. 33 - Epson FastFoto FF-640 | Users Guide - Page 34
3. Check to make sure that the page separation lever is in the position shown here. Note: To prevent paper jams, keep the lever in this position for most types of documents. 4. If you are loading a multi-page document, fan your stack of pages and tap them gently on a flat surface to even the edges. - Epson FastFoto FF-640 | Users Guide - Page 35
5. Slide your documents into the input tray as shown until they meet resistance. Make sure the printed side is facedown, in portrait orientation, and top edge first. Note: If you are loading a paper business card, load it horizontally. 35 - Epson FastFoto FF-640 | Users Guide - Page 36
edge guides against same time. Make sure the documents meet the document specifications of the scanner. Do not mix photos and documents in the input tray. Caution: Load these originals one at a time using a carrier sheet. For more information, view this Epson support video. 1. Open the input tray and - Epson FastFoto FF-640 | Users Guide - Page 37
2. Pull up the input tray extension, extend the output tray, and flip up the stopper. Note: If you are scanning originals longer than this, do not flip up the stopper: Letter (8.5 × 11 inches [216 × 279 mm]). 37 - Epson FastFoto FF-640 | Users Guide - Page 38
3. Slide the input tray edge guides all the way out. 38 - Epson FastFoto FF-640 | Users Guide - Page 39
4. Check to make sure that the scan separation lever is in the position shown here. Note: To prevent paper jams, keep the lever in this position for most types of documents. 39 - Epson FastFoto FF-640 | Users Guide - Page 40
stack, you can rotate the portrait images after scanning. Note: If you are loading a paper business card, load it horizontally. 6. Slide the edge guides against the edges of the widest document. Parent topic: Loading Documents in the Input Tray Document Loading Capacity You can load documents that - Epson FastFoto FF-640 | Users Guide - Page 41
documents, or valuable original documents or artwork. Caution: Do not load the following types of documents in the scanner, or they may be damaged or may damage the scanner: • Thermal paper • Coated paper • Documents with uneven surfaces, such as embossed documents • Documents with wet ink • Ripped - Epson FastFoto FF-640 | Users Guide - Page 42
• Glossy documents • Carbon paper • Non-carbon copy paper • Perforated documents • Documents with labels or stickers Parent topic: Loading Documents in the Input Tray Loading Plastic Cards in the Input Tray You can load plastic cards that meet the card specifications in the input tray. 1. Pull up - Epson FastFoto FF-640 | Users Guide - Page 43
2. Slide the input tray edge guides all the way out. 43 - Epson FastFoto FF-640 | Users Guide - Page 44
3. Load up to three standard plastic cards horizontally in the input tray as shown, sliding them in until they meet resistance. Make sure the printed side is facedown and top edge first. Note: You can load only one embossed plastic card at a time. Do not load plastic cards vertically. 44 - Epson FastFoto FF-640 | Users Guide - Page 45
4. Slide the edge guides against the edges of the plastic card. 45 - Epson FastFoto FF-640 | Users Guide - Page 46
5. Set the page separation lever to the position shown here. • When scanning a single embossed plastic card: 46 - Epson FastFoto FF-640 | Users Guide - Page 47
Parent topic: Loading Originals Plastic Card Loading Capacity You can load original plastic cards that meet these specifications in your scanner. Type Size Thickness Loading capacity Loading direction Plastic cards, including embossed cards (ISO7810 compliant) 2.1 × 3.3 inches (56 × 85.6 mm) Up - Epson FastFoto FF-640 | Users Guide - Page 48
it. Note: When scanning special documents, turn off the Detect Double Feed setting on the Main Settings tab in Epson Scan 2. If you are scanning with the FastFoto software, close Epson Scan 2 before starting the scan. 1. Pull up the input tray extension, extend the output tray, and flip up the - Epson FastFoto FF-640 | Users Guide - Page 49
2. Slide the input tray edge guides all the way out. 49 - Epson FastFoto FF-640 | Users Guide - Page 50
3. Do one of the following to load your original: • Load a large or thick document, or an envelope, in the input tray as shown. Make sure the printed side is facedown and top edge first. • For a folded document, fold and load the document as shown. 50 - Epson FastFoto FF-640 | Users Guide - Page 51
folded document with the open side facing down. • For a photo or an irregularly-shaped document, use a carrier sheet to load the document. Do the following to load the document into the carrier sheet: facing the arrow on the sheet. 4. Slide the original into the scanner until it meets resistance. 51 - Epson FastFoto FF-640 | Users Guide - Page 52
5. Slide the edge guides against the edges of the sheet. 52 - Epson FastFoto FF-640 | Users Guide - Page 53
Large or Thick Document Loading Capacity You can load one large, thick, or folded document, or one envelope that meets these specifications in your scanner. Paper type Plain paper, fine paper, or recycled paper Paper size Width: 2.0 to 8.5 inches (50.8 to 215.9 mm) Length: 2.0 to 120 inches (50 - Epson FastFoto FF-640 | Users Guide - Page 54
Paper type Folded plain paper, fine paper, or recycled paper Envelope Irregularly shaped document (load only in a carrier sheet) Paper size Unfolded minimum size: A6 (4.1 × 5.8 inches [105 × 148 mm]) Unfolded maximum size: A3 (11.7 × 16.5 inches [297 × 420 mm]) 3.6 × 6.1 inches (92 × 155 mm) to 4.7 - Epson FastFoto FF-640 | Users Guide - Page 55
Scanning with Epson Scan 2 Scanning Special Projects Starting a Scan from a Scanner Button You can scan using a button on your scanner. This automatically starts the scanning program you have assigned to the button. By default, pressing the scan button launches the FastFoto software. Your product - Epson FastFoto FF-640 | Users Guide - Page 56
• Mac: Open the Applications folder and select Epson FastFoto. You see a screen like this: 2. Click Settings. 3. Select the Scanner Settings tab. You see a screen like this: 56 - Epson FastFoto FF-640 | Users Guide - Page 57
Select Application. You see a screen like this: 5. Choose the software you want to launch when you start a scan using the Parent topic: Starting a Scan from a Scanner Button Related tasks Scanning Photos with Epson FastFoto Scanning with Document Capture Pro in Standard View - Windows Scanning with - Epson FastFoto FF-640 | Users Guide - Page 58
Note: This guide contains instructions for the 2.0 version of the FastFoto software. If you have an earlier version, you can download and install the latest software from the Epson support site or using the Epson Software Updater utility. Caution: Because of the speed at which photos are scanned, - Epson FastFoto FF-640 | Users Guide - Page 59
You see a screen like this: 3. If you want to change any of the scanning options, click Settings. 4. Click Start Scanning. You may see a screen like this: 59 - Epson FastFoto FF-640 | Users Guide - Page 60
Windows Mac 60 - Epson FastFoto FF-640 | Users Guide - Page 61
or edit them using Epson FastFoto. Sharing Photos with Epson FastFoto Uploading Photos with Epson FastFoto Epson FastFoto Edit Menu Available Epson FastFoto Preferences and Features Parent topic: Scanning Related references Where to Get Help Related tasks Cleaning Inside Your Scanner Loading Photos - Epson FastFoto FF-640 | Users Guide - Page 62
. Epson FastFoto does not support web-based email, such as Gmail. Parent topic: Scanning Photos with Epson FastFoto Uploading Photos with Epson FastFoto You can upload photos to Dropbox or Google Drive with the Epson FastFoto software. You can automatically upload them as you scan them, or manually - Epson FastFoto FF-640 | Users Guide - Page 63
All Programs or Programs. Select EPSON Software > Epson FastFoto. • Mac: Open the Applications folder and select Epson FastFoto. You see a window like Scanning Photos with Epson FastFoto Epson FastFoto Edit Menu You can edit your scanned photos using these settings in the Epson FastFoto Edit menu. - Epson FastFoto FF-640 | Users Guide - Page 64
(shown as the Date Taken information). (Windows only) Undo All Removes all edits from the selected photos made during the current session (since you started Epson FastFoto). Once you exit Epson FastFoto, your edits are permanent. Parent topic: Scanning Photos with - Epson FastFoto FF-640 | Users Guide - Page 65
Select this checkbox to be prompted during scanning to add a subject and date to your photos and create a subfolder. If you deselect the checkbox, Epson FastFoto uses the default file name prefix and folder. After scanning, view my photos with Choose the program from this list in which you want to - Epson FastFoto FF-640 | Users Guide - Page 66
the file format in which you want to save your scans. Scan the back of my photos with Epson single-step technology Select whether to scan both sides of your photos when Epson FastFoto detects writing or printing on the back of them. Adjust the slider to determine the detection's sensitivity level - Epson FastFoto FF-640 | Users Guide - Page 67
on your scanner. Choose and Download Select to download and install any available software. (If all software is installed, this option is not available.) Parent topic: Scanning Photos with Epson FastFoto Scanning with Document Capture Pro in Standard View - Windows You can use Document Capture - Epson FastFoto FF-640 | Users Guide - Page 68
You see a window like this: 4. Select Scan Settings from the Scan Setting Name list (or select Scan > Scan Settings from the menu bar). 68 - Epson FastFoto FF-640 | Users Guide - Page 69
You see a window like this: 5. Select any displayed settings you want to use and click OK. Note: See the help information in Document Capture Pro for details. 6. Click Scan. 69 - Epson FastFoto FF-640 | Users Guide - Page 70
. Note: You may have to close the Epson Scan 2 window to view your scan in the Document Capture Pro window. 7. If you would like to scan additional originals and add them to the current captured images, click the Add Page(s) icon and follow the instructions on the screen. 8. Check the scanned images - Epson FastFoto FF-640 | Users Guide - Page 71
scan. Note: The settings may vary, depending on the software version you are using. See the help information in Document Capture Pro for Programs. Select Epson Software > Document Capture Pro. You see the Document Capture Pro window. (You may see a screen asking you to select your scanner first; if - Epson FastFoto FF-640 | Users Guide - Page 72
Settings button. 6. If you want to select scan settings for a particular destination, click the Scan Settings button, select any displayed settings you want to use, and click OK. Note: See the help information in Document Capture Pro for details. If you do not see the Scan Settings button, click the - Epson FastFoto FF-640 | Users Guide - Page 73
you are using. See the Help information in Document Capture for details. 1. Load your original in the product. 2. Open the Applications folder, open the Epson Software folder, and select Document Capture. You see a window like this: Note: You may need to select your scanner from the scanner list - Epson FastFoto FF-640 | Users Guide - Page 74
and skip the rest of these steps. 4. Select any displayed scan settings you want to use. Note: See the Help information in Document Capture for details. 5. If you want to , and select Displays the EPSON Scan Setup Screen. 6. Click the Scan icon and select any detailed scan settings you want to - Epson FastFoto FF-640 | Users Guide - Page 75
the Document Capture window. Note: You may have to close the Epson Scan 2 window to view your scan in the Document Capture window add them to the current captured images, click the + icon, select Acquire from Scanner, and repeat the previous steps. 9. Check the scanned images and edit them as - Epson FastFoto FF-640 | Users Guide - Page 76
. Note: If you are using your Epson product with the Windows 10 S operating system, you cannot use the software described in this section. You also cannot download and install any Epson product software from the Epson website for use with Windows 10 S; you must obtain software only from the Windows - Epson FastFoto FF-640 | Users Guide - Page 77
You see an Epson Scan 2 window like this: 77 - Epson FastFoto FF-640 | Users Guide - Page 78
. You also cannot download and install any Epson product software from the Epson website for use with Windows 10 S; you must obtain software only from the Windows Store. 1. Open your scanning program and select its scanning option. (See your scanning program help for instructions.) 2. Select your - Epson FastFoto FF-640 | Users Guide - Page 79
You see an Epson Scan 2 window like this: 79 - Epson FastFoto FF-640 | Users Guide - Page 80
Parent topic: Scanning with Epson Scan 2 Scanning in Epson Scan 2 Epson Scan 2 automatically scans your document and saves the scanned file in JPEG format in your operating preview, and change the scanned file settings as necessary. 1. Load your original in the product. 2. Start Epson Scan 2. 80 - Epson FastFoto FF-640 | Users Guide - Page 81
You see this window: 81 - Epson FastFoto FF-640 | Users Guide - Page 82
that matches the size of your original, or select Auto Detect to have Epson Scan 2 automatically detect the size. You can select Customize to enter a the Resolution setting you want to use for your scan. 8. Select any of the additional settings that you want to use on the Main Settings tab. 9. - Epson FastFoto FF-640 | Users Guide - Page 83
Scan 2 previews your original and displays the results in the Epson Scan 2 window. 11. Reinsert your original into the ADF. 12. Select the format in which you want to save your scanned file as the Image - Epson FastFoto FF-640 | Users Guide - Page 84
Cleaning Inside Your Scanner Additional Scanning Settings - Main Settings Tab You can select these additional scanning settings on the Epson save multiple pages in a single file, you must select a file format that supports multiple pages such as PDF or Multi-TIFF. If you select another file format, - Epson FastFoto FF-640 | Users Guide - Page 85
Skip Blank Pages If the scanner detects marks from the other side of a blank page and adds the marks to the scanned image, adjust this setting to prevent -feed paper error in the ADF. If you are scanning an original envelope or plastic card, select Off. Parent topic: Scanning in Epson Scan 2 85 - Epson FastFoto FF-640 | Users Guide - Page 86
Additional Scanning Settings - Advanced Settings Tab You can select these additional scanning settings on the Epson Scan 2 Advanced Settings tab. Not all adjustment settings may be available, depending on other settings you have chosen. 86 - Epson FastFoto FF-640 | Users Guide - Page 87
or white. Remove Punch Holes Removes the shadows caused by holes on the edges of the original. Dual Image Output Scans the original image twice using different output settings (Windows only). Parent topic: Scanning in - Epson FastFoto FF-640 | Users Guide - Page 88
PDF (*.pdf) A document format that is readable by Windows and Mac systems using Adobe Reader, Acrobat, or other programs. You can save multi-page documents . Parent topic: Scanning in Epson Scan 2 Scan Resolution Guidelines The resolution setting in your scanning software, measured in dpi (dots per - Epson FastFoto FF-640 | Users Guide - Page 89
of a double-sided or folded original and combine them into a single image with the Epson Scan 2 Stitch Images settings (not available for all products). Note: The settings may vary, depending on the software version you are using. See the help information in Document Capture Pro for details. 89 - Epson FastFoto FF-640 | Users Guide - Page 90
8.x: Navigate to the Apps screen and select Document Capture Pro. • Windows (other versions): Click or Start and select All Programs or Programs. Select Epson Software > Document Capture Pro. 3. If you see a Switch to Simple View button in the upper right corner of the window, click it. You see - Epson FastFoto FF-640 | Users Guide - Page 91
You see an Epson Scan 2 window like this: 91 - Epson FastFoto FF-640 | Users Guide - Page 92
not stitched together in the correct orientation, click Scanning Side on the Epson Scan 2 window, select Settings, set the Binding Edge to Left or be detected by the software as separation markers. Note: The settings may vary, depending on the software version you are using. See the help information - Epson FastFoto FF-640 | Users Guide - Page 93
Navigate to the Apps screen and select Document Capture Pro. • Windows (other versions): Click or Start, and select All Programs or Programs. Select Epson Software > Document Capture Pro. You see the Document Capture Pro window. 3. If you see a Switch to Simple View button in the upper right corner - Epson FastFoto FF-640 | Users Guide - Page 94
You see a window like this: 5. Select any displayed settings you want to use and click OK. Note: See the help information in Document Capture Pro for details. 6. Click one of the destination icons (except Print) in the Scan - Epson FastFoto FF-640 | Users Guide - Page 95
You see a window like this: 9. Select the method you used to separate the originals as the Separator setting. Note: See the help information in Document Capture Pro for details. 10. If necessary, select Create Folder - Epson FastFoto FF-640 | Users Guide - Page 96
text is recognized using Optical Character Recognition (OCR) and then embedded in the scanned original. Note: The required Epson Scan 2 OCR Component is installed automatically when you install your product software as instructed on the Start Here sheet. If you install your scanner software programs - Epson FastFoto FF-640 | Users Guide - Page 97
You see this window: 7. Select any of the options on the General tab. 8. Select the Text tab. 9. Make sure the language used in the document text is selected as the Text Language setting. 10. Select the Security tab if you want to add a password to the PDF - Epson FastFoto FF-640 | Users Guide - Page 98
you are using. See the Help information in Document Capture for details. 1. Load your original in the product for scanning. 2. Open the Applications folder, open the Epson Software folder, and select Document Capture. You see a window like this: Note: You may need to select your scanner from the - Epson FastFoto FF-640 | Users Guide - Page 99
and skip the rest of these steps. 4. Select any displayed scan settings you want to use. Note: See the Help information in Document Capture for details. 5. If you want to , and select Displays the EPSON Scan Setup Screen. 6. Click the Scan icon and select any detailed scan settings you want to - Epson FastFoto FF-640 | Users Guide - Page 100
Document Capture window. Note: You may have to close the Epson Scan 2 window to view your scan in the Document Capture and add them to the current captured images, click the + icon, select Acquire from Scanner, and repeat the previous steps. 9. Check the scanned images and edit them as necessary. - Epson FastFoto FF-640 | Users Guide - Page 101
version you are using. See the help information in Document Capture Pro for details. 1. Load your original in the product. 2. Do one of the following to start Document Capture Pro: • Windows 10: Click and select Epson Software > Document Capture Pro. • Windows 8.x: Navigate to the Apps screen - Epson FastFoto FF-640 | Users Guide - Page 102
where to send your scanned files. Your product starts scanning and you see the settings window. 7. Select the Office format file you want to use from the File Type drop-down list. 8. Click Option to display additional settings. 9. Select any additional settings as necessary and click OK. Note: See - Epson FastFoto FF-640 | Users Guide - Page 103
you are using. See the Help information in Document Capture for details. 1. Load your original in the product for scanning. 2. Open the Applications folder, open the Epson Software folder, and select Document Capture. You see a window like this: Note: You may need to select your scanner from the - Epson FastFoto FF-640 | Users Guide - Page 104
and skip the rest of these steps. 4. Select any displayed scan settings you want to use. Note: See the Help information in Document Capture for details. 5. If you want to , and select Displays the EPSON Scan Setup Screen. 6. Click the Scan icon and select any detailed scan settings you want to - Epson FastFoto FF-640 | Users Guide - Page 105
You may have to close the Epson Scan 2 window to view your captured images, click the + icon, select Acquire from Scanner, and repeat the previous steps. 9. Check the scanned images download a necessary plug-in for Microsoft Office files. Select Yes and follow the on-screen instructions to download - Epson FastFoto FF-640 | Users Guide - Page 106
, such as ABBYY FineReader. Scanning Using OCR - Windows Scanning Using OCR - Mac Parent topic: Scanning Special Projects Scanning Using OCR - Windows You can use the ABBYY FineReader OCR program to convert scanned documents to editable text. 1. Load your original in the scanner. 2. Do one of the - Epson FastFoto FF-640 | Users Guide - Page 107
You see a window like this: 3. Select the language used in the document you are going to scan as the Document Languages setting. 4. Click Scan Document. 5. If you see the Select Scanner window, select your product and click OK. Note: Do not select a WIA option for your product; it will not work - Epson FastFoto FF-640 | Users Guide - Page 108
Loading Plastic Cards in the Input Tray Loading Special Documents Scanning Using OCR - Mac You can use the ABBYY FineReader OCR program to convert scanned documents to editable text. 1. Load your original in the scanner. 2. Open the Applications folder and double-click the ABBYY FineReader Sprint - Epson FastFoto FF-640 | Users Guide - Page 109
You see a window like this: 3. Select your product from the Source list. 4. Select the language used in the document you are going to scan as the Document language setting. 5. Click on Scan Images to New Document. You see a window like this: 109 - Epson FastFoto FF-640 | Users Guide - Page 110
6. Select your scan settings and click Scan. Note: For best results, select Grayscale as the Color Depth setting. 7. Click Finish Import. You see your scanned image. 8. Click on the Export icon. 9. Select the program or format you want to scan to and click Next. 110 - Epson FastFoto FF-640 | Users Guide - Page 111
Scanning to a SharePoint Server or Cloud Service - Windows You can use Document Capture Pro (Windows) to upload scanned images to a SharePoint server or a cloud service. Note: The settings may vary, depending on the software version you are using. See the help information in Document Capture - Epson FastFoto FF-640 | Users Guide - Page 112
8.x: Navigate to the Apps screen and select Document Capture Pro. • Windows (other versions): Click or Start, and select All Programs or Programs. Select Epson Software > Document Capture Pro. 3. If you see a Switch to Simple View button in the upper right corner of the window, click it. You see - Epson FastFoto FF-640 | Users Guide - Page 113
want to use and click OK. Note: See the help information in Document Capture Pro for details. 6. Click one of the cloud server or service destination icons If you cannot see all of the icons, the service software may not be installed or the service may not be available on your platform. 7. Enter any - Epson FastFoto FF-640 | Users Guide - Page 114
click OK. Note: See the help information in Document Capture Pro for details. Your originals are uploaded to the indicated server or cloud service. Parent topic: Scanning Special Projects Related tasks Loading Documents in the Input Tray Loading Plastic Cards in the Input Tray Scanning with Document - Epson FastFoto FF-640 | Users Guide - Page 115
transport your scanner. Cleaning Your Scanner Cleaning Inside Your Scanner Checking the Scanner Roller Counter Replacing the Scanner Rollers Transporting Your Scanner Cleaning Your Scanner To keep your product working at its best, you should clean it several times a year. Caution: Do not use a hard - Epson FastFoto FF-640 | Users Guide - Page 116
brush, alcohol, or paint thinner to clean the product or you may damage it. Do not use oil or other lubricants inside the product or let water get inside it. For more information, view this Epson support video. 1. Turn off the scanner and unplug the AC adapter. 2. Disconnect any connected cables - Epson FastFoto FF-640 | Users Guide - Page 117
or dirt on the rollers as they rotate. 9. Turn off the scanner and unplug the AC adapter. 10. Wipe off any dust or dirt on the glass scanning surfaces using the included microfiber cloth or a soft, dry cloth. Be sure to clean the entire surface of both glass scanning surfaces, including the light - Epson FastFoto FF-640 | Users Guide - Page 118
microfiber cloth used with glass cleaner. Be careful not to place too much force on the glass. 11. Close the scanner cover. 12. Plug in the AC adapter and turn on the scanner. Parent topic: Cleaning and Transporting Your Scanner Checking the Scanner Roller Counter Check the scanner roller counter - Epson FastFoto FF-640 | Users Guide - Page 119
• Mac: Open the Applications folder, click Epson Software, and click Epson Scan 2 Utility. 3. Click the Counter tab. You see a screen like this , it is time to replace the rollers. 5. Close the Epson Scan 2 Utility. Parent topic: Cleaning and Transporting Your Scanner Related topics Replacing the - Epson FastFoto FF-640 | Users Guide - Page 120
if you need to replace the rollers in your scanner. Replacing the Pickup Rollers Replacing the Separation Rollers Resetting the Scanner Roller Counter Parent topic: Cleaning and Transporting Your Scanner Related tasks Checking the Scanner Roller Counter Replacing the Pickup Rollers Replace the - Epson FastFoto FF-640 | Users Guide - Page 121
4. Squeeze the tab on the right side of the pickup roller cover and open the cover. Caution: Do not place too much force on the arm inside the cover when replacing the pickup roller. 121 - Epson FastFoto FF-640 | Users Guide - Page 122
5. Slide the pickup rollers to the right and remove them. 6. Remove the lower pickup roller from the spindle. 122 - Epson FastFoto FF-640 | Users Guide - Page 123
7. Place the new lower pickup roller on the spindle, rotate the roller, and slide it all the way onto the spindle. 8. Install the lower pickup roller spindle by aligning the notches on the roller and sliding it to the left. 123 - Epson FastFoto FF-640 | Users Guide - Page 124
9. Remove the middle pickup roller from the spindle. 124 - Epson FastFoto FF-640 | Users Guide - Page 125
10. Place the new middle pickup roller on the spindle, rotate the roller to line up the notches, and slide it all the way onto the spindle. 11. Install the middle pickup roller spindle by aligning the notches on the spindle and sliding it to the left. 125 - Epson FastFoto FF-640 | Users Guide - Page 126
12. Remove the upper pickup roller from the spindle. 13. Place the new upper pickup roller on the spindle, rotate the roller to line up the notches, and slide it all the way onto the spindle. 14. Install the upper pickup roller spindle by aligning the notches on the spindle and sliding it to the - Epson FastFoto FF-640 | Users Guide - Page 127
reinstall them, and try to close the cover again. 16. Replace the separation rollers. Parent topic: Replacing the Scanner Rollers Related tasks Checking the Scanner Roller Counter Replacing the Separation Rollers Replacing the Separation Rollers Replace the separation rollers after you have scanned - Epson FastFoto FF-640 | Users Guide - Page 128
4. Press down on the separation roller cover latch inside the scanner cover and pull down the cover to open it. Caution: Be careful not to apply too much force when opening the cover. 128 - Epson FastFoto FF-640 | Users Guide - Page 129
5. Press in on the separation roller to release it, then slide the roller to the side and remove it. 6. Remove the separation roller from the spindle. 7. Slide the new separation roller onto the spindle as shown. Make sure that the notches on the roller and spindle align properly. You hear a click - Epson FastFoto FF-640 | Users Guide - Page 130
Note: Check that there are no gaps between the roller and spindle. 8. Align the notches on the spindle and the scanner, then slide the separation roller into the scanner and gently push it until it clicks into place. 130 - Epson FastFoto FF-640 | Users Guide - Page 131
Navigate to the Apps screen and select Epson Scan 2 Utility. • Windows (other versions): Click or Start > All Programs or Programs > EPSON > Epson Scan 2 > Epson Scan 2 Utility. • Mac: Open the Applications folder, click Epson Software, and click Epson Scan 2 Utility. 3. Click the Counter tab. 131 - Epson FastFoto FF-640 | Users Guide - Page 132
this: 4. Click Reset. The Number of Scans field changes to 0 (zero). 5. Close the Epson Scan 2 Utility. Parent topic: Replacing the Scanner Rollers Related tasks Checking the Scanner Roller Counter Transporting Your Scanner If you need to ship your product, transport it a long distance, or store it - Epson FastFoto FF-640 | Users Guide - Page 133
and the output tray. 4. Remove the input tray by pulling it towards the scanner cover and then pulling it off the scanner. 5. Place the scanner in its original packing materials, if possible, or use equivalent materials with cushioning around the product. Parent topic: Cleaning and Transporting Your - Epson FastFoto FF-640 | Users Guide - Page 134
sections for solutions to problems you may have using your product. Scanner Light Status Solving Scanning Problems Solving Scanned Image Quality Problems Uninstall Your Scanner Software Where to Get Help Scanner Light Status You can often diagnose problems with your scanner by checking its lights - Epson FastFoto FF-640 | Users Guide - Page 135
these solutions if you have problems scanning with your product. Scanner Does Not Turn On or Turns Off Unexpectedly Scanner Button Does Not Work as Expected Scanning Software Does Not Operate Correctly Cannot Share or Upload Photos Using FastFoto Cannot Start Epson Scan 2 Original Feeds Incorrectly - Epson FastFoto FF-640 | Users Guide - Page 136
sure the FastFoto software selector on the Windows status bar or Mac menu bar has the correct software selected. • Check the USB cable connection between the computer and scanner. • Check that the correct scanner is selected using the Epson Scan 2 Utility. Make sure your scanner supports Epson Scan - Epson FastFoto FF-640 | Users Guide - Page 137
not, contact Epson for support. • If you are using a TWAIN-compliant program, make sure that the correct product is selected as the Scanner or Source setting. Parent topic: Solving Scanning Problems Related concepts Uninstall Your Scanner Software Cannot Share or Upload Photos Using FastFoto If you - Epson FastFoto FF-640 | Users Guide - Page 138
did not reinstall Epson Scan 2, try reinstalling it. • If you are using a TWAIN-compliant program, make sure that the correct product is selected as the Scanner or Source setting. Parent topic: Solving Scanning Problems Original Feeds Incorrectly in Scanner If you have problems feeding originals in - Epson FastFoto FF-640 | Users Guide - Page 139
setting. Parent topic: Solving Scanning Problems Related references Page Separation Lever Related tasks Loading Photos in the Input Tray Loading Documents in the Input Tray Loading Plastic Cards in the Input Tray Loading Special Documents Cleaning Inside Your Scanner Loading a Photo with a Carrier - Epson FastFoto FF-640 | Users Guide - Page 140
3. Pull down the cover open lever and open the scanner cover. 4. Gently pull out any jammed originals from inside the scanner. 140 - Epson FastFoto FF-640 | Users Guide - Page 141
5. Gently pull out any jammed originals from the output tray. 6. Close the scanner cover. 7. Carefully follow all loading instructions when you reload originals. Parent topic: Solving Scanning Problems Related tasks Loading Photos in the Input Tray Loading Documents in the Input Tray Loading Plastic - Epson FastFoto FF-640 | Users Guide - Page 142
or security software instructions for details. The TWAIN.log file is saved in C:\Users\(user name)\AppData\Local\Temp. Note: You may need to unhide system folders to view files in that location. Parent topic: Solving Scanning Problems Related concepts Uninstall Your Scanner Software Solving Scanned - Epson FastFoto FF-640 | Users Guide - Page 143
Parent topic: Solving Scanned Image Quality Problems Related tasks Loading Documents in the the original from laying flat when passed over the scanner sensors. • Do not move your original or your beyond its base in all directions. • Adjust these Epson Scan 2 settings (if available) and try scanning - Epson FastFoto FF-640 | Users Guide - Page 144
CMYK (cyan, magenta, yellow, and black). Check the color matching and color management capabilities of your computer, display adapter, and the software you are using to see if they are affecting the palette of colors you see on your screen. To adjust the colors in your scanned image, adjust these - Epson FastFoto FF-640 | Users Guide - Page 145
Problems Characters are not Recognized During Conversion to Editable Text (OCR) If characters in your scanned images are not recognized during OCR conversion, try these solutions: • Make sure your original is loaded straight on your product. • Use an original with clear text. • Adjust these Epson - Epson FastFoto FF-640 | Users Guide - Page 146
the original document is in landscape mode, set the Rotate setting to Auto in Epson Scan 2. • If you are using OCR software, check the manual for any additional adjustments. Parent topic: Solving Scanned Image Quality Problems Ripple Patterns Appear in an Image You may see a ripple pattern (called - Epson FastFoto FF-640 | Users Guide - Page 147
on the cover open lever and open the scanner cover. 4. Wipe off any dust or dirt on the glass scanning surfaces using the included microfiber cloth or a soft, dry cloth. Note: If the glass surfaces are stained with grease or some other hard-to-remove material, use a small amount of glass cleaner on - Epson FastFoto FF-640 | Users Guide - Page 148
the FastFoto software. Parent topic: Solving Scanned Image Quality Problems Related tasks Cleaning Inside Your Scanner Streaks Appear in All Scanned Images If streaks appear in all your scanned images, try these solutions: • Clean the glass surfaces inside your scanner using a genuine Epson cleaning - Epson FastFoto FF-640 | Users Guide - Page 149
problem, uninstall Epson Scan 2 and reinstall it. Parent topic: Solving Scanned Image Quality Problems Uninstall Your Scanner Software If you have a problem that requires you to uninstall and re-install your software, follow the instructions for your operating system. Uninstalling Scanner Software - Epson FastFoto FF-640 | Users Guide - Page 150
utility from the Epson support website to uninstall your scanner software as described here. 1. To download the Uninstaller utility, visit epson.com/support (U.S.), epson.ca/support (Canada), or epson.com.jm/support (Caribbean) and select your product. 2. Follow the instructions on the screen - Epson FastFoto FF-640 | Users Guide - Page 151
a problem, contact Epson. Parent topic: Uninstall Your Scanner Software Where to Get Help If you need to contact Epson for technical support services, use the following support options. Internet Support Visit Epson's support website at epson.com/support (U.S.), epson.ca/support (Canada), or epson - Epson FastFoto FF-640 | Users Guide - Page 152
at epson.com (U.S. sales), epson.ca (Canadian sales), or epson.com.jm (Caribbean sales). You can also purchase accessories from an Epson authorized reseller. To find the nearest one, call 800-GO-EPSON (800-463-7766) in the U.S. or 800-807-7766 in Canada. Parent topic: Solving Problems 152 - Epson FastFoto FF-640 | Users Guide - Page 153
Epson support site at epson.com/support (U.S.), epson.ca/support (Canada), or epson.com.jm/support (Caribbean), select your product, and select Downloads. Parent topic: Technical Specifications Mac System Requirements Make sure your system meets these requirements before using it with your scanner - Epson FastFoto FF-640 | Users Guide - Page 154
10.11.x, 10.10.x, 10.9.x Note: The FastFoto 2.0 software requires macOS 10.13.x, macOS 10.12.x or OS X 10.11.x. (Fast user switching on Mac OS X is not supported.) Macintosh USB Color monitor with 1024 × 768 resolution or higher Note: Epson Scan 2 does not support the UNIX File System (UFS) for OS - Epson FastFoto FF-640 | Users Guide - Page 155
8.8 lb (4 kg) Note: Dimensions do not include projecting parts. Parent topic: Technical Specifications Electrical Specifications Scanner Note: Check the label on the scanner and the AC adapter for voltage information. Power consumption varies depending on operating conditions or whether an option - Epson FastFoto FF-640 | Users Guide - Page 156
140 °F (-25 to 60 °C) Operating: 10 to 80% RH Storage: 10 to 85% RH Ordinary office or home conditions Note: Avoid operating the scanner in direct sunlight, near a strong light source, or in extremely dusty conditions. Caution: Some photo papers become extremely sticky in hot and humid environments - Epson FastFoto FF-640 | Users Guide - Page 157
(480 Mbits per second) of Universal Serial Bus Specifications Revision 2.0 One Type B port Parent topic: Technical Specifications Safety and Approvals Specifications Scanner United States Canada EMC: FCC part 15 Subpart B class B EMC: CAN/CSA-CEI/IEC CISPR 22 Class B AC Adapter United States - Epson FastFoto FF-640 | Users Guide - Page 158
for important notices about your scanner. Note: Epson offers a recycling program for end of life Epson products. Please go to this site (U.S) or this site (Canada) for information on how to return your Epson products for proper disposal. Important Safety Instructions Restrictions on Copying Default - Epson FastFoto FF-640 | Users Guide - Page 159
systems that regularly switch on and off. • If you use an extension cord with the scanner, make sure the total ampere rating of the devices plugged to repair the AC adapter by yourself except as specifically explained in the scanner's guides. • If damage occurs to the plug, replace the cord set or - Epson FastFoto FF-640 | Users Guide - Page 160
instructions.) • Unplug the scanner and the AC adapter before cleaning. Clean with a damp cloth only. Do not use liquid or aerosol cleaners. • If you are not going to use the scanner monthly passes, concession tickets, etc. • Passports, driver's licenses, warrants of fitness, road passes, food - Epson FastFoto FF-640 | Users Guide - Page 161
any dispute, claim, controversy or action between you and Epson arising out of or relating to this Agreement, Epson branded products (hardware and including any related software), or other transaction involving you and Epson, whether in contract, warranty, misrepresentation, fraud, tort, intentional - Epson FastFoto FF-640 | Users Guide - Page 162
in that court. 1.5 WAIVER OF CLASS ACTIONS AND CLASS ARBITRATIONS. YOU AND EPSON AGREE THAT EACH PARTY MAY BRING DISPUTES AGAINST THE OTHER PARTY ONLY IN TO AN ARBITRATION PROCEEDING. 1.6 Arbitration Procedure. If you or Epson commences arbitration, the arbitration shall be governed by the rules of - Epson FastFoto FF-640 | Users Guide - Page 163
within thirty (30) days of your assent to this Agreement (including without limitation the purchase, download, installation of the Software or other applicable use of Epson Hardware, products and services) that specifies (i) your name, (ii) your mailing address, and (iii) your request to be excluded - Epson FastFoto FF-640 | Users Guide - Page 164
EPSON® is a registered trademark, FastFoto is a trademark, and EPSON Exceed Your Vision is a registered logomark of Seiko Epson Corporation Software, Ltd. General Notice: Other product names used herein are for identification purposes only and may be trademarks of their respective owners. Epson - Epson FastFoto FF-640 | Users Guide - Page 165
this product, or (excluding the U.S.) failure to strictly comply with Seiko Epson Corporation's operating and maintenance instructions. Seiko Epson Corporation shall not be liable for any damages or problems arising from the use of any options or any consumable products other than those designated - Epson FastFoto FF-640 | Users Guide - Page 166
of any interface cables other than those designated as Epson approved Products by Seiko Epson Corporation. This information is subject to change without notice. libTIFF Software Acknowledgment libjpeg-turbo A Note Concerning Responsible Use of Copyrighted Materials Copyright Attribution Parent topic - Epson FastFoto FF-640 | Users Guide - Page 167
BUT NOT LIMITED TO, PROCUREMENT OF SUBSTITUTE GOODS OR SERVICES; LOSS OF USE, DATA, OR PROFITS; OR BUSINESS INTERRUPTION) HOWEVER USE OF THIS SOFTWARE, EVEN IF ADVISED OF THE POSSIBILITY OF SUCH DAMAGE. Parent topic: Copyright Notice A Note Concerning Responsible Use of Copyrighted Materials Epson
-
 1
1 -
 2
2 -
 3
3 -
 4
4 -
 5
5 -
 6
6 -
 7
7 -
8
-
9
-
10
-
11
-
12
-
13
-
14
-
15
-
16
-
17
-
18
-
19
-
20
-
21
-
22
-
23
-
24
-
25
-
26
-
27
-
28
-
29
-
30
-
31
-
32
-
33
-
34
-
35
-
36
-
37
-
38
-
39
-
40
-
41
-
42
-
43
-
44
-
45
-
46
-
47
-
48
-
49
-
50
-
51
-
52
-
53
-
54
-
55
-
56
-
57
-
58
-
59
-
60
-
61
-
62
-
63
-
64
-
65
-
66
-
67
-
68
-
69
-
70
-
71
-
72
-
73
-
74
-
75
-
76
-
77
-
78
-
79
-
80
-
81
-
82
-
83
-
84
-
85
-
86
-
87
-
88
-
89
-
90
-
91
-
92
-
93
-
94
-
95
-
96
-
97
-
98
-
99
-
100
-
101
-
102
-
103
-
104
-
105
-
106
-
107
-
108
-
109
-
110
-
111
-
112
-
113
-
114
-
115
-
116
-
117
-
118
-
119
-
120
-
121
-
122
-
123
-
124
-
125
-
126
-
127
-
128
-
129
-
130
-
131
-
132
-
133
-
134
-
135
-
136
-
137
-
138
-
139
-
140
-
141
-
142
-
143
-
144
-
145
-
146
-
147
-
148
-
149
-
150
-
151
-
152
-
153
-
154
-
155
-
156
-
157
-
158
-
159
-
160
-
161
-
162
-
163
-
164
-
165
-
166
-
167
 |
 |

FF-640 User's Guide