Epson FX-890IIN Users Guide - Page 22
Installing the tractor in the rear push position, Loading paper with the rear push tractor
 |
View all Epson FX-890IIN manuals
Add to My Manuals
Save this manual to your list of manuals |
Page 22 highlights
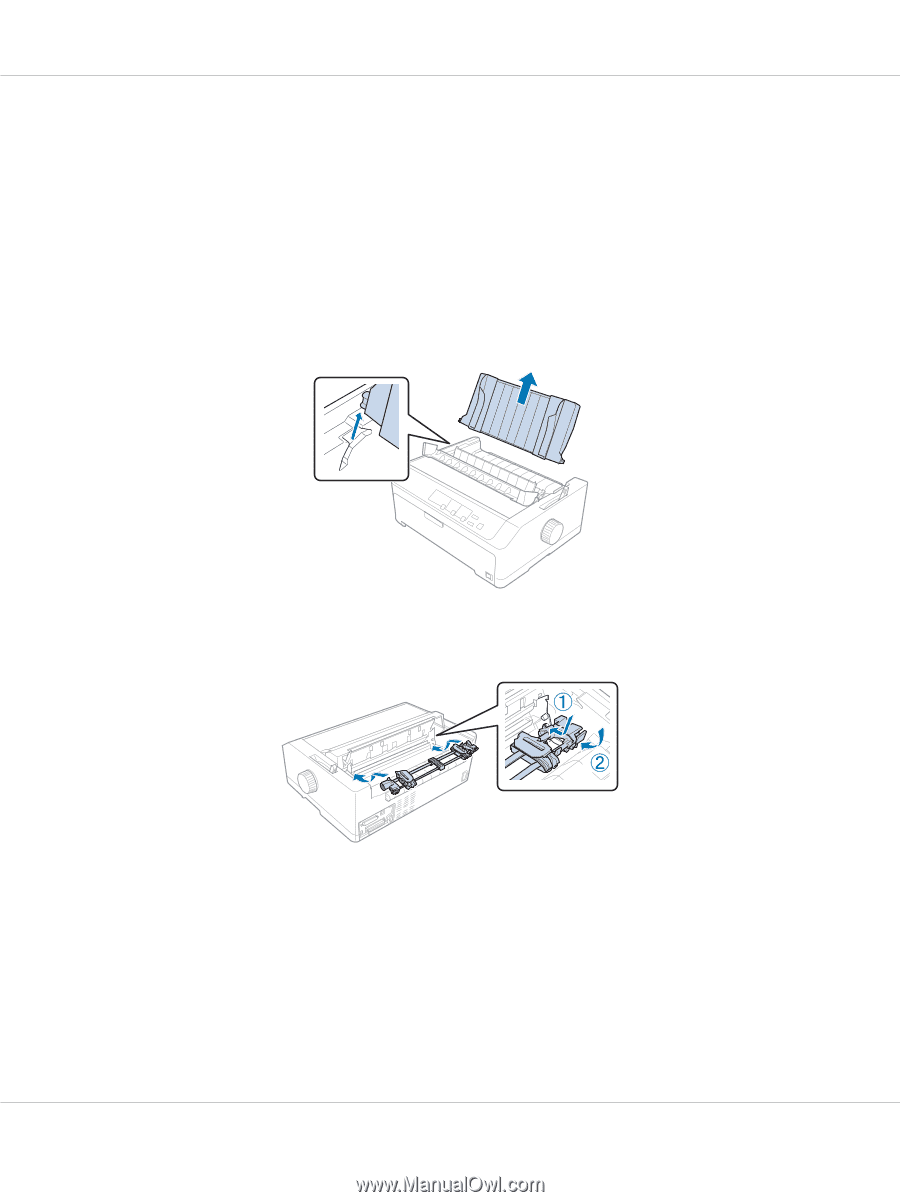
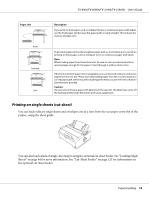
FX-890II/FX-890IIN/FX-2190II/FX-2190IIN User's Guide Installing the tractor in the rear push position Before installing the tractor in the rear push position, remove it from its current position. If the tractor is in the front push position, remove it by pressing the tractor's lock tabs while lifting it out. If the tractor is in the pull position, remove it as described in "Removing the tractor from the rear push position" on page 25. 1. Make sure the printer is turned off. Then open the paper guide cover by pulling its back edge forward. 2. Slide the sheet guide along the path and lift it at an angle to remove it. 3. Lower the tractor into the printer's mounting slots and press down both ends of the tractor to make sure that it is firmly seated. See "Loading paper with the rear push tractor" on page 22 for instructions on loading continuous paper using the rear push tractor. Loading paper with the rear push tractor Follow these steps to load paper using the rear push tractor: 1. Make sure the printer is turned off. Paper Handling 22
-
 1
1 -
2
-
3
-
4
-
5
-
6
-
7
-
8
-
9
-
10
-
11
-
12
-
13
-
14
-
15
-
16
-
 17
17 -
 18
18 -
 19
19 -
 20
20 -
 21
21 -
 22
22 -
 23
23 -
 24
24 -
 25
25 -
 26
26 -
 27
27 -
28
-
29
-
30
-
31
-
32
-
33
-
34
-
35
-
36
-
37
-
38
-
39
-
40
-
41
-
42
-
43
-
44
-
45
-
46
-
47
-
48
-
49
-
50
-
51
-
52
-
53
-
54
-
55
-
56
-
57
-
58
-
59
-
60
-
61
-
62
-
63
-
64
-
65
-
66
-
67
-
68
-
69
-
70
-
71
-
72
-
73
-
74
-
75
-
76
-
77
-
78
-
79
-
80
-
81
-
82
-
83
-
84
-
85
-
86
-
87
-
88
-
89
-
90
-
91
-
92
-
93
-
94
-
95
-
96
-
97
-
98
-
99
-
100
-
101
-
102
-
103
-
104
-
105
-
106
-
107
-
108
-
109
-
110
-
111
-
112
-
113
-
114
-
115
-
116
-
117
-
118
-
119
-
120
-
121
-
122
-
123
-
124
-
125
-
126
-
127
-
128
-
129
-
130
-
131
-
132
-
133
-
134
-
135
-
136
-
137
-
138
-
139
-
140
-
141
-
142
-
143
-
144
-
145
-
146
-
147
-
148
-
149
-
150
-
151
-
152
-
153
-
154
-
155
-
156
-
157
-
158
-
159
-
160
-
161
-
162
-
163
-
164
-
165
 |
 |