D-Link DES-3226L User Manual - Page 45
User Accounts, Basic Setup, Apply, Management, Show All, User Account Entries, Save Changes, Main Menu
 |
UPC - 790069262722
View all D-Link DES-3226L manuals
Add to My Manuals
Save this manual to your list of manuals |
Page 45 highlights
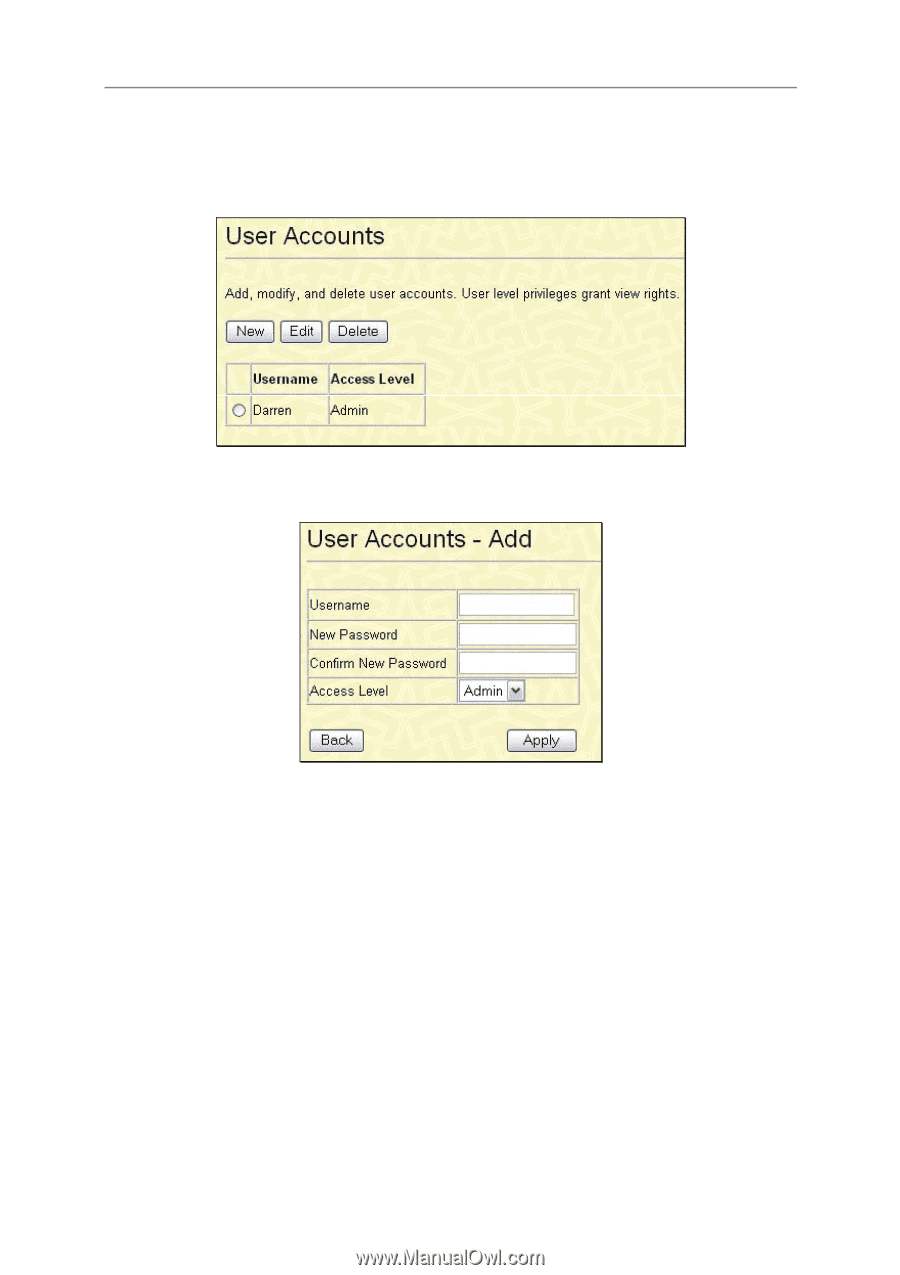
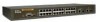
DES-3226L Layer 2 Fast Ethernet Switch User's Guide User Accounts From the Basic Setup menu, click User Accounts and the following window appears. Figure 5-9. User Accounts window Click New to add a new user account, utilizing the window below. Figure 5-10. User Accounts - Add window 1. Enter the new user name, assign an initial password, and then confirm the new password. Determine whether the new user should have Admin or User privileges. 2. Click Apply to make the user addition effective. 3. A listing of all user accounts and access levels is shown in the User Account Management window. This list is updated when Apply is executed. Click Show All User Account Entries to access this window. 4. Please remember that Apply makes changes to the switch configuration for the current session only. All changes (including User additions or updates) must be entered into non-volatile ram using the Save Changes command on the Main Menu - if you want these changes to be permanent. To edit a User Account, click the radio button of the corresponding User Account and click Edit. To delete a User Account, click the radio button of the corresponding User Account and click Delete. 33
-
 1
1 -
2
-
3
-
4
-
5
-
6
-
7
-
8
-
9
-
10
-
11
-
12
-
13
-
14
-
15
-
16
-
17
-
18
-
19
-
20
-
21
-
22
-
23
-
24
-
25
-
26
-
27
-
28
-
29
-
30
-
31
-
32
-
33
-
34
-
35
-
36
-
37
-
38
-
39
-
 40
40 -
 41
41 -
 42
42 -
 43
43 -
 44
44 -
 45
45 -
 46
46 -
 47
47 -
 48
48 -
 49
49 -
 50
50 -
51
-
52
-
53
-
54
-
55
-
56
-
57
-
58
-
59
-
60
-
61
-
62
-
63
-
64
-
65
-
66
-
67
-
68
-
69
-
70
-
71
-
72
-
73
-
74
-
75
-
76
-
77
-
78
-
79
-
80
-
81
-
82
-
83
-
84
-
85
-
86
-
87
-
88
-
89
-
90
-
91
-
92
-
93
-
94
-
95
-
96
-
97
-
98
-
99
-
100
-
101
-
102
-
103
-
104
-
105
-
106
-
107
-
108
-
109
-
110
-
111
-
112
-
113
-
114
-
115
-
116
-
117
-
118
-
119
-
120
-
121
-
122
-
123
-
124
-
125
-
126
-
127
-
128
-
129
-
130
-
131
-
132
-
133
-
134
 |
 |