Canon REALiS LCOS 4K600STZ 4K600STZ 4K601STZ 4K600Z 4K601Z Users Manual - Page 43
Lens Shift Function, Amount of Lens Shift
 |
View all Canon REALiS LCOS 4K600STZ manuals
Add to My Manuals
Save this manual to your list of manuals |
Page 43 highlights
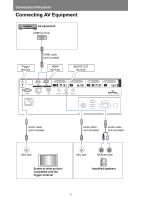
Basic Guide Installation Procedure Installation Procedure Lens Shift Function You can reposition the image in all directions by pressing the SHIFT button on the remote control, which moves the lens up, down, left, or right. For instructions, refer to "Adjusting the Image Position" (P62). ■ Amount of Lens Shift The amount of lens shift is indicated as a percentage relative to the image height and width. The lens shift ranges for the projector are as follows. A (Amount of vertical shift) B (Amount of horizontal shift) ±60% ±10% The lens can be shifted up or down and to the left or right. Performance using lens shift is ensured within the recommended range described below. However, peripheral dimness or blurriness may occur in the corners outside the last 10% of the horizontal lens shift range and outside the last 15% of the vertical lens shift range. In this case, adjust lens shift to within the recommended range. Recommended lens shift range 10% 15% A A B A Lens shift range B A 43
-
 1
1 -
2
-
3
-
4
-
5
-
6
-
7
-
8
-
9
-
10
-
11
-
12
-
13
-
14
-
15
-
16
-
17
-
18
-
19
-
20
-
21
-
22
-
23
-
24
-
25
-
26
-
27
-
28
-
29
-
30
-
31
-
32
-
33
-
34
-
35
-
36
-
37
-
 38
38 -
 39
39 -
 40
40 -
 41
41 -
 42
42 -
 43
43 -
 44
44 -
 45
45 -
 46
46 -
 47
47 -
 48
48 -
49
-
50
-
51
-
52
-
53
-
54
-
55
-
56
-
57
-
58
-
59
-
60
-
61
-
62
-
63
-
64
-
65
-
66
-
67
-
68
-
69
-
70
-
71
-
72
-
73
-
74
-
75
-
76
-
77
-
78
-
79
-
80
-
81
-
82
-
83
-
84
-
85
-
86
-
87
-
88
-
89
-
90
-
91
-
92
-
93
-
94
-
95
-
96
-
97
-
98
-
99
-
100
-
101
-
102
-
103
-
104
-
105
-
106
-
107
-
108
-
109
-
110
-
111
-
112
-
113
-
114
-
115
-
116
-
117
-
118
-
119
-
120
-
121
-
122
-
123
-
124
-
125
-
126
-
127
-
128
-
129
-
130
-
131
-
132
-
133
-
134
-
135
-
136
-
137
-
138
-
139
-
140
-
141
-
142
-
143
-
144
-
145
-
146
-
147
-
148
-
149
-
150
-
151
-
152
-
153
-
154
-
155
-
156
-
157
-
158
-
159
-
160
-
161
-
162
-
163
-
164
-
165
-
166
-
167
-
168
-
169
-
170
-
171
-
172
-
173
-
174
-
175
-
176
-
177
-
178
-
179
-
180
-
181
-
182
-
183
-
184
-
185
-
186
-
187
-
188
-
189
-
190
-
191
-
192
-
193
-
194
-
195
-
196
-
197
-
198
-
199
-
200
-
201
-
202
-
203
-
204
-
205
-
206
-
207
-
208
-
209
-
210
-
211
-
212
-
213
-
214
-
215
-
216
-
217
 |
 |
