Behringer RD-9 Quick Start Guide - Page 8
Controls
 |
View all Behringer RD-9 manuals
Add to My Manuals
Save this manual to your list of manuals |
Page 8 highlights
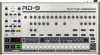
14 RD-9 RD-9 Controls Quick Start Guide 15 (EN) Controls Mode Section Volume Section (1) (2) (1) MASTER - Controls the main output level. (2) PHONES - Adjusts the headphones level. Note, the headphones signal is taken before the wave designer and filter bus for monitoring purposes. FX SECTION Analog Filter (3) (4) (5) (6) (3) CUTOFF - Adjusts the cutoff frequency of the filter. (4) HPF - Toggle the filter between High Pass Filter (HPF) and Low Pass Filter (LPF). (5) ON - Engages the filter when illuminated. (6) RESONANCE - Adjusts the resonance of the filter. This emphasises the frequencies around the cutoff point. Wave Designer (15) (16) (17) (15) SONG - Enter song mode. Cue 1 of 16 songs. (16) PATTERN - Enter pattern mode. Use the 16 available patterns to build your song. (17) STEP - Shows each available step for the selected voice (up to 64 steps per pattern). Sync Section (18) (19) (20) (21) (22) (18) CYCLE - Cycles through the various SYNC options. Internal, MIDI, USB or External Clock. (19) INTERNAL - The unit is the sync master. (20) MIDI - Sync is taken from MIDI in port. (21) USB - Sync is taken from the USB port. (22) TRIG - Sync is taken from the External Clock input. Playback Controls (23) (24) (28) (30) (31) (32) (33) (7) (8) (9) (10) (7) ATTACK - Controls the attack portion of the wave designer circuit. Turn counter clockwise (CCW) to reduce the attack portion of the signal and clockwise (CW) to enhance the attack. (8) SIG - Shows that signal is present in the wave designer circuit. (9) SEND - Activates the wave designer assignment menu. The button is illuminated when one or more voices are assigned to this bus. (10) SUSTAIN - Controls the sustain portion of the wave designer circuit. Turn CCW to reduce the sustain portion of the signal and turn CW to lengthen the sustain. Edit Section (11) (12) (13) (14) (11) SAVE - Save a song or pattern to a memory location. (12) COPY - Copy a song or pattern to another memory location. (13) ERASE - Delete the selected song or pattern. (14) DUMP - Performs a MIDI SysEx Dump of pattern/song. (25) (26) (27) (29) (23) TAP/HOLD - Tap tempo of the pattern. Hold for quick macro control. (24) DISPLAY - Multi function 4-character display. (25) RECORD - Enable record mode. (26) STOP - Stops the currently-playing song or pattern. (27) PLAY/PAUSE - Play or pause the current song or pattern. (28) DATA - Encoder for data editing. (29) DATA MODE - Cycles through the various Data Modes: Tempo, Swing, Probability and Flam. (30) TEMPO - Adjust the tempo when selected with the DATA encoder. (31) SWING - Adjust the swing or shuffle feeling when selected with the DATA encoder. (32) PROB - Adjust the probability of a step. (33) FLAM - Adjust the flam width.
-
 1
1 -
2
-
 3
3 -
 4
4 -
 5
5 -
 6
6 -
 7
7 -
 8
8 -
 9
9 -
 10
10 -
 11
11 -
 12
12 -
 13
13 -
14
-
15
-
16
-
17
-
18
-
19
-
20
-
21
-
22
-
23
-
24
-
25
-
26
-
27
-
28
-
29
 |
 |
