2009 Kawasaki KFX700 Owners Manual
2009 Kawasaki KFX700 Manual

2009 Kawasaki KFX700 manual content summary:
- 2009 Kawasaki KFX700 | Owners Manual - Page 1
- 2009 Kawasaki KFX700 | Owners Manual - Page 2
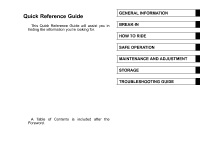
Quick Reference Guide This Quick Reference Guide will assist you in finding the information you're looking for. GENERAL INFORMATION BREAK-IN HOW TO RIDE SAFE OPERATION MAINTENANCE AND ADJUSTMENT STORAGE TROUBLESHOOTING GUIDE j j j j j j j A Table of Contents is included after the Foreword. - 2009 Kawasaki KFX700 | Owners Manual - Page 3
- 2009 Kawasaki KFX700 | Owners Manual - Page 4
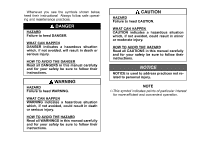
not avoided, will result in death or serious injury. HOW TO AVOID THE DANGER Read all DANGERS in this manual carefully and for your safety be sure to follow their instructions. NOTICE NOTICE is used to address practices not related to personal injury. WARNING HAZARD Failure to heed WARNING. WHAT - 2009 Kawasaki KFX700 | Owners Manual - Page 5
this manual carefully and completely before starting your new Kawasaki. It contains important safety information. Never operate an ATV without proper instruction. , the sport has the potential to cause environmental problems as well as conflicts with other people. Responsible use of your off- - 2009 Kawasaki KFX700 | Owners Manual - Page 6
to take proper precautions. SEVERE INJURY OR DEATH can result if you do not follow these instructions: żRead this manual and all labels carefully and follow the operating procedures described. żThe Owner's Manual should be kept in the waterproof plastic bag and stored in the storage case provided - 2009 Kawasaki KFX700 | Owners Manual - Page 7
sharply to one side. Go straight down the hill where possible. żAlways follow proper procedures for crossing the side of a hill as described in this manual. Avoid hills with excessively slippery or loose surfaces. Shift your weight to the uphill side of the ATV. Never attempt to turn the ATV around - 2009 Kawasaki KFX700 | Owners Manual - Page 8
installation or use of accessories. Installation of accessory items may affect vehicle handling. Refer to the Loading Information chapter in this manual. żPreserve the environment, ride responsibly and always know and obey laws and regulations governing ATV operation. żRefueling: Shut engine off and - 2009 Kawasaki KFX700 | Owners Manual - Page 9
and limitations. This manual offers many safe riding tips, but its purpose is not to provide instruction in all the trouble-free life for your ATV, give it the proper care and maintenance described in this manual. For those who would like more detailed information on their ATVs, a Service Manual - 2009 Kawasaki KFX700 | Owners Manual - Page 10
The photographs in this Owner's Manual show the KSV700A. The KSV700B is model with different graphic design and is identical to the KSV700A, the base model, in every other aspect: controls, - 2009 Kawasaki KFX700 | Owners Manual - Page 11
Shifting Gears...Braking ...Stopping the Engine ...Parking the ATV...Stopping the ATV in an Emergency...SAFE OPERATION ...Read the Owner's Manual...Obey Local Laws...Adult Supervision ...Beginning Riders ...Off-Road Use Only ...Dress Properly...Operator Only...Ride Carefully and with Good Judgement - 2009 Kawasaki KFX700 | Owners Manual - Page 12
Fuse ...General Lubrication ...Cleaning ...Bolt and Nut Tightening ...STORAGE ...Preparation for Storage ...Removal from Storage ...TRANSPORTING THE ATV ...TROUBLESHOOTING GUIDE...OWNER SATISFACTION ...ENVIRONMENTAL PROTECTION ...MAINTENANCE RECORD ... 128 128 130 132 132 133 134 138 140 141 142 144 - 2009 Kawasaki KFX700 | Owners Manual - Page 13
12 SPECIFICATIONS SPECIFICATIONS PERFORMANCE Maximum Torque Minimum Turning Radius DIMENSIONS Overall Length Overall Width Overall Height Wheelbase Track: Ground Clearance 59.2 N·m (6.0 kgf·m, 44.00 ft·lb) @5 000 r/min (rpm) 3.2 m (10.50 ft) 1 985 mm (78.15 in.) 1 195 mm (47.05 in.) 1 170 mm (46.06 - 2009 Kawasaki KFX700 | Owners Manual - Page 14
SPECIFICATIONS 13 Spark Plug Lubrication System Engine Oil: NGK CR7E, DENSO U22ESR-N Forced lubrication (wet sump) API SF or SG API SH, SJ or SL with JASO MA class SAE 10W-40 2.2 L (2.33 US qt) 2.5 L (2.64 US qt) Belt drive torque converter (CVT) Shaft 2WD 1-speed & reverse 3.122 ∼ 0.635 4.375 32. - 2009 Kawasaki KFX700 | Owners Manual - Page 15
14 SPECIFICATIONS Tire Size: Rim Size: Brake: Parking Brake Fuel Tank Capacity ELECTRICAL EQUIPMENT Battery Headlight Tail/Brake Light Front Rear Front Rear Front Rear AT22 × 7-10 AT22 × 11-10 10 × 5.5 10 × 8.5 Disk Enclosed Wet Multi-Plate Enclosed Wet Multi-Plate 12 L (3.2 US gal) 12 V 12 Ah 12 - 2009 Kawasaki KFX700 | Owners Manual - Page 16
SERIAL NUMBER LOCATIONS 15 SERIAL NUMBER LOCATIONS The frame and engine serial numbers are used to register the vehicle. They are the only means of identifying your particular machine from others of the same model type. These serial numbers may be needed by your dealer when ordering parts. In the - 2009 Kawasaki KFX700 | Owners Manual - Page 17
16 LOCATION OF LABELS LOCATION OF LABELS All warning labels which are on your ATV are repeated here. Read them and understand them thoroughly. They contain information which is important for your safety and the safety of anyone else who may operate your ATV. Therefore, it is very important that all - 2009 Kawasaki KFX700 | Owners Manual - Page 18
LOCATION OF LABELS 17 6. Passenger Warning 7. Tire Pressure and Overloading Warning 8. Drive Belt Information 9. Vehicle Emission Control Information 10. Battery Danger/Poison (on the back side) 11. Air Cleaner Information - 2009 Kawasaki KFX700 | Owners Manual - Page 19
18 LOCATION OF LABELS 12. Shock Absorber Warning - 2009 Kawasaki KFX700 | Owners Manual - Page 20
LOCATION OF LABELS 19 (1) (2) (3) - 2009 Kawasaki KFX700 | Owners Manual - Page 21
20 LOCATION OF LABELS (4) (6) (5) for KSV700A (7) (5) for KSV700B - 2009 Kawasaki KFX700 | Owners Manual - Page 22
LOCATION OF LABELS 21 (8) (9) for KSV700B (9) for KSV700A (11) - 2009 Kawasaki KFX700 | Owners Manual - Page 23
22 LOCATION OF LABELS (10) (12) (13) - 2009 Kawasaki KFX700 | Owners Manual - Page 24
LOCATION OF PARTS 23 LOCATION OF PARTS 1. Rear Brake Lever (Parking Brake) 2. Brake Lever Lock 3. Starter Button 4. Indicator Lights 5. Ignition Switch 6. Front Brake Reservoir 7. Front Brake Lever 8. Shift Control 9. Light/Dimmer Switch 10. Engine Stop Switch 11. Choke Lever 12. Reverse Power - 2009 Kawasaki KFX700 | Owners Manual - Page 25
24 LOCATION OF PARTS 15. Shock Absorber 16. Front Cylinder Spark Plug 17. Air Cleaner 18. Battery 19. Fuses 20. Seat Latch 21. Headlights 22. Disc Brake Caliper 23. Oil Filler Plug 24. Rear Brake 25. Rear Final Gear Case 26. Muffler (Spark Arrester) - 2009 Kawasaki KFX700 | Owners Manual - Page 26
LOCATION OF PARTS 25 27. Tail/Brake Light 28. Fuel Tank Filler Cap 29. Storage Case/Tool Kit 30. Rear Cylinder Spark Plug 31. Carburetor 32. Fuel Tap 33. Coolant Reserve Tank 34. Radiator 35. Belt Drive Transmission 36. Rear Brake Pedal 37. Fuel Tank - 2009 Kawasaki KFX700 | Owners Manual - Page 27
vehicle should be genuine Kawasaki or equivalent components designed for use on this ATV and should be installed and used according to instructions. If you have questions, consult an authorized ATV dealer. żKawasaki Parts and Accessories have been specially designed for use on Kawasaki vehicles - 2009 Kawasaki KFX700 | Owners Manual - Page 28
LOADING INFORMATION 27 Because an all terrain vehicle is sensitive to increases in weight, changes in weight distribution, and aerodynamic forces, you must take extreme care in the fitting of accessories. The following general guidelines have been prepared to help you make your determinations. Do - 2009 Kawasaki KFX700 | Owners Manual - Page 29
28 GENERAL INFORMATION j GENERAL INFORMATION Indicator Lights The indicator lights are mounted at the middle of the handlebars. Reverse: When the transmission is in reverse gear, the reverse indicator light is lit. Oil Pressure Indicator: The pressure indicator goes on to warn the operator - 2009 Kawasaki KFX700 | Owners Manual - Page 30
GENERAL INFORMATION 29 Drive Belt Check Indicator Light: This vehicle is equipped with an hour meter by which the periodical maintenance is to be provided. The indicator turns on when the vehicle has been used for 100 hours in total of operation. When the belt indicator lights goes on, return the - 2009 Kawasaki KFX700 | Owners Manual - Page 31
30 GENERAL INFORMATION j Brake Levers and Pedal The lever on the right side of the handlebars operates the front brake. The lever on the left side of the handlebar operates the rear brake, and it can be used for a parking brake by using the brake lever lock at the brake lever (see Brake Lever Lock - 2009 Kawasaki KFX700 | Owners Manual - Page 32
GENERAL INFORMATION 31 The foot pedal on the right side also operates the rear brake. WARNING HAZARD Stalling, rolling backwards or improperly dismounting while climbing a hill. WHAT CAN HAPPEN Could result in ATV overturning. HOW TO AVOID THE HAZARD Use low gearing and maintain steady speed when - 2009 Kawasaki KFX700 | Owners Manual - Page 33
32 GENERAL INFORMATION j Brake Lever Lock (Parking Brake) If the brake lever lock is used, the rear brake lever can be used as a parking brake. To lock the brake lever, first pull in the brake lever. Then pull in the lock lever and while holding it against the brake lever, release the brake lever. - 2009 Kawasaki KFX700 | Owners Manual - Page 34
GENERAL INFORMATION 33 j Fuel Tank Fuel Filler Cap Filler Cap is under the flip-up cover at the rear of the seat. First, pull the cover a little and flip it up to open. Filling the Tank: Only use gasoline with the recommended octane rating (See next page.) Avoid filling the tank in the rain or - 2009 Kawasaki KFX700 | Owners Manual - Page 35
34 GENERAL INFORMATION j A. Cover A. Fuel Tank B. Filler Neck C. Top Level A. Fuel Tank B. Filler Cap - 2009 Kawasaki KFX700 | Owners Manual - Page 36
standard industry specifications may result in unsatisfactory performance. Operating problems that result from the use of poor quality or nonrecommended Antiknock Index of 87. The Antiknock Index is posted on service station pumps in the U.S.A. The Fuels Containing Oxygenates Gasoline frequently - 2009 Kawasaki KFX700 | Owners Manual - Page 37
from the fuel tank and carburetors. See the Storage section in this manual. NOTICE Avoid using blends of unleaded gasoline and methanol (wood alcohol) " containing more than 5% methanol. Fuel system damage and performance problems may result. Gasoline/Ether Blends- The most common ether is methyl - 2009 Kawasaki KFX700 | Owners Manual - Page 38
GENERAL INFORMATION 37 Fuel Tap The fuel tap is located under the cover and on the right side of the air cleaner. running, and fuel supply is shut off when the engine is stopped. j A. Fuel Tap B. "ON" position C. Air Cleaner żThe tap is kept in ON position all the time and does not need to be - 2009 Kawasaki KFX700 | Owners Manual - Page 39
38 GENERAL INFORMATION j Ignition Switch The ignition switch is located at the center of the handlebars. It is a 2-position, key-operated switch. The key can be removed only when in the "OFF" position. The lights, ignition, and electric starter will operate only when the key is in the "ON" position - 2009 Kawasaki KFX700 | Owners Manual - Page 40
Grip A. Engine Stop Button B. "RUN" position C. "OFF" position Starter Button: Refer to the "Starting the Engine" section of the "How to Ride" chapter for starting instructions. - 2009 Kawasaki KFX700 | Owners Manual - Page 41
40 GENERAL INFORMATION To start the engine, push the starter button with the front or rear brake applied in any shift position. j Choke Lever The choke lever on the left handlebar provides a rich mixture for cold starting conditions. Pull the choke lever all the way to the left to start the engine - 2009 Kawasaki KFX700 | Owners Manual - Page 42
GENERAL INFORMATION 41 Shift Control The shift control grip is located at the left handlebar and it has three positions: "D" (Drive), "N" (Neutral), and "R" (Reverse). Drive Gear: To shift into drive gear range, first stop the vehicle completely and shift the shift control into the "D" (Drive) - 2009 Kawasaki KFX700 | Owners Manual - Page 43
42 GENERAL INFORMATION j WARNING HAZARD Inattentive operation in "R" (Reverse). Backing up without looking where you are going. WHAT CAN HAPPEN Inattentive operation in "R" (Reverse) could cause you to hit a person or obstacle behind you, resulting in severe personal injury or death. HOW TO AVOID - 2009 Kawasaki KFX700 | Owners Manual - Page 44
maximum engine power. j WARNING HAZARD Operating this ATV without proper instruction. WHAT CAN HAPPEN The risk of an accident is greatly increased in the course and the operating techniques described in the Owner's Manual. For more information about the training course, contact an authorized - 2009 Kawasaki KFX700 | Owners Manual - Page 45
44 GENERAL INFORMATION j NOTICE If the throttle limiter is adjusted, verify the changes in throttle in an open, non-traffic area. Never try to adjust the limiter by racing the engine in neutral or in gear with brake on, or the engine may be damaged. Seat To remove the seat, push the latch lever - 2009 Kawasaki KFX700 | Owners Manual - Page 46
GENERAL INFORMATION 45 To attach the seat, insert the front and center hooks of the seat into the front stopper and the center slots and slide it all the way forward pushing the seat end. Make sure the rear projections of the seat enter into the dampers. j A. Seat B. Front Hook C. Front Stopper D. - 2009 Kawasaki KFX700 | Owners Manual - Page 47
of the seat to make sure it is securely locked. j Storage Case The storage case is located above the right rear wheel. Keep this Owner's Manual in the storage case. Here is where you will find a tool kit. Keep only light items in this storage case. To open the case lid - 2009 Kawasaki KFX700 | Owners Manual - Page 48
GENERAL INFORMATION 47 j Tool Kit The tool kit is stored in the storage case. The minor adjustments and replacement of parts explained in this manual can be performed with the tools in the kit. A. Tool Kit - 2009 Kawasaki KFX700 | Owners Manual - Page 49
the engine while the transmission is in neutral. żIt is important to perform the initial service after the first 10 hours (100 km, 60 mi) of operation as described in this manual and the service manual for this vehicle. See the Periodic Maintenance Chart in the MAINTENANCE AND ADJUSTMENT chapter. - 2009 Kawasaki KFX700 | Owners Manual - Page 50
. If any irregularities are found during these checks, refer to the MAINTENANCE AND ADJUSTMENT chapter, see your dealer, or refer to the Service Manual for the action required to return the vehicle to a safe operating condition. DANGER HAZARD Running the engine without ventilation. WHAT CAN HAPPEN - 2009 Kawasaki KFX700 | Owners Manual - Page 51
50 HOW TO RIDE Fuel ...Engine Oil ...Coolant ...Tires ...Enough fuel in tank, no leaks. Oil level between "H" (High) and "L" (Low) lines, no leaks. Coolant level between level lines (when engine is cold), no leaks. Air Pressure (when cold): Front: 28 kPa (0.28 kgf/cm², 4 psi) Rear: 28 kPa (0.28 kgf/ - 2009 Kawasaki KFX700 | Owners Manual - Page 52
HOW TO RIDE 51 Starting the Engine the engine is cold (same as outside temper• When ature), pull the choke lever all the way to the left. Keep the throttle completely closed. DANGER HAZARD Running the engine without ventilation. WHAT CAN HAPPEN Breathing exhaust gas leads to carbon monoxide - 2009 Kawasaki KFX700 | Owners Manual - Page 53
52 HOW TO RIDE Moving Off the shift lever into the "D" (Drive) position. • Move Release parking brake. • Graduallythe increase engine speed by pushing the • throttle lever forward. Shifting Gears the vehicle completely. • Stop Move shift control into the "D" (Drive) position. • If you the intend - 2009 Kawasaki KFX700 | Owners Manual - Page 54
HOW TO RIDE 53 WARNING HAZARD Shifting into "D" (Drive) or "R" (Reverse) while moving. WHAT CAN HAPPEN Shifting the transmission gear while the vehicle is moving can cause abrupt changes in speed and direction resulting in loss of control and accident with severe personal injury or death. HOW TO - 2009 Kawasaki KFX700 | Owners Manual - Page 55
54 HOW TO RIDE WARNING HAZARD Stalling, rolling backwards or improperly dismounting while climbing a hill. WHAT CAN HAPPEN Could result in ATV overturning. HOW TO AVOID THE HAZARD Use low gearing and maintain steady speed when climbing a hill. If you lose all forward speed: Keep weight uphill. - 2009 Kawasaki KFX700 | Owners Manual - Page 56
HOW TO RIDE 55 Parking the ATV parking inside a garage or other structure, be • If sure it is well ventilated and the vehicle is not close to any source of flame or sparks; this includes any appliance with a pilot light. • Stop the vehicle on a level surface. WARNING HAZARD Parking on a steep - 2009 Kawasaki KFX700 | Owners Manual - Page 57
. Improper maintenance can create a dangerous situation known as throttle failure. Two of the most common causes of throttle failure are: 1. An improperly serviced or clogged air cleaner may allow dirt and dust to enter the carburetor and stick the throttle open. 2. During removal of the air cleaner - 2009 Kawasaki KFX700 | Owners Manual - Page 58
ride there without the express written permission of the owner. Always try to preserve nature and the environment. Read the Owner's Manual Read and understand this Owner's Manual, and carry it with you when you ride. This is especially important for younger riders and beginners. Refer to this Owner - 2009 Kawasaki KFX700 | Owners Manual - Page 59
to reach to put their feet on the footboards and their hands on the handlebars. Study this manual with your child to be sure he or she fully understands all of the special safety instructions. WARNING HAZARD Failure to follow the age recommendations for this ATV. Failure to supervise children 16 - 2009 Kawasaki KFX700 | Owners Manual - Page 60
are designed for off-road use only. WARNING HAZARD Operating this ATV without proper instruction. WHAT CAN HAPPEN The risk of an accident is greatly increased if the and the operating techniques described in the Owner's Manual. For more information about the training course, contact an authorized ATV - 2009 Kawasaki KFX700 | Owners Manual - Page 61
60 SAFE OPERATION Off-Road Use Only This vehicle is designed for off-road use only. Operation on public streets, roads, and highways is not recommended and is not safe. ATV tires are not designed to operate on paved or concrete surfaces. The tires will not slip as necessary which may seriously - 2009 Kawasaki KFX700 | Owners Manual - Page 62
SAFE OPERATION 61 Dress Properly Always wear an approved helmet, eye protection, and protective clothing. The proper clothing can make riding more comfortable and reduce the chance of injury If you take a spill. Long pants will also protect your legs from the hot exhaust system. j - 2009 Kawasaki KFX700 | Owners Manual - Page 63
62 SAFE OPERATION WARNING HAZARD Operating this ATV without wearing an approved motorcycle helmet, eye protection and protective clothing. WHAT CAN HAPPEN Operating without an approved motorcycle helmet increases your chances of a severe head injury or death in the event of an accident. Operating - 2009 Kawasaki KFX700 | Owners Manual - Page 64
SAFE OPERATION 63 WARNING HAZARD Carrying a passenger on this ATV. WHAT CAN HAPPEN Passengers affect balance and steering and increase risk of losing control. Carrying a passenger could cause an accident, resulting in harm to you and/or your passenger. HOW TO AVOID THE HAZARD Never carry a - 2009 Kawasaki KFX700 | Owners Manual - Page 65
64 SAFE OPERATION WARNING HAZARD Attempting wheelies, stunts. jumps, and other Never Drink and Drive Alcohol and drugs impair your judgement and slow your reactions. Even drugs prescribed by a physician can be dangerous. Check with your doctor. WHAT CAN HAPPEN Increases the chance of an accident, - 2009 Kawasaki KFX700 | Owners Manual - Page 66
SAFE OPERATION 65 Keep Your Feet on the Footboards and Hands on the Handlebars Always ride with your feet on the footboards. If your feet touch the ground while you are moving, you could be injured. It is possible to have the rear wheel run over your foot. If you have a lot of motorcycle experience - 2009 Kawasaki KFX700 | Owners Manual - Page 67
66 SAFE OPERATION Before Starting the Engine Three "musts" before starting the engine are: 1) Set the parking brake, 2) Put the transmission in neutral, Use the Parking Brake Always apply the parking brake before getting off your vehicle. If it should roll, it might be damaged or cause injury. j - 2009 Kawasaki KFX700 | Owners Manual - Page 68
affect the handling of your ATV. See the Loading Information chapter of this manual for more detailed information. Kawasaki does not recommend that you modify your ATV in this ATV and should be installed and used according to instructions. If you have questions, consult an authorized ATV dealer. j - 2009 Kawasaki KFX700 | Owners Manual - Page 69
use it to make sure the ATV is in safe operating condition. Always follow the inspection and maintenance procedures and schedules described in the Owner's Manual. j - 2009 Kawasaki KFX700 | Owners Manual - Page 70
loss of control, increasing your risk of an accident. HOW TO AVOID THE HAZARD Always use the size and type tires specified in the Owner's Manual for this vehicle. Always maintain proper tire pressure as described in the Owner - 2009 Kawasaki KFX700 | Owners Manual - Page 71
70 SAFE OPERATION Riding Terrain Before riding in a new area be sure to check for hidden obstacles or hazards. Keep your speed down until you know the area well. You must know the land you intend to ride on and be familiar with your machine and its handling characteristics to have a safe and - 2009 Kawasaki KFX700 | Owners Manual - Page 72
large obstacles, such as large rocks or fallen trees. When you go over obstacles, always follow proper procedures as described in the Owner's Manual. WARNING HAZARD Failure to use extra care when operating on excessively rough, slippery or loose terrain. WHAT CAN HAPPEN Could cause loss of traction - 2009 Kawasaki KFX700 | Owners Manual - Page 73
72 SAFE OPERATION Riding in Reverse Start the engine following the procedure in the "Starting the Engine" section. Before shifting into reverse, make certain that the vehicle is completely stopped, and then move the shift control into the "R" (Reverse) position. Refer to the "Shift Control" section - 2009 Kawasaki KFX700 | Owners Manual - Page 74
SAFE OPERATION 73 WARNING HAZARD Inattentive operation in "R" (Reverse). Backing up without looking where you are going. WHAT CAN HAPPEN Inattentive operation in "R" (Reverse) could cause you to hit a person or obstacle behind you, resulting in severe personal injury or death. HOW TO AVOID THE - 2009 Kawasaki KFX700 | Owners Manual - Page 75
74 SAFE OPERATION seat and shifting body weight onto the outside footboard, helps the rear wheels turn easier and improve front wheel steering. WARNING HAZARD Removing hands from handlebars or feet from footboards during operation. WHAT CAN HAPPEN Removing even one hand or foot can reduce your - 2009 Kawasaki KFX700 | Owners Manual - Page 76
loss of control or cause ATV to overturn. HOW TO AVOID THE HAZARD Always follow proper procedures for climbing hills as described in the Owner's Manual. Always check the terrain carefully before you start up any hill. Never climb hills with excessively slippery or loose surfaces. Shift your weight - 2009 Kawasaki KFX700 | Owners Manual - Page 77
76 SAFE OPERATION Don't attempt to climb hills that are too steep for the ATV or for your abilities. When climbing a hill, lean forward to keep the front wheels from lifting. On steeper hills you may need to stand and lean forward for even more weight transfer. The front wheels must be kept on the - 2009 Kawasaki KFX700 | Owners Manual - Page 78
TO AVOID THE HAZARD Never attempt to turn the ATV around on any hill until you have mastered the turning technique as described in this manual on level ground. Be very careful when turning on any hill. Rear brake application will brake the downhill wheels when climbing hills and so will - 2009 Kawasaki KFX700 | Owners Manual - Page 79
parking brake. Dismount on uphill side or to a side if pointed straight uphill. Turn the ATV around and remount, following the procedure described in this manual. - 2009 Kawasaki KFX700 | Owners Manual - Page 80
SAFE OPERATION 79 Antenna Flag In hilly country, use an antenna flag so others can see you coming from the other side of a hill or sand dune. Take extra care when approaching blind hill tops and corners. Traversing Hillsides When riding across the side of a hill, keep your body weight toward the - 2009 Kawasaki KFX700 | Owners Manual - Page 81
loss of control or cause ATV to overturn. HOW TO AVOID THE HAZARD Always follow proper procedures for going down hills as described in this manual. Note: a special technique is required when braking as you go down a hill. Always check the terrain carefully before you start down any hill. Shift your - 2009 Kawasaki KFX700 | Owners Manual - Page 82
SAFE OPERATION 81 Be careful if the surface is loose; the tires may skid and braking effectiveness will be reduced. Turning while descending a slope must be done very carefully and gradually to avoid tipping the vehicle over. The rider should keep his feet on the footboards and transfer his weight - 2009 Kawasaki KFX700 | Owners Manual - Page 83
82 SAFE OPERATION Sliding and Skidding On slippery or loose surfaces, special care is required. Sliding may be hazardous because the wheels may suddenly regain traction and cause the vehicle to tip or overturn and have an accident. Therefore, never ride "over your head" when you are unprepared for - 2009 Kawasaki KFX700 | Owners Manual - Page 84
SAFE OPERATION 83 Remember: żBe especially careful on very slippery and very high traction surfaces. żSteer in the direction of the skid. żDon't ride on public streets, roads, or highways. Riding in Water Choose a location to enter and exit the water where the banks are not too steep or slippery. - 2009 Kawasaki KFX700 | Owners Manual - Page 85
84 SAFE OPERATION WARNING HAZARD Operating this ATV through deep or fast flowing water. WHAT CAN HAPPEN Tires may float, causing loss of traction and loss of control, which could lead to an accident. HOW TO AVOID THE HAZARD Never operate this ATV in fast flowing water or in water deeper than the - 2009 Kawasaki KFX700 | Owners Manual - Page 86
SAFE OPERATION 85 Wash the vehicle in fresh water if it is exposed to salt water or operated in muddy conditions. Wet brakes provide little or no efficiency and could lead to an accident and injury. After operation in water, always apply the brakes long enough for the friction to dry the pads. Also, - 2009 Kawasaki KFX700 | Owners Manual - Page 87
86 MAINTENANCE AND ADJUSTMENT MAINTENANCE AND ADJUSTMENT The maintenance and adjustments outlined in this chapter must be carried out in accordance with the Periodic Maintenance Chart to keep the vehicle in good running condition. The initial maintenance is vitally important and must not be - 2009 Kawasaki KFX700 | Owners Manual - Page 88
repair recommendations specified in the appropriate Kawasaki Service Manual. Refer to the MAINTENANCE AND ADJUSTMENT chapter sure that the recommended maintenance is carried out according to the instructions in this Owner's Manual at your own expense. You should keep a maintenance record for - 2009 Kawasaki KFX700 | Owners Manual - Page 89
read your Kawasaki Limited Emission Control Systems Warranty delivered with this Owner's Manual carefully and keep it valid by complying with the owner's obligations it contains. To obtain warranty service, the Kawasaki Limited Emission Control Systems Warranty requires that you return your vehicle - 2009 Kawasaki KFX700 | Owners Manual - Page 90
MAINTENANCE AND ADJUSTMENT 89 TAMPERING WITH NOISE CONTROL SYSTEM PROHIBITED: Federal law prohibits the following acts or the causing thereof: (1) the removal or rendering inoperative by any person other than for purposes of maintenance, repair, or replacement, of any device or element of design - 2009 Kawasaki KFX700 | Owners Manual - Page 91
mi) of use OPERATION ENGINE Transmission drive belt wear-inspect* Transmission drive belt deflection-inspect* ż Air cleaner-service* ż Throttle lever play-inspect Every 10 days or 200 km (120 mi) of use Regular Service Every 30 days or 600 km (360 mi) of use Every 90 days of vehicle use, Every 1,700 - 2009 Kawasaki KFX700 | Owners Manual - Page 92
MAINTENANCE AND ADJUSTMENT 91 FREQUENCY First Service After 10 hrs. or 100 km (60 mi) of use OPERATION Engine * Rear brake plates-change * Brake hose-replace Every 10 days or 200 km (120 mi) of use Regular Service Every 30 days or 600 km (360 mi) of use Every 90 days of vehicle use, Every 1,700 km - 2009 Kawasaki KFX700 | Owners Manual - Page 93
* Bolts and nuts-tighten Rear final gear case oil-change * Regular Service Every 10 days or 200 km (120 mi) of use Every 30 D • • D D 2 years (D) 2 years (D) D • • • D • • • Service more frequently when operated in mud, dust, or other harsh riding conditions, or when carrying heavy loads - 2009 Kawasaki KFX700 | Owners Manual - Page 94
MAINTENANCE AND ADJUSTMENT 93 Engine Oil In order for the engine and transmission to function properly, maintain the engine oil at the proper level, and change the oil and replace the oil filter in accordance with the Periodic Maintenance Chart. Not only do dirt and metal particles collect in the - 2009 Kawasaki KFX700 | Owners Manual - Page 95
94 MAINTENANCE AND ADJUSTMENT the plug and check the oil level. The • Unscrew oil level should be between the "H" (High) and "L" (Low) lines on the dipstick. WARNING HAZARD Engine or transmission seizure. WHAT CAN HAPPEN Can lock the rear wheels causing an accident and injury. HOW TO AVOID THE - 2009 Kawasaki KFX700 | Owners Manual - Page 96
MAINTENANCE AND ADJUSTMENT 95 the oil filter is to be replaced, remove the oil filter • If cartridge and replace it with a new one. j A. Drain Plug the oil completely drain with the vehicle on • Let level ground. A. Cartridge WARNING HAZARD Improper disposal of used motor oil. WHAT CAN HAPPEN - 2009 Kawasaki KFX700 | Owners Manual - Page 97
96 MAINTENANCE AND ADJUSTMENT Tightening Torque Engine Oil Drain Plug: 18 ∼ 22 N·m (1.8 ∼ 2.2 kgf·m, 13 ∼ 16 ft·lb) Engine Oil Drain Plug: 18 ∼ 22 N·m (1.5 ∼ 2.0 kgf·m, 11 ∼ 15 ft·lb) Engine Oil Grade: Viscosity: A. Gasket API SF or SG API SH, SJ or SL with JASO MA SAE 10W-40 1.7 L (1.80 US qt) [ - 2009 Kawasaki KFX700 | Owners Manual - Page 98
MAINTENANCE AND ADJUSTMENT 97 Rear Final Gear Case Oil In order for the pinion and ring gears to function properly, check the oil level and change the oil in accordance with the Periodic Maintenance Chart. WARNING HAZARD Operating this vehicle with insufficient, deteriorated, or contaminated gear - 2009 Kawasaki KFX700 | Owners Manual - Page 99
98 MAINTENANCE AND ADJUSTMENT j A. Rear Final Gear Case B. Filler Cap A. B. C. D. Rear Final Gear Case Filler Opening Bottom Thread Drain Plug NOTICE Be careful not to allow any dirt or foreign materials to enter the gear case. the oil level. If it is insufficient, add oil • Check through the oil - 2009 Kawasaki KFX700 | Owners Manual - Page 100
MAINTENANCE AND ADJUSTMENT 99 • Remove the filler cap and drain plug. WARNING HAZARD Improper disposal of used gear case oil. WHAT CAN HAPPEN Used gear case oil is a toxic substance, which can pollute the environment. HOW TO AVOID THE HAZARD Contact your local authorities for approved disposal - 2009 Kawasaki KFX700 | Owners Manual - Page 101
100 MAINTENANCE AND ADJUSTMENT NOTICE To ensure correct performance and durability, use only the recommended oil. The rear final gear case uses a special oil type; refer to the chart above. The rear gear case contains the rear brake discs which must be lubricated by the MOBIL FLUID 424, CITGO - 2009 Kawasaki KFX700 | Owners Manual - Page 102
MAINTENANCE AND ADJUSTMENT 101 Coolant: Coolant absorbs heat from the engine and transfers it to the air at the radiator. If the coolant level becomes low, the engine overheats and may suffer damage. Check the coolant level each day before operating the vehicle, and replenish coolant if the level is - 2009 Kawasaki KFX700 | Owners Manual - Page 103
102 MAINTENANCE AND ADJUSTMENT j A. Reserve Tank B. "F" (Full) Mark C. "L" (Low) Mark A. Reserve Tank Cap B. Radiator Cap the amount of coolant is insufficient, unscrew the • If cap from the reserve tank and add coolant through the filler opening to the "F" (Full) mark. Install the cap. - 2009 Kawasaki KFX700 | Owners Manual - Page 104
MAINTENANCE AND ADJUSTMENT 103 and contains ethylene glycol. It is mixed at 50% and has the freezing point of -35°C (-31°F). NOTICE If coolant must be added often, or the reserve tank completely runs dry, there is probably leakage in the system. Have the cooling system inspected by your authorized - 2009 Kawasaki KFX700 | Owners Manual - Page 105
104 MAINTENANCE AND ADJUSTMENT Spark Plug The standard spark plug is shown in the table. The spark plugs should be taken out in accordance with the Periodic Maintenance Chart for cleaning, inspection, and resetting of the plug gap. Maintenance If the plugs are oily or have carbon build up on them, - 2009 Kawasaki KFX700 | Owners Manual - Page 106
MAINTENANCE AND ADJUSTMENT 105 Spark Plug Removal Front Cylinder Carefully pull the spark plug cap from the spark plug. • Rear Cylinder Remove the cover first and two clamps Remove the rubber air duct of belt drive transmission. • • j A. Spark Plug Cap • Unscrew the spark plug. A. Rubber Air - 2009 Kawasaki KFX700 | Owners Manual - Page 107
106 MAINTENANCE AND ADJUSTMENT Valve Clearance Valve and valve seat wear decrease valve clearance, upsetting valve timing. NOTICE If valve clearance is left unadjusted, wear will eventually cause the valves to remain partially open, which lowers performance, burns the valves and valve seats, and - 2009 Kawasaki KFX700 | Owners Manual - Page 108
and stick the throttle open. This could cause an accident. HOW TO AVOID THE HAZARD Clean the air cleaner regularly and according to the instructions in this section. the knob with ignition switch key and remove • Turn the air cleaner upper cover. j NOTICE A clogged air cleaner may allow dirt - 2009 Kawasaki KFX700 | Owners Manual - Page 109
108 MAINTENANCE AND ADJUSTMENT j A. Air Cleaner Housing Cap B. Snaps A. Element B. Air Cleaner Housing the air cleaner element up and take it out of • Pull the air cleaner housing. Check inside the inlet tract and carburetor for dirt. If dirt is present, clean the intake tract and carburetor - 2009 Kawasaki KFX700 | Owners Manual - Page 110
MAINTENANCE AND ADJUSTMENT 109 WARNING HAZARD Dirt or dust allowed into the carburetor. WHAT CAN HAPPEN Can cause the throttle to stick open. This could cause an accident. HOW TO AVOID THE HAZARD Be sure to cover the air cleaner opening to the carburetor after removing the element. Clean the air - 2009 Kawasaki KFX700 | Owners Manual - Page 111
110 MAINTENANCE AND ADJUSTMENT WARNING HAZARD Cleaning the air cleaner element with gasoline or low flash-point solvent. WHAT CAN HAPPEN Gasoline or low flash-point solvents are extremely flammable and can be explosive under certain conditions. A fire or explosion can cause severe injury or death. - 2009 Kawasaki KFX700 | Owners Manual - Page 112
MAINTENANCE AND ADJUSTMENT 111 j A. Drain Tube A. Drain Plug B. Drain Tube - 2009 Kawasaki KFX700 | Owners Manual - Page 113
112 MAINTENANCE AND ADJUSTMENT Spark Arrester This vehicle is equipped with a spark arrester approved for off-road use by the U.S. Forest Service. It must be properly maintained to ensure its efficiency. In accordance with the Periodic Maintenance Chart, clean the spark arrester. Spark Arrester - 2009 Kawasaki KFX700 | Owners Manual - Page 114
MAINTENANCE AND ADJUSTMENT 113 an open area away from combustible materials, • In start the engine with the transmission in neutral. DANGER HAZARD Running the engine without ventilation. WHAT CAN HAPPEN Breathing exhaust gas leads to carbon monoxide poisoning, asphyxiation, and death. Exhaust gases - 2009 Kawasaki KFX700 | Owners Manual - Page 115
114 MAINTENANCE AND ADJUSTMENT Throttle Cable There must be free play in the throttle mechanism. Measure the distance the throttle lever moves before the engine begins to pick up speed. Free play should be 2 ∼ 3 mm (0.08 ∼ 0.12 in.). j A. Adjuster B. Locknut If the free play cannot be set by - 2009 Kawasaki KFX700 | Owners Manual - Page 116
MAINTENANCE AND ADJUSTMENT 115 Carburetor Carburetor adjustment is done with the idle adjusting screw. Adjustment WARNING HAZARD Hot engine and exhaust pipe. WHAT CAN HAPPEN Can burn your hands. HOW TO AVOID THE HAZARD Never touch a hot engine or an exhaust pipe during carburetor adjustment. the - 2009 Kawasaki KFX700 | Owners Manual - Page 117
116 MAINTENANCE AND ADJUSTMENT WARNING HAZARD Failure to maintain the control cable. WHAT CAN HAPPEN Can result in control malfunction and an accident. Without proper maintenance the cable can become frayed, kinked, pinched, and damaged so that it can break or jam. HOW TO AVOID THE HAZARD Be sure - 2009 Kawasaki KFX700 | Owners Manual - Page 118
MAINTENANCE AND ADJUSTMENT 117 out the drain screws a few turns to drain the • Turn carburetor, and check to see if water or dirt has accumulated in the carburetor. The fuel tank vent hoses must be routed as specified. The engine may stall or lose power if the fuel tank vent is plugged or if the - 2009 Kawasaki KFX700 | Owners Manual - Page 119
118 MAINTENANCE AND ADJUSTMENT Choke Lever Pulling the choke lever to the left makes the carburetor provide a richer mixture for easy starting when the engine is cold. If starting difficulty or richer fuel mixture occurred, inspect the choke lever to adjust it if necessary. Inspection if the - 2009 Kawasaki KFX700 | Owners Manual - Page 120
MAINTENANCE AND ADJUSTMENT 119 Shift Control Cables There must be free play in the shift control mechanism. Measure the distance the shift control grip moves with the push button depressed. Free play should be 0 ∼ 2 mm (0.00 ∼ 0.08 in.). Check both directions. j A. Choke Cable B. Lock Nut C. - 2009 Kawasaki KFX700 | Owners Manual - Page 121
120 MAINTENANCE AND ADJUSTMENT j A. Adjusting Nuts B. Transmission Side Lever C. Shift Inner Cable A. Adjusters B. Locknuts the adjusting nuts at the transmission side • Turning lever, make the shift inner cables tense with no the shift control grip from "N" to "D" and "N" to • Turn "R" - 2009 Kawasaki KFX700 | Owners Manual - Page 122
MAINTENANCE AND ADJUSTMENT 121 Belt Drive Transmission (CVT) The vehicle is equipped with a belt-driven Continuously Variable Transmission (CVT). This automatic drive system, although simple to operate, does require periodic inspection since the drive belt wears with normal use. Inspection should - 2009 Kawasaki KFX700 | Owners Manual - Page 123
122 MAINTENANCE AND ADJUSTMENT Causes of accelerated Belt Wear Avoid these hard usage conditions to obtain maximum belt life and prevent accelerated belt wear and deterioration. Operating in mud or water deeper than recommended. Operating in extremely dusty conditions. Continued operation with - 2009 Kawasaki KFX700 | Owners Manual - Page 124
MAINTENANCE AND ADJUSTMENT 123 Brakes Front Brake: Disc and brake pad wear is automatically compensated for and has no effect on the brake lever action. There are no parts that require adjustment on the front brake. WARNING HAZARD Air in brake line. WHAT CAN HAPPEN Can make the brake feel mushy or - 2009 Kawasaki KFX700 | Owners Manual - Page 125
124 MAINTENANCE AND ADJUSTMENT WARNING HAZARD Contaminated brake fluid. WHAT CAN HAPPEN Can reduce braking performance or cause brake failure, resulting in an accident. HOW TO AVOID THE HAZARD Do not use brake fluid from a container that has been left open or that has been unsealed for a long time. - 2009 Kawasaki KFX700 | Owners Manual - Page 126
MAINTENANCE AND ADJUSTMENT 125 Maintenance Chart. Replacement should be done by an authorized Kawasaki Dealer. Brake Pedal Free Play Adjustment the parking brake. • Release Measure the distance the brake pedal moves be• fore the brake starts to take hold. Pedal free play • should be 15 ∼ 25 mm - 2009 Kawasaki KFX700 | Owners Manual - Page 127
126 MAINTENANCE AND ADJUSTMENT Brake Lever Free Play Adjustment the locknut and turn the adjuster at the • Loosen brake lever in as far as it will go. the locknut. • Tighten the adjuster at the rear end of the brake cable • Turn so that the brake lever has 1 ∼ 2 mm (0.04 ∼ 0.08 in.) of free play. j - 2009 Kawasaki KFX700 | Owners Manual - Page 128
MAINTENANCE AND ADJUSTMENT 127 Brake Light Switch Only the switch at the rear brake pedal can be adjusted. When the brake pedal is depressed, the brake light goes on. The brake light switch should be inspected in accordance with the Periodic Maintenance Chart. The brake light switches of the front - 2009 Kawasaki KFX700 | Owners Manual - Page 129
vehicle and possibly result in a loss of control. żInstallation of tubeless tires on rims requires compressed air and is normally recommended as a dealer service operation. However, a tube can be inserted into the tire by the operator as an emergency repair. NOTE j Maximum Tire Air Pressure for - 2009 Kawasaki KFX700 | Owners Manual - Page 130
accident. HOW TO AVOID THE HAZARD Always use the size and type tires specified in the Owner's Manual for this vehicle. Always maintain proper tire pressure as described in this Owner's Manual. A. Tire Depth Gauge j Minimum Tread Depth Front Tire 3 mm (0.12 in.) Rear Tire 3 mm (0.12 in.) Tightening - 2009 Kawasaki KFX700 | Owners Manual - Page 131
pieces), tie rod ends (4 pieces), steering knuckles (2 pieces), and propeller shaft (1 piece) for cracks, holes, damage or deterioration. If there is any indication of these troubles, one of them, have the joint boot replaced by an authorized Kawasaki dealer. j A. Steering Knuckle B. Joint Boots - 2009 Kawasaki KFX700 | Owners Manual - Page 132
MAINTENANCE AND ADJUSTMENT 131 j A. Tie Rod B. Joint Boots A. Boot for propeller shaft - 2009 Kawasaki KFX700 | Owners Manual - Page 133
132 MAINTENANCE AND ADJUSTMENT Suspension Front Shock Absorbers the adjusting sleeves on the shock absorbers • Turn to the desired position with a hook wrench. The sure to adjust the both side springs to the same • Be degree of stiffness. Spring Action PosiSpring tion Force 1 2 3 4 5 | | | Ļ - 2009 Kawasaki KFX700 | Owners Manual - Page 134
MAINTENANCE AND ADJUSTMENT 133 Headlight Beam • The headlight beams can be adjusted vertically. Turn the adjusting screw on each headlight rim in or out to adjust the headlight vertically. j A. Rear Shock Absorber B. Adjusting Sleeves C. Nitrogen Container A. Adjusting Screw - 2009 Kawasaki KFX700 | Owners Manual - Page 135
sealed type, and the sealing strip should not be removed at any time after the specified electrolyte has been installed in the battery for initial service. It is not necessary to check the battery electrolyte level or add distilled water. However, in order to maximize battery life and ensure that it - 2009 Kawasaki KFX700 | Owners Manual - Page 136
MAINTENANCE AND ADJUSTMENT 135 Self-discharge Approx. Number of Days From 100% Charged to 100% discharged Lead-Antimony Battery 100 Days 200 Days 550 Days Lead-Calcium Battery 300 Days 600 Days 950 Days Sulfation occurs when the battery is left in a discharged condition for an extended time. Sulfate - 2009 Kawasaki KFX700 | Owners Manual - Page 137
Handling battery parts that contain lead and lead compounds. WHAT CAN HAPPEN Could cause health problem. HOW TO AVOID THE HAZARD Wash hands after handling battery. j NOTICE Never remove the charge the sealed battery, never fail to observe the instructions shown on the label on the battery. NOTE - 2009 Kawasaki KFX700 | Owners Manual - Page 138
MAINTENANCE AND ADJUSTMENT 137 connect the cable with protective cap to • Securely the (+) terminal, and then securely connect the a light coat of grease on the terminals to pre• Put vent corrosion. the (+) terminal with its protective cap. • Cover Reinstall the battery holder. • black cable to the - 2009 Kawasaki KFX700 | Owners Manual - Page 139
138 MAINTENANCE AND ADJUSTMENT Fuse The main fuse and the fuse for the radiator fan are located under the seat, and the spare fuses next to them. If the electrical systems do not function, inspect the fuse. Before replacing the fuse, check the wiring harness and electrical equipment for bare wires - 2009 Kawasaki KFX700 | Owners Manual - Page 140
MAINTENANCE AND ADJUSTMENT 139 j A. Fuse Case for Radiator Fan B. Spare Fuse - 2009 Kawasaki KFX700 | Owners Manual - Page 141
140 MAINTENANCE AND ADJUSTMENT General Lubrication Lubricate the points shown below, with either motor oil or regular grease, in accordance with the Periodic Maintenance Chart or whenever the vehicle has been operated under wet or rainy conditions, and especially after using a high-pressure spray - 2009 Kawasaki KFX700 | Owners Manual - Page 142
MAINTENANCE AND ADJUSTMENT 141 Cleaning For the prolonged life of your vehicle, wash it down immediately after it has been splashed with seawater or exposed to the sea breeze, or operated on rainy days, rough terrain, or in dusty areas. bearings and other components causing eventual failure from - 2009 Kawasaki KFX700 | Owners Manual - Page 143
Bolt and Nut Tightening Every day before riding, check the tightness of the nuts and bolts listed here. Please refer to the Service Manual or ask your authorized dealer for the torque values. j 1. Brake Lever Pivot Nut 2. Brake Lever Holder Screws 3. Left Switch Case Screws 4. Suspension - 2009 Kawasaki KFX700 | Owners Manual - Page 144
MAINTENANCE AND ADJUSTMENT 143 j 9. 10. 11. 12. Throttle Case Screws Brake Master Cylinder Clamp Bolts Brake Lever Pivot Nut Exhaust Pipe Holder Nuts - 2009 Kawasaki KFX700 | Owners Manual - Page 145
144 STORAGE STORAGE Preparation for Storage the entire vehicle thoroughly. • Clean Run the for about five minutes to warm the • oil, shut engine it off and drain the engine oil. for a long time, the fuel will break down and could clog the carburetor.) Close the drain screw when finished. WARNING - 2009 Kawasaki KFX700 | Owners Manual - Page 146
STORAGE 145 WARNING HAZARD Improper disposal of gasoline. WHAT CAN HAPPEN Gasoline is a toxic substance, which can pollute the environment. HOW TO AVOID THE HAZARD Contact your local authorities for approved disposal methods and follow those methods at all times. the spark plug and spray fogging - 2009 Kawasaki KFX700 | Owners Manual - Page 147
146 STORAGE NOTICE Keep the battery well charged during cold weather so that the electrolyte does not freeze and crack open the battery. The more discharged a battery becomes, the more easily it freezes. a plastic bag over the muffler to prevent mois• Tie ture from entering. a cover over the - 2009 Kawasaki KFX700 | Owners Manual - Page 148
TRANSPORTING THE ATV 147 TRANSPORTING THE ATV Note the following points for transporting the vehicle. Drain the carburetor float bowls by loosening the drain screws. Hold a suitable container under the drain hose to catch the fuel. Tighten the screws when finished. Check that the vent hose for the - 2009 Kawasaki KFX700 | Owners Manual - Page 149
148 TRANSPORTING THE ATV WARNING HAZARD Transporting this ATV tipped up on its rear end. WHAT CAN HAPPEN Can cause gasoline to leak from the fuel tank causing a fire hazard. HOW TO AVOID THE HAZARD Never tip this vehicle up on end for transporting. - 2009 Kawasaki KFX700 | Owners Manual - Page 150
TROUBLESHOOTING GUIDE 149 TROUBLESHOOTING GUIDE Starter Motor Not Rotating Engine stop switch "OFF" Fuse failed Battery leads do not make good electrical contact with battery terminals. Battery discharged Engine Cranks, - 2009 Kawasaki KFX700 | Owners Manual - Page 151
150 TROUBLESHOOTING GUIDE belt slipping • Drive żWater in belt drive torque converter housing j - 2009 Kawasaki KFX700 | Owners Manual - Page 152
receipt of your correspondence we will contact the dealership and work with them in resolving your problem. In order to provide a permanent record, all warranty and service resolutions take place only through written correspondence. Please send your correspondence to:. CONSUMER RELATIONS KAWASAKI - 2009 Kawasaki KFX700 | Owners Manual - Page 153
152 ENVIRONMENTAL PROTECTION ENVIRONMENTAL PROTECTION To protect our environment, properly discard used tire, engine oil, or other vehicle components that you might dispose of in the future. Consult your authorized Kawasaki dealer or local environmental waste agency for their proper disposal - 2009 Kawasaki KFX700 | Owners Manual - Page 154
MAINTENANCE RECORD 153 MAINTENANCE RECORD Owner Name...Address ...Phone Number ...Engine Number ...Vehicle Number...Selling Dealer Name ...Address ...Phone Number ...Warranty Start Date ...Note: Keep this information and a spare key in a secure location. Date Traveled Distance Maintenance Performed - 2009 Kawasaki KFX700 | Owners Manual - Page 155
154 MAINTENANCE RECORD Date Traveled Distance Maintenance Performed Dealer Name Dealer Address - 2009 Kawasaki KFX700 | Owners Manual - Page 156
MAINTENANCE RECORD 155 Date Traveled Distance Maintenance Performed Dealer Name Dealer Address - 2009 Kawasaki KFX700 | Owners Manual - Page 157
156 MAINTENANCE RECORD Date Traveled Distance Maintenance Performed Dealer Name Dealer Address - 2009 Kawasaki KFX700 | Owners Manual - Page 158
MAINTENANCE RECORD 157 Date Traveled Distance Maintenance Performed Dealer Name Dealer Address - 2009 Kawasaki KFX700 | Owners Manual - Page 159
-
 1
1 -
 2
2 -
 3
3 -
 4
4 -
 5
5 -
 6
6 -
 7
7 -
8
-
9
-
10
-
11
-
12
-
13
-
14
-
15
-
16
-
17
-
18
-
19
-
20
-
21
-
22
-
23
-
24
-
25
-
26
-
27
-
28
-
29
-
30
-
31
-
32
-
33
-
34
-
35
-
36
-
37
-
38
-
39
-
40
-
41
-
42
-
43
-
44
-
45
-
46
-
47
-
48
-
49
-
50
-
51
-
52
-
53
-
54
-
55
-
56
-
57
-
58
-
59
-
60
-
61
-
62
-
63
-
64
-
65
-
66
-
67
-
68
-
69
-
70
-
71
-
72
-
73
-
74
-
75
-
76
-
77
-
78
-
79
-
80
-
81
-
82
-
83
-
84
-
85
-
86
-
87
-
88
-
89
-
90
-
91
-
92
-
93
-
94
-
95
-
96
-
97
-
98
-
99
-
100
-
101
-
102
-
103
-
104
-
105
-
106
-
107
-
108
-
109
-
110
-
111
-
112
-
113
-
114
-
115
-
116
-
117
-
118
-
119
-
120
-
121
-
122
-
123
-
124
-
125
-
126
-
127
-
128
-
129
-
130
-
131
-
132
-
133
-
134
-
135
-
136
-
137
-
138
-
139
-
140
-
141
-
142
-
143
-
144
-
145
-
146
-
147
-
148
-
149
-
150
-
151
-
152
-
153
-
154
-
155
-
156
-
157
-
158
-
159
 |
 |