Xerox C2424 User Guide Section 4: Scanning - Page 5
Adjusting Scanning Options, Setting Up a Private Folder for Scanning
 |
UPC - 095205676532
View all Xerox C2424 manuals
Add to My Manuals
Save this manual to your list of manuals |
Page 5 highlights
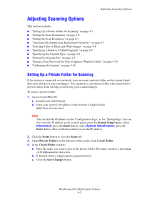
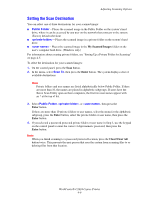
Adjusting Scanning Options Adjusting Scanning Options This section includes: ■ "Setting Up a Private Folder for Scanning" on page 4-5 ■ "Setting the Scan Destination" on page 4-6 ■ "Setting the Scan Resolution" on page 4-7 ■ "Automatically Suppressing Background Variations" on page 4-7 ■ "Selecting Color or Black and White Images" on page 4-8 ■ "Specifying 1-Sided or 2-Sided Originals" on page 4-8 ■ "Specifying the Original Type" on page 4-9 ■ "Setting the Original Size" on page 4-9 ■ "Setting a Scan Password for Your Computer (Windows Only)" on page 4-10 ■ "Calibrating the Scanner" on page 4-10 Setting Up a Private Folder for Scanning If the system is connected on a network, you can create a private folder on the system's hard drive into which you can scan images. You can protect your private folder with a password to prevent others from viewing or retrieving your scanned images. To create a private folder: 1. Access CentreWare IS: a. Launch your web browser. b. Enter your system's IP address in the browser's Address field (http://xxx.xxx.xxx.xxx). Note You can find the IP address on the "Configuration Page" or the "Startup Page. You can also view the IP address on the control panel; press the System Setup button, select Information, press the Enter button, select System Identification, press the Enter button, then scroll down until you see the IP address. 2. Click the Scans button to view the Scans tab. 3. Under Private Folders on the left side of the screen, click Create Folder. 4. In the Create Folder window: a. Enter the name you want to give to the private folder. The name can have a maximum of 10 alphanumeric characters. b. If desired, enter a 4-digit numeric password twice. c. Click the Save Changes button. WorkCentre® C2424 Copier-Printer 4-5
-
 1
1 -
 2
2 -
 3
3 -
 4
4 -
 5
5 -
 6
6 -
 7
7 -
 8
8 -
 9
9 -
 10
10 -
 11
11 -
12
-
13
-
14
-
15
-
16
-
17
-
18
-
19
-
20
-
21
 |
 |
