Intermec CV30 CV30 Fixed Mount Computer With Windows CE User's Manual
Intermec CV30 Manual
 |
View all Intermec CV30 manuals
Add to My Manuals
Save this manual to your list of manuals |
Intermec CV30 manual content summary:
- Intermec CV30 | CV30 Fixed Mount Computer With Windows CE User's Manual - Page 1
User's Manual CV30 Fixed Mount Computer With Windows CE - Intermec CV30 | CV30 Fixed Mount Computer With Windows CE User's Manual - Page 2
service Intermec-manufactured equipment and is not to be released, reproduced, or used for any other purpose without written permission of Intermec Technologies Corporation. Information and specifications of Bluetooth SIG, Inc., U.S.A. ii CV30 Fixed Mount Computer With Windows CE User's Manual - Intermec CV30 | CV30 Fixed Mount Computer With Windows CE User's Manual - Page 3
Power Button to Reset the CV30 10 Using the Reset Button to Reset the CV30 10 Understanding the Status Lights 11 Installing an External Antenna 12 Installing an External Keyboard 13 Connecting a Scanner 14 Increasing Memory Storage 16 CV30 Fixed Mount Computer With Windows CE User's Manual - Intermec CV30 | CV30 Fixed Mount Computer With Windows CE User's Manual - Page 4
for a UDP Plus Network 39 Checking the Status of Your Wireless Connection 39 Configuring Security on the CV30 40 Understanding the Wireless Network 40 Using WPA Security 41 Using Static WEP Security 42 Using 802.1x Security 42 iv CV30 Fixed Mount Computer With Windows CE User's Manual - Intermec CV30 | CV30 Fixed Mount Computer With Windows CE User's Manual - Page 5
Product Support 80 Troubleshooting the CV30 81 Upgrading the CV30 86 Upgrading the CV30 Using an SD Card 87 Upgrading Your CV30 Using SmartSystems Server 88 Troubleshooting the Boot Process (Clean Booting 89 Cleaning the Screen 91 CV30 Fixed Mount Computer With Windows CE User's Manual v - Intermec CV30 | CV30 Fixed Mount Computer With Windows CE User's Manual - Page 6
A Specifications 93 Physical and Environmental Specifications 94 Accessories for the CV30 94 Index 97 vi CV30 Fixed Mount Computer With Windows CE User's Manual - Intermec CV30 | CV30 Fixed Mount Computer With Windows CE User's Manual - Page 7
contact your local Intermec representative or distributor. Visit the Intermec technical knowledge base (Knowledge Central) at intermec.custhelp.com to review technical information or to request technical support for your Intermec product. CV30 Fixed Mount Computer With Windows CE User's Manual vii - Intermec CV30 | CV30 Fixed Mount Computer With Windows CE User's Manual - Page 8
. • Inquire about repair billing or other service invoicing questions. Outside the U.S.A. and Canada, contact your local Intermec representative. To search for your local representative, from the Intermec web site, click Contact. viii CV30 Fixed Mount Computer With Windows CE User's Manual - Intermec CV30 | CV30 Fixed Mount Computer With Windows CE User's Manual - Page 9
Manual This CV30 Fixed Mount Computer With Windows CE User's Manual is for the person who is responsible for installing, configuring, and maintaining the CV30. This manual provides you with information about the features of the CV30, and how to install, configure, operate, maintain, and troubleshoot - Intermec CV30 | CV30 Fixed Mount Computer With Windows CE User's Manual - Page 10
Before You Begin There may be other U.S. and foreign patents pending. x CV30 Fixed Mount Computer With Windows CE User's Manual - Intermec CV30 | CV30 Fixed Mount Computer With Windows CE User's Manual - Page 11
sections: • Introducing the CV30 Fixed Mount Computer • Attaching the CV30 to Power • Understanding the Status Lights • Installing an External Antenna • Installing an External Keyboard • Connecting a Scanner • Increasing Memory Storage CV30 Fixed Mount Computer With Windows CE User's Manual 1 - Intermec CV30 | CV30 Fixed Mount Computer With Windows CE User's Manual - Page 12
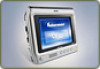
other 802.11 b/g wireless LAN devices. Understanding the Features of the CV30 The CV30 includes these standard features: • Touch screen heater • Two USB ports, two serial ports, and an Ethernet port • 802.11 b/g radio • Bluetooth radio 2 CV30 Fixed Mount Computer With Windows CE User's Manual - Intermec CV30 | CV30 Fixed Mount Computer With Windows CE User's Manual - Page 13
For additional help using the terminal emulation application, see the TE 2000 Terminal Emulation Programmer's Guide (P/N 977055-xxx). CV30 Headphones Zoom Volume down Brightness Understanding the Buttons on the CV30 Power Volume up CV30 Fixed Mount Computer With Windows CE User's Manual 3 - Intermec CV30 | CV30 Fixed Mount Computer With Windows CE User's Manual - Page 14
full duplex standard Ethernet interfaces. Use this manual to understand how to use the features and options available on the CV30. For a complete list of accessories available for the CV30, see "Accessories for the CV30" on page 94. 4 CV30 Fixed Mount Computer With Windows CE User's Manual - Intermec CV30 | CV30 Fixed Mount Computer With Windows CE User's Manual - Page 15
the setting as you hold the button. You can also adjust the brightness settings by going to Start > Settings > Control Panel > Backlight or by using Intermec Settings. CV30 Fixed Mount Computer With Windows CE User's Manual 5 - Intermec CV30 | CV30 Fixed Mount Computer With Windows CE User's Manual - Page 16
when you turn on the CV30 is the Windows CE Start screen. This screen appears unless you have the TE 2000 application installed on the CV30. If you have the TE 2000 application installed, it launches after the initial booting sequence. 6 CV30 Fixed Mount Computer With Windows CE User's Manual - Intermec CV30 | CV30 Fixed Mount Computer With Windows CE User's Manual - Page 17
, tap the action you want to perform. Aligning the Touch Screen If the touch screen does not respond when you tap it with the stylus, you may need to align the screen. To align the touch screen 1 Tap Start > Settings > Control Panel. CV30 Fixed Mount Computer With Windows CE User's Manual 7 - Intermec CV30 | CV30 Fixed Mount Computer With Windows CE User's Manual - Page 18
information on performing a clean boot, see "Troubleshooting the Boot Process (Clean Booting)" on page 89. Attaching the CV30 to Power For the CV30 to operate, you must provide power to the CV30 through a DC/DC power supply or an AC/DC power supply. The CV30 also has a backup battery to sustain all - Intermec CV30 | CV30 Fixed Mount Computer With Windows CE User's Manual - Page 19
button, or if the computer or an application is locked up, you may need to reset it. The CV30 uses the configuration currently saved in flash memory during the boot processes. There are two ways to reset the CV30: • Using the Power button CV30 Fixed Mount Computer With Windows CE User's Manual 9 - Intermec CV30 | CV30 Fixed Mount Computer With Windows CE User's Manual - Page 20
you may need to perform a clean boot. For more information, see "Troubleshooting the Boot Process (Clean Booting)" on page 89. Using the Power Button to Reset the CV30 Intermec recommends pressing and holding the Power button as the preferred method to reset the CV30. This method performs a graceful - Intermec CV30 | CV30 Fixed Mount Computer With Windows CE User's Manual - Page 21
attached scanner. The blue light indicates when the CV30 is ready to use in your application, typically TE 2000. If you have problems using the TE 2000 application, see the TE 2000 Terminal Emulation Programmer's Guide (P/N 977-055-xxx). CV30 Fixed Mount Computer With Windows CE User's Manual 11 - Intermec CV30 | CV30 Fixed Mount Computer With Windows CE User's Manual - Page 22
mounting location and orientation may require some experimentation. In most fixed installations, you should mount the antenna initially in a vertically-polarized position, with the cable from the antenna parallel to the floor/ ceiling. 12 CV30 Fixed Mount Computer With Windows CE User's Manual - Intermec CV30 | CV30 Fixed Mount Computer With Windows CE User's Manual - Page 23
are two types of keyboards you can install and use with the CV30: • The compact keyboard (P/N VE011-2002) • Rugged QWERTY large external keyboards. For a complete list of available keyboards, see "Accessories for the CV30" on page 94. CV30 Fixed Mount Computer With Windows CE User's Manual 13 - Intermec CV30 | CV30 Fixed Mount Computer With Windows CE User's Manual - Page 24
) connectors on the CV30 if you order the appropriate RS-232 cable. Supported Scanners and Cables Scanner 1470 1400, 1551E, 1553, ASCII 1800 SR60 Slot scanner Required Cable Ships with the scanner 3-604032-05 3-364032-02 321-642-002 N/A 14 CV30 Fixed Mount Computer With Windows CE User's Manual - Intermec CV30 | CV30 Fixed Mount Computer With Windows CE User's Manual - Page 25
Configuring the CV30 Using Intermec Settings" on page 28. 4 Go to Data Collection > Tethered Scanner (COM1) or (COM3). 5 Make sure Enable scanner port is checked. 6 Go to Scanner Settings > Scanner model and select your scanner from the list. CV30 Fixed Mount Computer With Windows CE User's Manual - Intermec CV30 | CV30 Fixed Mount Computer With Windows CE User's Manual - Page 26
the CV30 Fixed Mount Computer If you are configuring an ASCII scanner, you need to select ASCII from the Scanner model list and then configure the scanner port settings to match the scanner after Intermec Settings refreshes. Note: If you are attaching a 1470 scanner, you need to configure it as - Intermec CV30 | CV30 Fixed Mount Computer With Windows CE User's Manual - Page 27
.11 Antenna cable SD card 5 Push the SD card into the slot until it latches in place. 6 Reattach the antenna cable, replace the top cover, and attach it with the six screws you removed in Step 2. 7 Press Power to resume using the CV30. CV30 Fixed Mount Computer With Windows CE User's Manual 17 - Intermec CV30 | CV30 Fixed Mount Computer With Windows CE User's Manual - Page 28
Chapter 1 - Using the CV30 Fixed Mount Computer 18 CV30 Fixed Mount Computer With Windows CE User's Manual - Intermec CV30 | CV30 Fixed Mount Computer With Windows CE User's Manual - Page 29
2 Understanding Windows CE This chapter introduces Microsoft Windows CE. In this chapter you will find these sections: • Understanding Windows CE • Using Microsoft ActiveSync • Using Internet Explorer Mobile CV30 Fixed Mount Computer With Windows CE User's Manual 19 - Intermec CV30 | CV30 Fixed Mount Computer With Windows CE User's Manual - Page 30
Skills Learning to use the CV30 is easy. This section describes the basic concepts of using and customizing your CV30 Computer. Using the Desktop Screen When you turn on your CV30 for the first time each day, you see the Desktop Screen. 20 CV30 Fixed Mount Computer With Windows CE User's Manual - Intermec CV30 | CV30 Fixed Mount Computer With Windows CE User's Manual - Page 31
the program name. The following is a partial list of programs that are on your CV30, in the order they appear in the Panel icon. Use the taskbar to switch to programs and close screens. Windows CE Taskbar Using Pop-Up Menus Use pop-up menus CV30 Fixed Mount Computer With Windows CE User's Manual 21 - Intermec CV30 | CV30 Fixed Mount Computer With Windows CE User's Manual - Page 32
. On the soft keyboard that displays, tap the keys with your stylus. The soft keyboard works just like a standard qwerty keyboard. Here are a few tips for using the soft keyboard: • To type lowercase letters, tap the keys with the stylus. 22 CV30 Fixed Mount Computer With Windows CE User's Manual - Intermec CV30 | CV30 Fixed Mount Computer With Windows CE User's Manual - Page 33
. Using Transcriber With Transcriber, you can write anywhere on the screen using the stylus just as you would on paper. You can CV30 and organize these files into folders. To open Windows Explorer • Select Start > Programs > Windows Explorer. CV30 Fixed Mount Computer With Windows CE User's Manual - Intermec CV30 | CV30 Fixed Mount Computer With Windows CE User's Manual - Page 34
PC with a USB cable. 2 Install ActiveSync on your desktop. ActiveSync is available from the Microsoft web site. ActiveSync is already installed on the CV30. After installation, ActiveSync automatically launches the ActiveSync Setup Wizard. 24 CV30 Fixed Mount Computer With Windows CE User's Manual - Intermec CV30 | CV30 Fixed Mount Computer With Windows CE User's Manual - Page 35
the screens of the ActiveSync to complete the synchronization process. The wizard helps you connect to the CV30, default page that appears when you open Internet Explorer contains links to the Intermec we site and to the Windows CE web site. CV30 Fixed Mount Computer With Windows CE User's Manual - Intermec CV30 | CV30 Fixed Mount Computer With Windows CE User's Manual - Page 36
Chapter 2 - Understanding Windows CE Default Internet Explorer Web Page 26 CV30 Fixed Mount Computer With Windows CE User's Manual - Intermec CV30 | CV30 Fixed Mount Computer With Windows CE User's Manual - Page 37
this chapter, you will find these sections: • Configuring the CV30 Operating Parameters • Setting Up Ethernet Communications • Setting Up Bluetooth Communications • Setting Up 802.11 Radio Communications • Configuring Security on the CV30 CV30 Fixed Mount Computer With Windows CE User's Manual 27 - Intermec CV30 | CV30 Fixed Mount Computer With Windows CE User's Manual - Page 38
> Intermec Settings. For detailed information on the commands available in Intermec Settings, see the Intermec Computer Command Reference Manual (P/N 073529). The Intermec Computer Command Reference Manual is available from the Intermec web site. 28 CV30 Fixed Mount Computer With Windows CE User - Intermec CV30 | CV30 Fixed Mount Computer With Windows CE User's Manual - Page 39
the CV30 in an Ethernet network 1 Go to Start > Settings > Control Panel > Intermec Settings. 2 If you have a DHCP server, enable DHCP. or If you do not have a DHCP server, set these parameters: • IP address • Subnet mask • Default router CV30 Fixed Mount Computer With Windows CE User's Manual 29 - Intermec CV30 | CV30 Fixed Mount Computer With Windows CE User's Manual - Page 40
software, see the Bluetooth Resource Kit and the Wireless Printing Development Guide in the Intermec Developer Library (IDL). You can download this resource kit from the Intermec Developer Library web site at www.intermec.com/idl. 30 CV30 Fixed Mount Computer With Windows CE User's Manual - Intermec CV30 | CV30 Fixed Mount Computer With Windows CE User's Manual - Page 41
the CV30 1 Select Start > Settings >Control Panel > Intermec Settings. 2 Select Communications > Bluetooth. 3 If you want to allow incoming connections from wireless scanners, you must enable these two parameters: • Discoverable • Connectable CV30 Fixed Mount Computer With Windows CE User's Manual - Intermec CV30 | CV30 Fixed Mount Computer With Windows CE User's Manual - Page 42
to the next screen. 4 Select how you would like to set your scanner (the default is Search) and then tap Next. The CV30 starts discovering scanners. 5 Select the scanner you want to connect to from the Devices list and then tap Next. 32 CV30 Fixed Mount Computer With Windows CE User's Manual - Intermec CV30 | CV30 Fixed Mount Computer With Windows CE User's Manual - Page 43
Chapter 3 - Configuring the CV30 6 When prompted to add the scanner to your device list, tap Yes. 7 In the Passcode text box, enter the passcode for your scanner. The default passcode for Intermec Bluetooth scanners is 0000. 8 Tap Next. The CV30 connects to the scanner and displays the remote device - Intermec CV30 | CV30 Fixed Mount Computer With Windows CE User's Manual - Page 44
three ways to select the current wireless printer: • Discovering the printer using Bluetooth device discovery • Manually entering the printer's Bluetooth device address • Choosing the printer from a list of previously discovered printers 34 CV30 Fixed Mount Computer With Windows CE User's Manual - Intermec CV30 | CV30 Fixed Mount Computer With Windows CE User's Manual - Page 45
the printer is turned on and discovery is enabled, and then repeat Steps 1 through 3. 4 Tap Print Test Page. The printer prints out the test page. CV30 Fixed Mount Computer With Windows CE User's Manual 35 - Intermec CV30 | CV30 Fixed Mount Computer With Windows CE User's Manual - Page 46
to the next screen where you enter the device address. 3 Type the address of the printer in the Enter Device Address text box and then tap OK. The keyword -unknown- appears in the Device Name field in the Current Wireless Printer box. 36 CV30 Fixed Mount Computer With Windows CE User's Manual - Intermec CV30 | CV30 Fixed Mount Computer With Windows CE User's Manual - Page 47
Configuring the CV30 The name of the printer is not sent to the CV30 when you manually enter the printer address. 4 Tap Print Test Page. The printer prints out the test page. To choose the printer from a list bar to adjust the setting. CV30 Fixed Mount Computer With Windows CE User's Manual 37 - Intermec CV30 | CV30 Fixed Mount Computer With Windows CE User's Manual - Page 48
the CV30 is talking to the network and that the network can see the CV30. The easiest way to configure the network parameters on the CV30 is to use Intermec Settings. For help, see "Configuring the CV30 Using Intermec Settings" on page 28. 38 CV30 Fixed Mount Computer With Windows CE User's Manual - Intermec CV30 | CV30 Fixed Mount Computer With Windows CE User's Manual - Page 49
select Status > Wireless. The Wireless Status screen appears and checks the connection. You can also use iConnect to configure the network settings if you need to change anything by tapping Tools > Wireless Settings from the iConnect menu. CV30 Fixed Mount Computer With Windows CE User's Manual 39 - Intermec CV30 | CV30 Fixed Mount Computer With Windows CE User's Manual - Page 50
configure security on your wireless CV30. If you choose not to use security, see "Disabling Security" on page 65. Intermec Service Set Identifier) to allow multiple networks to exist in the same area without infringing on each other. 40 CV30 Fixed Mount Computer With Windows CE User's Manual - Intermec CV30 | CV30 Fixed Mount Computer With Windows CE User's Manual - Page 51
supports WPA. • a CV30 with the 802.11b/g radio and the 802.1x/WPA security option. The CV30 also supports Wi-Fi Protected Access 2 (WPA2) if you are using Funk security. WPA2 uses an Advanced Encryption Standard (AES) for data encryption. CV30 Fixed Mount Computer With Windows CE User's Manual - Intermec CV30 | CV30 Fixed Mount Computer With Windows CE User's Manual - Page 52
Chapter 3 - Configuring the CV30 WPA2 runs in 802.1x (Enterprise) mode or PSK (Pre-Shared Key) mode: • use 802.1x security, you need: • an access point with an 802.11b/g radio. • a CV30 with an 802.11b/g radio. • an authentication server. 42 CV30 Fixed Mount Computer With Windows CE User's Manual - Intermec CV30 | CV30 Fixed Mount Computer With Windows CE User's Manual - Page 53
Intermec Settings" on page 44 or "Configuring Funk Security Using the Profile Wizard" on page 49. If you want to use Microsoft security, you need to select it as your security choice. For help, see "Configuring Microsoft Security" on page 59. CV30 Fixed Mount Computer With Windows CE User's Manual - Intermec CV30 | CV30 Fixed Mount Computer With Windows CE User's Manual - Page 54
Chapter 3 - Configuring the CV30 Configuring Funk Security Using Intermec Settings You can define up to four profiles for Funk security. Different profiles let your CV30 communicate in and choosing a profile from the drop-down list. 44 CV30 Fixed Mount Computer With Windows CE User's Manual - Intermec CV30 | CV30 Fixed Mount Computer With Windows CE User's Manual - Page 55
and press Enter. Encryption automatically defaults to TKIP if you are using WPA. Encryption automatically defaults to AES if you are using WPA2. 5 For 8021x, choose TTLS, PEAP, EAP-FAST, or TLS and press Enter. If you choose TTLS or PEAP: CV30 Fixed Mount Computer With Windows CE User's Manual 45 - Intermec CV30 | CV30 Fixed Mount Computer With Windows CE User's Manual - Page 56
Chapter 3 - Configuring the CV30 a For Prompt for Credentials, choose Enter credentials now. Note: You can use Prompt for credentials to troubleshoot your connection to the network if you have problems. By choosing Enter credentials now, you are storing the user name and password on the device so - Intermec CV30 | CV30 Fixed Mount Computer With Windows CE User's Manual - Page 57
Save your settings. Configuring 802.1x Security With Funk Security 1 Open Intermec Settings. 2 Make sure you have configured the communications parameters and or TLS. If you choose TTLS or PEAP: a Select User name and type your user name. CV30 Fixed Mount Computer With Windows CE User's Manual 47 - Intermec CV30 | CV30 Fixed Mount Computer With Windows CE User's Manual - Page 58
Chapter 3 - Configuring the CV30 b Select Password prompt, and choose Enter password now. Note: You can use Prompt for password to troubleshoot your connection to the network if you have problems. c Select User Password and type a user password. d For Validate Server Certificate, choose Enabled. If - Intermec CV30 | CV30 Fixed Mount Computer With Windows CE User's Manual - Page 59
or passwords on different networks. To select a profile for Funk security 1 Select Start > Settings > Control Panel > Wireless Network. or Tap the iConnect icon ( )in the lower right corner of the screen and select Tools > Wireless Settings. CV30 Fixed Mount Computer With Windows CE User's Manual - Intermec CV30 | CV30 Fixed Mount Computer With Windows CE User's Manual - Page 60
Chapter 3 - Configuring the CV30 The Profile Wizard appears on the screen. 2 From the Profile list, select the profile you want to configure. 3 Tap Edit Selected Profile. 4 (Optional) Give your . 6 Enter the SSID (Network Name). 7 Tap OK. 50 CV30 Fixed Mount Computer With Windows CE User's Manual - Intermec CV30 | CV30 Fixed Mount Computer With Windows CE User's Manual - Page 61
Hex keys must be preceded by 0x and contain 5 or 13 hex pairs. 7 Tap OK. Configuring WPA-PSK Security With Profile Wizard 1 In the Profile Wizard, select the Security page. 2 For 8021x Security, choose None. 3 For Association, choose WPA. CV30 Fixed Mount Computer With Windows CE User's Manual 51 - Intermec CV30 | CV30 Fixed Mount Computer With Windows CE User's Manual - Page 62
secure authentication against Windows domains and directory services. It is comparable to EAP-TTLS, though not as flexible. To configure PEAP security 1 In the Profile Wizard, select the Security page. 2 For 8021x Security, choose PEAP. 52 CV30 Fixed Mount Computer With Windows CE User's Manual - Intermec CV30 | CV30 Fixed Mount Computer With Windows CE User's Manual - Page 63
the Inner PEAP Authentication list, choose EAP/MSCHAP- user and authentication server to have certificates for mutual authentication. To configure TLS security 1 In the Profile Wizard, select the Security page. 2 For 8021x Security, choose TLS. CV30 Fixed Mount Computer With Windows CE User's Manual - Intermec CV30 | CV30 Fixed Mount Computer With Windows CE User's Manual - Page 64
using TLS. 10 Tap Root CA, select a root certificate, and then tap OK. 11 Enter the Common Names of trusted servers. 12 Tap OK. 54 CV30 Fixed Mount Computer With Windows CE User's Manual - Intermec CV30 | CV30 Fixed Mount Computer With Windows CE User's Manual - Page 65
Chapter 3 - Configuring the CV30 Configuring TTLS Security With Profile Wizard TTLS (Technical Translation and Localization Services) protocol provides authentication like EAP-TLS but does not require user certificates. User authentication is done using a password or other credentials that are - Intermec CV30 | CV30 Fixed Mount Computer With Windows CE User's Manual - Page 66
protocol form the Inner EAP list. 12 Check Validate Server Certificate Configuring LEAP Security With Profile Wizard LEAP is the Cisco Lightweight version of EAP. To configure LEAP security 1 In the Profile Wizard, select the Security page. 56 CV30 Fixed Mount Computer With Windows CE User's Manual - Intermec CV30 | CV30 Fixed Mount Computer With Windows CE User's Manual - Page 67
Chapter 3 - Configuring the CV30 2 For 8021x password to have the user enter this password each time to access the protocol, or select Use following password to use the protocol without entering a password each time you use the CV30. 8 Tap OK. CV30 Fixed Mount Computer With Windows CE User's Manual - Intermec CV30 | CV30 Fixed Mount Computer With Windows CE User's Manual - Page 68
time to access the protocol, or select Use following password to use the protocol without entering a password each time you use the CV30. 8 Tap Additional Settings to set options for PAC management and assign an anonymous EAP-FAST name. 58 CV30 Fixed Mount Computer With Windows CE User's Manual - Intermec CV30 | CV30 Fixed Mount Computer With Windows CE User's Manual - Page 69
to save your settings and reset your computer for your change to take effect. To select Microsoft security as your security choice 1 Select Start > Settings > Control Panel > Intermec Settings. The Intermec Settings application appears. CV30 Fixed Mount Computer With Windows CE User's Manual 59 - Intermec CV30 | CV30 Fixed Mount Computer With Windows CE User's Manual - Page 70
. The following information is for setting up a new connection. To configure Microsoft security for a new connection 1 In the radio network connection dialog box, double-tap Add New. The Wireless Network Properties dialog box appears. 60 CV30 Fixed Mount Computer With Windows CE User's Manual - Intermec CV30 | CV30 Fixed Mount Computer With Windows CE User's Manual - Page 71
Chapter 3 - Configuring the CV30 2 Enter a network name. If the network was detected, the network name is entered and cannot be the appropriate Key index. Follow these steps to enable WPA authentication: a Set Authentication to WPA. CV30 Fixed Mount Computer With Windows CE User's Manual 61 - Intermec CV30 | CV30 Fixed Mount Computer With Windows CE User's Manual - Page 72
you can use the Import Root Certificates and Import User Certificates functions. Note: For certificates to be valid, the CV30 must be set to the correct date and time. After cold booting the CV30, you may need to correct the date and time. 62 CV30 Fixed Mount Computer With Windows CE User's Manual - Intermec CV30 | CV30 Fixed Mount Computer With Windows CE User's Manual - Page 73
telling you that the root certificate has been imported. 7 Tap OK to close the Success message box. 8 Tap Import User Cert. A dialog box appears telling you that the user certificate and the associated key were successfully imported. CV30 Fixed Mount Computer With Windows CE User's Manual 63 - Intermec CV30 | CV30 Fixed Mount Computer With Windows CE User's Manual - Page 74
key files in \Temp\User are imported into the My Certificates certificate store. c The Import Root Certificates and the Import User Certificates settings are changed from True to False. 8 Configure your CV30 for WEP, WPA, or WPA2 security. 64 CV30 Fixed Mount Computer With Windows CE User's Manual - Intermec CV30 | CV30 Fixed Mount Computer With Windows CE User's Manual - Page 75
in your network. To disable security 1 Open Intermec Settings. 2 Choose Communications > 802.11 Radio > Microsoft Security. 3 For Network Authentication, choose Open. 4 For Data Encryption, choose Disabled. 5 Close Intermec Settings. CV30 Fixed Mount Computer With Windows CE User's Manual 65 - Intermec CV30 | CV30 Fixed Mount Computer With Windows CE User's Manual - Page 76
Chapter 3 - Configuring the CV30 66 CV30 Fixed Mount Computer With Windows CE User's Manual - Intermec CV30 | CV30 Fixed Mount Computer With Windows CE User's Manual - Page 77
existing Trakker Antares applications for use on the CV30. You will also find information on installing CV30 • Installing Applications on the CV30 • Freeing Up Virtual Memory for Applications • Launching an Application Automatically CV30 Fixed Mount Computer With Windows CE User's Manual - Intermec CV30 | CV30 Fixed Mount Computer With Windows CE User's Manual - Page 78
• 360 MB hard drive space for minimum installation (720 MB for complete) • CD-ROM drive compatible with multimedia PC specification • VGA or higher-resolution monitor (Super VGA recommended) • Microsoft Mouse or compatible pointing device 68 CV30 Fixed Mount Computer With Windows CE User's Manual - Intermec CV30 | CV30 Fixed Mount Computer With Windows CE User's Manual - Page 79
2000/XP • Microsoft Visual Studio 2005 • Antares Migration Resource Kit (from IDL 2.4 or later) The resource kit is part of the Intermec Developer's Library (IDL), which you can download from the Intermec web site at www.intermec.com/idl. CV30 Fixed Mount Computer With Windows CE User's Manual 69 - Intermec CV30 | CV30 Fixed Mount Computer With Windows CE User's Manual - Page 80
perform clean boot. Since the flash in the system has a limited number of write cycles, do not use the Flash File Store for excessive writing. There are several ways you can install files and applications on the CV30: • SmartSystems server • ActiveSync • SD card • FTP server 70 CV30 Fixed Mount - Intermec CV30 | CV30 Fixed Mount Computer With Windows CE User's Manual - Page 81
the CV30 to a PC using a USB cable. You may have to disconnect and then connect the cable to "wake" the connection. 2 Wait for a "Connected" message to appear in the Microsoft ActiveSync application to signal a connection to the CV30. CV30 Fixed Mount Computer With Windows CE User's Manual 71 - Intermec CV30 | CV30 Fixed Mount Computer With Windows CE User's Manual - Page 82
into the desired folder. 7 When you are done copying files, reset the CV30. 8 After the CV30 is done resetting, tap Start > Programs > Windows Explorer to locate the newly your CV30, this is the best place for you to install applications. 72 CV30 Fixed Mount Computer With Windows CE User's Manual - Intermec CV30 | CV30 Fixed Mount Computer With Windows CE User's Manual - Page 83
the CV30 updates or manually initiate an update using the Avalanche Administrative Console. For more information on using Wavelink Avalanche, contact your local Intermec representative or visit the Wavelink web site at www.wavelink.com. CV30 Fixed Mount Computer With Windows CE User's Manual 73 - Intermec CV30 | CV30 Fixed Mount Computer With Windows CE User's Manual - Page 84
Intermec service representative for information about each software feature before making changes. To free up virtual memory, you select items from the InstallSelect list that you do not want to install. When you perform a clean boot box. 74 CV30 Fixed Mount Computer With Windows CE User's Manual - Intermec CV30 | CV30 Fixed Mount Computer With Windows CE User's Manual - Page 85
a clean boot. 6 Click Apply to initiate the clean boot and install only the files that are selected. 7 Click Yes to continue with the clean boot. The CV30 performs a clean boot and restarts with all of the checked components installed. CV30 Fixed Mount Computer With Windows CE User's Manual 75 - Intermec CV30 | CV30 Fixed Mount Computer With Windows CE User's Manual - Page 86
, you cannot use SmartSystems or Intermec Settings locally on the device. Provides the Intermec DHCP client application. Provides the Intermec Bluetooth application support. Enables the client to the Wavelink Device Management solution. 76 CV30 Fixed Mount Computer With Windows CE User's Manual - Intermec CV30 | CV30 Fixed Mount Computer With Windows CE User's Manual - Page 87
reset on the CV30: • Make sure your CAB file places a shortcut to your application in the \Windows\StartUp folder. • Configure the AutoRun program to launch your application. The CV30 . AutoRun only supports one set of quotes per command. CV30 Fixed Mount Computer With Windows CE User's Manual 77 - Intermec CV30 | CV30 Fixed Mount Computer With Windows CE User's Manual - Page 88
Chapter 4 - Developing and Installing Applications 78 CV30 Fixed Mount Computer With Windows CE User's Manual - Intermec CV30 | CV30 Fixed Mount Computer With Windows CE User's Manual - Page 89
You will also find information on routine maintenance. This chapter contains these sections: • Calling Product Support • Troubleshooting the CV30 • Upgrading the CV30 • Troubleshooting the Boot Process (Clean Booting) • Cleaning the Screen CV30 Fixed Mount Computer With Windows CE User's Manual 79 - Intermec CV30 | CV30 Fixed Mount Computer With Windows CE User's Manual - Page 90
application. To find your operating system version • Start> Programs > Internet Explorer An Intermec page opens and displays the OS version loaded on the CV30. To find your configuration number • Look at the label on the back of the CV30. 80 CV30 Fixed Mount Computer With Windows CE User's Manual - Intermec CV30 | CV30 Fixed Mount Computer With Windows CE User's Manual - Page 91
the CV30" on page 86. • If the CV30 will not reset or boot, contact your local Intermec service representative for help. You tap the screen and nothing Align your screen. For help, see "Aligning the Touch Screen" happens. on page 7. CV30 Fixed Mount Computer With Windows CE User's Manual 81 - Intermec CV30 | CV30 Fixed Mount Computer With Windows CE User's Manual - Page 92
Troubleshooting and Maintaining the CV30 Problems While Configuring Security Problem Solution You are setting up multiple access The CV30 incorrect" then save your changes. after you clean boot the CV30. You are using static WEP keys Make CV30 Fixed Mount Computer With Windows CE User's Manual - Intermec CV30 | CV30 Fixed Mount Computer With Windows CE User's Manual - Page 93
computer. Check with your network computer is not receiving any data administrator or see the user's manual for the Intermec from the CV30. Application Server. In a TCP/IP network, there may be a problem with the connection between the access point and the host computer. Check with your network - Intermec CV30 | CV30 Fixed Mount Computer With Windows CE User's Manual - Page 94
not read The scanner window may be dirty. Clean the window with a the bar code labels quickly, solution of ammonia and water. Wipe dry. Do not allow abrasive or scanning beam seems to material to touch the window. be faint or obscured. 84 CV30 Fixed Mount Computer With Windows CE User's Manual - Intermec CV30 | CV30 Fixed Mount Computer With Windows CE User's Manual - Page 95
change the configuration. The configuration settings Try disabling and then enabling the scanner port state to in Intermec Settings do not synchronize the CV30 settings with the scanner. match the settings on your 1551E or 1553 scanner. CV30 Fixed Mount Computer With Windows CE User's Manual 85 - Intermec CV30 | CV30 Fixed Mount Computer With Windows CE User's Manual - Page 96
your desktop computer. To download the upgrade files 1 Start your web browser and go to the Intermec web site at www.intermec.com. 2 Go to Service & Support > Downloads. 3 Select Computers: CV30 Fixed Mount from the list. 4 Select the download you need. Make sure the download you select is for the - Intermec CV30 | CV30 Fixed Mount Computer With Windows CE User's Manual - Page 97
CV30. Note: Make sure the CV30 has completely loaded all of the upgrade files before you remove the SD card or reset the computer. 7 Perform a clean boot on the CV30. For help, see "Troubleshooting the Boot Process (Clean Booting)" on page 89. CV30 Fixed Mount Computer With Windows CE User's Manual - Intermec CV30 | CV30 Fixed Mount Computer With Windows CE User's Manual - Page 98
SmartSystems Foundation. To download SmartSystems Foundation, go to www.intermec.com/SmartSystems. • the device upgrade .exe file. This file is available from the Intermec web site at www.intermec.com. Go to Service & Support > Downloads. 88 CV30 Fixed Mount Computer With Windows CE User's Manual - Intermec CV30 | CV30 Fixed Mount Computer With Windows CE User's Manual - Page 99
you can perform diagnostic tests to determine which elements of the normal boot process are causing problems. The clean boot process will erase the memory in the CV30, inluding all applications and data files found in the object store. CV30 Fixed Mount Computer With Windows CE User's Manual 89 - Intermec CV30 | CV30 Fixed Mount Computer With Windows CE User's Manual - Page 100
. 5 Calibrate the screen and then tap anywhere on the screen to exit the application. The CV30 continues with the boot process. 6 Reload any custom applications that may have been erased during the clean boot and reset the time and date. 90 CV30 Fixed Mount Computer With Windows CE User's Manual - Intermec CV30 | CV30 Fixed Mount Computer With Windows CE User's Manual - Page 101
. To clean the screen 1 Disconnect the CV30 from the power supply. 2 Dip a clean towel or rag in the ammonia solution and wring out the excess. Wipe off the screen. Do not allow any abrasive material to touch these surfaces. 3 Wipe dry. CV30 Fixed Mount Computer With Windows CE User's Manual 91 - Intermec CV30 | CV30 Fixed Mount Computer With Windows CE User's Manual - Page 102
Chapter 5 - Troubleshooting and Maintaining the CV30 92 CV30 Fixed Mount Computer With Windows CE User's Manual - Intermec CV30 | CV30 Fixed Mount Computer With Windows CE User's Manual - Page 103
A Specifications CV30 Fixed Mount Computer With Windows CE User's Manual 93 - Intermec CV30 | CV30 Fixed Mount Computer With Windows CE User's Manual - Page 104
(sold and ordered separately) with the CV30. To order accessories, contact your local Intermec sales representative. 2455/CV30 Adapter Plate (P/N VE011-2011) Use this adapter plate to mount the CV30 in an existing 2455 installation. 94 CV30 Fixed Mount Computer With Windows CE User's Manual - Intermec CV30 | CV30 Fixed Mount Computer With Windows CE User's Manual - Page 105
A - Specifications CV30 Cable Protector (P/N VE011-2013) Use the cable protector to keep your cables from getting disconnected from the CV30. CV30 Compact Keyboard (P/N VE011-2002) Use the compact keyboard to save space or to have a keyboard that you can attach directly to the CV30. CV30 Compact - Intermec CV30 | CV30 Fixed Mount Computer With Windows CE User's Manual - Page 106
Supply (P/N 851-082-004) Use the universal power supply to supply AC power to the CV30. You need to purchase a country-specific power cord separately. The universal power supply does not provide power for the internal touch screen heater. 96 CV30 Fixed Mount Computer With Windows CE User's Manual - Intermec CV30 | CV30 Fixed Mount Computer With Windows CE User's Manual - Page 107
I Index CV30 Fixed Mount Computer With Windows CE User's Manual 97 - Intermec CV30 | CV30 Fixed Mount Computer With Windows CE User's Manual - Page 108
Index Numerics 1470 scanner, connecting, 16 2455/CV30 adapter plate accessory, described, 94 802.11 b/g radio, setting up communications, 38 802.1x security overview, 42 troubleshooting, 83 A AC power supply, 8 accessories, described, 94 Active Directory, using to issue certificates, 63 ActiveSync - Intermec CV30 | CV30 Fixed Mount Computer With Windows CE User's Manual - Page 109
, 89 cleaning the screen, 91 cold booting with the Reset button, 10 COM1 connector Index described, 4 illustrated, 4 COM3 connector described, 4 illustrated, 4 communications, setting up 802.11 radio, 38 compact keyboard, 13 accessory described, 95 mounting kit accessory described, 95 configuration - Intermec CV30 | CV30 Fixed Mount Computer With Windows CE User's Manual - Page 110
CV30 accessories, 94 buttons, understanding, 3 clean booting, 89 connector descriptions, 4 customizing, 24 described, 2 features, 2 locked up, troubleshooting, 81 not connected to network, troubleshooting, 83 resetting, 9 D Data Collection & Intermec Settings, InstallSelect component, 76 DC/DC power - Intermec CV30 | CV30 Fixed Mount Computer With Windows CE User's Manual - Page 111
to configure CV30, 28 using to connect a tethered scanner, 15 Index Intermec Value Add (IVA) functionality, 86 internal touch screen heater, 8 Internet Explorer default web page, 26 using, 25 using for web-based applications, 69 K keyboard compact, 13 accessory, described, 95 mounting kit accessory - Intermec CV30 | CV30 Fixed Mount Computer With Windows CE User's Manual - Page 112
to configure WPA-PSK security, 51 programs accessing, 21 list of available, 21 protector, screen accessory, 95 PSK mode, defined, 41 Q QWERTY external keyboard accessories, described, 96 QWERTY keyboard illustrated, 14 installing, 13 102 CV30 Fixed Mount Computer With Windows CE User's Manual - Intermec CV30 | CV30 Fixed Mount Computer With Windows CE User's Manual - Page 113
the Reset button, 10 resource kits, part of IDL, 68 S safety information, vii scanner cable accessories, 96 connecting, 14 connecting with Bluetooth association label, 32 supported models and cables, 14 troubleshooting, 84 wireless, configuring, 31 wizard, Bluetooth, 32 screen cleaning, 91 protector - Intermec CV30 | CV30 Fixed Mount Computer With Windows CE User's Manual - Page 114
, 82 boot process, 89 operating the CV30, 81 scanning with connected scanner, 84 WEP security, 82 wireless communications, 83 TTLS security, configuring, 55 turn off power, configuring, 5 U UDP Plus configuring network parameters, 39 troubleshooting, 83 Universal Power Supply (UPS) accessory - Intermec CV30 | CV30 Fixed Mount Computer With Windows CE User's Manual - Page 115
, 39 configuring, 38 troubleshooting, 83 wireless printing applet defined, 33 Index icon illustrated, 35 choosing the printer from a list, 37 configuring, 33 current wireless printer, selecting, 34 Development Guide, 30 manually entering printer address, 36 wireless scanner configuring CV30 to - Intermec CV30 | CV30 Fixed Mount Computer With Windows CE User's Manual - Page 116
Index 106 CV30 Fixed Mount Computer With Windows CE User's Manual - Intermec CV30 | CV30 Fixed Mount Computer With Windows CE User's Manual - Page 117
- Intermec CV30 | CV30 Fixed Mount Computer With Windows CE User's Manual - Page 118
Worldwide Headquarters 6001 36th Avenue West Everett, Washington 98203 U.S.A. tel 425.348.2600 fax 425.355.9551 www.intermec.com CV30 Fixed Mount Computer With Windows CE User's Manual *935-012-001* P/N 935-012-001
-
 1
1 -
 2
2 -
 3
3 -
 4
4 -
 5
5 -
 6
6 -
 7
7 -
8
-
9
-
10
-
11
-
12
-
13
-
14
-
15
-
16
-
17
-
18
-
19
-
20
-
21
-
22
-
23
-
24
-
25
-
26
-
27
-
28
-
29
-
30
-
31
-
32
-
33
-
34
-
35
-
36
-
37
-
38
-
39
-
40
-
41
-
42
-
43
-
44
-
45
-
46
-
47
-
48
-
49
-
50
-
51
-
52
-
53
-
54
-
55
-
56
-
57
-
58
-
59
-
60
-
61
-
62
-
63
-
64
-
65
-
66
-
67
-
68
-
69
-
70
-
71
-
72
-
73
-
74
-
75
-
76
-
77
-
78
-
79
-
80
-
81
-
82
-
83
-
84
-
85
-
86
-
87
-
88
-
89
-
90
-
91
-
92
-
93
-
94
-
95
-
96
-
97
-
98
-
99
-
100
-
101
-
102
-
103
-
104
-
105
-
106
-
107
-
108
-
109
-
110
-
111
-
112
-
113
-
114
-
115
-
116
-
117
-
118
 |
 |
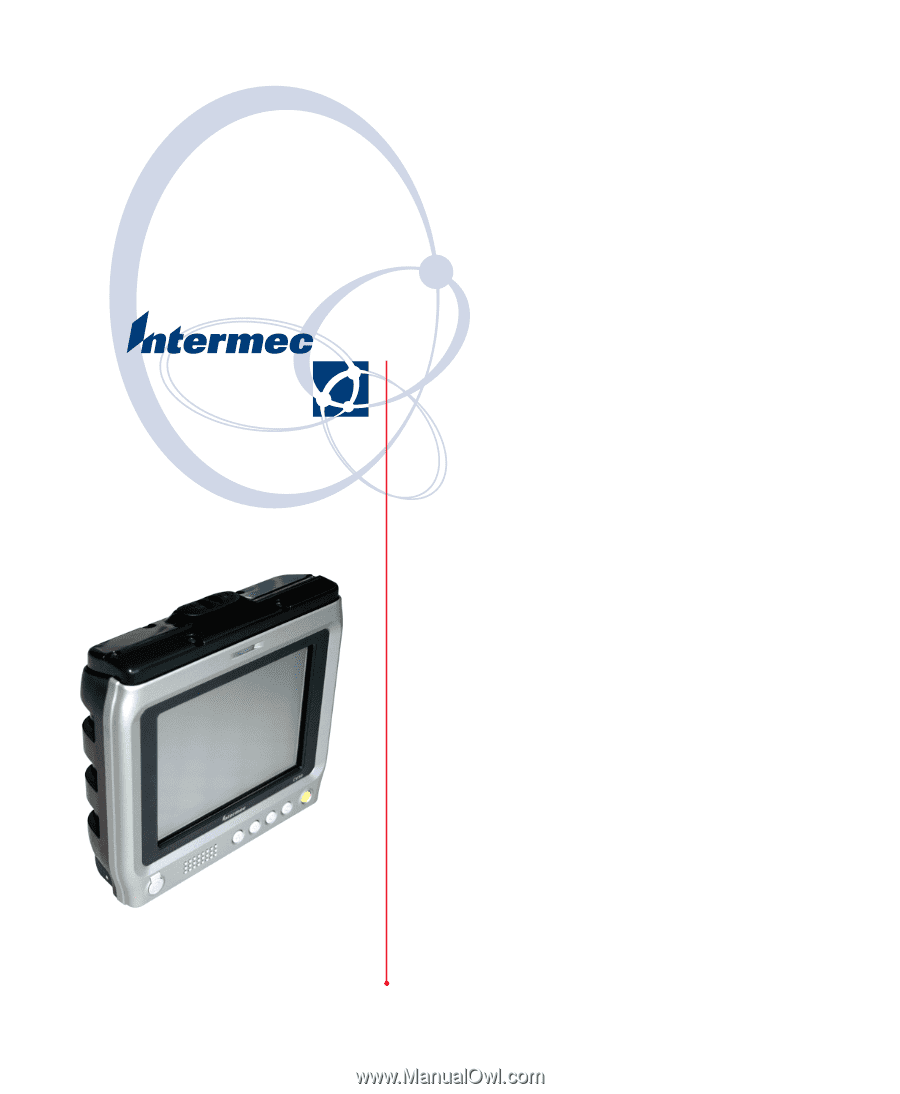
CV30 Fixed Mount
Computer With
Windows CE
User’s Manual