Image Fitness 10.6 Treadmill English Manual - Page 11
Manual, Operation
 |
View all Image Fitness 10.6 Treadmill manuals
Add to My Manuals
Save this manual to your list of manuals |
Page 11 highlights
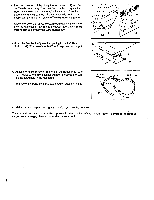
MANUAL MODE OPERATION HOW TO CONTROL THE SPEED When the power is turned on, the console will be in the manual mode. For your safety, the walking belt will be stationary. The speed range of the treadmill is 0.5 to 10 miles V . DIMAS! SKID per hour. The speed is con- trolled with the INCREASE SPEED and DECREASE SPEED buttons. Each time one of the buttons is pressed, the speed will change by 0.1 mph. The buttons can be held down to change the speed rapidly. heart-shaped indicator beside the PULSE display will flash each time your heart beats, the NO PULSE DETECTED indicator will darken, and your pulse will be shown. Note: Because your pulse constantly changes, the pulse sensor will sample and average your pulse every few seconds. It may take up to ten seconds before an accurate pulse is shown. If your pulse is not shown, see GUIDELINES FOR OBTAINING ACCURATE PULSE READINGS on page 7. HOW TO USE THE CALORIES DISPLAY For the CALORIES display to be accurate, your age and weight must be entered into the console. If you have not entered your age and weight, see HOW TO ENTER YOUR AGE AND WEIGHT on page 10. The CALORIES display will show the approximate number of calories you have burned. To find the number of fat calories you have burned (see BURNING FAT on page 22), preps the FAT button N./LSE 111 CALORIES 8 1-111 0 0 Li An• ) ." 3."ff An6 ) P,i- 34, (5) tOZET.111301Y LOW t> I> ILINI43 FAT 4 4P63H .4.666 4.5 6.5 4.2 SC 3.9 7.5 3.6 70 3.3 6.5 30 6.0 2.7 5.5 beside the CALO- RIES display. The approximate number of fat calories you have bumed will be shown for three seconds. Press the INCREASE SPEED button until the walking belt is moving at slow speed. Hold the handrails and -A HOW TO USE THE TIME DISPLAY step carefully onto the walking belt. Change the speed of the walking belt as desired by pressing the INCREASE SPEED and DECREASE SPEED buttons. The TIME display will show how long the walking belt has been moving. To stop the walking belt, press the STOP button. If desired, a time HOW TO CONTROL THE INCLINE The incline range of the treadmill is 1% to 12%. The Ramos whoa: 4, ceatemteatwe incline is con- trolled with the INCREASE INCLINE and DECREASE INCLINE buttons. Each time one of the buttons is pressed, the incline will change by 0.5%. The buttons can be held down to change the incline rapidly. goal can be set. First, stop the walking belt. Press the • TIME SET buttons to set the length of 60 12 50 11 40 10 30 9 20 10 7 00 6 90 5 TIME 191308 9 0 AWL ocean 'S7 we= MY, 111110 time that you plan to exercise. Each time one of the buttons is pressed, the time goal will change by 10 seconds. If one of the buttons is held down, the time goal will change in increments of 1 minute. As you exercise, the time will be counted down. When no time remains, the walking belt will slow to a stop. Note: The purpose of the SEG- MENT TIME button will be explained later. If the Note: After the INCLINE buttons are pressed, it will take a few seconds for the treadmill to reach the selected incline setting. Because the INCLINE display FITNESS TEST program is selected, the TIME display will be reset to zero. The display will be reset again when the program is completed. has two digits, the display will show 10% when the incline is set at either 10% or 10.5%, and 11% when HOW TO USE THE DISTANCE DISPLAY the incline is set at either 11% or 11.5%. The DISTANCE display will show the distance that HOW TO USE THE PULSE DISPLAY you have walked or run, in miles. Note: If the FITNESS TEST program is selected, the DISTANCE Put on the pulse sensor (see HOW TO USE THE display will be reset to zero. The display will be reset PULSE SENSOR on page 7). After a few seconds, the again when the program is completed. 11
-
 1
1 -
2
-
3
-
4
-
5
-
 6
6 -
 7
7 -
 8
8 -
 9
9 -
 10
10 -
 11
11 -
 12
12 -
 13
13 -
 14
14 -
 15
15 -
 16
16 -
17
-
18
-
19
-
20
-
21
-
22
-
23
-
24
-
25
-
26
-
27
 |
 |
