Image Fitness 10.6 Treadmill English Manual
Image Fitness 10.6 Treadmill Manual
 |
View all Image Fitness 10.6 Treadmill manuals
Add to My Manuals
Save this manual to your list of manuals |
Image Fitness 10.6 Treadmill manual content summary:
- Image Fitness 10.6 Treadmill | English Manual - Page 1
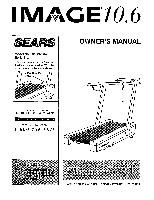
the space above. Serial Number Decal OWNER'S MANUAL 401 l > - Image Fitness 10.6 Treadmill | English Manual - Page 2
and PART LIST for future reference. FULL ONE YEAR WARRANTY - For one (1) year from the date of purchase, if failure occurs due to defect in material or workmanship in this SEARS TREADMILL EXERCISER, contact the nearest SEARS Service Center throughout the United States and SEARS will repair or - Image Fitness 10.6 Treadmill | English Manual - Page 3
and tighten ail parts of the treadmill every three months. 20. Always unplug the power cord before performing the maintenance and adjustment procedures describedin this manual. Servicingother than the procedures in this manual should be performed by an authorized service representative only. turned - Image Fitness 10.6 Treadmill | English Manual - Page 4
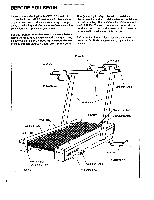
for selecting the IMAGES 10.6 treadmill. The sophisticated IMAGE 10.6 treadmill blends stateof-the-art technology with innovative design to let you enjoy a motivating and effective form of exercise in the convenience and privacy of your home. For your benefit, read this manual carefully before using - Image Fitness 10.6 Treadmill | English Manual - Page 5
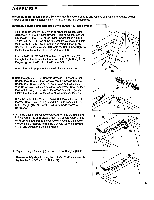
materials. Do not dispose of the packing materials until the treadmill is fully assembled. Assembly can be completed using the the Console Crossbar (6) near the Right Upright (15). Connect the Console Wire Harness (10) to the 2 Upright Wire Harness (12). The small latch on the Console Wire - Image Fitness 10.6 Treadmill | English Manual - Page 6
on pages 7 and 8. 7 Sensor Window Hole 93 or 107 a O0 0 0 14 8. Make sure that all parts are tightened before you use the treadmill. The use of all remaining parts will be explained in other sections of this manual. Note: To protect the floor or carpet from damage, place a mat under the - Image Fitness 10.6 Treadmill | English Manual - Page 7
HOW TO USE THE PULSE SENSOR The treadmill features a state-of-the-art cordless pulse sensor, specially designed for greater accuracy, comfort, and durability. Please read the following instructions before using the pulse sensor. HOW TO INSTALL BATTERIES The pulse sensor requires two "AAA" batteries - Image Fitness 10.6 Treadmill | English Manual - Page 8
, or the console may not pick up the rAy signal from the pulse sensor. 5. The sensor window should be cleaned weekly when the treadmill is used regularly. Moisten a cotton swab with water, and carefully wipe the sensor win- e dow. 6. Because your pulse constantly changes, the pulse sensor - Image Fitness 10.6 Treadmill | English Manual - Page 9
to a permanent ground such as a properly grounded outlet box cover. Whenever the adapter is used it must be held in place Your treadmill, like any other type of sophisticated electronic equipment, can be seriously damaged by sudden voltage changes in your home's power. Voltage surges, spikes - Image Fitness 10.6 Treadmill | English Manual - Page 10
In the manual mode, the speed and incline of the treadmill can be burning programs, each designed to guide you through a different type the console's memory. Carefully read these instructions before operating the console. Note: If flash three times. Note: If the key is in the console when the power - Image Fitness 10.6 Treadmill | English Manual - Page 11
HOW TO CONTROL THE SPEED When the power is turned on, the console will be in the manual mode. For your safety, the walking belt will be stationary. The speed range of the treadmill is 0.5 to 10 miles V . DIMAS! SKID per hour. The speed is con- trolled with the INCREASE SPEED and DECREASE - Image Fitness 10.6 Treadmill | English Manual - Page 12
ENTER YOUR AGE AND WEIGHT on page 10. In addition, the pulse sensor must six preset workout programs, each designed to guide you through a different type of workout treadmill during the program, press the INCLINE button. The INCLINE indicator will darken. (The incline can then be controlled manually - Image Fitness 10.6 Treadmill | English Manual - Page 13
12 TIME E /1/1-111-/1 utes, as shown in 11 0 0 •0 0 j the TIME display. 10 9 O TUE O SEGME1011ME The length of time a irg sEr can be changed, if 7 6 second column of indicators will begin to flash, and the treadmill will automatically adjust to tkie speed and/or incline setting(s) of - Image Fitness 10.6 Treadmill | English Manual - Page 14
weight into the console, see HOW TO ENTER YOUR AGE AND WEIGHT on page 10. If you have already entered your age and weight, simply press one of the to flash. The console will then change the speed and/or incline of the treadmill at any time to keep your pulse near the setting of the second segment. - Image Fitness 10.6 Treadmill | English Manual - Page 15
segment. If your pulse is not detected for one minute, the speed of the treadmill will automatically decrease by half. If your pulse is not detected for a second into the console, see HOW TO ENTER YOUR AGE AND WEIGHT on page 10. If you have already entered your age and weight, simply press one of - Image Fitness 10.6 Treadmill | English Manual - Page 16
AGE AND WEIGHT on page 10. If you have already entered sole will then be in the MANUAL CONTROL mode. HOW TO CREATE many times as desired. Follow the instructions below to create a custom program. - cally control the speed and incline of the treadmill dur- ing the program, and the speed range - Image Fitness 10.6 Treadmill | English Manual - Page 17
/1/141/7 set the length of 11 1.710 -0 0 10 time that you want 9 O TIME O SEGMENT TIME the the program for future workouts, follow the instructions below. HOW TO USE A CUSTOM WORKOUT auto- matically control the speedandincline of the treadmill The settings of the first segment will be - Image Fitness 10.6 Treadmill | English Manual - Page 18
flash, and the treadmill will automatically adjust key in a secure location. In addition, move the on/off switch to the "off position. (See the drawing near the bottom of page 10.) The length of time TIME the program will 12 111O.00 last can be adjust- 11 17.117.1•0 0 ed, if desired, with 10 - Image Fitness 10.6 Treadmill | English Manual - Page 19
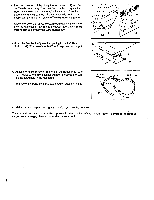
back by pressing the button again. To exit the information mode, remove the key. HOW TO ADJUST THE ANGLE OF THE CONSOLE In order for the console to THE CUSHION LEVEL The rear legs of the treadmill are designed to cushion the impact as you walk or run on the treadmill. The legs can be adjusted for a - Image Fitness 10.6 Treadmill | English Manual - Page 20
of the walking belt surges above the selected speed setting. Remove the key, wait for ten seconds, and then reinsert the key. If the error code appears again, call our toll-free HELPLINE. Do not operate the treadmill until the problem is corrected. d. Error code "E4" may appear in the SPEED display - Image Fitness 10.6 Treadmill | English Manual - Page 21
POWER CORD. Using the belt tool, turn the rear a roller adjustment bolt clockwise 1/4 of a turn. Plug in the power cord, insert the key and run the treadmill for a few minutes. Repeat until the walking belt is centered. Belt Tool b. If the walking belt has shifted to the right, first remove - Image Fitness 10.6 Treadmill | English Manual - Page 22
your specific goals. The key to achieving the desired results caught in the treadmill. Always wear athletic workout should include three basic parts: (1) a. warm-up, increasby using your pulse as a guide. As you exercise, your ing is known as with 5 to 10 minutes of stretching and light exercise - Image Fitness 10.6 Treadmill | English Manual - Page 23
each workout with 5 to 10 minutes of stretching to cool down. This will muscles and will help to prevent post-exercise problems. Exercise Frequency To maintain or improve your complete up to five workouts each week if desired. The key to success is to make exercise a regular and SUGGESTED - Image Fitness 10.6 Treadmill | English Manual - Page 24
or service, or ordering parts, please be prepared to provide the following information: • The NAME OF THE PRODUCT (IMAGE° 10.6 treadmill) • The MODEL NUMBER OF THE PRODUCT (831.297564) • The PART NUMBER OF THE PART (see the EXPLODED DRAWING and PART LIST attached to the center of this manual) • The - Image Fitness 10.6 Treadmill | English Manual - Page 25
REMOVE THIS EXPLODED DRAWING AND PART LIST FROM THE MANUAL Save this EXPLODED DRAWING and PART LIST for future reference. Note: Specifications are subject to change without notice. For information about ordering replacement parts, see the back cover of the user's manual. - Image Fitness 10.6 Treadmill | English Manual - Page 26
EXPLODED DRAWING-Model No. 831.297564 R0497A 113 14 96 110 3 109 13 99 41 42 94 9 8 97 I • 56 coy' 90_--112/ 92 91 37 99 35 104 Ilf 48 111 100' 101 103 63 61 30 3 30 12 15 107 105 27 26 79 89 49 59 70 25 5 • 72 85 86 78 112 85 52 51 84 54 53 50 23 / 11 :0 - Image Fitness 10.6 Treadmill | English Manual - Page 27
1 Power Board-Controller Wire 29 121460 1 Belt Guide 30 109520 3 6" Cable Loom 31 117806 2 10 Endcap Screw/Knob Screw 60 012096 1 Spring Nut 61 102633 2 Optic Switch Wire Harness 62 102959 2 Small Bolt 63 102955 2 Optic Switch Key Part 1 Owner's Manual * Includes all parts shown in the box # These
-
 1
1 -
 2
2 -
 3
3 -
 4
4 -
 5
5 -
 6
6 -
 7
7 -
8
-
9
-
10
-
11
-
12
-
13
-
14
-
15
-
16
-
17
-
18
-
19
-
20
-
21
-
22
-
23
-
24
-
25
-
26
-
27
 |
 |
IIIVI
GE10.6
SEARS
Model
No.
831.297564
Serial
No.
The
serial
number
can
be
found
in
the
location
shown
below.
Write
the
serial
number
in
the
space
above.
Serial
Number
Decal
l
><EiRcisE
0
::::0LJ1
1==•
1•4ENI
-r
QU
E
S
T
I
ONS
HELF
,
LINEI
1-800-736-6879
•
aultlons
an
II7sIr
01
1
OWNER'S
MANUAL
401
MagAMAISMONMESINgiii;o:titappiggigiggpir
4...w.
w
k,
Cease
tmeoAl
xnRk
ri
s.‘
I
SEARS,
ROEBUCK
AND
CO.,
HOFFMAN
ESTATES,
IL
60179
USA