Epson WF-C20590 Quick Reference - Document Capture Pro 2.0 - Page 8
Scanning with Document Capture Pro in Simple View - Windows, Parent topic, Windows 10, Epson Software
 |
View all Epson WF-C20590 manuals
Add to My Manuals
Save this manual to your list of manuals |
Page 8 highlights
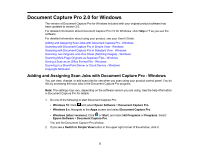
6. Select the jobs that you want to assign using any of the pull-down menus. Note: The number of pull-down menus available may vary, depending on your product and any connected options. 7. Click OK, then click OK again. You can now use the added scan jobs when you scan from the product control panel. Parent topic: Document Capture Pro 2.0 for Windows Scanning with Document Capture Pro in Simple View - Windows You can use Document Capture Pro in Simple View to quickly select options and scan. Note: The settings may vary, depending on the software version you are using. See the help information in Document Capture Pro for details. 1. Load your original in the product. 2. Do one of the following to start Document Capture Pro: • Windows 10: Click and select Epson Software > Document Capture Pro. 8
-
 1
1 -
2
-
 3
3 -
 4
4 -
 5
5 -
 6
6 -
 7
7 -
 8
8 -
 9
9 -
 10
10 -
 11
11 -
 12
12 -
 13
13 -
14
-
15
-
16
-
17
-
18
-
19
-
20
-
21
-
22
-
23
-
24
 |
 |
